

Introduction
Medusa Cloud is a dedicated hosting service for Medusa-based applications. It automatically detects changes on your repository, pulls and builds the code, and provisions a database, Redis, and file storage. Head to the Medusa Cloud signup page to get started. After registration is complete and your account is active, authorize the Medusa Cloud GitHub app in your organization or personal account.A single Medusa Cloud deployment serves everything: the backend API, the
admin panel at
/dashboard, and the vendor panel at /seller. The
panels are built together with the backend and served from the same origin.
No separate hosting is needed.How it works
Thebasic template wires this up out of the box:
- During
build, the API package builds both panels and bundles their production output into the Medusa build artifact (.medusa/server/dashboards/<name>), so hosts that deploy only the artifact, like Medusa Cloud, carry the panels with it (packages/api/scripts/bundle-dashboards.mjs). - At runtime, the
admin-uiandvendor-uimodules detect the bundled builds and serve them statically at their configured paths (/dashboard,/seller). - The panels bake the backend URL at build time from the
MERCUR_BACKEND_URLenvironment variable. Because they are served from the backend’s own origin, all API calls are same-origin. No cross-site cookie or CORS gymnastics.
NODE_ENV=production. In that mode the build
fails fast when MERCUR_BACKEND_URL is missing instead of shipping panels that
silently point at http://localhost:9000. Make sure to set it as described below.
Prerequisites
- A Mercur project created with
@mercurjs/cliand pushed to a GitHub repository - A Medusa Cloud account with the GitHub app authorized
- API keys for any third-party services you plan to use (Stripe, Resend, Algolia, etc.)
Setup
1
Import your repository
From the Medusa Cloud dashboard, choose Import your existing repository into the Cloud (the Mercur project lives in your own GitHub repo, not in the bundled DTC/B2B starters).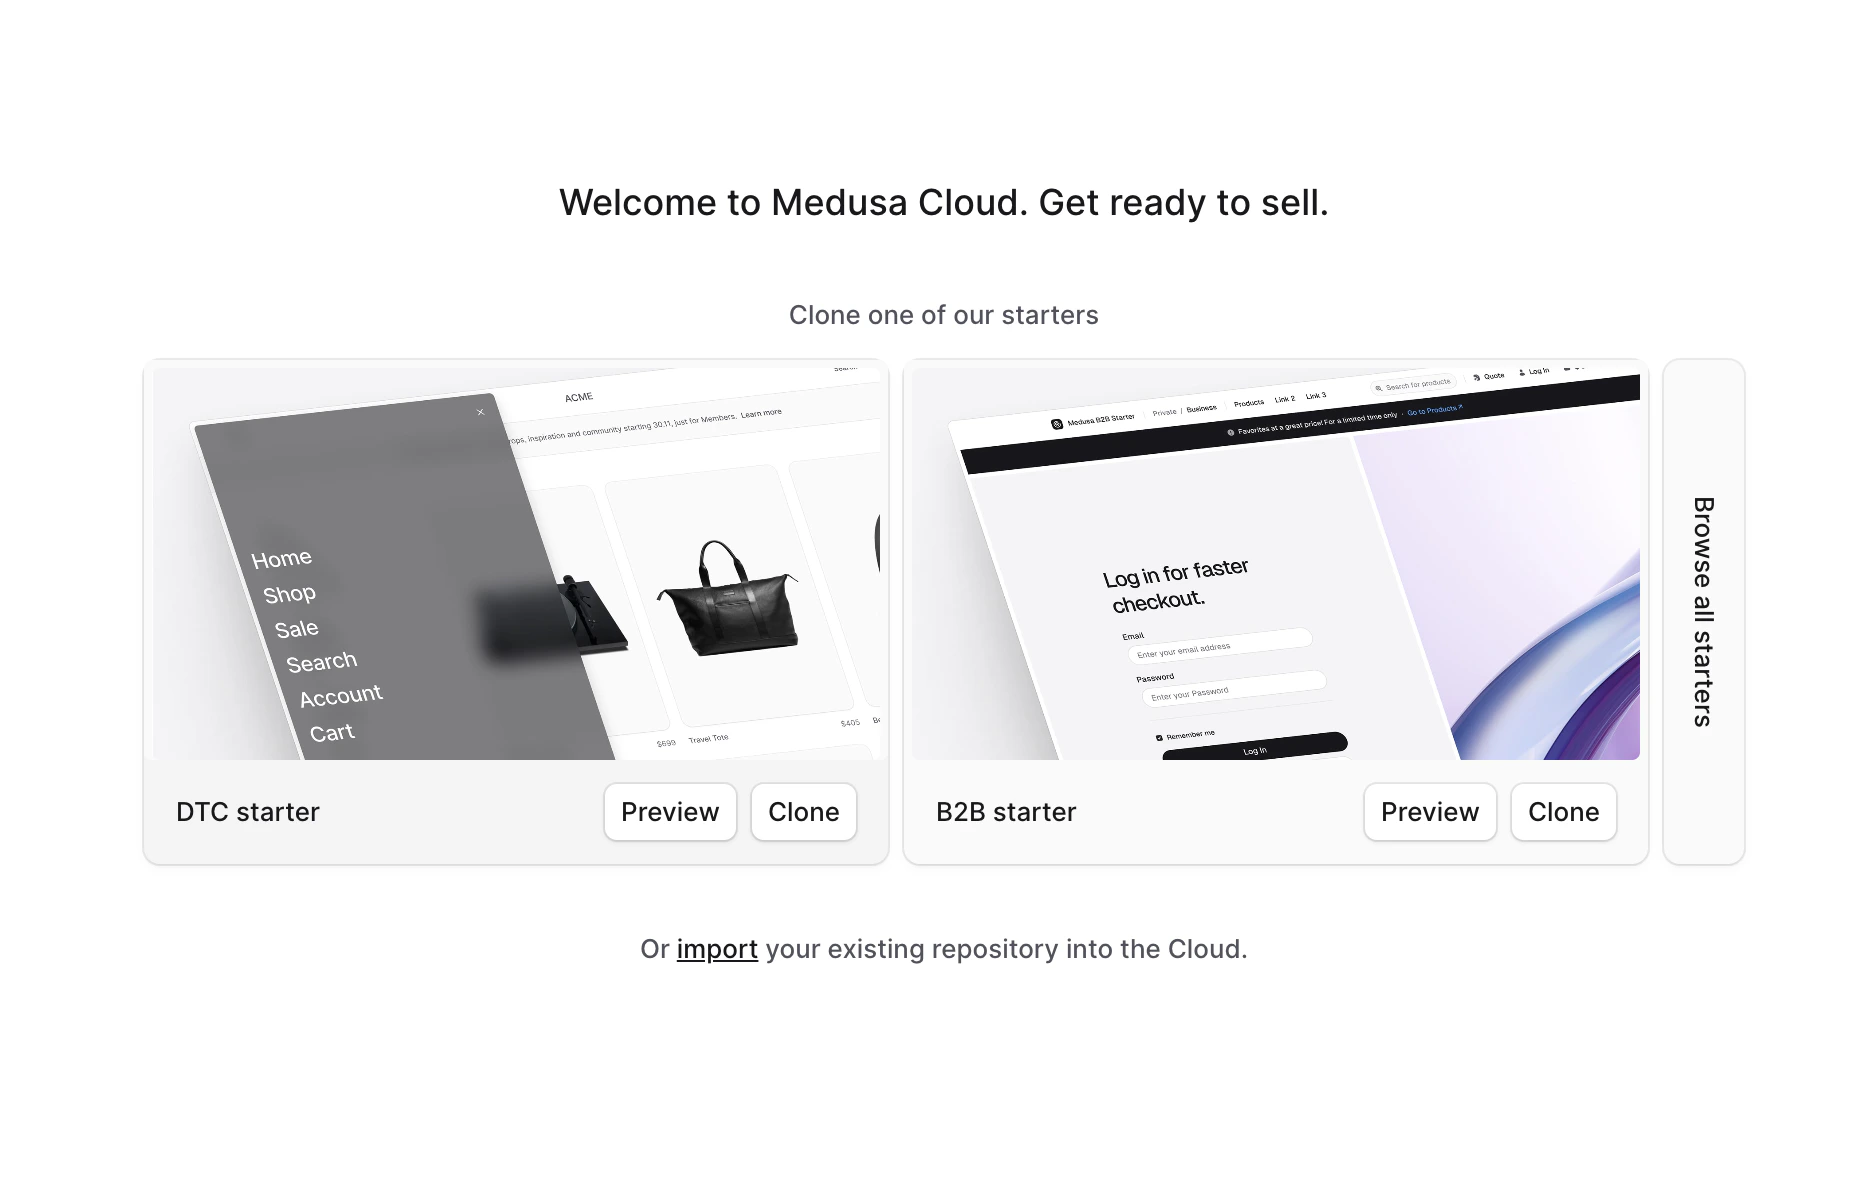
2
Pick the repository
On the Repository step, make sure the Medusa Cloud GitHub app is installed, pick your Mercur repository from the list, and click Continue.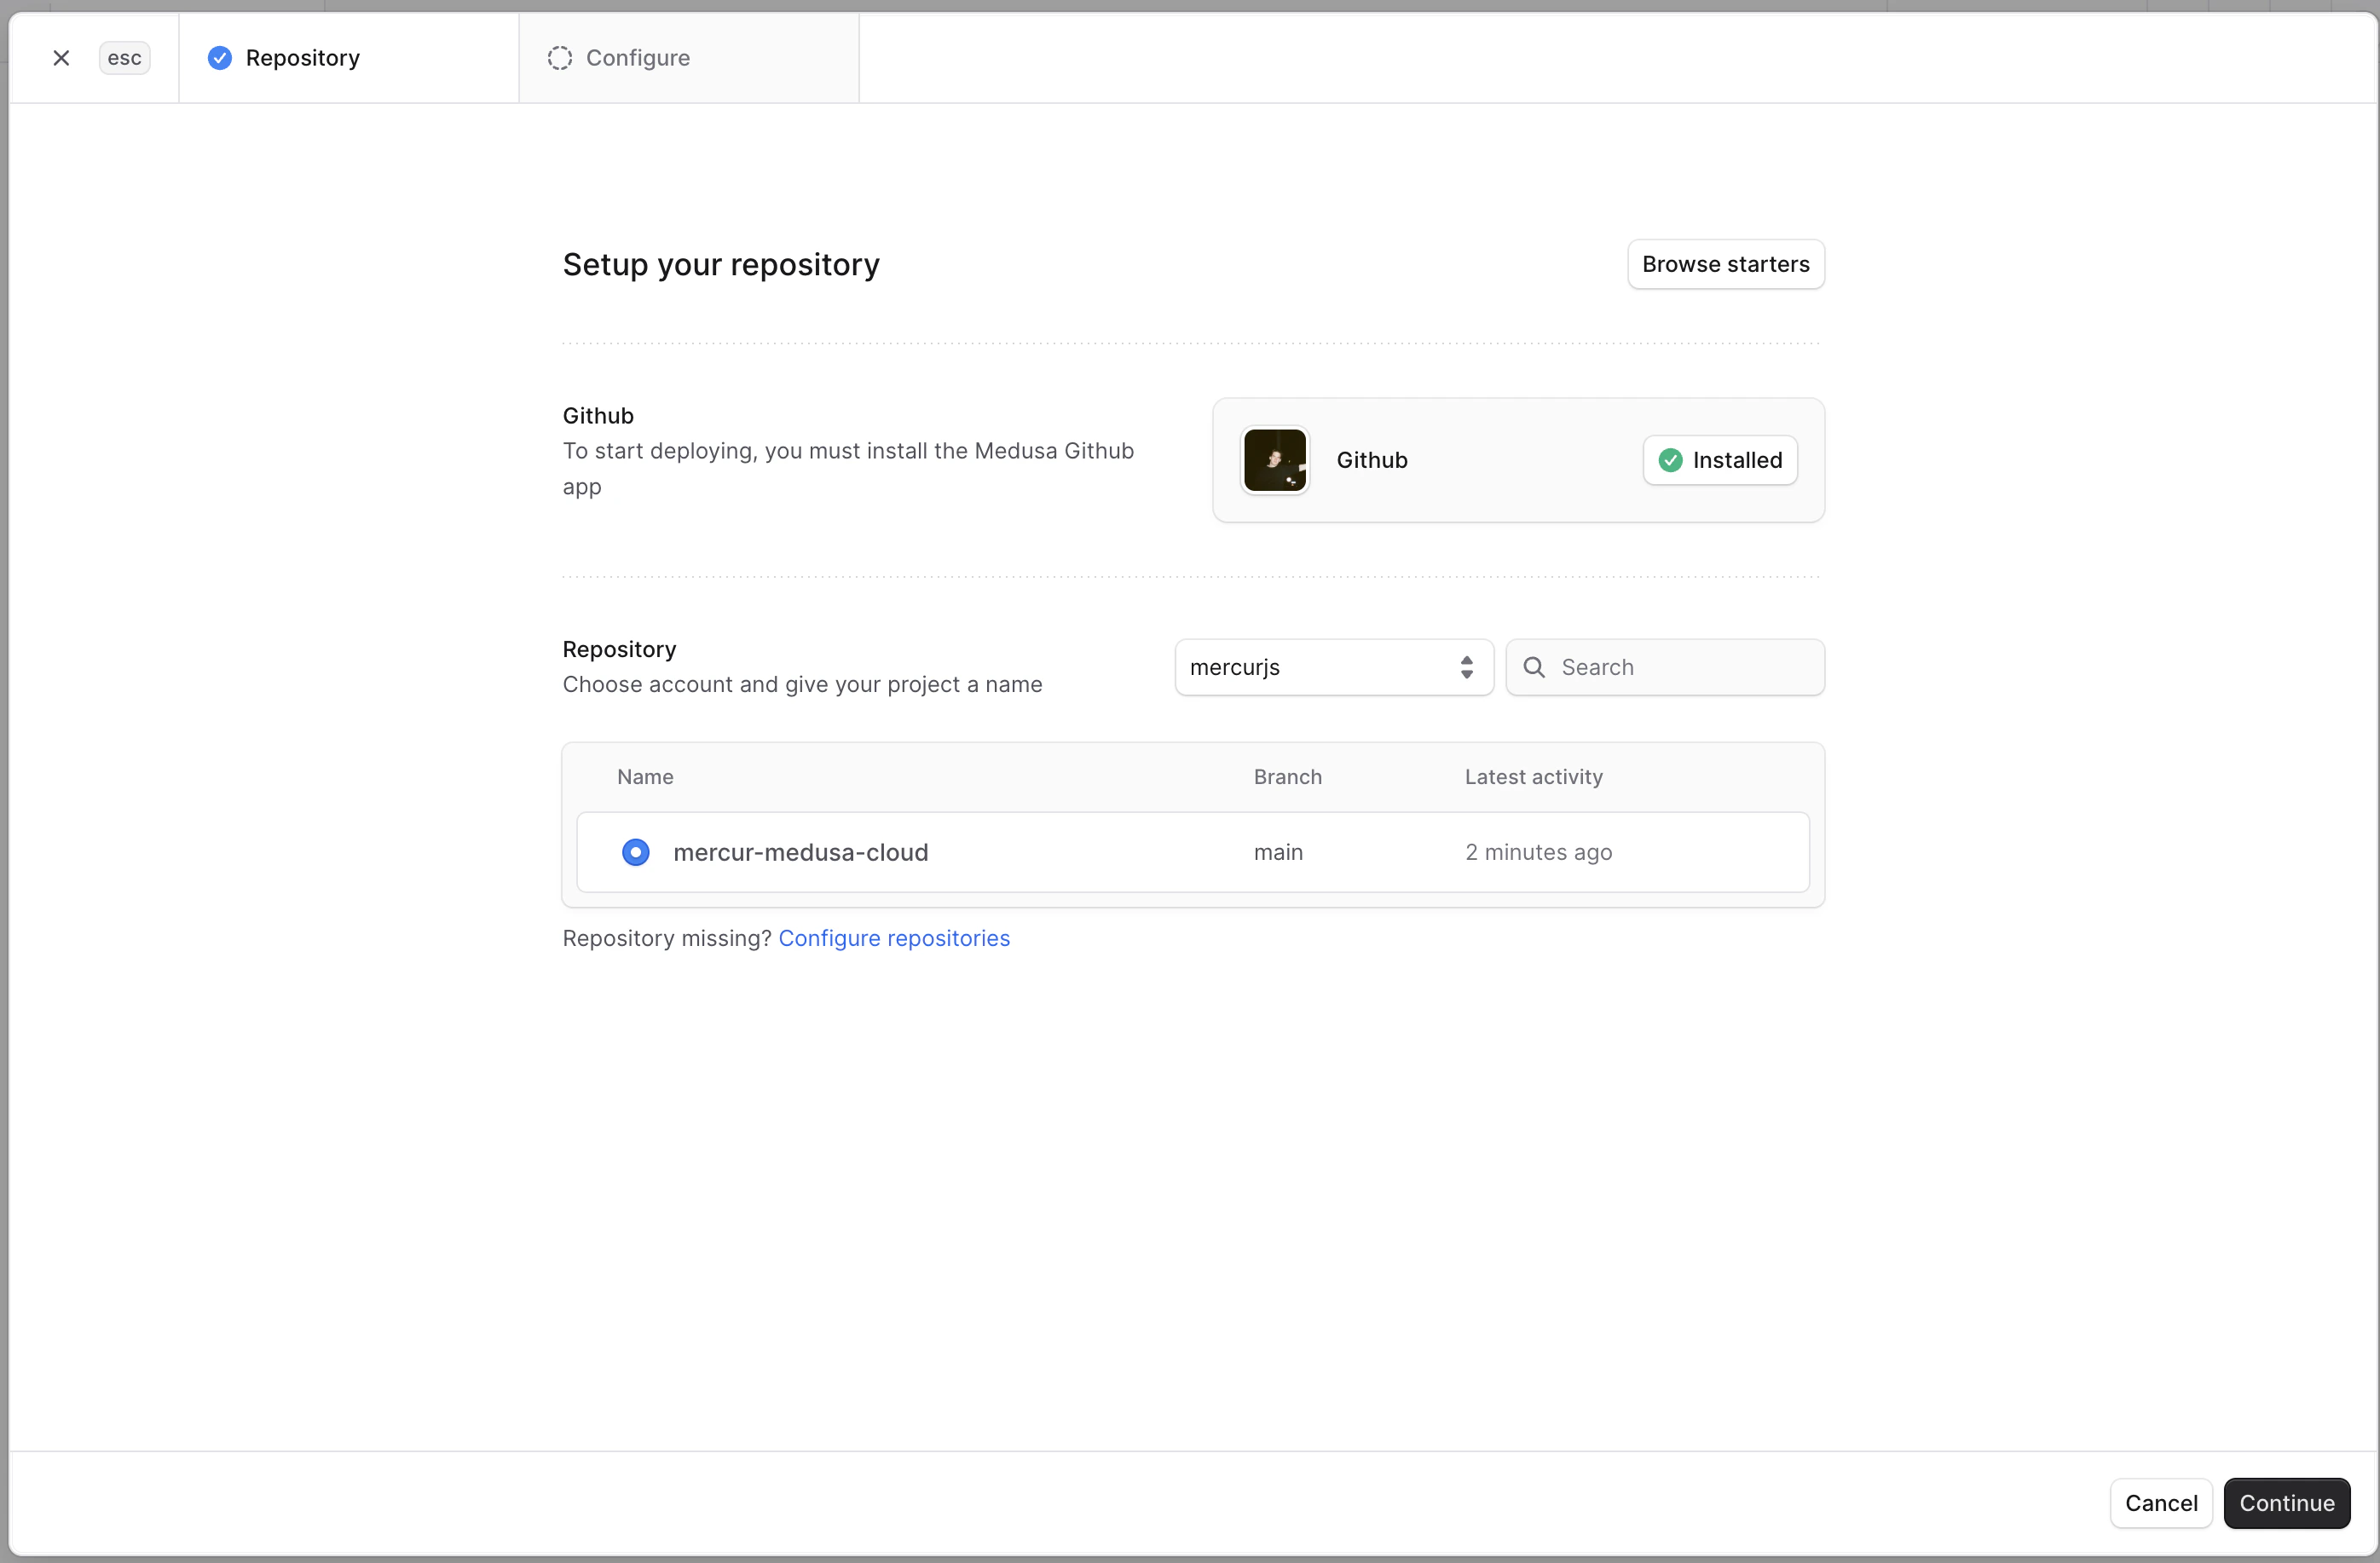
3
Configure the project
On the Configure step, fill in: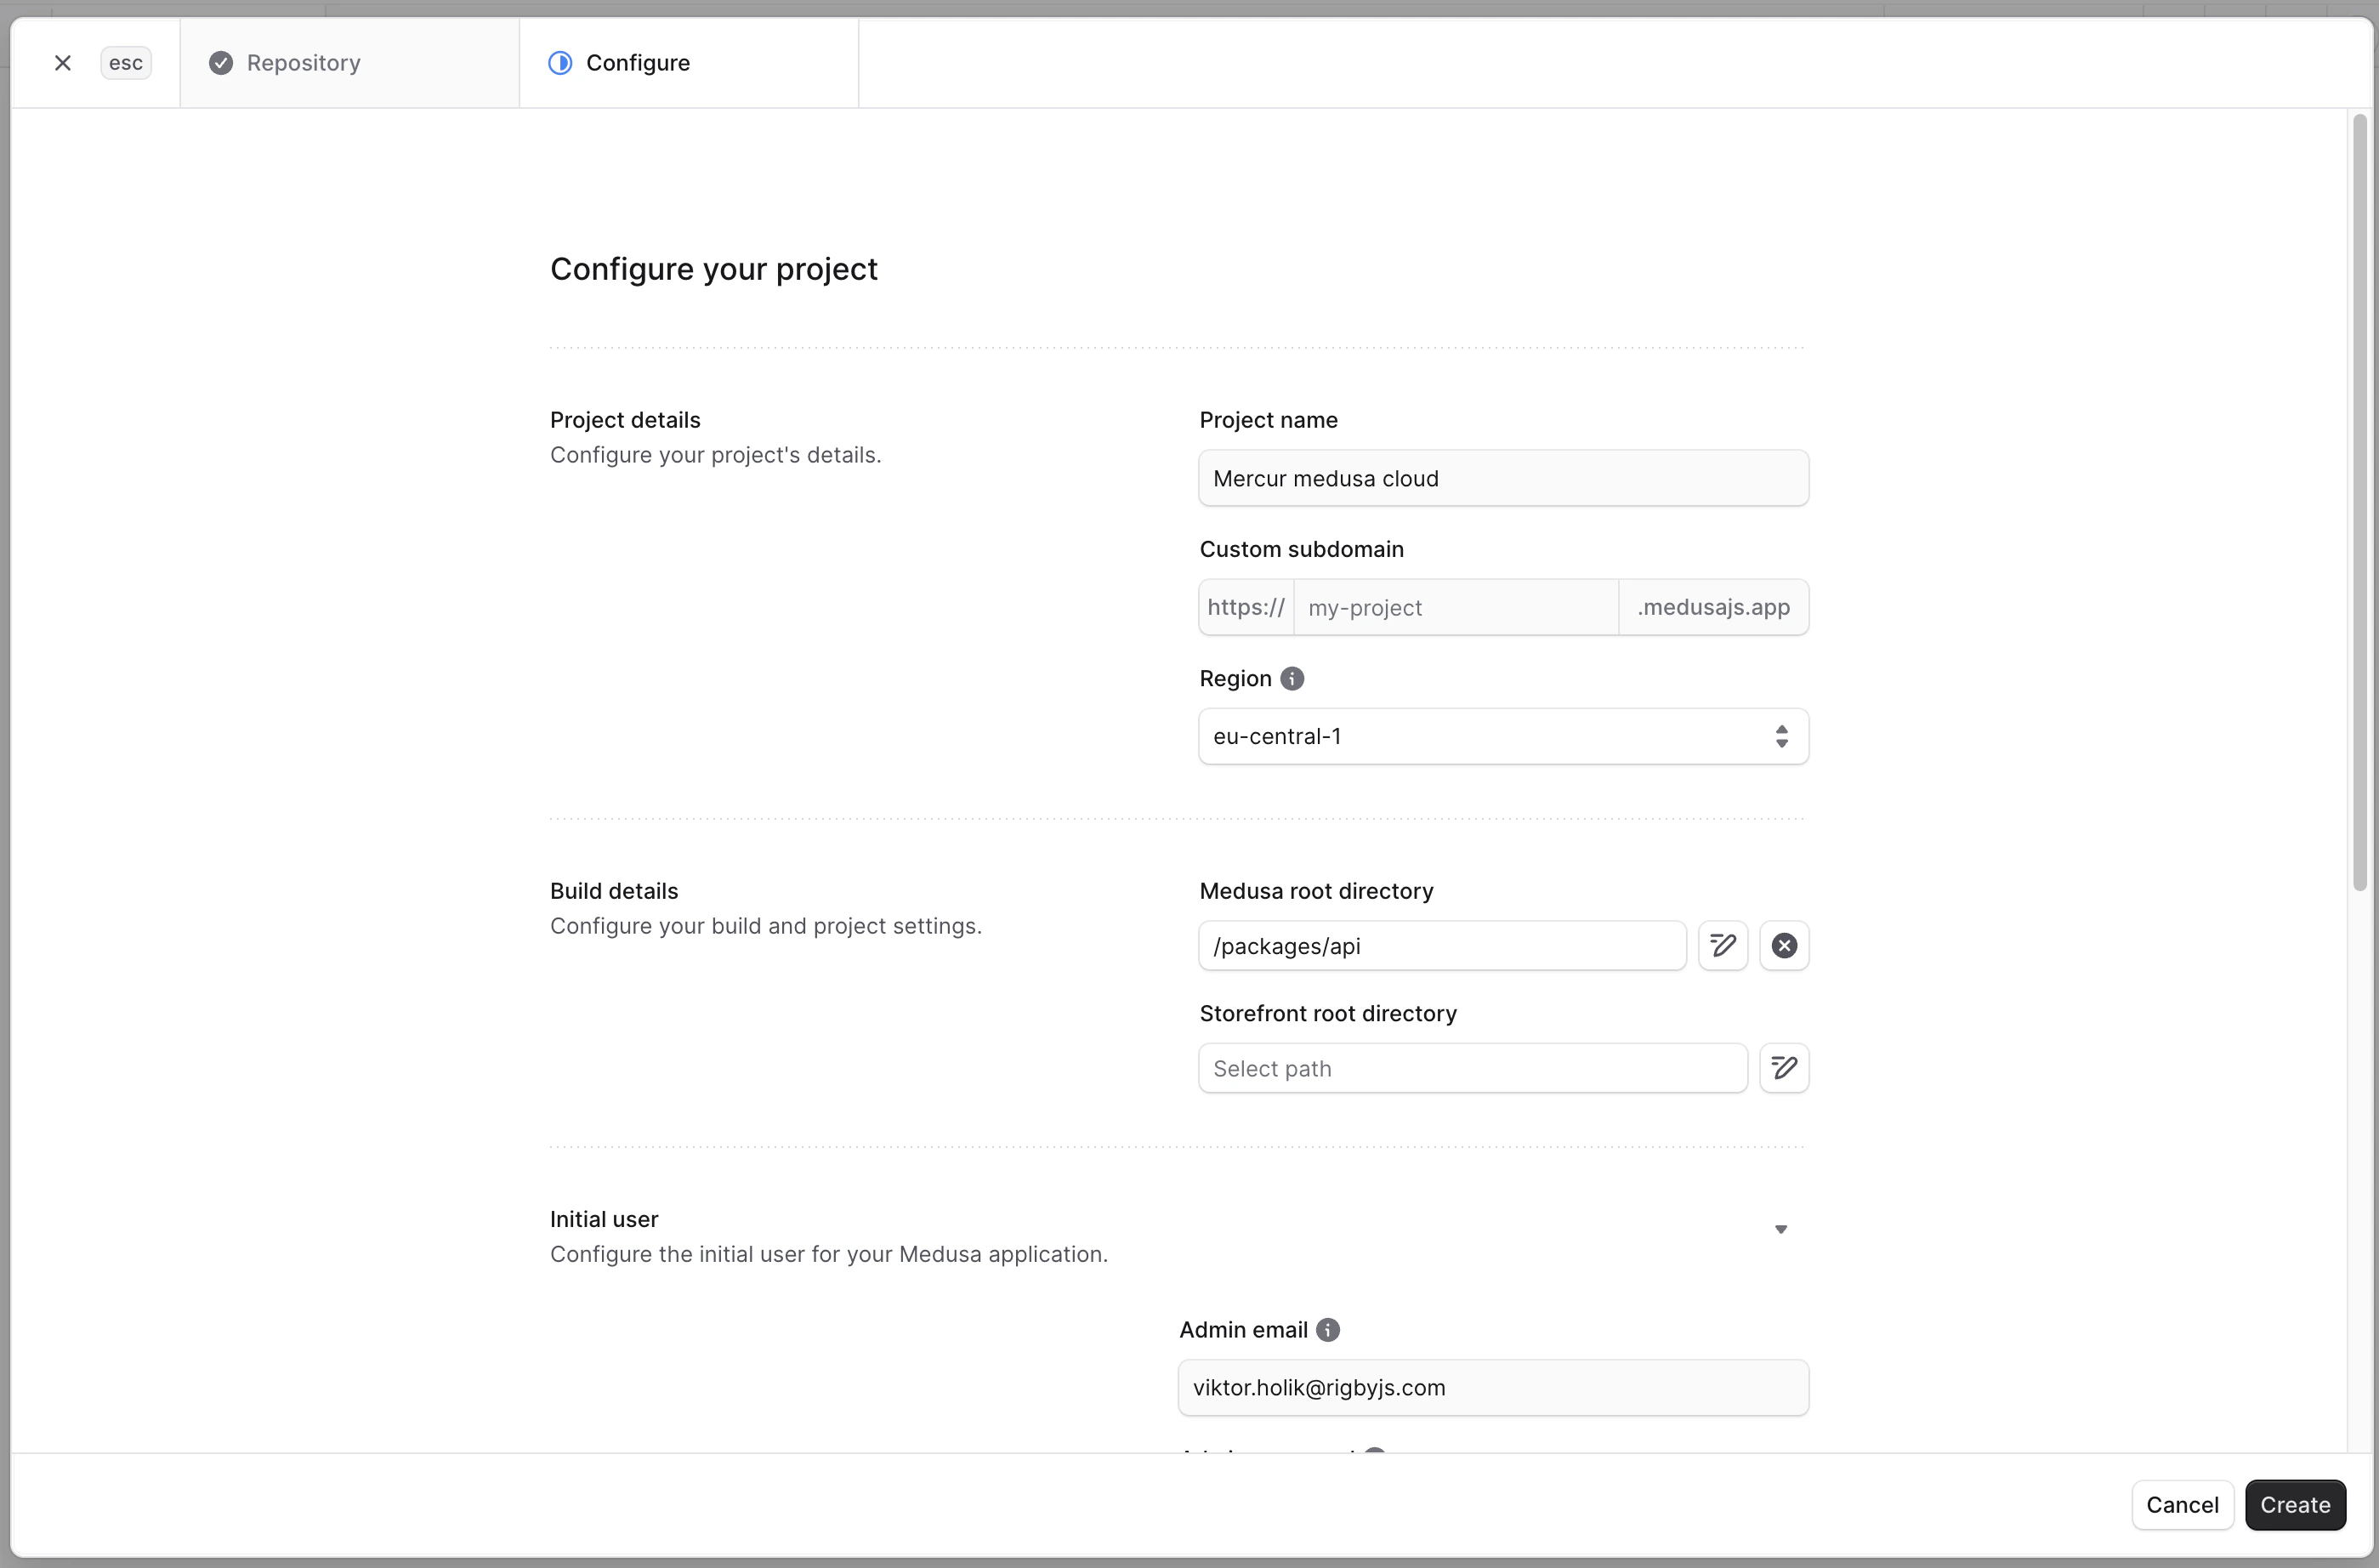
- Project name and Custom subdomain. The subdomain determines your backend URL (
https://<subdomain>.medusajs.app). You will reference it in the environment variables below. - Region closest to your users.
- Medusa root directory:
/packages/api. - Initial user: the first admin email and password.
4
Set environment variables
Scroll down to Environment variables and add the Backend Environment Variables below. Medusa Cloud provisions the database, Redis, and file storage automatically, so you don’t need to set those.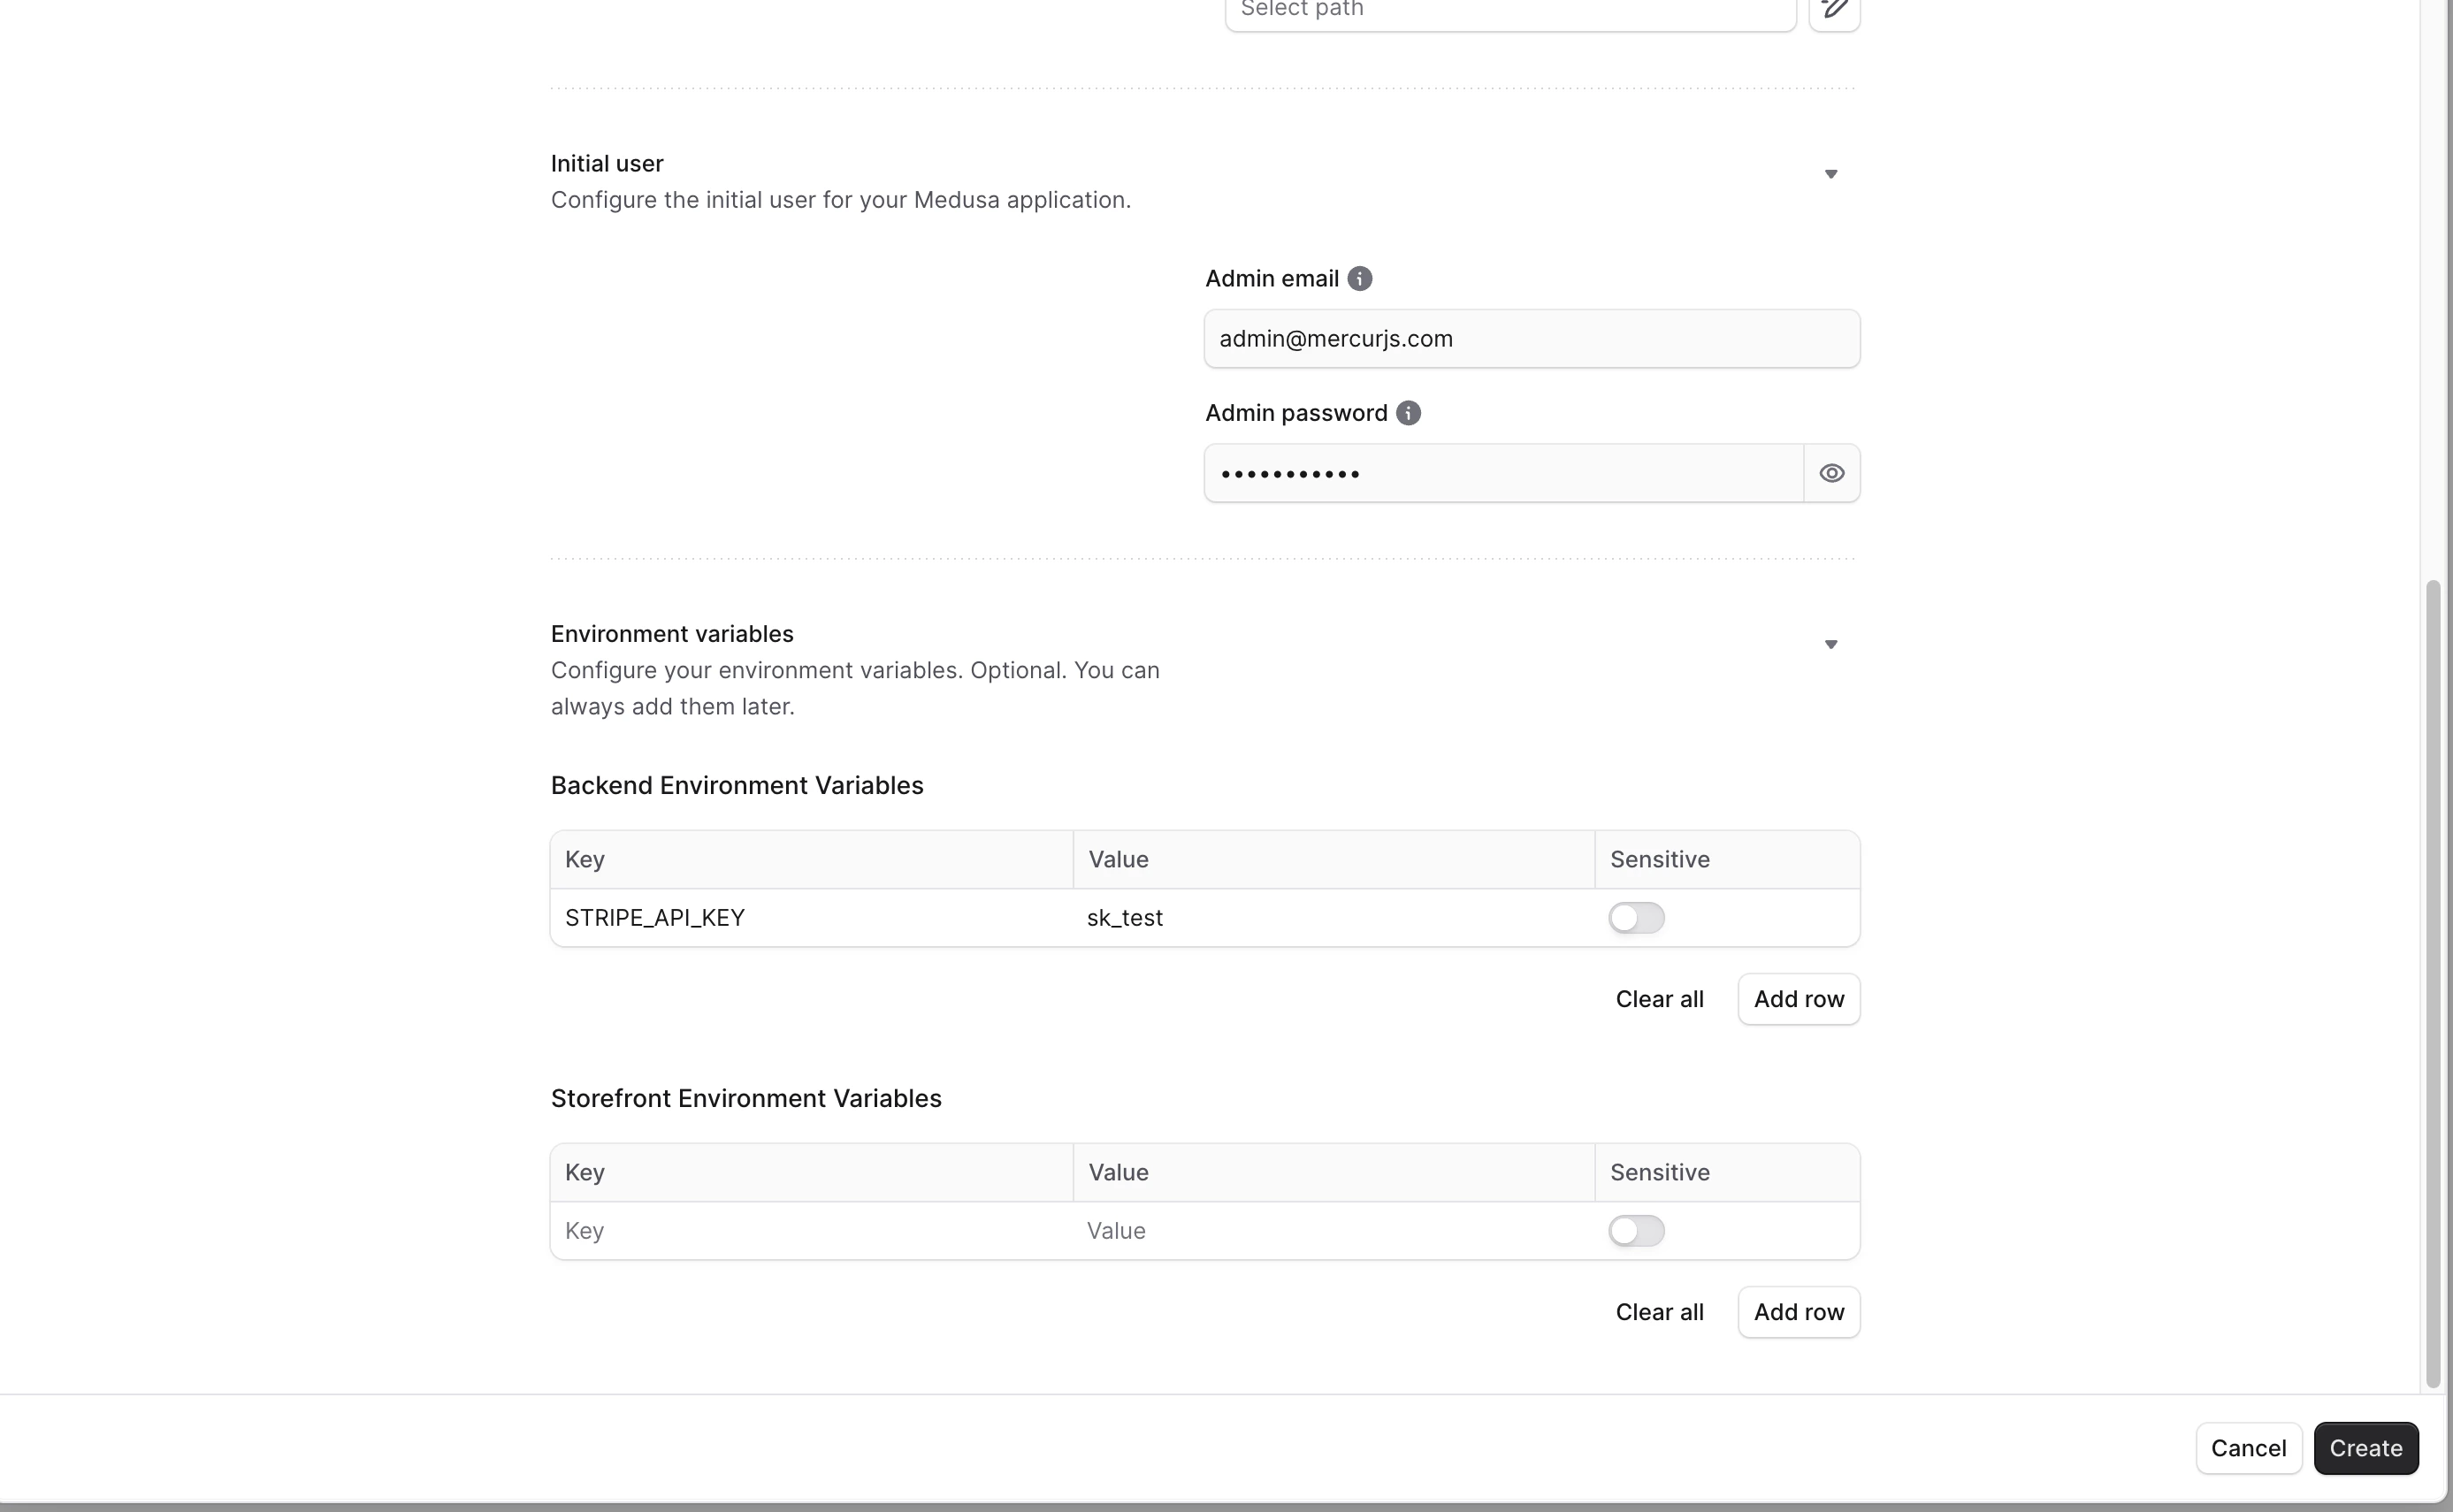
For Stripe setup, including which keys go where and how to wire both webhooks,
see the Stripe Connect integration
guide.
5
Create and deploy
Click Create. The build and deploy process will start and can take a few minutes to complete.
MERCUR_BACKEND_URL is baked into the panels at build time. Changing it requires a redeploy.
After deployment
Once the build succeeds, everything is served fromhttps://<your-subdomain>.medusajs.app:
Open the admin panel and sign in with the Initial user you configured in the setup step. If a panel shows a “Dashboard not built” page, the bundling step did not run. Check the deployment’s build logs for output from
bundle-dashboards.
FAQ
A panel shows a 'Dashboard not built' page. What went wrong?
A panel shows a 'Dashboard not built' page. What went wrong?
The bundling step didn’t run during the build. Check the deployment’s build logs for output from
bundle-dashboards; the most common cause is a build that failed earlier (often a missing MERCUR_BACKEND_URL with the Build toggle off).I changed MERCUR_BACKEND_URL but the panels still call the old URL
I changed MERCUR_BACKEND_URL but the panels still call the old URL
The backend URL is baked into the panels at build time, not read at runtime. After changing the variable, trigger a redeploy so the panels rebuild with the new value.
Do I need to configure a database or Redis?
Do I need to configure a database or Redis?
No. Medusa Cloud provisions Postgres, Redis, and file storage automatically and injects their connection variables. Only set the variables listed in the setup step.
Next steps
Stripe Connect
Wire payments and payouts on the deployed environment.
Overview
Set up Mercur and run a marketplace.