# Get Algolia Status
Source: https://docs.mercurjs.com/api-reference/admin-algolia/get-algolia-status
api-reference/combined.oas.json get /admin/algolia
Retrieves the current status of Algolia configuration and product index.
# Sync Algolia
Source: https://docs.mercurjs.com/api-reference/admin-algolia/sync-algolia
api-reference/combined.oas.json post /admin/algolia
Initiates a synchronization process for Algolia indices.
# Create Api Key
Source: https://docs.mercurjs.com/api-reference/admin-api-keys/create-api-key
api-reference/combined.oas.json post /admin/api-keys
Create a secret or publishable API key.
A secret API key is used for admin authentication.
A publishable API key is used by client applications to set the scope of the request.
# Delete an Api Key
Source: https://docs.mercurjs.com/api-reference/admin-api-keys/delete-an-api-key
api-reference/combined.oas.json delete /admin/api-keys/{id}
Delete a publishable or secret API key.
# Get API Key
Source: https://docs.mercurjs.com/api-reference/admin-api-keys/get-api-key
api-reference/combined.oas.json get /admin/api-keys/{id}
Retrieve an API key by its ID. You can expand the API key's relations or select the fields that should be returned using the query parameters.
# List API Keys
Source: https://docs.mercurjs.com/api-reference/admin-api-keys/list-api-keys
api-reference/combined.oas.json get /admin/api-keys
Retrieve a list of API keys. The API keys can be filtered by fields such as `id`. The API keys can also be sorted or paginated.
# Manage Sales Channels of a Publishable API Key
Source: https://docs.mercurjs.com/api-reference/admin-api-keys/manage-sales-channels-of-a-publishable-api-key
api-reference/combined.oas.json post /admin/api-keys/{id}/sales-channels
Manage the sales channels of a publishable API key, either to associate them or remove them from the API key.
# Revoke API Key
Source: https://docs.mercurjs.com/api-reference/admin-api-keys/revoke-api-key
api-reference/combined.oas.json post /admin/api-keys/{id}/revoke
Revokes an API key. If the API key is a secret, it can't be used for authentication anymore. If it's publishable, it can't be used by client applications.
# Update an API Key
Source: https://docs.mercurjs.com/api-reference/admin-api-keys/update-an-api-key
api-reference/combined.oas.json post /admin/api-keys/{id}
Update an API key's details.
# Create Attribute
Source: https://docs.mercurjs.com/api-reference/admin-attributes/create-attribute
api-reference/combined.oas.json post /admin/attributes
Creates a new attribute with the specified properties.
# Create Attribute Value
Source: https://docs.mercurjs.com/api-reference/admin-attributes/create-attribute-value
api-reference/combined.oas.json post /admin/attributes/{id}/values
Creates a new possible value for a specific attribute.
# Delete Attribute
Source: https://docs.mercurjs.com/api-reference/admin-attributes/delete-attribute
api-reference/combined.oas.json delete /admin/attributes/{id}
Deletes an attribute and all its associated possible values.
# Get Attribute
Source: https://docs.mercurjs.com/api-reference/admin-attributes/get-attribute
api-reference/combined.oas.json get /admin/attributes/{id}
Retrieves a specific attribute by its ID.
# Get Attribute Value
Source: https://docs.mercurjs.com/api-reference/admin-attributes/get-attribute-value
api-reference/combined.oas.json get /admin/attributes/{id}/values/{value_id}
Retrieves a specific attribute possible value by its ID.
# List Attribute Values
Source: https://docs.mercurjs.com/api-reference/admin-attributes/list-attribute-values
api-reference/combined.oas.json get /admin/attributes/{id}/values
Retrieves a list of possible values for a specific attribute.
# List Attributes
Source: https://docs.mercurjs.com/api-reference/admin-attributes/list-attributes
api-reference/combined.oas.json get /admin/attributes
Retrieves a list of attributes with optional filtering.
# Update Attribute
Source: https://docs.mercurjs.com/api-reference/admin-attributes/update-attribute
api-reference/combined.oas.json post /admin/attributes/{id}
Updates an existing attribute with the specified properties.
# Update Attribute Value
Source: https://docs.mercurjs.com/api-reference/admin-attributes/update-attribute-value
api-reference/combined.oas.json post /admin/attributes/{id}/values/{value_id}
Updates an existing attribute possible value with the specified properties.
# Authenticate User
Source: https://docs.mercurjs.com/api-reference/admin-auth/authenticate-user
api-reference/combined.oas.json post /auth/user/{auth_provider}
Authenticate a user and receive the JWT token to be used in the header of subsequent requests.
When used with a third-party provider, such as Google, the request returns a `location` property. You redirect to the specified URL in your frontend to continue authentication with the third-party service.
# Generate Reset Password Token for Admin User
Source: https://docs.mercurjs.com/api-reference/admin-auth/generate-reset-password-token-for-admin-user
api-reference/combined.oas.json post /auth/user/{auth_provider}/reset-password
Generate a reset password token for an admin user. This API route doesn't reset the admin's password or send them the reset instructions in a notification.
Instead, This API route emits the `auth.password_reset` event, passing it the token as a payload. You can listen to that event in a subscriber as explained in [this guide](https://docs.medusajs.com/resources/commerce-modules/auth/reset-password), then send the user a notification. The notification is sent using a [Notification Module Provider](https://docs.medusajs.com/resources/infrastructure-modules/notification), and it should have the URL to reset the password in the Medusa Admin dashboard, such as `http://localhost:9000/app/reset-password?token=123`.
Use the generated token to update the user's password using the [Reset Password API route](https://docs.medusajs.com/api/admin#auth_postactor_typeauth_providerupdate).
# Reset an Admin User's Password
Source: https://docs.mercurjs.com/api-reference/admin-auth/reset-an-admin-users-password
api-reference/combined.oas.json post /auth/user/{auth_provider}/update
Reset an admin user's password using a reset-password token generated with the [Generate Reset Password Token API route](https://docs.medusajs.com/api/admin#auth_postactor_typeauth_providerresetpassword). You pass the token as a bearer token in the request's Authorization header.
# Retrieve Registration JWT Token
Source: https://docs.mercurjs.com/api-reference/admin-auth/retrieve-registration-jwt-token
api-reference/combined.oas.json post /auth/user/{auth_provider}/register
This API route retrieves a registration JWT token of a user that hasn't been registered yet. The token is used in the header of requests that create a user, such as the Accept Invite API route.
# Validate Authentication Callback
Source: https://docs.mercurjs.com/api-reference/admin-auth/validate-authentication-callback
api-reference/combined.oas.json post /auth/user/{auth_provider}/callback
This API route is used by your dashboard or frontend application when a third-party provider redirects to it after authentication. It validates the authentication with the third-party provider and, if successful, returns an authentication token. All query parameters received from the third-party provider, such as `code`, `state`, and `error`, must be passed as query parameters to this route.
You can decode the JWT token using libraries like [react-jwt](https://www.npmjs.com/package/react-jwt) in the frontend. If the decoded data doesn't have an `actor_id` property, then you must create a user, typically using the Accept Invite route passing the token in the request's Authorization header.
# Create Campaign
Source: https://docs.mercurjs.com/api-reference/admin-campaigns/create-campaign
api-reference/combined.oas.json post /admin/campaigns
Create a campaign.
# Delete a Campaign
Source: https://docs.mercurjs.com/api-reference/admin-campaigns/delete-a-campaign
api-reference/combined.oas.json delete /admin/campaigns/{id}
Delete a campaign by its ID. This doesn't delete promotions that belong to this campaign.
# Get a Campaign
Source: https://docs.mercurjs.com/api-reference/admin-campaigns/get-a-campaign
api-reference/combined.oas.json get /admin/campaigns/{id}
Retrieve a campaign by its ID. You can expand the campaign's relations or select the fields that should be returned using the query parameters.
# List Campaigns
Source: https://docs.mercurjs.com/api-reference/admin-campaigns/list-campaigns
api-reference/combined.oas.json get /admin/campaigns
Retrieve a list of campaigns. The campaigns can be filtered by fields such as `id`. The campaigns can also be sorted or paginated.
# Manage the Promotions of a Campaign
Source: https://docs.mercurjs.com/api-reference/admin-campaigns/manage-the-promotions-of-a-campaign
api-reference/combined.oas.json post /admin/campaigns/{id}/promotions
Manage the promotions of a campaign, either by adding them or removing them from the campaign.
# Update a Campaign
Source: https://docs.mercurjs.com/api-reference/admin-campaigns/update-a-campaign
api-reference/combined.oas.json post /admin/campaigns/{id}
Update a campaign's details.
# Add an Inbound Shipping Method to a Claim
Source: https://docs.mercurjs.com/api-reference/admin-claims/add-an-inbound-shipping-method-to-a-claim
api-reference/combined.oas.json post /admin/claims/{id}/inbound/shipping-method
Add an inbound (or return) shipping method to a claim. The inbound shipping method will have a `SHIPPING_ADD` action.
# Add Claim Items to a Claim
Source: https://docs.mercurjs.com/api-reference/admin-claims/add-claim-items-to-a-claim
api-reference/combined.oas.json post /admin/claims/{id}/claim-items
Add order items to a claim as claim items. These claim items will have the action `WRITE_OFF_ITEM`.
# Add Inbound Items to a Claim
Source: https://docs.mercurjs.com/api-reference/admin-claims/add-inbound-items-to-a-claim
api-reference/combined.oas.json post /admin/claims/{id}/inbound/items
Add inbound (or return) items to a claim. These inbound items will have a `RETURN_ITEM` action.
# Add Outbound Items to a Claim
Source: https://docs.mercurjs.com/api-reference/admin-claims/add-outbound-items-to-a-claim
api-reference/combined.oas.json post /admin/claims/{id}/outbound/items
Add outbound (or new) items to a claim. These outbound items will have an `ITEM_ADD` action.
# Add Outbound Shipping Methods to a Claim
Source: https://docs.mercurjs.com/api-reference/admin-claims/add-outbound-shipping-methods-to-a-claim
api-reference/combined.oas.json post /admin/claims/{id}/outbound/shipping-method
Add an outbound shipping method to a claim. The outbound shipping method will have a `SHIPPING_ADD` action.
# Cancel a Claim
Source: https://docs.mercurjs.com/api-reference/admin-claims/cancel-a-claim
api-reference/combined.oas.json post /admin/claims/{id}/cancel
Cancel a claim and its associated return.
# Cancel Claim Request
Source: https://docs.mercurjs.com/api-reference/admin-claims/cancel-claim-request
api-reference/combined.oas.json delete /admin/claims/{id}/request
Cancel a requested claim.
# Confirm a Claim Request
Source: https://docs.mercurjs.com/api-reference/admin-claims/confirm-a-claim-request
api-reference/combined.oas.json post /admin/claims/{id}/request
Confirm a claim request, applying its changes on the associated order.
# Create a Claim
Source: https://docs.mercurjs.com/api-reference/admin-claims/create-a-claim
api-reference/combined.oas.json post /admin/claims
Create a claim. The claim is still in the request state, and the changes are only applied on the order once the claim is confirmed.
# Get a Claim
Source: https://docs.mercurjs.com/api-reference/admin-claims/get-a-claim
api-reference/combined.oas.json get /admin/claims/{id}
Retrieve a claim by its ID. You can expand the claim's relations or select the fields that should be returned using the query parameters.
# List Claims
Source: https://docs.mercurjs.com/api-reference/admin-claims/list-claims
api-reference/combined.oas.json get /admin/claims
Retrieve a list of claims. The claims can be filtered by fields such as `id`. The claims can also be sorted or paginated.
# Remove a Claim Item from a Claim
Source: https://docs.mercurjs.com/api-reference/admin-claims/remove-a-claim-item-from-a-claim
api-reference/combined.oas.json delete /admin/claims/{id}/claim-items/{action_id}
Remove an order item from a claim by the ID of the item's `WRITE_OFF_ITEM` action.
Every item has an `actions` property, whose value is an array of actions. You can check the action's name using its `action` property, and use the value of the `id` property.
# Remove an Inbound Item from Claim
Source: https://docs.mercurjs.com/api-reference/admin-claims/remove-an-inbound-item-from-claim
api-reference/combined.oas.json delete /admin/claims/{id}/inbound/items/{action_id}
Remove an inbound (or return) item from a claim using the `ID` of the item's `RETURN_ITEM` action.
Every item has an `actions` property, whose value is an array of actions. You can check the action's name using its `action` property, and use the value of the `id` property.
# Remove an Outbound Item from Claim
Source: https://docs.mercurjs.com/api-reference/admin-claims/remove-an-outbound-item-from-claim
api-reference/combined.oas.json delete /admin/claims/{id}/outbound/items/{action_id}
Remove an outbound (or new) item from a claim using the `ID` of the item's `ITEM_ADD` action.
Every item has an `actions` property, whose value is an array of actions. You can check the action's name using its `action` property, and use the value of the `id` property.
# Remove Inbound Shipping Method from Claim
Source: https://docs.mercurjs.com/api-reference/admin-claims/remove-inbound-shipping-method-from-claim
api-reference/combined.oas.json delete /admin/claims/{id}/inbound/shipping-method/{action_id}
Remove the shipping method for returning items in the claim using the `ID` of the method's `SHIPPING_ADD` action.
Every shipping method has an `actions` property, whose value is an array of actions. You can check the action's name using its `action` property, and use the value of the `id` property.
# Remove Outbound Shipping Method from Claim
Source: https://docs.mercurjs.com/api-reference/admin-claims/remove-outbound-shipping-method-from-claim
api-reference/combined.oas.json delete /admin/claims/{id}/outbound/shipping-method/{action_id}
Remove the shipping method for delivering outbound items in the claim using the `ID` of the method's `SHIPPING_ADD` action.
Every shipping method has an `actions` property, whose value is an array of actions. You can check the action's name using its `action` property, and use the value of the `id` property.
# Update a Claim Item
Source: https://docs.mercurjs.com/api-reference/admin-claims/update-a-claim-item
api-reference/combined.oas.json post /admin/claims/{id}/claim-items/{action_id}
Update an order item in a claim by the ID of the item's `WRITE_OFF_ITEM` action.
Every item has an `actions` property, whose value is an array of actions. You can check the action's name using its `action` property, and use the value of the `id` property.
# Update Inbound Items of a Claim
Source: https://docs.mercurjs.com/api-reference/admin-claims/update-inbound-items-of-a-claim
api-reference/combined.oas.json post /admin/claims/{id}/inbound/items/{action_id}
Update an inbound (or return) item of a claim using the `ID` of the item's `RETURN_ITEM` action.
Every item has an `actions` property, whose value is an array of actions. You can check the action's name using its `action` property, and use the value of the `id` property.
# Update Inbound Shipping Method of a Claim
Source: https://docs.mercurjs.com/api-reference/admin-claims/update-inbound-shipping-method-of-a-claim
api-reference/combined.oas.json post /admin/claims/{id}/inbound/shipping-method/{action_id}
Update the shipping method for returning items in the claim using the `ID` of the method's `SHIPPING_ADD` action.
Every shipping method has an `actions` property, whose value is an array of actions. You can check the action's name using its `action` property, and use the value of the `id` property.
# Update Outbound Item of a Claim
Source: https://docs.mercurjs.com/api-reference/admin-claims/update-outbound-item-of-a-claim
api-reference/combined.oas.json post /admin/claims/{id}/outbound/items/{action_id}
Update an outbound (or new) item of a claim using the `ID` of the item's `ITEM_ADD` action.
Every item has an `actions` property, whose value is an array of actions. You can check the action's name using its `action` property, and use the value of the `id` property.
# Update Outbound Shipping Method of a Claim
Source: https://docs.mercurjs.com/api-reference/admin-claims/update-outbound-shipping-method-of-a-claim
api-reference/combined.oas.json post /admin/claims/{id}/outbound/shipping-method/{action_id}
Update the shipping method for delivering outbound items in a claim using the `ID` of the method's `SHIPPING_ADD` action.
Every shipping method has an `actions` property, whose value is an array of actions. You can check the action's name using its `action` property, and use the value of the `id` property.
# Create Collection
Source: https://docs.mercurjs.com/api-reference/admin-collections/create-collection
api-reference/combined.oas.json post /admin/collections
Create a collection.
# Delete a Collection
Source: https://docs.mercurjs.com/api-reference/admin-collections/delete-a-collection
api-reference/combined.oas.json delete /admin/collections/{id}
Delete a product collection.
# Get a Collection
Source: https://docs.mercurjs.com/api-reference/admin-collections/get-a-collection
api-reference/combined.oas.json get /admin/collections/{id}
Retrieve a collection by its ID. You can expand the collection's relations or select the fields that should be returned using the query parameters.
# List Collections
Source: https://docs.mercurjs.com/api-reference/admin-collections/list-collections
api-reference/combined.oas.json get /admin/collections
Retrieve a list of collections. The collections can be filtered by fields such as `id`. The collections can also be sorted or paginated.
# Manage Products of a Collection
Source: https://docs.mercurjs.com/api-reference/admin-collections/manage-products-of-a-collection
api-reference/combined.oas.json post /admin/collections/{id}/products
Manage the products of a collection by adding or removing them from the collection.
# Update a Collection
Source: https://docs.mercurjs.com/api-reference/admin-collections/update-a-collection
api-reference/combined.oas.json post /admin/collections/{id}
Update a collection's details.
# Create a CommissionRule
Source: https://docs.mercurjs.com/api-reference/admin-commission/create-a-commissionrule
api-reference/combined.oas.json post /admin/commission/rules
Creates a new commission rule.
# Delete a Commission Rule
Source: https://docs.mercurjs.com/api-reference/admin-commission/delete-a-commission-rule
api-reference/combined.oas.json delete /admin/commission/rules/{id}
Deletes a commission rule by id.
# Get commission rule by id
Source: https://docs.mercurjs.com/api-reference/admin-commission/get-commission-rule-by-id
api-reference/combined.oas.json get /admin/commission/rules/{id}
Retrieves a commission rule by id.
# Get default commission rule
Source: https://docs.mercurjs.com/api-reference/admin-commission/get-default-commission-rule
api-reference/combined.oas.json get /admin/commission/default
Retrieves a commission rule with 'site' reference type.
# List Commission Lines
Source: https://docs.mercurjs.com/api-reference/admin-commission/list-commission-lines
api-reference/combined.oas.json get /admin/commission/commission-lines
Retrieves a list of commission lines with optional filtering and expansion.
# List Commission rules
Source: https://docs.mercurjs.com/api-reference/admin-commission/list-commission-rules
api-reference/combined.oas.json get /admin/commission/rules
Retrieves a list of commission rules.
# Update CommissionRule
Source: https://docs.mercurjs.com/api-reference/admin-commission/update-commissionrule
api-reference/combined.oas.json post /admin/commission/rules/{id}
Updates commission rule by id.
# Upsert default CommissionRule
Source: https://docs.mercurjs.com/api-reference/admin-commission/upsert-default-commissionrule
api-reference/combined.oas.json post /admin/commission/default
Creates or updates default commission rule.
# Create a configuration rule
Source: https://docs.mercurjs.com/api-reference/admin-configuration/create-a-configuration-rule
api-reference/combined.oas.json post /admin/configuration
Creates a request to admin to accept new resource
# List rules
Source: https://docs.mercurjs.com/api-reference/admin-configuration/list-rules
api-reference/combined.oas.json get /admin/configuration
Retrieves rules list
# Update a configuration rule
Source: https://docs.mercurjs.com/api-reference/admin-configuration/update-a-configuration-rule
api-reference/combined.oas.json post /admin/configuration/{id}
Updates a rule
# Get a Currency
Source: https://docs.mercurjs.com/api-reference/admin-currencies/get-a-currency
api-reference/combined.oas.json get /admin/currencies/{code}
Retrieve a currency by its code. You can expand the currency's relations or select the fields that should be returned using the query parameters.
# List Currencies
Source: https://docs.mercurjs.com/api-reference/admin-currencies/list-currencies
api-reference/combined.oas.json get /admin/currencies
Retrieve a list of currencies. The currencies can be filtered by fields such as `id`. The currencies can also be sorted or paginated.
# Create Customer Group
Source: https://docs.mercurjs.com/api-reference/admin-customer-groups/create-customer-group
api-reference/combined.oas.json post /admin/customer-groups
Create a customer group.
# Delete a Customer Group
Source: https://docs.mercurjs.com/api-reference/admin-customer-groups/delete-a-customer-group
api-reference/combined.oas.json delete /admin/customer-groups/{id}
Delete a customer group. Customers in the group aren't deleted.
# Get a Customer Group
Source: https://docs.mercurjs.com/api-reference/admin-customer-groups/get-a-customer-group
api-reference/combined.oas.json get /admin/customer-groups/{id}
Retrieve a customer group by its ID. You can expand the customer group's relations or select the fields that should be returned.
# List Customer Groups
Source: https://docs.mercurjs.com/api-reference/admin-customer-groups/list-customer-groups
api-reference/combined.oas.json get /admin/customer-groups
Retrieve a list of customer groups. The customer groups can be filtered by fields such as `id`. The customer groups can also be sorted or paginated.
# Manage Customers of a Customer Group
Source: https://docs.mercurjs.com/api-reference/admin-customer-groups/manage-customers-of-a-customer-group
api-reference/combined.oas.json post /admin/customer-groups/{id}/customers
Manage the customers of a group to add or remove them from the group.
# Update a Customer Group
Source: https://docs.mercurjs.com/api-reference/admin-customer-groups/update-a-customer-group
api-reference/combined.oas.json post /admin/customer-groups/{id}
Update a customer group's details.
# Add a Customer Address
Source: https://docs.mercurjs.com/api-reference/admin-customers/add-a-customer-address
api-reference/combined.oas.json post /admin/customers/{id}/addresses
Add an address to a customer.
# Create Customer
Source: https://docs.mercurjs.com/api-reference/admin-customers/create-customer
api-reference/combined.oas.json post /admin/customers
Create a customer.
# Delete a Customer
Source: https://docs.mercurjs.com/api-reference/admin-customers/delete-a-customer
api-reference/combined.oas.json delete /admin/customers/{id}
Delete a customer.
# Get a Customer
Source: https://docs.mercurjs.com/api-reference/admin-customers/get-a-customer
api-reference/combined.oas.json get /admin/customers/{id}
Retrieve a customer by its ID. You can expand the customer's relations or select the fields that should be returned.
# List Addresses
Source: https://docs.mercurjs.com/api-reference/admin-customers/list-addresses
api-reference/combined.oas.json get /admin/customers/{id}/addresses
Retrieve a list of addresses in a customer. The addresses can be filtered by fields like `query`. The addresses can also be paginated.
# List Addresses
Source: https://docs.mercurjs.com/api-reference/admin-customers/list-addresses-1
api-reference/combined.oas.json get /admin/customers/{id}/addresses/{address_id}
Retrieve a list of a customer's addresses. The addresses can be filtered by fields like `company`. The addresses can also be paginated.
# List Customers
Source: https://docs.mercurjs.com/api-reference/admin-customers/list-customers
api-reference/combined.oas.json get /admin/customers
Retrieve a list of customers. The customers can be filtered by fields such as `id`. The customers can also be sorted or paginated.
# Manage Customer Groups of Customer
Source: https://docs.mercurjs.com/api-reference/admin-customers/manage-customer-groups-of-customer
api-reference/combined.oas.json post /admin/customers/{id}/customer-groups
Manage the customer groups of a customer, adding or removing the customer from those groups.
# Remove an Address from Customer
Source: https://docs.mercurjs.com/api-reference/admin-customers/remove-an-address-from-customer
api-reference/combined.oas.json delete /admin/customers/{id}/addresses/{address_id}
Remove a customer's address.
# Update a Customer
Source: https://docs.mercurjs.com/api-reference/admin-customers/update-a-customer
api-reference/combined.oas.json post /admin/customers/{id}
Update a customer's details.
# Update a Customer's Address
Source: https://docs.mercurjs.com/api-reference/admin-customers/update-a-customers-address
api-reference/combined.oas.json post /admin/customers/{id}/addresses/{address_id}
Update a customer address's details.
# Add Item to Draft Order Edit
Source: https://docs.mercurjs.com/api-reference/admin-draft-orders/add-item-to-draft-order-edit
api-reference/combined.oas.json post /admin/draft-orders/{id}/edit/items
Add an item to a draft order edit.
# Add Promotions to Draft Order Edit
Source: https://docs.mercurjs.com/api-reference/admin-draft-orders/add-promotions-to-draft-order-edit
api-reference/combined.oas.json post /admin/draft-orders/{id}/edit/promotions
Add promotions to a draft order edit.
# Add Shipping Method to Draft Order Edit
Source: https://docs.mercurjs.com/api-reference/admin-draft-orders/add-shipping-method-to-draft-order-edit
api-reference/combined.oas.json post /admin/draft-orders/{id}/edit/shipping-methods
Add a shipping method to a draft order edit.
# Cancel Edit on Draft Order
Source: https://docs.mercurjs.com/api-reference/admin-draft-orders/cancel-edit-on-draft-order
api-reference/combined.oas.json delete /admin/draft-orders/{id}/edit
Cancel an unconfirmed edit on a draft order.
# Confirm an Edit on a Draft Order
Source: https://docs.mercurjs.com/api-reference/admin-draft-orders/confirm-an-edit-on-a-draft-order
api-reference/combined.oas.json post /admin/draft-orders/{id}/edit/confirm
Confirm an edit on a draft order. This will apply the changes made to the draft order.
# Convert a Draft Order to an Order
Source: https://docs.mercurjs.com/api-reference/admin-draft-orders/convert-a-draft-order-to-an-order
api-reference/combined.oas.json post /admin/draft-orders/{id}/convert-to-order
Convert a draft order to an order. This will finalize the draft order and create a new order with the same details.
# Create a Draft Order Edit
Source: https://docs.mercurjs.com/api-reference/admin-draft-orders/create-a-draft-order-edit
api-reference/combined.oas.json post /admin/draft-orders/{id}/edit
Create an edit on a draft order. This will allow you to make changes to the draft order's items, shipping methods, or promotions. Once you've made the necessar changes, you can later either request the edit (which requires a confirmation from the customer), or force-confirm the edit.
# Create Draft Order
Source: https://docs.mercurjs.com/api-reference/admin-draft-orders/create-draft-order
api-reference/combined.oas.json post /admin/draft-orders
Create a draft order. This creates an order with the `is_draft_order` property enabled. You can later convert the draft order to an order.
# Delete a Draft Order
Source: https://docs.mercurjs.com/api-reference/admin-draft-orders/delete-a-draft-order
api-reference/combined.oas.json delete /admin/draft-orders/{id}
Delete a draft order.
# Get a Draft Order
Source: https://docs.mercurjs.com/api-reference/admin-draft-orders/get-a-draft-order
api-reference/combined.oas.json get /admin/draft-orders/{id}
Retrieve a draft order by its ID. You can expand the draft order's relations or select the fields that should be returned using the query parameters.
# List Draft Orders
Source: https://docs.mercurjs.com/api-reference/admin-draft-orders/list-draft-orders
api-reference/combined.oas.json get /admin/draft-orders
Retrieve a list of draft orders. The draft orders can be filtered by fields such as `id`. The draft orders can also be sorted or paginated.
# Remove Item from Draft Order Edit
Source: https://docs.mercurjs.com/api-reference/admin-draft-orders/remove-item-from-draft-order-edit
api-reference/combined.oas.json delete /admin/draft-orders/{id}/edit/items/{action_id}
Remove an order item from a draft order edit by the ID of the item's `ITEM_ADD` or `ITEM_UPDATE` action.
Every item has an `actions` property, whose value is an array of actions. You can check the action's name using its `action` property, and use the value of the `id` property.
# Remove New Shipping Method from Draft Order
Source: https://docs.mercurjs.com/api-reference/admin-draft-orders/remove-new-shipping-method-from-draft-order
api-reference/combined.oas.json delete /admin/draft-orders/{id}/edit/shipping-methods/{action_id}
Remove a shipping method that was added to a draft order edit using the `ID` of the method's `SHIPPING_ADD` action.
Every shipping method has an `actions` property, whose value is an array of actions. You can check the action's name using its `action` property, and use the value of the `id` property.
# Remove Promotions from Draft Order Edit
Source: https://docs.mercurjs.com/api-reference/admin-draft-orders/remove-promotions-from-draft-order-edit
api-reference/combined.oas.json delete /admin/draft-orders/{id}/edit/promotions
Remove specified promotions from a draft order edit.
# Remove Shipping Method from Draft Order Edit
Source: https://docs.mercurjs.com/api-reference/admin-draft-orders/remove-shipping-method-from-draft-order-edit
api-reference/combined.oas.json delete /admin/draft-orders/{id}/edit/shipping-methods/method/{method_id}
Remove an existing shipping method from a draft order edit.
# Request Edit on Draft Order
Source: https://docs.mercurjs.com/api-reference/admin-draft-orders/request-edit-on-draft-order
api-reference/combined.oas.json post /admin/draft-orders/{id}/edit/request
Change the status of a draft order's edit to be requested. Later, the edit can be confirmed or canceled.
# Update a Draft Order
Source: https://docs.mercurjs.com/api-reference/admin-draft-orders/update-a-draft-order
api-reference/combined.oas.json post /admin/draft-orders/{id}
Update a draft order's details. This doesn't include updating the draft order's items, shipping methods, or promotions. To update those, you need to create an edit that you can later request or confirm.
# Update Existing Item in Draft Order Edit
Source: https://docs.mercurjs.com/api-reference/admin-draft-orders/update-existing-item-in-draft-order-edit
api-reference/combined.oas.json post /admin/draft-orders/{id}/edit/items/item/{item_id}
Update an existing item in a draft order edit.
# Update Existing Shipping Method in Draft Order Edit
Source: https://docs.mercurjs.com/api-reference/admin-draft-orders/update-existing-shipping-method-in-draft-order-edit
api-reference/combined.oas.json post /admin/draft-orders/{id}/edit/shipping-methods/method/{method_id}
Update an existing shipping method in a draft order edit.
# Update New Item in Draft Order Edit
Source: https://docs.mercurjs.com/api-reference/admin-draft-orders/update-new-item-in-draft-order-edit
api-reference/combined.oas.json post /admin/draft-orders/{id}/edit/items/{action_id}
Update a new item that was added to a draft order edit by the ID of the item's `ITEM_ADD` action.
Every item has an `actions` property, whose value is an array of actions. You can check the action's name using its `action` property, and use the value of the `id` property.
# Update New Shipping Method in Draft Order Edit
Source: https://docs.mercurjs.com/api-reference/admin-draft-orders/update-new-shipping-method-in-draft-order-edit
api-reference/combined.oas.json post /admin/draft-orders/{id}/edit/shipping-methods/{action_id}
Update a new shipping method that was added to a draft order edit using the `ID` of the method's `SHIPPING_ADD` action.
Every shipping method has an `actions` property, whose value is an array of actions. You can check the action's name using its `action` property, and use the value of the `id` property.
# Add an Inbound Shipping Method to an Exchange
Source: https://docs.mercurjs.com/api-reference/admin-exchanges/add-an-inbound-shipping-method-to-an-exchange
api-reference/combined.oas.json post /admin/exchanges/{id}/inbound/shipping-method
Add an inbound (or return) shipping method to an exchange. The inbound shipping method will have a `SHIPPING_ADD` action.
# Add Inbound Items to an Exchange
Source: https://docs.mercurjs.com/api-reference/admin-exchanges/add-inbound-items-to-an-exchange
api-reference/combined.oas.json post /admin/exchanges/{id}/inbound/items
Add inbound (or return) items to an exchange. These inbound items will have the action `RETURN_ITEM`.
# Add Outbound Items to Exchange
Source: https://docs.mercurjs.com/api-reference/admin-exchanges/add-outbound-items-to-exchange
api-reference/combined.oas.json post /admin/exchanges/{id}/outbound/items
Add outbound (or new) items to an exchange. These outbound items will have the action `ITEM_ADD`.
# Add Outbound Shipping Method to Exchange
Source: https://docs.mercurjs.com/api-reference/admin-exchanges/add-outbound-shipping-method-to-exchange
api-reference/combined.oas.json post /admin/exchanges/{id}/outbound/shipping-method
Add an outbound shipping method to an exchange. The outbound shipping method will have a `SHIPPING_ADD` action.
# Cancel an Exchange
Source: https://docs.mercurjs.com/api-reference/admin-exchanges/cancel-an-exchange
api-reference/combined.oas.json post /admin/exchanges/{id}/cancel
Cancel an exchange and its associated return.
# Cancel Exchange Request
Source: https://docs.mercurjs.com/api-reference/admin-exchanges/cancel-exchange-request
api-reference/combined.oas.json delete /admin/exchanges/{id}/request
Cancel a requested exchange.
# Confirm an Exchange
Source: https://docs.mercurjs.com/api-reference/admin-exchanges/confirm-an-exchange
api-reference/combined.oas.json post /admin/exchanges/{id}/request
Confirm an exchange request, applying its changes on the associated order.
# Create Exchange
Source: https://docs.mercurjs.com/api-reference/admin-exchanges/create-exchange
api-reference/combined.oas.json post /admin/exchanges
Create an exchange request. Its changes aren't applied on the order until the exchange is confirmed.
# Get an Exchange
Source: https://docs.mercurjs.com/api-reference/admin-exchanges/get-an-exchange
api-reference/combined.oas.json get /admin/exchanges/{id}
Retrieve an exchange by its ID. You can expand the exchange's relations or select the fields that should be returned using query parameters.
# List Exchanges
Source: https://docs.mercurjs.com/api-reference/admin-exchanges/list-exchanges
api-reference/combined.oas.json get /admin/exchanges
Retrieve a list of exchanges. The exchanges can be filtered by fields such as `id`. The exchanges can also be sorted or paginated.
# Remove Inbound Item from Exchange
Source: https://docs.mercurjs.com/api-reference/admin-exchanges/remove-inbound-item-from-exchange
api-reference/combined.oas.json delete /admin/exchanges/{id}/inbound/items/{action_id}
Remove an inbound (or return) item from an exchange using the `ID` of the item's `RETURN_ITEM` action.
Every item has an `actions` property, whose value is an array of actions. You can check the action's name using its `action` property, and use the value of the `id` property.
# Remove Inbound Shipping Method from Exchange
Source: https://docs.mercurjs.com/api-reference/admin-exchanges/remove-inbound-shipping-method-from-exchange
api-reference/combined.oas.json delete /admin/exchanges/{id}/inbound/shipping-method/{action_id}
Remove the shipping method for returning items in the exchange using the `ID` of the method's `SHIPPING_ADD` action.
Every shipping method has an `actions` property, whose value is an array of actions. You can check the action's name using its `action` property, and use the value of the `id` property.
# Remove Outbound Item from Exchange
Source: https://docs.mercurjs.com/api-reference/admin-exchanges/remove-outbound-item-from-exchange
api-reference/combined.oas.json delete /admin/exchanges/{id}/outbound/items/{action_id}
Remove an outbound (or new) item from an exchange using the `ID` of the item's `ITEM_ADD` action.
Every item has an `actions` property, whose value is an array of actions. You can check the action's name using its `action` property, and use the value of the `id` property.
# Remove Outbound Shipping Method from Exchange
Source: https://docs.mercurjs.com/api-reference/admin-exchanges/remove-outbound-shipping-method-from-exchange
api-reference/combined.oas.json delete /admin/exchanges/{id}/outbound/shipping-method/{action_id}
Remove the shipping method for delivering outbound items in the exchange using the `ID` of the method's `SHIPPING_ADD` action.
Every shipping method has an `actions` property, whose value is an array of actions. You can check the action's name using its `action` property, and use the value of the `id` property.
# Update an Inbount Item of an Exchange
Source: https://docs.mercurjs.com/api-reference/admin-exchanges/update-an-inbount-item-of-an-exchange
api-reference/combined.oas.json post /admin/exchanges/{id}/inbound/items/{action_id}
Update an inbound (or return) item from an exchange using the `ID` of the item's `RETURN_ITEM` action.
Every item has an `actions` property, whose value is an array of actions. You can check the action's name using its `action` property, and use the value of the `id` property.
# Update Inbound Shipping Method of an Exchange
Source: https://docs.mercurjs.com/api-reference/admin-exchanges/update-inbound-shipping-method-of-an-exchange
api-reference/combined.oas.json post /admin/exchanges/{id}/inbound/shipping-method/{action_id}
Update the shipping method for returning items in the exchange using the `ID` of the method's `SHIPPING_ADD` action.
Every shipping method has an `actions` property, whose value is an array of actions. You can check the action's name using its `action` property, and use the value of the `id` property.
# Update Outbound Item of an Exchange
Source: https://docs.mercurjs.com/api-reference/admin-exchanges/update-outbound-item-of-an-exchange
api-reference/combined.oas.json post /admin/exchanges/{id}/outbound/items/{action_id}
Update an outbound (or new) item from an exchange using the `ID` of the item's `ITEM_ADD` action.
Every item has an `actions` property, whose value is an array of actions. You can check the action's name using its `action` property, and use the value of the `id` property.
# Update Outbound Shipping Method of Exchange
Source: https://docs.mercurjs.com/api-reference/admin-exchanges/update-outbound-shipping-method-of-exchange
api-reference/combined.oas.json post /admin/exchanges/{id}/outbound/shipping-method/{action_id}
Update the shipping method for delivering outbound items in the exchange using the `ID` of the method's `SHIPPING_ADD` action.
Every shipping method has an `actions` property, whose value is an array of actions. You can check the action's name using its `action` property, and use the value of the `id` property.
# List Fulfillment Options
Source: https://docs.mercurjs.com/api-reference/admin-fulfillment-providers/list-fulfillment-options
api-reference/combined.oas.json get /admin/fulfillment-providers/{id}/options
Retrieve the list of fulfillment options of a fulfillment provider. These options may be retrieved from an integrated third-party service.
# List Fulfillment Providers
Source: https://docs.mercurjs.com/api-reference/admin-fulfillment-providers/list-fulfillment-providers
api-reference/combined.oas.json get /admin/fulfillment-providers
Retrieve a list of fulfillment providers. The fulfillment providers can be filtered by fields such as `id`. The fulfillment providers can also be sorted or paginated.
# Add a Service Zone to a Fulfillment Set
Source: https://docs.mercurjs.com/api-reference/admin-fulfillment-sets/add-a-service-zone-to-a-fulfillment-set
api-reference/combined.oas.json post /admin/fulfillment-sets/{id}/service-zones
Add a service zone to a fulfillment set.
# Delete Fulfillment Set
Source: https://docs.mercurjs.com/api-reference/admin-fulfillment-sets/delete-fulfillment-set
api-reference/combined.oas.json delete /admin/fulfillment-sets/{id}
Delete a fulfillment set.
# Get a Service Zone in a Fulfillment Set
Source: https://docs.mercurjs.com/api-reference/admin-fulfillment-sets/get-a-service-zone-in-a-fulfillment-set
api-reference/combined.oas.json get /admin/fulfillment-sets/{id}/service-zones/{zone_id}
Retrieve a service zone that belongs to a fulfillment set. be paginated.
# Remove a Service Zone from Fulfillment Set
Source: https://docs.mercurjs.com/api-reference/admin-fulfillment-sets/remove-a-service-zone-from-fulfillment-set
api-reference/combined.oas.json delete /admin/fulfillment-sets/{id}/service-zones/{zone_id}
Remove a service zone that belongs to a fulfillment set.
# Update the Service Zone of a Fulfillment Set
Source: https://docs.mercurjs.com/api-reference/admin-fulfillment-sets/update-the-service-zone-of-a-fulfillment-set
api-reference/combined.oas.json post /admin/fulfillment-sets/{id}/service-zones/{zone_id}
Update the details of a service zone in a fulfillment set.
# Cancel a Fulfillment
Source: https://docs.mercurjs.com/api-reference/admin-fulfillments/cancel-a-fulfillment
api-reference/combined.oas.json post /admin/fulfillments/{id}/cancel
Cancel a fulfillment. The fulfillment can't be shipped or delivered.
To cancel the fulfillment, the `cancelFulfillment` method of the associated fulfillment provider is used.
# Create a Shipment for a Fulfillment
Source: https://docs.mercurjs.com/api-reference/admin-fulfillments/create-a-shipment-for-a-fulfillment
api-reference/combined.oas.json post /admin/fulfillments/{id}/shipment
Create a shipment for a fulfillment. The fulfillment must not be shipped or canceled.
# Create Fulfillment
Source: https://docs.mercurjs.com/api-reference/admin-fulfillments/create-fulfillment
api-reference/combined.oas.json post /admin/fulfillments
Create a fulfillment for an order, return, exchange, and more.
# Create Gift Card
Source: https://docs.mercurjs.com/api-reference/admin-gift-cards/create-gift-card
api-reference/combined.oas.json post /admin/gift-cards
Create a gift card.
# Get a Gift Card
Source: https://docs.mercurjs.com/api-reference/admin-gift-cards/get-a-gift-card
api-reference/combined.oas.json get /admin/gift-cards/{id}
Retrieve a gift card by its ID. You can expand the gift card's relations or select the fields that should be returned.
# List Gift Cards
Source: https://docs.mercurjs.com/api-reference/admin-gift-cards/list-gift-cards
api-reference/combined.oas.json get /admin/gift-cards
Retrieve a list of gift cards. The gift cards can be filtered by fields such as `id`. The gift cards can also be sorted or paginated.
# List Gift Card's Orders
Source: https://docs.mercurjs.com/api-reference/admin-gift-cards/list-gift-cards-orders
api-reference/combined.oas.json get /admin/gift-cards/{id}/orders
Retrieve the list of orders that a gift card was used in.
# Redeem a Gift Card
Source: https://docs.mercurjs.com/api-reference/admin-gift-cards/redeem-a-gift-card
api-reference/combined.oas.json post /admin/gift-cards/{id}/redeem
Redeem a gift card and add it to the customer's store credit account.
# Update a Gift Card
Source: https://docs.mercurjs.com/api-reference/admin-gift-cards/update-a-gift-card
api-reference/combined.oas.json post /admin/gift-cards/{id}
Update a gift card's details.
# Create Inventory Item
Source: https://docs.mercurjs.com/api-reference/admin-inventory-items/create-inventory-item
api-reference/combined.oas.json post /admin/inventory-items
Create an inventory item.
# Create Inventory Level for Inventory Item
Source: https://docs.mercurjs.com/api-reference/admin-inventory-items/create-inventory-level-for-inventory-item
api-reference/combined.oas.json post /admin/inventory-items/{id}/location-levels
Create an inventory level for an inventory item.
# Delete Inventory Item
Source: https://docs.mercurjs.com/api-reference/admin-inventory-items/delete-inventory-item
api-reference/combined.oas.json delete /admin/inventory-items/{id}
Delete an inventory item.
# Get a Inventory Item
Source: https://docs.mercurjs.com/api-reference/admin-inventory-items/get-a-inventory-item
api-reference/combined.oas.json get /admin/inventory-items/{id}
Retrieve a inventory item by its ID. You can expand the inventory item's relations or select the fields that should be returned.
# List Inventory Items
Source: https://docs.mercurjs.com/api-reference/admin-inventory-items/list-inventory-items
api-reference/combined.oas.json get /admin/inventory-items
Retrieve a list of inventory items. The inventory items can be filtered by fields such as `id`. The inventory items can also be sorted or paginated.
# List Inventory Levels
Source: https://docs.mercurjs.com/api-reference/admin-inventory-items/list-inventory-levels
api-reference/combined.oas.json get /admin/inventory-items/{id}/location-levels
Retrieve a list of inventory levels associated with an inventory item. The inventory levels can be filtered by fields like `location_id`. The inventory levels can also be paginated.
# Manage Inventory Levels
Source: https://docs.mercurjs.com/api-reference/admin-inventory-items/manage-inventory-levels
api-reference/combined.oas.json post /admin/inventory-items/location-levels/batch
Manage inventory levels to create, update, or delete them.
# Manage Inventory Levels of Inventory Item
Source: https://docs.mercurjs.com/api-reference/admin-inventory-items/manage-inventory-levels-of-inventory-item
api-reference/combined.oas.json post /admin/inventory-items/{id}/location-levels/batch
Manage the inventory levels of an inventory item to create or delete them.
# Remove Inventory Level of Inventory Item
Source: https://docs.mercurjs.com/api-reference/admin-inventory-items/remove-inventory-level-of-inventory-item
api-reference/combined.oas.json delete /admin/inventory-items/{id}/location-levels/{location_id}
Remove the inventory level of an inventory item.
If the inventory level has reserved quantity greater than `0`, an error is thrown.
# Update an Inventory Item
Source: https://docs.mercurjs.com/api-reference/admin-inventory-items/update-an-inventory-item
api-reference/combined.oas.json post /admin/inventory-items/{id}
Update an inventory item's details.
# Update an Inventory Level of an Inventory Item
Source: https://docs.mercurjs.com/api-reference/admin-inventory-items/update-an-inventory-level-of-an-inventory-item
api-reference/combined.oas.json post /admin/inventory-items/{id}/location-levels/{location_id}
Updates the details of an inventory item's inventory level using its associated location ID.
# Accept Invite
Source: https://docs.mercurjs.com/api-reference/admin-invites/accept-invite
api-reference/combined.oas.json post /admin/invites/accept
Accept an invite and create a new user.
Since the user isn't created yet, the JWT token used in the authorization header is retrieved from the `/auth/user/emailpass/register` API route (or a provider other than `emailpass`). The user can then authenticate using the `/auth/user/emailpass` API route.
# Create Invite
Source: https://docs.mercurjs.com/api-reference/admin-invites/create-invite
api-reference/combined.oas.json post /admin/invites
Create a invite.
# Delete Invite
Source: https://docs.mercurjs.com/api-reference/admin-invites/delete-invite
api-reference/combined.oas.json delete /admin/invites/{id}
Delete an invite.
# Get an Invite
Source: https://docs.mercurjs.com/api-reference/admin-invites/get-an-invite
api-reference/combined.oas.json get /admin/invites/{id}
Retrieve an invite by its ID. You can expand the invite's relations or select the fields that should be returned.
# List Invites
Source: https://docs.mercurjs.com/api-reference/admin-invites/list-invites
api-reference/combined.oas.json get /admin/invites
Retrieve a list of invites. The invites can be filtered by fields such as `id`. The invites can also be sorted or paginated.
# Refresh Invite Token
Source: https://docs.mercurjs.com/api-reference/admin-invites/refresh-invite-token
api-reference/combined.oas.json post /admin/invites/{id}/resend
Refresh the token of an invite.
# Get a Notification
Source: https://docs.mercurjs.com/api-reference/admin-notifications/get-a-notification
api-reference/combined.oas.json get /admin/notifications/{id}
Retrieve a notification by its ID. You can expand the notification's relations or select the fields that should be returned.
# List Notifications
Source: https://docs.mercurjs.com/api-reference/admin-notifications/list-notifications
api-reference/combined.oas.json get /admin/notifications
Retrieves a list of admin notifications from the feed channel.
# Add Items to Order Edit
Source: https://docs.mercurjs.com/api-reference/admin-order-edits/add-items-to-order-edit
api-reference/combined.oas.json post /admin/order-edits/{id}/items
Add new items to an order edit. These items will have the action `ITEM_ADD`.
# Add Shipping Method to Order Edit
Source: https://docs.mercurjs.com/api-reference/admin-order-edits/add-shipping-method-to-order-edit
api-reference/combined.oas.json post /admin/order-edits/{id}/shipping-method
Add a shipping method to an exchange. The shipping method will have a `SHIPPING_ADD` action.
# Cancel Order Edit
Source: https://docs.mercurjs.com/api-reference/admin-order-edits/cancel-order-edit
api-reference/combined.oas.json delete /admin/order-edits/{id}
Cancel a requested order edit.
# Confirm Order Edit
Source: https://docs.mercurjs.com/api-reference/admin-order-edits/confirm-order-edit
api-reference/combined.oas.json post /admin/order-edits/{id}/confirm
Confirm an order edit request and apply the changes on the order.
# Create Order Edit
Source: https://docs.mercurjs.com/api-reference/admin-order-edits/create-order-edit
api-reference/combined.oas.json post /admin/order-edits
Create an order edit.
# Remove Item from Order Edit
Source: https://docs.mercurjs.com/api-reference/admin-order-edits/remove-item-from-order-edit
api-reference/combined.oas.json delete /admin/order-edits/{id}/items/{action_id}
Remove an added item in the order edit by the ID of the item's `ITEM_ADD` action.
Every item has an `actions` property, whose value is an array of actions. You can check the action's name using its `action` property, and use the value of the `id` property.
# Remove Shipping Method from Order Edit
Source: https://docs.mercurjs.com/api-reference/admin-order-edits/remove-shipping-method-from-order-edit
api-reference/combined.oas.json delete /admin/order-edits/{id}/shipping-method/{action_id}
Remove a shipping method in the order edit by the ID of the method's `SHIPPING_ADD` action.
Every shipping method has an `actions` property, whose value is an array of actions. You can check the action's name using its `action` property, and use the value of the `id` property.
# Request Order Edit
Source: https://docs.mercurjs.com/api-reference/admin-order-edits/request-order-edit
api-reference/combined.oas.json post /admin/order-edits/{id}/request
Change the status of an active order edit to requested.
# Update an Item in an Order Edit
Source: https://docs.mercurjs.com/api-reference/admin-order-edits/update-an-item-in-an-order-edit
api-reference/combined.oas.json post /admin/order-edits/{id}/items/{action_id}
Update an added item in the order edit by the ID of the item's `ITEM_ADD` action.
Every item has an `actions` property, whose value is an array of actions. You can check the action's name using its `action` property, and use the value of the `id` property.
# Update Order Item Quantity of Order Edit
Source: https://docs.mercurjs.com/api-reference/admin-order-edits/update-order-item-quantity-of-order-edit
api-reference/combined.oas.json post /admin/order-edits/{id}/items/item/{item_id}
Update an existing order item's quantity of an order edit.
# Update Shipping Method of an Order Edit
Source: https://docs.mercurjs.com/api-reference/admin-order-edits/update-shipping-method-of-an-order-edit
api-reference/combined.oas.json post /admin/order-edits/{id}/shipping-method/{action_id}
Update a shipping method in the order edit by the ID of the method's `SHIPPING_ADD` action.
Every shipping method has an `actions` property, whose value is an array of actions. You can check the action's name using its `action` property, and use the value of the `id` property.
# Get Order Set
Source: https://docs.mercurjs.com/api-reference/admin-order-sets/get-order-set
api-reference/combined.oas.json get /admin/order-sets/{id}
Retrieves a specific order set by its ID.
# List Order Sets
Source: https://docs.mercurjs.com/api-reference/admin-order-sets/list-order-sets
api-reference/combined.oas.json get /admin/order-sets
Retrieves a list of order sets with optional filtering.
# Archive an Order
Source: https://docs.mercurjs.com/api-reference/admin-orders/archive-an-order
api-reference/combined.oas.json post /admin/orders/{id}/archive
Change the status of an order to archived.
# Cancel Fulfillment
Source: https://docs.mercurjs.com/api-reference/admin-orders/cancel-fulfillment
api-reference/combined.oas.json post /admin/orders/{id}/fulfillments/{fulfillment_id}/cancel
Cancel an order's fulfillment. The fulfillment can't be canceled if it's shipped.
# Cancel Order
Source: https://docs.mercurjs.com/api-reference/admin-orders/cancel-order
api-reference/combined.oas.json post /admin/orders/{id}/cancel
Cancel an order. The cancelation fails if:
- The order has captured payments.
- The order has refund payments.
- The order has fulfillments that aren't canceled.
# Cancel Transfer Request
Source: https://docs.mercurjs.com/api-reference/admin-orders/cancel-transfer-request
api-reference/combined.oas.json post /admin/orders/{id}/transfer/cancel
Cancel a request to transfer an order to another customer.
# Complete Order
Source: https://docs.mercurjs.com/api-reference/admin-orders/complete-order
api-reference/combined.oas.json post /admin/orders/{id}/complete
Mark an order as completed.
# Create an Order Fulfillment
Source: https://docs.mercurjs.com/api-reference/admin-orders/create-an-order-fulfillment
api-reference/combined.oas.json post /admin/orders/{id}/fulfillments
Create a fulfillment for an order. The creation fails if the order is canceled.
# Create Credit Line for Order
Source: https://docs.mercurjs.com/api-reference/admin-orders/create-credit-line-for-order
api-reference/combined.oas.json post /admin/orders/{id}/credit-lines
Create a credit line for an order.
# Create Shipment for an Order's Fulfillment
Source: https://docs.mercurjs.com/api-reference/admin-orders/create-shipment-for-an-orders-fulfillment
api-reference/combined.oas.json post /admin/orders/{id}/fulfillments/{fulfillment_id}/shipments
Create a shipment for an order's fulfillment.
# Get an Order
Source: https://docs.mercurjs.com/api-reference/admin-orders/get-an-order
api-reference/combined.oas.json get /admin/orders/{id}
Retrieve an order by its ID. You can expand the order's relations or select the fields that should be returned.
# Get Preview
Source: https://docs.mercurjs.com/api-reference/admin-orders/get-preview
api-reference/combined.oas.json get /admin/orders/{id}/preview
Retrieve a preview of an order using its associated change, such as an edit.
# List Changes on an Order
Source: https://docs.mercurjs.com/api-reference/admin-orders/list-changes-on-an-order
api-reference/combined.oas.json get /admin/orders/{id}/changes
Retrieve a list of changes made on an order, including returns, exchanges, etc...
The changes can be filtered by fields like FILTER FIELDS. The changes can also be paginated.
# List Line Items
Source: https://docs.mercurjs.com/api-reference/admin-orders/list-line-items
api-reference/combined.oas.json get /admin/orders/{id}/line-items
Retrieve a list of line items in a order. The line items can be filtered by fields like FILTER FIELDS. The line items can also be paginated.
# List Orders
Source: https://docs.mercurjs.com/api-reference/admin-orders/list-orders
api-reference/combined.oas.json get /admin/orders
Retrieve a list of orders. The orders can be filtered by fields such as `id`. The orders can also be sorted or paginated.
# Mark a Fulfillment as Delivered.
Source: https://docs.mercurjs.com/api-reference/admin-orders/mark-a-fulfillment-as-delivered
api-reference/combined.oas.json post /admin/orders/{id}/fulfillments/{fulfillment_id}/mark-as-delivered
Mark an order's fulfillment as delivered.
# Request Order Transfer
Source: https://docs.mercurjs.com/api-reference/admin-orders/request-order-transfer
api-reference/combined.oas.json post /admin/orders/{id}/transfer
Request an order to be transfered to another customer. The transfer is confirmed by sending a request to the [Accept Order Transfer](https://docs.medusajs.com/api/store#orders_postordersidtransferaccept) Store API route.
# Update Order
Source: https://docs.mercurjs.com/api-reference/admin-orders/update-order
api-reference/combined.oas.json post /admin/orders/{id}
Update an order's details.
# Create Payment Collection
Source: https://docs.mercurjs.com/api-reference/admin-payment-collections/create-payment-collection
api-reference/combined.oas.json post /admin/payment-collections
Create a payment collection.
# Delete a Payment Collection
Source: https://docs.mercurjs.com/api-reference/admin-payment-collections/delete-a-payment-collection
api-reference/combined.oas.json delete /admin/payment-collections/{id}
Delete a payment collection.
# Mark a Payment Collection as Paid
Source: https://docs.mercurjs.com/api-reference/admin-payment-collections/mark-a-payment-collection-as-paid
api-reference/combined.oas.json post /admin/payment-collections/{id}/mark-as-paid
Mark a payment collection as paid. This creates and authorizes a payment session, then capture its payment, using the manual payment provider.
# Capture Payment
Source: https://docs.mercurjs.com/api-reference/admin-payments/capture-payment
api-reference/combined.oas.json post /admin/payments/{id}/capture
Capture an amount of a payment. This uses the `capturePayment` method of the payment provider associated with the payment's collection.
# Get a Payment
Source: https://docs.mercurjs.com/api-reference/admin-payments/get-a-payment
api-reference/combined.oas.json get /admin/payments/{id}
Retrieve a payment by its ID. You can expand the payment's relations or select the fields that should be returned.
# List Payment Providers
Source: https://docs.mercurjs.com/api-reference/admin-payments/list-payment-providers
api-reference/combined.oas.json get /admin/payments/payment-providers
Retrieve a list of payment providers. The payment providers can be filtered by fields such as `id`. The payment providers can also be sorted or paginated.
# List Payments
Source: https://docs.mercurjs.com/api-reference/admin-payments/list-payments
api-reference/combined.oas.json get /admin/payments
Retrieve a list of payments. The payments can be filtered by fields such as `id`. The payments can also be sorted or paginated.
# Refund Payment
Source: https://docs.mercurjs.com/api-reference/admin-payments/refund-payment
api-reference/combined.oas.json post /admin/payments/{id}/refund
Refund an amount of a payment. This uses the `refundPayment` method of the payment provider associated with the payment's collection.
# List Plugins
Source: https://docs.mercurjs.com/api-reference/admin-plugins/list-plugins
api-reference/combined.oas.json get /admin/plugins
Retrieve the list of plugins installed in the Medusa application.
# Create Price List
Source: https://docs.mercurjs.com/api-reference/admin-price-lists/create-price-list
api-reference/combined.oas.json post /admin/price-lists
Create a price list.
# Delete a Price List
Source: https://docs.mercurjs.com/api-reference/admin-price-lists/delete-a-price-list
api-reference/combined.oas.json delete /admin/price-lists/{id}
Delete a price list.
# Get a Price List
Source: https://docs.mercurjs.com/api-reference/admin-price-lists/get-a-price-list
api-reference/combined.oas.json get /admin/price-lists/{id}
Retrieve a price list by its ID. You can expand the price list's relations or select the fields that should be returned.
# List Price Lists
Source: https://docs.mercurjs.com/api-reference/admin-price-lists/list-price-lists
api-reference/combined.oas.json get /admin/price-lists
Retrieve a list of price lists. The price lists can be filtered by fields such as `id`. The price lists can also be sorted or paginated.
# Manage Prices in Price List
Source: https://docs.mercurjs.com/api-reference/admin-price-lists/manage-prices-in-price-list
api-reference/combined.oas.json post /admin/price-lists/{id}/prices/batch
Manage the prices of a price list to create, update, or delete them.
# Remove Products from Price List
Source: https://docs.mercurjs.com/api-reference/admin-price-lists/remove-products-from-price-list
api-reference/combined.oas.json post /admin/price-lists/{id}/products
Remove products from a price list.
# Update a Price List
Source: https://docs.mercurjs.com/api-reference/admin-price-lists/update-a-price-list
api-reference/combined.oas.json post /admin/price-lists/{id}
Update a price list's details.
# Create Price Preference
Source: https://docs.mercurjs.com/api-reference/admin-price-preferences/create-price-preference
api-reference/combined.oas.json post /admin/price-preferences
Create a price preference.
# Delete a Price Preference
Source: https://docs.mercurjs.com/api-reference/admin-price-preferences/delete-a-price-preference
api-reference/combined.oas.json delete /admin/price-preferences/{id}
Delete a price preference.
# Get a Price Preference
Source: https://docs.mercurjs.com/api-reference/admin-price-preferences/get-a-price-preference
api-reference/combined.oas.json get /admin/price-preferences/{id}
Retrieve a price preference by its ID. You can expand the price preference's relations or select the fields that should be returned.
# List Price Preferences
Source: https://docs.mercurjs.com/api-reference/admin-price-preferences/list-price-preferences
api-reference/combined.oas.json get /admin/price-preferences
Retrieve a list of price preferences. The price preferences can be filtered by fields such as `id`. The price preferences can also be sorted or paginated.
# Update a Price Preference
Source: https://docs.mercurjs.com/api-reference/admin-price-preferences/update-a-price-preference
api-reference/combined.oas.json post /admin/price-preferences/{id}
Update a price preference's details.
# Create Product Category
Source: https://docs.mercurjs.com/api-reference/admin-product-categories/create-product-category
api-reference/combined.oas.json post /admin/product-categories
Create a product category.
# Delete a Product Category
Source: https://docs.mercurjs.com/api-reference/admin-product-categories/delete-a-product-category
api-reference/combined.oas.json delete /admin/product-categories/{id}
Delete a product category. This doesn't deleted products in that category.
# Get a Product Category
Source: https://docs.mercurjs.com/api-reference/admin-product-categories/get-a-product-category
api-reference/combined.oas.json get /admin/product-categories/{id}
Retrieve a product category by its ID. You can expand the product category's relations or select the fields that should be returned.
# List Product Categories
Source: https://docs.mercurjs.com/api-reference/admin-product-categories/list-product-categories
api-reference/combined.oas.json get /admin/product-categories
Retrieve a list of product categories. The product categories can be filtered by fields such as `id`. The product categories can also be sorted or paginated.
# Manage Products in Product Category
Source: https://docs.mercurjs.com/api-reference/admin-product-categories/manage-products-in-product-category
api-reference/combined.oas.json post /admin/product-categories/{id}/products
Manage products of a category to add or remove them.
# Update a Product Category
Source: https://docs.mercurjs.com/api-reference/admin-product-categories/update-a-product-category
api-reference/combined.oas.json post /admin/product-categories/{id}
Update a product category's details.
# Create Product Tag
Source: https://docs.mercurjs.com/api-reference/admin-product-tags/create-product-tag
api-reference/combined.oas.json post /admin/product-tags
Create a product tag.
# Delete a Product Tag
Source: https://docs.mercurjs.com/api-reference/admin-product-tags/delete-a-product-tag
api-reference/combined.oas.json delete /admin/product-tags/{id}
Delete a product tag. This doesn't delete products using the tag.
# Get a Product Tag
Source: https://docs.mercurjs.com/api-reference/admin-product-tags/get-a-product-tag
api-reference/combined.oas.json get /admin/product-tags/{id}
Retrieve a product tag by its ID. You can expand the product tag's relations or select the fields that should be returned.
# List Product Tags
Source: https://docs.mercurjs.com/api-reference/admin-product-tags/list-product-tags
api-reference/combined.oas.json get /admin/product-tags
Retrieve a list of product tags. The product tags can be filtered by fields such as `id`. The product tags can also be sorted or paginated.
# Update a Product Tag
Source: https://docs.mercurjs.com/api-reference/admin-product-tags/update-a-product-tag
api-reference/combined.oas.json post /admin/product-tags/{id}
Update a product tag's details.
# Create Product Type
Source: https://docs.mercurjs.com/api-reference/admin-product-types/create-product-type
api-reference/combined.oas.json post /admin/product-types
Create a product type.
# Delete a Product Type
Source: https://docs.mercurjs.com/api-reference/admin-product-types/delete-a-product-type
api-reference/combined.oas.json delete /admin/product-types/{id}
Delete a product type. This doesn't delete products of this type.
# Get a Product Type
Source: https://docs.mercurjs.com/api-reference/admin-product-types/get-a-product-type
api-reference/combined.oas.json get /admin/product-types/{id}
Retrieve a product type by its ID. You can expand the product type's relations or select the fields that should be returned.
# List Product Types
Source: https://docs.mercurjs.com/api-reference/admin-product-types/list-product-types
api-reference/combined.oas.json get /admin/product-types
Retrieve a list of product types. The product types can be filtered by fields such as `id`. The product types can also be sorted or paginated.
# Update a Product Type
Source: https://docs.mercurjs.com/api-reference/admin-product-types/update-a-product-type
api-reference/combined.oas.json post /admin/product-types/{id}
Update a product type's details.
# List Product Variants
Source: https://docs.mercurjs.com/api-reference/admin-product-variants/list-product-variants
api-reference/combined.oas.json get /admin/product-variants
Retrieve a list of product variants. The product variants can be filtered by fields such as `id`. The product variants can also be sorted or paginated.
# Associate Variant with Inventory Item
Source: https://docs.mercurjs.com/api-reference/admin-products/associate-variant-with-inventory-item
api-reference/combined.oas.json post /admin/products/{id}/variants/{variant_id}/inventory-items
Associate with a product variant an inventory item that manages its inventory details.
# Confirm Product Import
Source: https://docs.mercurjs.com/api-reference/admin-products/confirm-product-import
api-reference/combined.oas.json post /admin/products/import/{transaction_id}/confirm
Confirm that a created product import should start importing the products into Medusa.
# Confirm Product Import
Source: https://docs.mercurjs.com/api-reference/admin-products/confirm-product-import-1
api-reference/combined.oas.json post /admin/products/imports/{transaction_id}/confirm
Confirm that a created product import should start importing the products into Medusa.
# Create a Product Option
Source: https://docs.mercurjs.com/api-reference/admin-products/create-a-product-option
api-reference/combined.oas.json post /admin/products/{id}/options
Create an option for a product.
# Create a Product Variant
Source: https://docs.mercurjs.com/api-reference/admin-products/create-a-product-variant
api-reference/combined.oas.json post /admin/products/{id}/variants
Create a variant for a product.
# Create Product
Source: https://docs.mercurjs.com/api-reference/admin-products/create-product
api-reference/combined.oas.json post /admin/products
Create a product.
# Create Product Import
Source: https://docs.mercurjs.com/api-reference/admin-products/create-product-import
api-reference/combined.oas.json post /admin/products/import
Create a new product import process. The products aren't imported until the import is confirmed with the `/admin/products/:transaction-id/import` API route.
# Create Product Import
Source: https://docs.mercurjs.com/api-reference/admin-products/create-product-import-1
api-reference/combined.oas.json post /admin/products/imports
Create a new product import process. The products aren't imported until the import is confirmed with the `/admin/products/:transaction-id/imports` API route.
# Delete a Product
Source: https://docs.mercurjs.com/api-reference/admin-products/delete-a-product
api-reference/combined.oas.json delete /admin/products/{id}
Delete a product.
# Delete an Option from Product
Source: https://docs.mercurjs.com/api-reference/admin-products/delete-an-option-from-product
api-reference/combined.oas.json delete /admin/products/{id}/options/{option_id}
Delete an option from a product.
Values of this option in the product's variants are removed.
# Delete Product Variant
Source: https://docs.mercurjs.com/api-reference/admin-products/delete-product-variant
api-reference/combined.oas.json delete /admin/products/{id}/variants/{variant_id}
Delete a variant of a product.
# Export Products
Source: https://docs.mercurjs.com/api-reference/admin-products/export-products
api-reference/combined.oas.json post /admin/products/export
Start a product export process to retrieve a CSV of exported products.
You'll receive in the response the transaction ID of the workflow generating the CSV file. To check the status of the execution, send a GET request to `/admin/workflows-executions/export-products/:transaction-id`.
Once the execution finishes successfully, a notification is created for the export. You can retrieve the notifications using the `/admin/notification` API route to retrieve the file's download URL.
# Get a Product
Source: https://docs.mercurjs.com/api-reference/admin-products/get-a-product
api-reference/combined.oas.json get /admin/products/{id}
Retrieve a product by its ID. You can expand the product's relations or select the fields that should be returned.
# Get a Product's Option
Source: https://docs.mercurjs.com/api-reference/admin-products/get-a-products-option
api-reference/combined.oas.json get /admin/products/{id}/options/{option_id}
Retrieve a product's option by its ID.
# Get Product Applicable Attributes
Source: https://docs.mercurjs.com/api-reference/admin-products/get-product-applicable-attributes
api-reference/combined.oas.json get /admin/products/{id}/applicable-attributes
Retrieves all attributes that can be applied to a specific product, including global attributes and category-specific attributes.
# Get Variant of a Product
Source: https://docs.mercurjs.com/api-reference/admin-products/get-variant-of-a-product
api-reference/combined.oas.json get /admin/products/{id}/variants/{variant_id}
Retrieve a product's variant by its ID.
# List a Product's Options
Source: https://docs.mercurjs.com/api-reference/admin-products/list-a-products-options
api-reference/combined.oas.json get /admin/products/{id}/options
Retrieve a list of options of a product. The options can be filtered by fields like `id`. The options can also be paginated.
# List Products
Source: https://docs.mercurjs.com/api-reference/admin-products/list-products
api-reference/combined.oas.json get /admin/products
Retrieve a list of products. The products can be filtered by fields such as `id`. The products can also be sorted or paginated.
# List Variants of a Product
Source: https://docs.mercurjs.com/api-reference/admin-products/list-variants-of-a-product
api-reference/combined.oas.json get /admin/products/{id}/variants
Retrieve a list of variants in a product. The variants can be filtered by fields like FILTER FIELDS. The variants can also be paginated.
# Manage Products
Source: https://docs.mercurjs.com/api-reference/admin-products/manage-products
api-reference/combined.oas.json post /admin/products/batch
Manage products to create, update, or delete them.
# Manage Variants in a Product
Source: https://docs.mercurjs.com/api-reference/admin-products/manage-variants-in-a-product
api-reference/combined.oas.json post /admin/products/{id}/variants/batch
Manage variants in a product to create, update, or delete them.
# Manage Variants Inventory in a Product
Source: https://docs.mercurjs.com/api-reference/admin-products/manage-variants-inventory-in-a-product
api-reference/combined.oas.json post /admin/products/{id}/variants/inventory-items/batch
Manage a product's variant's inventoris to associate them with inventory items, update their inventory items, or delete their association with inventory items.
# Remove Inventory Item Association with Product Variant
Source: https://docs.mercurjs.com/api-reference/admin-products/remove-inventory-item-association-with-product-variant
api-reference/combined.oas.json delete /admin/products/{id}/variants/{variant_id}/inventory-items/{inventory_item_id}
Remove the association between an inventory item and its product variant.
# Update a Product
Source: https://docs.mercurjs.com/api-reference/admin-products/update-a-product
api-reference/combined.oas.json post /admin/products/{id}
Update a product's details.
# Update a Product Variant
Source: https://docs.mercurjs.com/api-reference/admin-products/update-a-product-variant
api-reference/combined.oas.json post /admin/products/{id}/variants/{variant_id}
Update a variant's details.
# Update a Product's Option
Source: https://docs.mercurjs.com/api-reference/admin-products/update-a-products-option
api-reference/combined.oas.json post /admin/products/{id}/options/{option_id}
Update the details of a product option.
# Update Product Variant's Inventory Details
Source: https://docs.mercurjs.com/api-reference/admin-products/update-product-variants-inventory-details
api-reference/combined.oas.json post /admin/products/{id}/variants/{variant_id}/inventory-items/{inventory_item_id}
Update the inventory item that manages the inventory details of a product variant.
# Create Promotion
Source: https://docs.mercurjs.com/api-reference/admin-promotions/create-promotion
api-reference/combined.oas.json post /admin/promotions
Create a promotion.
# Delete a Promotion
Source: https://docs.mercurjs.com/api-reference/admin-promotions/delete-a-promotion
api-reference/combined.oas.json delete /admin/promotions/{id}
Delete a promotion.
# Get a Promotion
Source: https://docs.mercurjs.com/api-reference/admin-promotions/get-a-promotion
api-reference/combined.oas.json get /admin/promotions/{id}
Retrieve a promotion by its ID. You can expand the promotion's relations or select the fields that should be returned.
# List Promotions
Source: https://docs.mercurjs.com/api-reference/admin-promotions/list-promotions
api-reference/combined.oas.json get /admin/promotions
Retrieve a list of promotions. The promotions can be filtered by fields such as `id`. The promotions can also be sorted or paginated.
# List Rule Attribute Options of a Rule Type
Source: https://docs.mercurjs.com/api-reference/admin-promotions/list-rule-attribute-options-of-a-rule-type
api-reference/combined.oas.json get /admin/promotions/rule-attribute-options/{rule_type}
Retrieve a list of potential rule attributes for the promotion and application method types specified in the query parameters.
Only the attributes of the rule type specified in the path parameter are retrieved:
- If `rule_type` is `rules`, the attributes of the promotion's type are retrieved.
- If `rule_type` is `target-rules`, the target rules' attributes of the application method's type are retrieved.
- If `rule_type` is `buy-rules`, the buy rules' attributes of the application method's type are retrieved.
# List Rule Values Given a Rule Attribute
Source: https://docs.mercurjs.com/api-reference/admin-promotions/list-rule-values-given-a-rule-attribute
api-reference/combined.oas.json get /admin/promotions/rule-value-options/{rule_type}/{rule_attribute_id}
Retrieve all potential values for promotion rules and target and buy rules based on the specified rule attribute and type.
For example, if you provide the ID of the `currency_code` rule attribute, and set `rule_type` to `rules`, a list of currencies are retrieved in label-value pairs.
# List Rules of a Promotion
Source: https://docs.mercurjs.com/api-reference/admin-promotions/list-rules-of-a-promotion
api-reference/combined.oas.json get /admin/promotions/{id}/{rule_type}
Retrieve a list of rules in a promotion. The type of rules retrieved depend on the value of the `rule_type` path parameter:
- If `rule_type` is `rules`, the promotion's rules are retrivied. - If `rule_type` is `target-rules`, the target rules of the promotion's application method are retrieved.
- If `rule_type` is `buy-rules`, the buy rules of the promotion's application method are retrieved.
# Manage a Promotion's Rules
Source: https://docs.mercurjs.com/api-reference/admin-promotions/manage-a-promotions-rules
api-reference/combined.oas.json post /admin/promotions/{id}/rules/batch
Manage the rules of a promotion to create, update, or delete them.
# Manage Target Rules of a Promotion
Source: https://docs.mercurjs.com/api-reference/admin-promotions/manage-target-rules-of-a-promotion
api-reference/combined.oas.json post /admin/promotions/{id}/target-rules/batch
Manage the target rules of a promotion to create, update, or delete them.
# Manage the Buy Rules of a Promotion
Source: https://docs.mercurjs.com/api-reference/admin-promotions/manage-the-buy-rules-of-a-promotion
api-reference/combined.oas.json post /admin/promotions/{id}/buy-rules/batch
Manage the buy rules of a `buyget` promotion to create, update, or delete them.
# Update a Promotion
Source: https://docs.mercurjs.com/api-reference/admin-promotions/update-a-promotion
api-reference/combined.oas.json post /admin/promotions/{id}
Update a promotion's details.
# Create Refund Reason
Source: https://docs.mercurjs.com/api-reference/admin-refund-reasons/create-refund-reason
api-reference/combined.oas.json post /admin/refund-reasons
Create a refund reason.
# Delete a Refund Reason
Source: https://docs.mercurjs.com/api-reference/admin-refund-reasons/delete-a-refund-reason
api-reference/combined.oas.json delete /admin/refund-reasons/{id}
Delete a refund reason.
# Get a Refund Reason
Source: https://docs.mercurjs.com/api-reference/admin-refund-reasons/get-a-refund-reason
api-reference/combined.oas.json get /admin/refund-reasons/{id}
Retrieve a refund reason by its ID. You can expand the refund reason's relations or select the fields that should be returned.
# List Refund Reasons
Source: https://docs.mercurjs.com/api-reference/admin-refund-reasons/list-refund-reasons
api-reference/combined.oas.json get /admin/refund-reasons
Retrieve a list of refund reasons. The refund reasons can be filtered by fields such as `id`. The refund reasons can also be sorted or paginated.
# Update a Refund Reason
Source: https://docs.mercurjs.com/api-reference/admin-refund-reasons/update-a-refund-reason
api-reference/combined.oas.json post /admin/refund-reasons/{id}
Update a refund reason's details.
# Create Region
Source: https://docs.mercurjs.com/api-reference/admin-regions/create-region
api-reference/combined.oas.json post /admin/regions
Create a region.
# Delete a Region
Source: https://docs.mercurjs.com/api-reference/admin-regions/delete-a-region
api-reference/combined.oas.json delete /admin/regions/{id}
Delete a region.
# Get a Region
Source: https://docs.mercurjs.com/api-reference/admin-regions/get-a-region
api-reference/combined.oas.json get /admin/regions/{id}
Retrieve a region by its ID. You can expand the region's relations or select the fields that should be returned.
# List Regions
Source: https://docs.mercurjs.com/api-reference/admin-regions/list-regions
api-reference/combined.oas.json get /admin/regions
Retrieve a list of regions. The regions can be filtered by fields such as `id`. The regions can also be sorted or paginated.
# Update a Region
Source: https://docs.mercurjs.com/api-reference/admin-regions/update-a-region
api-reference/combined.oas.json post /admin/regions/{id}
Update a region's details.
# Get return request by id
Source: https://docs.mercurjs.com/api-reference/admin-requests/get-return-request-by-id
api-reference/combined.oas.json get /admin/requests/{id}
Retrieves a request by id.
# Get return request by id
Source: https://docs.mercurjs.com/api-reference/admin-requests/get-return-request-by-id-1
api-reference/combined.oas.json post /admin/requests/{id}
Retrieves a request by id.
# List requests
Source: https://docs.mercurjs.com/api-reference/admin-requests/list-requests
api-reference/combined.oas.json get /admin/requests
Retrieves requests list
# Create Reservation
Source: https://docs.mercurjs.com/api-reference/admin-reservations/create-reservation
api-reference/combined.oas.json post /admin/reservations
Create a reservation.
# Delete a Reservation
Source: https://docs.mercurjs.com/api-reference/admin-reservations/delete-a-reservation
api-reference/combined.oas.json delete /admin/reservations/{id}
Delete a reservation.
# Get a Reservation
Source: https://docs.mercurjs.com/api-reference/admin-reservations/get-a-reservation
api-reference/combined.oas.json get /admin/reservations/{id}
Retrieve a reservation by its ID. You can expand the reservation's relations or select the fields that should be returned.
# List Reservations
Source: https://docs.mercurjs.com/api-reference/admin-reservations/list-reservations
api-reference/combined.oas.json get /admin/reservations
Retrieve a list of reservations. The reservations can be filtered by fields such as `id`. The reservations can also be sorted or paginated.
# Update a Reservation
Source: https://docs.mercurjs.com/api-reference/admin-reservations/update-a-reservation
api-reference/combined.oas.json post /admin/reservations/{id}
Update a reservation's details.
# Create Return Reason
Source: https://docs.mercurjs.com/api-reference/admin-return-reasons/create-return-reason
api-reference/combined.oas.json post /admin/return-reasons
Create a return reason.
# Delete a Return Reason
Source: https://docs.mercurjs.com/api-reference/admin-return-reasons/delete-a-return-reason
api-reference/combined.oas.json delete /admin/return-reasons/{id}
Delete a return reason.
# Get a Return Reason
Source: https://docs.mercurjs.com/api-reference/admin-return-reasons/get-a-return-reason
api-reference/combined.oas.json get /admin/return-reasons/{id}
Retrieve a return reason by its ID. You can expand the return reason's relations or select the fields that should be returned.
# List Return Reasons
Source: https://docs.mercurjs.com/api-reference/admin-return-reasons/list-return-reasons
api-reference/combined.oas.json get /admin/return-reasons
Retrieve a list of return reasons. The return reasons can be filtered by fields such as `id`. The return reasons can also be sorted or paginated.
# Update a Return Reason
Source: https://docs.mercurjs.com/api-reference/admin-return-reasons/update-a-return-reason
api-reference/combined.oas.json post /admin/return-reasons/{id}
Update a return reason's details.
# Get return request by id
Source: https://docs.mercurjs.com/api-reference/admin-return-request/get-return-request-by-id
api-reference/combined.oas.json get /admin/return-request/{id}
Retrieves a request by id.
# List return requests
Source: https://docs.mercurjs.com/api-reference/admin-return-request/list-return-requests
api-reference/combined.oas.json get /admin/return-request
Retrieves requests list
# Update return request by id
Source: https://docs.mercurjs.com/api-reference/admin-return-request/update-return-request-by-id
api-reference/combined.oas.json post /admin/return-request/{id}
Updates a request by id.
# Add a Shipping Method to a Return
Source: https://docs.mercurjs.com/api-reference/admin-returns/add-a-shipping-method-to-a-return
api-reference/combined.oas.json post /admin/returns/{id}/shipping-method
Add a shipping method to a return. The shipping method will have a `SHIPPING_ADD` action.
# Add Damaged Items to Return
Source: https://docs.mercurjs.com/api-reference/admin-returns/add-damaged-items-to-return
api-reference/combined.oas.json post /admin/returns/{id}/dismiss-items
Add damaged items, whose quantity is to be dismissed, to a return. These items will have the action `RECEIVE_DAMAGED_RETURN_ITEM`.
# Add Received Items to Return
Source: https://docs.mercurjs.com/api-reference/admin-returns/add-received-items-to-return
api-reference/combined.oas.json post /admin/returns/{id}/receive-items
Add received items in a return. These items will have the action `RECEIVE_RETURN_ITEM`.
# Add Requested Items to Return
Source: https://docs.mercurjs.com/api-reference/admin-returns/add-requested-items-to-return
api-reference/combined.oas.json post /admin/returns/{id}/request-items
Add items that are requested to be returned. These items will have the action `RETURN_ITEM`.
# Cancel a return.
Source: https://docs.mercurjs.com/api-reference/admin-returns/cancel-a-return
api-reference/combined.oas.json post /admin/returns/{id}/cancel
Cancel a return.
# Cancel Return Receival
Source: https://docs.mercurjs.com/api-reference/admin-returns/cancel-return-receival
api-reference/combined.oas.json delete /admin/returns/{id}/receive
Cancel the receival process previously started, and hasn't been confirmed, of a return.
# Cancel Return Request
Source: https://docs.mercurjs.com/api-reference/admin-returns/cancel-return-request
api-reference/combined.oas.json delete /admin/returns/{id}/request
Cancel a requested return.
# Confirm Return Receival
Source: https://docs.mercurjs.com/api-reference/admin-returns/confirm-return-receival
api-reference/combined.oas.json post /admin/returns/{id}/receive/confirm
Confirm that a return has been received. This updates the quantity of the items received, if not damaged, and reflects the changes on the order.
# Confirm Return Request
Source: https://docs.mercurjs.com/api-reference/admin-returns/confirm-return-request
api-reference/combined.oas.json post /admin/returns/{id}/request
Confirm a requested return. The changes are applied on the inventory quantity and the order only after the return has been confirmed as received using the `/admin/returns/:id/received/confirm`.
# Create Return
Source: https://docs.mercurjs.com/api-reference/admin-returns/create-return
api-reference/combined.oas.json post /admin/returns
Create a return. The return can later be requested or confirmed.
# Get a Return
Source: https://docs.mercurjs.com/api-reference/admin-returns/get-a-return
api-reference/combined.oas.json get /admin/returns/{id}
Retrieve a return by its ID. You can expand the return's relations or select the fields that should be returned.
# List Returns
Source: https://docs.mercurjs.com/api-reference/admin-returns/list-returns
api-reference/combined.oas.json get /admin/returns
Retrieve a list of returns. The returns can be filtered by fields such as `id`. The returns can also be sorted or paginated.
# Remove a Received Item from Return
Source: https://docs.mercurjs.com/api-reference/admin-returns/remove-a-received-item-from-return
api-reference/combined.oas.json delete /admin/returns/{id}/receive-items/{action_id}
Remove a received item in the return by the ID of the item's `RECEIVE_RETURN_ITEM` action.
Every item has an `actions` property, whose value is an array of actions. You can check the action's name using its `action` property, and use the value of the `id` property. return.
# Remove Damaged Item from Return
Source: https://docs.mercurjs.com/api-reference/admin-returns/remove-damaged-item-from-return
api-reference/combined.oas.json delete /admin/returns/{id}/dismiss-items/{action_id}
Remove a damaged item, whose quantity is to be dismissed, in the return by the ID of the item's `RECEIVE_DAMAGED_RETURN_ITEM` action.
Every item has an `actions` property, whose value is an array of actions. You can check the action's name using its `action` property, and use the value of the `id` property. return.
# Remove Item from Return
Source: https://docs.mercurjs.com/api-reference/admin-returns/remove-item-from-return
api-reference/combined.oas.json delete /admin/returns/{id}/request-items/{action_id}
Remove a requested item to be returned by the ID of the item's `RETURN_ITEM` action.
Every item has an `actions` property, whose value is an array of actions. You can check the action's name using its `action` property, and use the value of the `id` property. return.
# Remove Shipping Method from Return
Source: https://docs.mercurjs.com/api-reference/admin-returns/remove-shipping-method-from-return
api-reference/combined.oas.json delete /admin/returns/{id}/shipping-method/{action_id}
Remove a shipping method of the return by the ID of the item's `SHIPPING_ADD` action.
Every item has an `actions` property, whose value is an array of actions. You can check the action's name using its `action` property, and use the value of the `id` property.
# Start Return Receival
Source: https://docs.mercurjs.com/api-reference/admin-returns/start-return-receival
api-reference/combined.oas.json post /admin/returns/{id}/receive
Start a return receival process to be later confirmed using the `/admin/returns/:id/receive/confirm` API route.
# Update a Received Item in a Return
Source: https://docs.mercurjs.com/api-reference/admin-returns/update-a-received-item-in-a-return
api-reference/combined.oas.json post /admin/returns/{id}/receive-items/{action_id}
Update a received item in the return by the ID of the item's `RECEIVE_RETURN_ITEM` action.
Every item has an `actions` property, whose value is an array of actions. You can check the action's name using its `action` property, and use the value of the `id` property. return.
# Update a Return
Source: https://docs.mercurjs.com/api-reference/admin-returns/update-a-return
api-reference/combined.oas.json post /admin/returns/{id}
Update a return's details.
# Update a Shipping Method of a Return
Source: https://docs.mercurjs.com/api-reference/admin-returns/update-a-shipping-method-of-a-return
api-reference/combined.oas.json post /admin/returns/{id}/shipping-method/{action_id}
Update a shipping method of the return by the ID of the item's `SHIPPING_ADD` action.
Every item has an `actions` property, whose value is an array of actions. You can check the action's name using its `action` property, and use the value of the `id` property.
# Update Damaged Item of Return
Source: https://docs.mercurjs.com/api-reference/admin-returns/update-damaged-item-of-return
api-reference/combined.oas.json post /admin/returns/{id}/dismiss-items/{action_id}
Update a damaged item, whose quantity is to be dismissed, in the return by the ID of the item's `RECEIVE_DAMAGED_RETURN_ITEM` action.
Every item has an `actions` property, whose value is an array of actions. You can check the action's name using its `action` property, and use the value of the `id` property. return.
# Update Requested Item in Return
Source: https://docs.mercurjs.com/api-reference/admin-returns/update-requested-item-in-return
api-reference/combined.oas.json post /admin/returns/{id}/request-items/{action_id}
Update a requested item to be returned by the ID of the item's `RETURN_ITEM` action.
Every item has an `actions` property, whose value is an array of actions. You can check the action's name using its `action` property, and use the value of the `id` property. return.
# Get review by id
Source: https://docs.mercurjs.com/api-reference/admin-reviews/get-review-by-id
api-reference/combined.oas.json get /admin/reviews/{id}
Retrieves a review by id.
# List reviews
Source: https://docs.mercurjs.com/api-reference/admin-reviews/list-reviews
api-reference/combined.oas.json get /admin/reviews
Retrieves review list
# Create Sales Channel
Source: https://docs.mercurjs.com/api-reference/admin-sales-channels/create-sales-channel
api-reference/combined.oas.json post /admin/sales-channels
Create a sales channel.
# Delete a Sales Channel
Source: https://docs.mercurjs.com/api-reference/admin-sales-channels/delete-a-sales-channel
api-reference/combined.oas.json delete /admin/sales-channels/{id}
Delete a sales channel.
# Get a Sales Channel
Source: https://docs.mercurjs.com/api-reference/admin-sales-channels/get-a-sales-channel
api-reference/combined.oas.json get /admin/sales-channels/{id}
Retrieve a sales channel by its ID. You can expand the sales channel's relations or select the fields that should be returned.
# List Sales Channels
Source: https://docs.mercurjs.com/api-reference/admin-sales-channels/list-sales-channels
api-reference/combined.oas.json get /admin/sales-channels
Retrieve a list of sales channels. The sales channels can be filtered by fields such as `id`. The sales channels can also be sorted or paginated.
# Manage Products in Sales Channel
Source: https://docs.mercurjs.com/api-reference/admin-sales-channels/manage-products-in-sales-channel
api-reference/combined.oas.json post /admin/sales-channels/{id}/products
Manage products in a sales channel to add or remove them from the channel.
# Update a Sales Channel
Source: https://docs.mercurjs.com/api-reference/admin-sales-channels/update-a-sales-channel
api-reference/combined.oas.json post /admin/sales-channels/{id}
Update a sales channel's details.
# Get Seller
Source: https://docs.mercurjs.com/api-reference/admin-sellers/get-seller
api-reference/combined.oas.json get /admin/sellers/{id}
Retrieves a specific seller by its ID.
# Invite Seller
Source: https://docs.mercurjs.com/api-reference/admin-sellers/invite-seller
api-reference/combined.oas.json post /admin/sellers/invite
Sends an invitation to a new seller to join the platform.
# List Seller Customer Groups
Source: https://docs.mercurjs.com/api-reference/admin-sellers/list-seller-customer-groups
api-reference/combined.oas.json get /admin/sellers/{id}/customer-groups
Retrieves a list of customer groups associated with a specific seller.
# List Seller Orders
Source: https://docs.mercurjs.com/api-reference/admin-sellers/list-seller-orders
api-reference/combined.oas.json get /admin/sellers/{id}/orders
Retrieves a list of orders associated with a specific seller.
# List Seller Products
Source: https://docs.mercurjs.com/api-reference/admin-sellers/list-seller-products
api-reference/combined.oas.json get /admin/sellers/{id}/products
Retrieves a list of products associated with a specific seller.
# List Sellers
Source: https://docs.mercurjs.com/api-reference/admin-sellers/list-sellers
api-reference/combined.oas.json get /admin/sellers
Retrieves a list of sellers.
# Update Seller
Source: https://docs.mercurjs.com/api-reference/admin-sellers/update-seller
api-reference/combined.oas.json post /admin/sellers/{id}
Updates an existing seller with the specified properties.
# Create Shipping Option
Source: https://docs.mercurjs.com/api-reference/admin-shipping-options/create-shipping-option
api-reference/combined.oas.json post /admin/shipping-options
Create a shipping option.
# Delete a Shipping Option
Source: https://docs.mercurjs.com/api-reference/admin-shipping-options/delete-a-shipping-option
api-reference/combined.oas.json delete /admin/shipping-options/{id}
Delete a shipping option.
# Get a Shipping Option
Source: https://docs.mercurjs.com/api-reference/admin-shipping-options/get-a-shipping-option
api-reference/combined.oas.json get /admin/shipping-options/{id}
Retrieve a shipping option by its ID. You can expand the shipping option's relations or select the fields that should be returned.
# List Shipping Options
Source: https://docs.mercurjs.com/api-reference/admin-shipping-options/list-shipping-options
api-reference/combined.oas.json get /admin/shipping-options
Retrieve a list of shipping options. The shipping options can be filtered by fields such as `id`. The shipping options can also be sorted or paginated.
# Manage the Rules of a Shipping Option
Source: https://docs.mercurjs.com/api-reference/admin-shipping-options/manage-the-rules-of-a-shipping-option
api-reference/combined.oas.json post /admin/shipping-options/{id}/rules/batch
Manage the rules of a shipping option to create, update, or delete them.
# Update a Shipping Option
Source: https://docs.mercurjs.com/api-reference/admin-shipping-options/update-a-shipping-option
api-reference/combined.oas.json post /admin/shipping-options/{id}
Update a shipping option's details.
# Create Shipping Profile
Source: https://docs.mercurjs.com/api-reference/admin-shipping-profiles/create-shipping-profile
api-reference/combined.oas.json post /admin/shipping-profiles
Create a shipping profile.
# Delete a Shipping Profile
Source: https://docs.mercurjs.com/api-reference/admin-shipping-profiles/delete-a-shipping-profile
api-reference/combined.oas.json delete /admin/shipping-profiles/{id}
Delete a shipping profile.
# Get a Shipping Profile
Source: https://docs.mercurjs.com/api-reference/admin-shipping-profiles/get-a-shipping-profile
api-reference/combined.oas.json get /admin/shipping-profiles/{id}
Retrieve a shipping profile by its ID. You can expand the shipping profile's relations or select the fields that should be returned.
# List Shipping Profiles
Source: https://docs.mercurjs.com/api-reference/admin-shipping-profiles/list-shipping-profiles
api-reference/combined.oas.json get /admin/shipping-profiles
Retrieve a list of shipping profiles. The shipping profiles can be filtered by fields such as `id`. The shipping profiles can also be sorted or paginated.
# Update a Shipping Profile
Source: https://docs.mercurjs.com/api-reference/admin-shipping-profiles/update-a-shipping-profile
api-reference/combined.oas.json post /admin/shipping-profiles/{id}
Update a shipping profile's details.
# Add Fulfillment Set to Stock Location
Source: https://docs.mercurjs.com/api-reference/admin-stock-locations/add-fulfillment-set-to-stock-location
api-reference/combined.oas.json post /admin/stock-locations/{id}/fulfillment-sets
Create and add a fulfillment set to a stock location.
# Create Stock Location
Source: https://docs.mercurjs.com/api-reference/admin-stock-locations/create-stock-location
api-reference/combined.oas.json post /admin/stock-locations
Create a stock location.
# Delete a Stock Location
Source: https://docs.mercurjs.com/api-reference/admin-stock-locations/delete-a-stock-location
api-reference/combined.oas.json delete /admin/stock-locations/{id}
Delete a stock location.
# Get a Stock Location
Source: https://docs.mercurjs.com/api-reference/admin-stock-locations/get-a-stock-location
api-reference/combined.oas.json get /admin/stock-locations/{id}
Retrieve a stock location by its ID. You can expand the stock location's relations or select the fields that should be returned.
# List Stock Locations
Source: https://docs.mercurjs.com/api-reference/admin-stock-locations/list-stock-locations
api-reference/combined.oas.json get /admin/stock-locations
Retrieve a list of stock locations. The stock locations can be filtered by fields such as `id`. The stock locations can also be sorted or paginated.
# Manage Fulfillment Providers of a Stock Location
Source: https://docs.mercurjs.com/api-reference/admin-stock-locations/manage-fulfillment-providers-of-a-stock-location
api-reference/combined.oas.json post /admin/stock-locations/{id}/fulfillment-providers
Manage the fulfillment providers to add or remove them from a stock location.
# Manage Sales Channels of a Stock Location
Source: https://docs.mercurjs.com/api-reference/admin-stock-locations/manage-sales-channels-of-a-stock-location
api-reference/combined.oas.json post /admin/stock-locations/{id}/sales-channels
Manage the sales channels in a stock location by adding or removing them.
# Update a Stock Location
Source: https://docs.mercurjs.com/api-reference/admin-stock-locations/update-a-stock-location
api-reference/combined.oas.json post /admin/stock-locations/{id}
Update a stock location's details.
# Create Store Credit Account
Source: https://docs.mercurjs.com/api-reference/admin-store-credit-accounts/create-store-credit-account
api-reference/combined.oas.json post /admin/store-credit-accounts
Create a store credit account.
# Get a Store Credit Account
Source: https://docs.mercurjs.com/api-reference/admin-store-credit-accounts/get-a-store-credit-account
api-reference/combined.oas.json get /admin/store-credit-accounts/{id}
Retrieve a store credit account by its ID. You can expand the store credit account's relations or select the fields that should be returned.
# List Store Credit Accounts
Source: https://docs.mercurjs.com/api-reference/admin-store-credit-accounts/list-store-credit-accounts
api-reference/combined.oas.json get /admin/store-credit-accounts
Retrieve a list of store credit accounts. The store credit accounts can be filtered by fields such as `id`. The store credit accounts can also be sorted or paginated.
# List Transactions
Source: https://docs.mercurjs.com/api-reference/admin-store-credit-accounts/list-transactions
api-reference/combined.oas.json get /admin/store-credit-accounts/{id}/transactions
Retrieve a list of transactions in a store credit account. The transactions can be filtered by fields like FILTER FIELDS. The transactions can also be paginated.
# Get a Store
Source: https://docs.mercurjs.com/api-reference/admin-stores/get-a-store
api-reference/combined.oas.json get /admin/stores/{id}
Retrieve a store by its ID. You can expand the store's relations or select the fields that should be returned.
# List Stores
Source: https://docs.mercurjs.com/api-reference/admin-stores/list-stores
api-reference/combined.oas.json get /admin/stores
Retrieve a list of stores. The stores can be filtered by fields such as `id`. The stores can also be sorted or paginated.
# Update a Store
Source: https://docs.mercurjs.com/api-reference/admin-stores/update-a-store
api-reference/combined.oas.json post /admin/stores/{id}
Update a store's details.
# List Tax Providers
Source: https://docs.mercurjs.com/api-reference/admin-tax-providers/list-tax-providers
api-reference/combined.oas.json get /admin/tax-providers
Retrieve a list of tax providers installed in the Medusa application through Tax Module Providers. The tax providers can be filtered by fields such as `id`. The tax providers can also be sorted or paginated.
# Create Tax Rate
Source: https://docs.mercurjs.com/api-reference/admin-tax-rates/create-tax-rate
api-reference/combined.oas.json post /admin/tax-rates
Create a tax rate.
# Create Tax Rule for a Rate
Source: https://docs.mercurjs.com/api-reference/admin-tax-rates/create-tax-rule-for-a-rate
api-reference/combined.oas.json post /admin/tax-rates/{id}/rules
Create a tax rule for a rate.
# Delete a Tax Rate
Source: https://docs.mercurjs.com/api-reference/admin-tax-rates/delete-a-tax-rate
api-reference/combined.oas.json delete /admin/tax-rates/{id}
Delete a tax rate.
# Get a Tax Rate
Source: https://docs.mercurjs.com/api-reference/admin-tax-rates/get-a-tax-rate
api-reference/combined.oas.json get /admin/tax-rates/{id}
Retrieve a tax rate by its ID. You can expand the tax rate's relations or select the fields that should be returned.
# List Tax Rates
Source: https://docs.mercurjs.com/api-reference/admin-tax-rates/list-tax-rates
api-reference/combined.oas.json get /admin/tax-rates
Retrieve a list of tax rates. The tax rates can be filtered by fields such as `id`. The tax rates can also be sorted or paginated.
# Remove Rule of Tax Rate
Source: https://docs.mercurjs.com/api-reference/admin-tax-rates/remove-rule-of-tax-rate
api-reference/combined.oas.json delete /admin/tax-rates/{id}/rules/{rule_id}
Remove a tax rate's rule.
# Update a Tax Rate
Source: https://docs.mercurjs.com/api-reference/admin-tax-rates/update-a-tax-rate
api-reference/combined.oas.json post /admin/tax-rates/{id}
Update a tax rate's details.
# Create Tax Region
Source: https://docs.mercurjs.com/api-reference/admin-tax-regions/create-tax-region
api-reference/combined.oas.json post /admin/tax-regions
Create a tax region.
# Delete a Tax Region
Source: https://docs.mercurjs.com/api-reference/admin-tax-regions/delete-a-tax-region
api-reference/combined.oas.json delete /admin/tax-regions/{id}
Delete a tax region.
# Get a Tax Region
Source: https://docs.mercurjs.com/api-reference/admin-tax-regions/get-a-tax-region
api-reference/combined.oas.json get /admin/tax-regions/{id}
Retrieve a tax region by its ID. You can expand the tax region's relations or select the fields that should be returned.
# List Tax Regions
Source: https://docs.mercurjs.com/api-reference/admin-tax-regions/list-tax-regions
api-reference/combined.oas.json get /admin/tax-regions
Retrieve a list of tax regions. The tax regions can be filtered by fields such as `id`. The tax regions can also be sorted or paginated.
# Update a Tax Region
Source: https://docs.mercurjs.com/api-reference/admin-tax-regions/update-a-tax-region
api-reference/combined.oas.json post /admin/tax-regions/{id}
Update a tax region's details.
# List Transaction Groups
Source: https://docs.mercurjs.com/api-reference/admin-transaction-groups/list-transaction-groups
api-reference/combined.oas.json get /admin/transaction-groups
Retrieve a list of transaction groups. The transaction groups can be filtered by fields such as `id`. The transaction groups can also be sorted or paginated.
# Delete a File
Source: https://docs.mercurjs.com/api-reference/admin-uploads/delete-a-file
api-reference/combined.oas.json delete /admin/uploads/{id}
Delete a file. Uses the installed file module provider to delete the file.
# Get a File
Source: https://docs.mercurjs.com/api-reference/admin-uploads/get-a-file
api-reference/combined.oas.json get /admin/uploads/{id}
Retrieve an uploaded file by its ID. You can expand the file's relations or select the fields that should be returned.
# Get Presigned Upload URL
Source: https://docs.mercurjs.com/api-reference/admin-uploads/get-presigned-upload-url
api-reference/combined.oas.json post /admin/uploads/presigned-urls
Get a presigned URL for uploading a file to the configured File Module Provider. The presigned URL can be used to upload files directly to the third-party provider. This only works if your configured provider supports presigned URLs, such as the S3 provider.
# Upload Files
Source: https://docs.mercurjs.com/api-reference/admin-uploads/upload-files
api-reference/combined.oas.json post /admin/uploads
Upload files to the configured File Module Provider.
# Delete a User
Source: https://docs.mercurjs.com/api-reference/admin-users/delete-a-user
api-reference/combined.oas.json delete /admin/users/{id}
Delete a user.
# Get a User
Source: https://docs.mercurjs.com/api-reference/admin-users/get-a-user
api-reference/combined.oas.json get /admin/users/{id}
Retrieve a user by its ID. You can expand the user's relations or select the fields that should be returned.
# Get Logged-In User
Source: https://docs.mercurjs.com/api-reference/admin-users/get-logged-in-user
api-reference/combined.oas.json get /admin/users/me
Retrieve the logged-in user's details.
# List Users
Source: https://docs.mercurjs.com/api-reference/admin-users/list-users
api-reference/combined.oas.json get /admin/users
Retrieve a list of users. The users can be filtered by fields such as `id`. The users can also be sorted or paginated.
# Update a User
Source: https://docs.mercurjs.com/api-reference/admin-users/update-a-user
api-reference/combined.oas.json post /admin/users/{id}
Update a user's details.
# Execute a Workflow
Source: https://docs.mercurjs.com/api-reference/admin-workflows-executions/execute-a-workflow
api-reference/combined.oas.json post /admin/workflows-executions/{workflow_id}/run
Execute a workflow by its ID.
# Fail a Step in a Workflow's Execution
Source: https://docs.mercurjs.com/api-reference/admin-workflows-executions/fail-a-step-in-a-workflows-execution
api-reference/combined.oas.json post /admin/workflows-executions/{workflow_id}/steps/failure
Set the status of a step in a workflow's execution as failed. This is useful for long-running workflows.
# Get a Workflows Execution
Source: https://docs.mercurjs.com/api-reference/admin-workflows-executions/get-a-workflows-execution
api-reference/combined.oas.json get /admin/workflows-executions/{id}
Retrieve a workflows execution by its ID. You can expand the workflows execution's relations or select the fields that should be returned.
# Get Workflow Execution's Details
Source: https://docs.mercurjs.com/api-reference/admin-workflows-executions/get-workflow-executions-details
api-reference/combined.oas.json get /admin/workflows-executions/{workflow_id}/{transaction_id}
Get the details of the workflow's execution.
# List Workflows Executions
Source: https://docs.mercurjs.com/api-reference/admin-workflows-executions/list-workflows-executions
api-reference/combined.oas.json get /admin/workflows-executions
Retrieve a list of workflows executions. The workflows executions can be filtered by fields such as `id`. The workflows executions can also be sorted or paginated.
# Subscribe to a Workflow's Execution
Source: https://docs.mercurjs.com/api-reference/admin-workflows-executions/subscribe-to-a-workflows-execution
api-reference/combined.oas.json get /admin/workflows-executions/{workflow_id}/subscribe
Subscribe to a workflow's execution to receive real-time information about its steps, status, and data.
This route returns an event stream that you can consume using the [EventSource API](https://developer.mozilla.org/en-US/docs/Web/API/EventSource).
# Subscribe to Step of a Workflow's Execution
Source: https://docs.mercurjs.com/api-reference/admin-workflows-executions/subscribe-to-step-of-a-workflows-execution
api-reference/combined.oas.json get /admin/workflows-executions/{workflow_id}/{transaction_id}/{step_id}/subscribe
Subscribe to a step in a workflow's execution to receive real-time information about its status and data.
This route returns an event stream that you can consume using the [EventSource API](https://developer.mozilla.org/en-US/docs/Web/API/EventSource).
# Succeed a Step in a Workflow's Execution
Source: https://docs.mercurjs.com/api-reference/admin-workflows-executions/succeed-a-step-in-a-workflows-execution
api-reference/combined.oas.json post /admin/workflows-executions/{workflow_id}/steps/success
Set the status of a step in a workflow's execution as successful. This is useful for long-running workflows.
# Authenticate Seller
Source: https://docs.mercurjs.com/api-reference/auth/authenticate-seller
api-reference/combined.oas.json post /auth/seller/{auth_provider}
Authenticate a seller and receive the JWT token to be used in the header of subsequent requests.
When used with a third-party provider, such as Google, the request returns a `location` property. You redirect to the specified URL in your frontend to continue authentication with the third-party service.
# Retrieve Registration JWT Token
Source: https://docs.mercurjs.com/api-reference/auth/retrieve-registration-jwt-token
api-reference/combined.oas.json post /auth/seller/{auth_provider}/register
This API route retrieves a registration JWT token of a seller that hasn't been registered yet. The token is used in the header of requests that create a seller, such as the Accept Invite API route.
# Authenticate Customer
Source: https://docs.mercurjs.com/api-reference/store-auth/authenticate-customer
api-reference/combined.oas.json post /auth/customer/{auth_provider}
Authenticate a customer and receive the JWT token to be used in the header of subsequent requests.
When used with a third-party provider, such as Google, the request returns a `location` property. You redirect to the specified URL in your storefront to continue authentication with the third-party service.
# Delete Authentication Session
Source: https://docs.mercurjs.com/api-reference/store-auth/delete-authentication-session
api-reference/combined.oas.json delete /auth/session
Deletes the cookie session ID previously set for authentication.
# Generate Reset Password Token for Customer
Source: https://docs.mercurjs.com/api-reference/store-auth/generate-reset-password-token-for-customer
api-reference/combined.oas.json post /auth/customer/{auth_provider}/reset-password
Generate a reset password token for a customer. This API route doesn't reset the customer password or send them the reset instructions in a notification.
Instead, This API route emits the `auth.password_reset` event, passing it the token as a payload. You can listen to that event in a subscriber as explained in [this guide](https://docs.medusajs.com/resources/commerce-modules/auth/reset-password), then send the customer a notification. The notification is sent using a [Notification Module Provider](https://docs.medusajs.com/resources/infrastructure-modules/notification), and it should have a URL that accepts a `token` query parameter, allowing the customer to reset their password from the storefront.
Use the generated token to update the customer's password using the [Reset Password API route](https://docs.medusajs.com/api/store#auth_postactor_typeauth_providerupdate).
# Refresh Authentication Token
Source: https://docs.mercurjs.com/api-reference/store-auth/refresh-authentication-token
api-reference/combined.oas.json post /auth/token/refresh
Refresh the authentication token of a customer. This is useful after authenticating a customer with a third-party service to ensure the token holds the new user's details, or when you don't want customers to re-login every day.
# Reset a Customer's Password
Source: https://docs.mercurjs.com/api-reference/store-auth/reset-a-customers-password
api-reference/combined.oas.json post /auth/customer/{auth_provider}/update
Reset a customer's password using a reset-password token generated with the [Generate Reset Password Token API route](https://docs.medusajs.com/api/store#auth_postactor_typeauth_providerresetpassword). You pass the token as a bearer token in the request's Authorization header.
# Retrieve Registration JWT Token
Source: https://docs.mercurjs.com/api-reference/store-auth/retrieve-registration-jwt-token
api-reference/combined.oas.json post /auth/customer/{auth_provider}/register
This API route retrieves a registration JWT token of a customer that hasn't been registered yet. The token is used in the header of requests that create a customer.
# Set Authentication Session
Source: https://docs.mercurjs.com/api-reference/store-auth/set-authentication-session
api-reference/combined.oas.json post /auth/session
Set the cookie session ID of a customer. The customer must be previously authenticated with the `/auth/customer/{provider}` API route first, as the JWT token is required in the header of the request.
# Validate Authentication Callback
Source: https://docs.mercurjs.com/api-reference/store-auth/validate-authentication-callback
api-reference/combined.oas.json post /auth/customer/{auth_provider}/callback
This API route is used by your storefront or frontend application when a third-party provider redirects to it after authentication. It validates the authentication with the third-party provider and, if successful, returns an authentication token. All query parameters received from the third-party provider, such as `code`, `state`, and `error`, must be passed as query parameters to this route.
You can decode the JWT token using libraries like [react-jwt](https://www.npmjs.com/package/react-jwt) in the storefront. If the decoded data doesn't have an `actor_id` property, then you must register the customer using the Create Customer API route passing the token in the request's Authorization header.
# Add Gift Card to Cart
Source: https://docs.mercurjs.com/api-reference/store-carts/add-gift-card-to-cart
api-reference/combined.oas.json post /store/carts/{id}/gift-cards
Add a Gift Card to a cart
# Add Line Item to Cart
Source: https://docs.mercurjs.com/api-reference/store-carts/add-line-item-to-cart
api-reference/combined.oas.json post /store/carts/{id}/line-items
Add a product variant as a line item in the cart.
# Add Promotions to Cart
Source: https://docs.mercurjs.com/api-reference/store-carts/add-promotions-to-cart
api-reference/combined.oas.json post /store/carts/{id}/promotions
Add a list of promotions to a cart.
# Add Shipping Method to Cart
Source: https://docs.mercurjs.com/api-reference/store-carts/add-shipping-method-to-cart
api-reference/combined.oas.json post /store/carts/{id}/shipping-methods
Add a shipping method to a cart. Use this API route when the customer chooses their preferred shipping option.
# Add Store Credit to Cart
Source: https://docs.mercurjs.com/api-reference/store-carts/add-store-credit-to-cart
api-reference/combined.oas.json post /store/carts/{id}/store-credits
Add a Store Credit to a cart
# Calculate Cart Taxes
Source: https://docs.mercurjs.com/api-reference/store-carts/calculate-cart-taxes
api-reference/combined.oas.json post /store/carts/{id}/taxes
Calculate the cart's tax lines and amounts.
# Complete Cart
Source: https://docs.mercurjs.com/api-reference/store-carts/complete-cart
api-reference/combined.oas.json post /store/carts/{id}/complete
Complete a cart and place an order.
# Create Cart
Source: https://docs.mercurjs.com/api-reference/store-carts/create-cart
api-reference/combined.oas.json post /store/carts
Create a cart.
# Get a Cart
Source: https://docs.mercurjs.com/api-reference/store-carts/get-a-cart
api-reference/combined.oas.json get /store/carts/{id}
Retrieve a cart by its ID. You can expand the cart's relations or select the fields that should be returned.
# Remove Gift Card from Cart
Source: https://docs.mercurjs.com/api-reference/store-carts/remove-gift-card-from-cart
api-reference/combined.oas.json delete /store/carts/{id}/gift-cards
Remove a Gift Card from a cart.
# Remove Line Item from Cart
Source: https://docs.mercurjs.com/api-reference/store-carts/remove-line-item-from-cart
api-reference/combined.oas.json delete /store/carts/{id}/line-items/{line_id}
Remove a line item from a cart.
# Remove Promotions from Cart
Source: https://docs.mercurjs.com/api-reference/store-carts/remove-promotions-from-cart
api-reference/combined.oas.json delete /store/carts/{id}/promotions
Remove a list of promotions from a cart.
# Set Cart's Customer
Source: https://docs.mercurjs.com/api-reference/store-carts/set-carts-customer
api-reference/combined.oas.json post /store/carts/{id}/customer
Set the customer of the cart. This is useful when you create the cart for a guest customer, then they log in with their account.
# Update a Cart
Source: https://docs.mercurjs.com/api-reference/store-carts/update-a-cart
api-reference/combined.oas.json post /store/carts/{id}
Update a cart's details. This unsets the payment methods chosen before, and the customer would have to choose them again. Also, if the customer has chosen a shipping method whose option isn't valid for the cart's shipping address anymore, the shipping method will be unset. For example, if the shipping option is valid only in the US geo zone, and the shipping address's country code is `DE`, the shipping method will be unset.
# Update a Line Item in a Cart
Source: https://docs.mercurjs.com/api-reference/store-carts/update-a-line-item-in-a-cart
api-reference/combined.oas.json post /store/carts/{id}/line-items/{line_id}
Update a line item's details in the cart.
# Get a Collection
Source: https://docs.mercurjs.com/api-reference/store-collections/get-a-collection
api-reference/combined.oas.json get /store/collections/{id}
Retrieve a collection by its ID. You can expand the collection's relations or select the fields that should be returned.
# List Collections
Source: https://docs.mercurjs.com/api-reference/store-collections/list-collections
api-reference/combined.oas.json get /store/collections
Retrieve a list of collections. The collections can be filtered by fields such as `handle`. The collections can also be sorted or paginated.
# Get a Currency
Source: https://docs.mercurjs.com/api-reference/store-currencies/get-a-currency
api-reference/combined.oas.json get /store/currencies/{code}
Retrieve a currency by its code. You can expand the currency's relations or select the fields that should be returned.
# List Currencies
Source: https://docs.mercurjs.com/api-reference/store-currencies/list-currencies
api-reference/combined.oas.json get /store/currencies
Retrieve a list of currencies. The currencies can be filtered by fields such as `code`. The currencies can also be sorted or paginated.
# Create Address for Logged-In Customer
Source: https://docs.mercurjs.com/api-reference/store-customers/create-address-for-logged-in-customer
api-reference/combined.oas.json post /store/customers/me/addresses
Create an address for the logged-in customer.
# Get Customer's Address
Source: https://docs.mercurjs.com/api-reference/store-customers/get-customers-address
api-reference/combined.oas.json get /store/customers/me/addresses/{address_id}
Retrieve an address of the logged-in customer. You can expand the address's relations or select the fields that should be returned.
# Get Logged-in Customer
Source: https://docs.mercurjs.com/api-reference/store-customers/get-logged-in-customer
api-reference/combined.oas.json get /store/customers/me
Retrieve the logged-in customer. You can expand the customer's relations or select the fields that should be returned.
# List Customer's Addresses
Source: https://docs.mercurjs.com/api-reference/store-customers/list-customers-addresses
api-reference/combined.oas.json get /store/customers/me/addresses
Retrieve the addresses of the logged-in customer. The addresses can be filtered by fields such as `country_code`. The addresses can also be sorted or paginated.
# Register Customer
Source: https://docs.mercurjs.com/api-reference/store-customers/register-customer
api-reference/combined.oas.json post /store/customers
Register a customer. Use the `/auth/customer/emailpass/register` API route first to retrieve the registration token and pass it in the header of the request.
# Remove Customer's Address
Source: https://docs.mercurjs.com/api-reference/store-customers/remove-customers-address
api-reference/combined.oas.json delete /store/customers/me/addresses/{address_id}
Remove an address of the logged-in customer.
# Update Customer
Source: https://docs.mercurjs.com/api-reference/store-customers/update-customer
api-reference/combined.oas.json post /store/customers/me
Update the logged-in customer's details.
# Update Customer's Address
Source: https://docs.mercurjs.com/api-reference/store-customers/update-customers-address
api-reference/combined.oas.json post /store/customers/me/addresses/{address_id}
Update the logged-in customer's address.
# Get a Gift Card
Source: https://docs.mercurjs.com/api-reference/store-gift-cards/get-a-gift-card
api-reference/combined.oas.json get /store/gift-cards/{idOrCode}
Retrieve a gift card by its ID or code. You can expand the gift card's relations or select the fields that should be returned.
# Redeem a Gift Card
Source: https://docs.mercurjs.com/api-reference/store-gift-cards/redeem-a-gift-card
api-reference/combined.oas.json post /store/gift-cards/{idOrCode}/redeem
Redeem a gift card by its ID or code. The gift card will be added to the logged-in customer's store credit account.
# Accept Order Transfer
Source: https://docs.mercurjs.com/api-reference/store-orders/accept-order-transfer
api-reference/combined.oas.json post /store/orders/{id}/transfer/accept
Accept an order to be transfered to a customer's account, which was specified when the transfer request was created. The transfer is requested previously either by the customer using the [Request Order Transfer Store API route](https://docs.medusajs.com/api/store#orders_postordersidtransferrequest), or by the admin using the [Request Order Transfer Admin API route](https://docs.medusajs.com/api/admin#orders_postordersidtransferrequest).
# Cancel Order Transfer
Source: https://docs.mercurjs.com/api-reference/store-orders/cancel-order-transfer
api-reference/combined.oas.json post /store/orders/{id}/transfer/cancel
Cancel an order transfer that the logged-in customer previously requested using the [Request Order Transfer](https://docs.medusajs.com/api/store#orders_postordersidtransferrequest) API route.
# Decline Order Transfer
Source: https://docs.mercurjs.com/api-reference/store-orders/decline-order-transfer
api-reference/combined.oas.json post /store/orders/{id}/transfer/decline
Decline an order transfer previously requested, typically by the admin user using the [Request Order Transfer Admin API route](https://docs.medusajs.com/api/admin#orders_postordersidtransferrequest).
# Get an Order
Source: https://docs.mercurjs.com/api-reference/store-orders/get-an-order
api-reference/combined.oas.json get /store/orders/{id}
Retrieve an order by its ID. You can expand the order's relations or select the fields that should be returned.
# List Logged-in Customer's Orders
Source: https://docs.mercurjs.com/api-reference/store-orders/list-logged-in-customers-orders
api-reference/combined.oas.json get /store/orders
Retrieve the orders of the logged-in customer. The orders can be filtered by fields such as `id`. The orders can also be sorted or paginated.
# Request Order Transfer
Source: https://docs.mercurjs.com/api-reference/store-orders/request-order-transfer
api-reference/combined.oas.json post /store/orders/{id}/transfer/request
Request an order to be transfered to the logged-in customer's account. The transfer is confirmed using the [Accept Order Transfer](https://docs.medusajs.com/api/store#orders_postordersidtransferaccept) API route.
# Create Payment Collection
Source: https://docs.mercurjs.com/api-reference/store-payment-collections/create-payment-collection
api-reference/combined.oas.json post /store/payment-collections
Create a payment collection for a cart. This is used during checkout, where the payment collection holds the cart's payment sessions.
# Initialize Payment Session of a Payment Collection
Source: https://docs.mercurjs.com/api-reference/store-payment-collections/initialize-payment-session-of-a-payment-collection
api-reference/combined.oas.json post /store/payment-collections/{id}/payment-sessions
Initialize and add a payment session to a payment collection. This is used during checkout, where you create a payment collection for the cart, then initialize a payment session for the payment provider that the customer chooses.
# List Payment Providers
Source: https://docs.mercurjs.com/api-reference/store-payment-providers/list-payment-providers
api-reference/combined.oas.json get /store/payment-providers
Retrieve a list of payment providers. You must provide the `region_id` query parameter to retrieve the payment providers enabled in that region.
# Get a Product Category
Source: https://docs.mercurjs.com/api-reference/store-product-categories/get-a-product-category
api-reference/combined.oas.json get /store/product-categories/{id}
Retrieve a product category by its ID. You can expand the product category's relations or select the fields that should be returned.
# List Product Categories
Source: https://docs.mercurjs.com/api-reference/store-product-categories/list-product-categories
api-reference/combined.oas.json get /store/product-categories
Retrieve a list of product categories. The product categories can be filtered by fields such as `id`. The product categories can also be sorted or paginated.
# Get a Product Tag
Source: https://docs.mercurjs.com/api-reference/store-product-tags/get-a-product-tag
api-reference/combined.oas.json get /store/product-tags/{id}
Retrieve a product tag by its ID. You can expand the product tag's relations or select the fields that should be returned.
# List Product Tags
Source: https://docs.mercurjs.com/api-reference/store-product-tags/list-product-tags
api-reference/combined.oas.json get /store/product-tags
Retrieve a list of product tags. The product tags can be filtered by fields such as `id`. The product tags can also be sorted or paginated.
# Get a Product Type
Source: https://docs.mercurjs.com/api-reference/store-product-types/get-a-product-type
api-reference/combined.oas.json get /store/product-types/{id}
Retrieve a product type by its ID. You can expand the product type's relations or select the fields that should be returned.
# List Product Types
Source: https://docs.mercurjs.com/api-reference/store-product-types/list-product-types
api-reference/combined.oas.json get /store/product-types
Retrieve a list of product types. The product types can be filtered by fields such as `id`. The product types can also be sorted or paginated.
# Get a Product
Source: https://docs.mercurjs.com/api-reference/store-products/get-a-product
api-reference/combined.oas.json get /store/products/{id}
Retrieve a product by its ID. You can expand the product's relations or select the fields that should be returned.
# List Products
Source: https://docs.mercurjs.com/api-reference/store-products/list-products
api-reference/combined.oas.json get /store/products
Retrieve a list of products. The products can be filtered by fields such as `id`. The products can also be sorted or paginated.
# Get a Region
Source: https://docs.mercurjs.com/api-reference/store-regions/get-a-region
api-reference/combined.oas.json get /store/regions/{id}
Retrieve a region by its ID. You can expand the region's relations or select the fields that should be returned.
# List Regions
Source: https://docs.mercurjs.com/api-reference/store-regions/list-regions
api-reference/combined.oas.json get /store/regions
Retrieve a list of regions. The regions can be filtered by fields such as `id`. The regions can also be sorted or paginated.
# Get a Return Reason
Source: https://docs.mercurjs.com/api-reference/store-return-reasons/get-a-return-reason
api-reference/combined.oas.json get /store/return-reasons/{id}
Retrieve a return reason by its ID. You can expand the return reason's relations or select the fields that should be returned.
# List Return Reasons
Source: https://docs.mercurjs.com/api-reference/store-return-reasons/list-return-reasons
api-reference/combined.oas.json get /store/return-reasons
Retrieve a list of return reasons. The return reasons can be sorted or paginated.
# Create an order return request
Source: https://docs.mercurjs.com/api-reference/store-return-request/create-an-order-return-request
api-reference/combined.oas.json post /store/return-request
Creates a new order return request for the authenticated customer
# Get return request by id
Source: https://docs.mercurjs.com/api-reference/store-return-request/get-return-request-by-id
api-reference/combined.oas.json get /store/return-request/{id}
Retrieves a request by id for the authenticated customer.
# List return requests
Source: https://docs.mercurjs.com/api-reference/store-return-request/list-return-requests
api-reference/combined.oas.json get /store/return-request
Retrieves a list of return requests for the authenticated customer
# Create new review
Source: https://docs.mercurjs.com/api-reference/store-reviews/create-new-review
api-reference/combined.oas.json post /store/reviews
Creates new review with rating and comment
# Delete a Review
Source: https://docs.mercurjs.com/api-reference/store-reviews/delete-a-review
api-reference/combined.oas.json delete /store/reviews/{id}
Deletes a review by id.
# Get Review
Source: https://docs.mercurjs.com/api-reference/store-reviews/get-review
api-reference/combined.oas.json get /store/reviews/{id}
Retrieves a review of specified id
# Get reviews of the current user
Source: https://docs.mercurjs.com/api-reference/store-reviews/get-reviews-of-the-current-user
api-reference/combined.oas.json get /store/reviews
Retrieves the reviews created by the authenticated user.
# Update a Review
Source: https://docs.mercurjs.com/api-reference/store-reviews/update-a-review
api-reference/combined.oas.json post /store/reviews/{id}
Updates customer_note and rating for the review of specified id
# Get seller
Source: https://docs.mercurjs.com/api-reference/store-sellers/get-seller
api-reference/combined.oas.json get /store/seller/{handle}
Retrieves seller of specified handle
# Get sellers
Source: https://docs.mercurjs.com/api-reference/store-sellers/get-sellers
api-reference/combined.oas.json get /store/seller
Retrieves the seller list.
# Calculate Shipping Option Price
Source: https://docs.mercurjs.com/api-reference/store-shipping-options/calculate-shipping-option-price
api-reference/combined.oas.json post /store/shipping-options/{id}/calculate
Calculate the price of a shipping option in a cart.
# Get Return Shipping Options
Source: https://docs.mercurjs.com/api-reference/store-shipping-options/get-return-shipping-options
api-reference/combined.oas.json get /store/shipping-options/return
Retrieves a list of return shipping options for a specific order
# List Shipping Options for Cart
Source: https://docs.mercurjs.com/api-reference/store-shipping-options/list-shipping-options-for-cart
api-reference/combined.oas.json get /store/shipping-options
Retrieve a list of shipping options for a cart. The cart's ID is set in the required `cart_id` query parameter.
The shipping options also be sorted or paginated.
# Get Customer's Store Credit Account
Source: https://docs.mercurjs.com/api-reference/store-store-credit-accounts/get-customers-store-credit-account
api-reference/combined.oas.json get /store/store-credit-accounts/{id}
Retrieve logged-in customer's store credit account by its ID. You can expand the store credit account's relations or select the fields that should be returned.
# List Customer's Store Credit Accounts
Source: https://docs.mercurjs.com/api-reference/store-store-credit-accounts/list-customers-store-credit-accounts
api-reference/combined.oas.json get /store/store-credit-accounts
Retrieve the logged-in customer's store credit accounts. The store credit accounts can be filtered by fields such as `id`. The store credit accounts can also be sorted or paginated.
# Create new wishlist entry
Source: https://docs.mercurjs.com/api-reference/store-wishlist/create-new-wishlist-entry
api-reference/combined.oas.json post /store/wishlist
Creates a new wishlist entry by specifying a reference type and reference ID.
# Delete a wishlist entry
Source: https://docs.mercurjs.com/api-reference/store-wishlist/delete-a-wishlist-entry
api-reference/combined.oas.json delete /store/wishlist/{id}/product/{reference_id}
Deletes a wishlist entry by its ID for the authenticated user.
# Get wishlist of the current user
Source: https://docs.mercurjs.com/api-reference/store-wishlist/get-wishlist-of-the-current-user
api-reference/combined.oas.json get /store/wishlist
Retrieves the wishlist created by the authenticated user.
# List Order Sets
Source: https://docs.mercurjs.com/api-reference/store/list-order-sets
api-reference/combined.oas.json get /store/order-set
Retrieves a list of order sets for the authenticated customer.
# List Returns
Source: https://docs.mercurjs.com/api-reference/store/list-returns
api-reference/combined.oas.json get /store/returns
Retrieves a list of returns for the authenticated customer.
# Get Attribute
Source: https://docs.mercurjs.com/api-reference/vendor-attributes/get-attribute
api-reference/combined.oas.json get /vendor/attributes/{id}
Retrieves a specific attribute by its ID.
# List Attributes
Source: https://docs.mercurjs.com/api-reference/vendor-attributes/list-attributes
api-reference/combined.oas.json get /vendor/attributes
Retrieves a list of attributes available to vendors with optional filtering.
# Create campaign
Source: https://docs.mercurjs.com/api-reference/vendor-campaigns/create-campaign
api-reference/combined.oas.json post /vendor/campaigns
Creates a new campaign for the authenticated vendor.
# Delete campaign
Source: https://docs.mercurjs.com/api-reference/vendor-campaigns/delete-campaign
api-reference/combined.oas.json delete /vendor/campaigns/{id}
Deletes campaign by id for the authenticated vendor.
# Get campaign
Source: https://docs.mercurjs.com/api-reference/vendor-campaigns/get-campaign
api-reference/combined.oas.json get /vendor/campaigns/{id}
Retrieves campaign by id for the authenticated vendor.
# List Campaigns
Source: https://docs.mercurjs.com/api-reference/vendor-campaigns/list-campaigns
api-reference/combined.oas.json get /vendor/campaigns
Retrieves a list of campaigns for the authenticated vendor.
# Update campaign
Source: https://docs.mercurjs.com/api-reference/vendor-campaigns/update-campaign
api-reference/combined.oas.json post /vendor/campaigns/{id}
Updates campaign by id for the authenticated vendor.
# List Commission Lines
Source: https://docs.mercurjs.com/api-reference/vendor-commission/list-commission-lines
api-reference/combined.oas.json get /vendor/commission
Retrieves a list of commission lines for the authenticated vendor/seller with optional filtering.
# List rules
Source: https://docs.mercurjs.com/api-reference/vendor-configuration/list-rules
api-reference/combined.oas.json get /vendor/configuration
Retrieves marketplace rules list
# Get Current Member
Source: https://docs.mercurjs.com/api-reference/vendor-current-member/get-current-member
api-reference/combined.oas.json get /vendor/me
Retrieves the member associated with the authenticated user.
# Create a customer group
Source: https://docs.mercurjs.com/api-reference/vendor-customer-groups/create-a-customer-group
api-reference/combined.oas.json post /vendor/customer-groups
Creates a new customer group
# Delete a customer group
Source: https://docs.mercurjs.com/api-reference/vendor-customer-groups/delete-a-customer-group
api-reference/combined.oas.json delete /vendor/customer-groups/{id}
Deletes a customer group by id.
# Link customers to customer group
Source: https://docs.mercurjs.com/api-reference/vendor-customer-groups/link-customers-to-customer-group
api-reference/combined.oas.json post /vendor/customer-groups/{id}/customers
Adds or removes customers to a customer group
# List Customer Groups
Source: https://docs.mercurjs.com/api-reference/vendor-customer-groups/list-customer-groups
api-reference/combined.oas.json get /vendor/customer-groups
Retrieves a list of customer groups.
# Retrieve customer group by id
Source: https://docs.mercurjs.com/api-reference/vendor-customer-groups/retrieve-customer-group-by-id
api-reference/combined.oas.json get /vendor/customer-groups/{id}
Retrieve customer group by id
# Update customer group
Source: https://docs.mercurjs.com/api-reference/vendor-customer-groups/update-customer-group
api-reference/combined.oas.json post /vendor/customer-groups/{id}
Updates customer group
# Get Customer details
Source: https://docs.mercurjs.com/api-reference/vendor-customers/get-customer-details
api-reference/combined.oas.json get /vendor/customers/{id}
Retrieves the details of specified customer.
# Link customers to customer group
Source: https://docs.mercurjs.com/api-reference/vendor-customers/link-customers-to-customer-group
api-reference/combined.oas.json post /vendor/customers/{id}/customer-groups
Adds or removes customer groups to a customer
# List Customers
Source: https://docs.mercurjs.com/api-reference/vendor-customers/list-customers
api-reference/combined.oas.json get /vendor/customers
Retrieves a list of customers who placed an order in sellers store.
# List Orders by customer id
Source: https://docs.mercurjs.com/api-reference/vendor-customers/list-orders-by-customer-id
api-reference/combined.oas.json get /vendor/customers/{id}/orders
Retrieves a list of orders for the specified customer.
# List Fulfillment Provider Options
Source: https://docs.mercurjs.com/api-reference/vendor-fulfillment-providers/list-fulfillment-provider-options
api-reference/combined.oas.json get /vendor/fulfillment-providers/{id}/options
Retrieves a list of available Fulfillment Provider Options.
# List Fulfillment Providers
Source: https://docs.mercurjs.com/api-reference/vendor-fulfillment-providers/list-fulfillment-providers
api-reference/combined.oas.json get /vendor/fulfillment-providers
Retrieves a list of Fulfillment Providers.
# Create a Service Zone
Source: https://docs.mercurjs.com/api-reference/vendor-fulfillment-sets/create-a-service-zone
api-reference/combined.oas.json post /vendor/fulfillment-sets/{id}/service-zones
Creates a Service Zone.
# Delete a Fulfillment Set
Source: https://docs.mercurjs.com/api-reference/vendor-fulfillment-sets/delete-a-fulfillment-set
api-reference/combined.oas.json delete /vendor/fulfillment-sets/{id}
Deletes a Fulfillment Set.
# Delete a Service Zone
Source: https://docs.mercurjs.com/api-reference/vendor-fulfillment-sets/delete-a-service-zone
api-reference/combined.oas.json delete /vendor/fulfillment-sets/{id}/service-zones/{zone_id}
Deletes a Service Zone.
# Update a Service Zone
Source: https://docs.mercurjs.com/api-reference/vendor-fulfillment-sets/update-a-service-zone
api-reference/combined.oas.json post /vendor/fulfillment-sets/{id}/service-zones/{zone_id}
Updates a Service Zone.
# Create inventory level
Source: https://docs.mercurjs.com/api-reference/vendor-inventory-items/create-inventory-level
api-reference/combined.oas.json post /vendor/inventory-items/{id}/location-levels
Creates inventory level of the InventoryItem in the specified location
# Get inventory item
Source: https://docs.mercurjs.com/api-reference/vendor-inventory-items/get-inventory-item
api-reference/combined.oas.json get /vendor/inventory-items/{id}
Retrieves InventoryItem of specified id
# Get inventory level
Source: https://docs.mercurjs.com/api-reference/vendor-inventory-items/get-inventory-level
api-reference/combined.oas.json get /vendor/inventory-items/{id}/location-levels/{location_id}
Retrieves inventory level of the InventoryItem in the specified location
# Get InventoryLevels of specified InventoryItem
Source: https://docs.mercurjs.com/api-reference/vendor-inventory-items/get-inventorylevels-of-specified-inventoryitem
api-reference/combined.oas.json get /vendor/inventory-items/{id}/location-levels
Retrieves inventory levels of the InventoryItem
# List InventoryItems
Source: https://docs.mercurjs.com/api-reference/vendor-inventory-items/list-inventoryitems
api-reference/combined.oas.json get /vendor/inventory-items
Retrieves list of InventoryItems
# Update inventory item
Source: https://docs.mercurjs.com/api-reference/vendor-inventory-items/update-inventory-item
api-reference/combined.oas.json post /vendor/inventory-items/{id}
Updates InventoryItem of specified id
# Update inventory item levels
Source: https://docs.mercurjs.com/api-reference/vendor-inventory-items/update-inventory-item-levels
api-reference/combined.oas.json post /vendor/inventory-items/location-levels/batch
Batch updates InventoryItem levels
# Update inventory item levels
Source: https://docs.mercurjs.com/api-reference/vendor-inventory-items/update-inventory-item-levels-1
api-reference/combined.oas.json post /vendor/inventory-items/{id}/location-levels/batch
Batch updates InventoryItem levels
# Update inventory level
Source: https://docs.mercurjs.com/api-reference/vendor-inventory-items/update-inventory-level
api-reference/combined.oas.json post /vendor/inventory-items/{id}/location-levels/{location_id}
Updates inventory level of the InventoryItem in the specified location
# Accept a Member Invite
Source: https://docs.mercurjs.com/api-reference/vendor-invites/accept-a-member-invite
api-reference/combined.oas.json post /vendor/invites/{id}/accept
Accepts a member invite using the provided token and creates a new member.
# Create a Member Invite
Source: https://docs.mercurjs.com/api-reference/vendor-invites/create-a-member-invite
api-reference/combined.oas.json post /vendor/invites
Creates a new member invite for the authenticated vendor.
# List Member Invites
Source: https://docs.mercurjs.com/api-reference/vendor-invites/list-member-invites
api-reference/combined.oas.json get /vendor/invites
Retrieves a list of member invites for the authenticated vendor.
# Delete a Member
Source: https://docs.mercurjs.com/api-reference/vendor-members/delete-a-member
api-reference/combined.oas.json delete /vendor/members/{id}
Deletes a member by id.
# Get a Member
Source: https://docs.mercurjs.com/api-reference/vendor-members/get-a-member
api-reference/combined.oas.json get /vendor/members/{id}
Retrieves a member by id.
# List Members
Source: https://docs.mercurjs.com/api-reference/vendor-members/list-members
api-reference/combined.oas.json get /vendor/members
Retrieves a list of members.
# Update a Member
Source: https://docs.mercurjs.com/api-reference/vendor-members/update-a-member
api-reference/combined.oas.json post /vendor/members/{id}
Updates a member by id for the authenticated vendor.
# List Notifications
Source: https://docs.mercurjs.com/api-reference/vendor-notifications/list-notifications
api-reference/combined.oas.json get /vendor/notifications
Retrieves a list of notifications for the authenticated vendor/seller.
# Get onboarding status of the current seller
Source: https://docs.mercurjs.com/api-reference/vendor-onboarding/get-onboarding-status-of-the-current-seller
api-reference/combined.oas.json get /vendor/sellers/me/onboarding
Retrieves the onboarding details of the current authenticated seller.
# Recalculates onboarding status
Source: https://docs.mercurjs.com/api-reference/vendor-onboarding/recalculates-onboarding-status
api-reference/combined.oas.json post /vendor/sellers/me/onboarding
Triggers onboarding status recalculation and retrieves the onboarding details of the current authenticated seller.
# Cancel order fulfillment.
Source: https://docs.mercurjs.com/api-reference/vendor-orders/cancel-order-fulfillment
api-reference/combined.oas.json post /vendor/orders/{id}/fulfillments/{fulfillment_id}/cancel
Cancel order fulfillment.
# Get Order details
Source: https://docs.mercurjs.com/api-reference/vendor-orders/get-order-details
api-reference/combined.oas.json get /vendor/orders/{id}
Retrieves the details of specified order.
# List Order Changes
Source: https://docs.mercurjs.com/api-reference/vendor-orders/list-order-changes
api-reference/combined.oas.json get /vendor/orders/{id}/changes
Retrieves a list of order changes for the authenticated vendor.
# List Orders
Source: https://docs.mercurjs.com/api-reference/vendor-orders/list-orders
api-reference/combined.oas.json get /vendor/orders
Retrieves a list of orders for the authenticated vendor.
# Mark order as cancelled
Source: https://docs.mercurjs.com/api-reference/vendor-orders/mark-order-as-cancelled
api-reference/combined.oas.json post /vendor/orders/{id}/cancel
Mark order as cancelled.
# Mark order as complete
Source: https://docs.mercurjs.com/api-reference/vendor-orders/mark-order-as-complete
api-reference/combined.oas.json post /vendor/orders/{id}/complete
Mark order as complete.
# Mark order fulfillment shipment as delivered.
Source: https://docs.mercurjs.com/api-reference/vendor-orders/mark-order-fulfillment-shipment-as-delivered
api-reference/combined.oas.json post /vendor/orders/{id}/fulfillments/{fulfillment_id}/mark-as-delivered
Mark order fulfillment shipment as delivered.
# Update a Product
Source: https://docs.mercurjs.com/api-reference/vendor-orders/update-a-product
api-reference/combined.oas.json post /vendor/products/{id}/fulfillments
Updates an existing product for the authenticated vendor.
# Update order fulfillment shipment.
Source: https://docs.mercurjs.com/api-reference/vendor-orders/update-order-fulfillment-shipment
api-reference/combined.oas.json post /vendor/orders/{id}/fulfillments/{fulfillment_id}/shipments
Update order fulfillment shipment.
# Create Onboarding
Source: https://docs.mercurjs.com/api-reference/vendor-payout-account/create-onboarding
api-reference/combined.oas.json post /vendor/payout-account/onboarding
Creates an onboarding for the authenticated vendor's payout account.
# Create Payout Account
Source: https://docs.mercurjs.com/api-reference/vendor-payout-account/create-payout-account
api-reference/combined.oas.json post /vendor/payout-account
Creates a payout account for the authenticated vendor.
# Get Payout Account
Source: https://docs.mercurjs.com/api-reference/vendor-payout-account/get-payout-account
api-reference/combined.oas.json get /vendor/payout-account
Retrieves the payout account for the authenticated vendor.
# Sync Payout Account
Source: https://docs.mercurjs.com/api-reference/vendor-payout-account/sync-payout-account
api-reference/combined.oas.json post /vendor/payout-account/sync
Synchronizes the payout account data with the payment processor for the authenticated vendor/seller.
# List Payouts
Source: https://docs.mercurjs.com/api-reference/vendor-payouts/list-payouts
api-reference/combined.oas.json get /vendor/payouts
Retrieves a list of payouts for the authenticated vendor/seller.
# Create price list
Source: https://docs.mercurjs.com/api-reference/vendor-price-lists/create-price-list
api-reference/combined.oas.json post /vendor/price-lists
Creates new price list
# Create price list
Source: https://docs.mercurjs.com/api-reference/vendor-price-lists/create-price-list-1
api-reference/combined.oas.json post /vendor/price-lists/{id}/prices
Creates new price list price
# Delete a Price List
Source: https://docs.mercurjs.com/api-reference/vendor-price-lists/delete-a-price-list
api-reference/combined.oas.json delete /vendor/price-lists/{id}
Delete a price list.
# Deletes price list price
Source: https://docs.mercurjs.com/api-reference/vendor-price-lists/deletes-price-list-price
api-reference/combined.oas.json delete /vendor/price-lists/{id}/prices/{price_id}
Deletes price list price by id.
# Get price list details
Source: https://docs.mercurjs.com/api-reference/vendor-price-lists/get-price-list-details
api-reference/combined.oas.json get /vendor/price-lists/{id}
Retrieves the details of specified price list.
# List Price lists
Source: https://docs.mercurjs.com/api-reference/vendor-price-lists/list-price-lists
api-reference/combined.oas.json get /vendor/price-lists
Retrieves a list of price lists.
# List Products in a given price list
Source: https://docs.mercurjs.com/api-reference/vendor-price-lists/list-products-in-a-given-price-list
api-reference/combined.oas.json get /vendor/price-lists/{id}/products
Retrieves a list of products in the given price list.
# Update price list
Source: https://docs.mercurjs.com/api-reference/vendor-price-lists/update-price-list
api-reference/combined.oas.json post /vendor/price-lists/{id}
Updates price list price
# Update price list
Source: https://docs.mercurjs.com/api-reference/vendor-price-lists/update-price-list-1
api-reference/combined.oas.json post /vendor/price-lists/{id}/products
Updates price list price
# List Price Preferences
Source: https://docs.mercurjs.com/api-reference/vendor-price-preferences/list-price-preferences
api-reference/combined.oas.json get /vendor/price-preferences
Retrieves a list of price preferences for the authenticated vendor.
# Get product category
Source: https://docs.mercurjs.com/api-reference/vendor-product-categories/get-product-category
api-reference/combined.oas.json get /vendor/product-categories/{id}
Retrieves product category by id.
# List product categories
Source: https://docs.mercurjs.com/api-reference/vendor-product-categories/list-product-categories
api-reference/combined.oas.json get /vendor/product-categories
Retrieves a list of product categories.
# Get product collection
Source: https://docs.mercurjs.com/api-reference/vendor-product-collections/get-product-collection
api-reference/combined.oas.json get /vendor/product-collections/{id}
Retrieves product collection by id.
# List product collections
Source: https://docs.mercurjs.com/api-reference/vendor-product-collections/list-product-collections
api-reference/combined.oas.json get /vendor/product-collections
Retrieves a list of product collections.
# Get product tag
Source: https://docs.mercurjs.com/api-reference/vendor-product-tags/get-product-tag
api-reference/combined.oas.json get /vendor/product-tags/{id}
Retrieves product tag by id.
# List product tags
Source: https://docs.mercurjs.com/api-reference/vendor-product-tags/list-product-tags
api-reference/combined.oas.json get /vendor/product-tags
Retrieves a list of product tags.
# Get product type
Source: https://docs.mercurjs.com/api-reference/vendor-product-types/get-product-type
api-reference/combined.oas.json get /vendor/product-types/{id}
Retrieves product type by id.
# List product types
Source: https://docs.mercurjs.com/api-reference/vendor-product-types/list-product-types
api-reference/combined.oas.json get /vendor/product-types
Retrieves a list of product types.
# Assign brand to the Product
Source: https://docs.mercurjs.com/api-reference/vendor-products/assign-brand-to-the-product
api-reference/combined.oas.json post /vendor/products/{id}/brand
Upserts brand and links to the product
# Create a Product
Source: https://docs.mercurjs.com/api-reference/vendor-products/create-a-product
api-reference/combined.oas.json post /vendor/products
Creates a new product for the authenticated vendor.
# Create option for product
Source: https://docs.mercurjs.com/api-reference/vendor-products/create-option-for-product
api-reference/combined.oas.json post /vendor/products/{id}/options
Creates option for product.
# Create variant for product
Source: https://docs.mercurjs.com/api-reference/vendor-products/create-variant-for-product
api-reference/combined.oas.json post /vendor/products/{id}/variants
Creates variant for product.
# Delete a Product
Source: https://docs.mercurjs.com/api-reference/vendor-products/delete-a-product
api-reference/combined.oas.json delete /vendor/products/{id}
Deletes a product by id for the authenticated vendor.
# Delete a Product option
Source: https://docs.mercurjs.com/api-reference/vendor-products/delete-a-product-option
api-reference/combined.oas.json delete /vendor/products/{id}/options/{option_id}
Deletes a product option by id for the authenticated vendor.
# Delete a Product variant
Source: https://docs.mercurjs.com/api-reference/vendor-products/delete-a-product-variant
api-reference/combined.oas.json delete /vendor/products/{id}/variants/{variant_id}
Deletes a product variant by id for the authenticated vendor.
# Get a Product
Source: https://docs.mercurjs.com/api-reference/vendor-products/get-a-product
api-reference/combined.oas.json get /vendor/products/{id}
Retrieves a product by id for the authenticated vendor.
# Get Product Applicable Attributes
Source: https://docs.mercurjs.com/api-reference/vendor-products/get-product-applicable-attributes
api-reference/combined.oas.json get /vendor/products/{id}/applicable-attributes
Retrieves the applicable attributes for a specific product, including global attributes and category-specific attributes.
# List Products
Source: https://docs.mercurjs.com/api-reference/vendor-products/list-products
api-reference/combined.oas.json get /vendor/products
Retrieves a list of products for the authenticated vendor.
# Update a Product
Source: https://docs.mercurjs.com/api-reference/vendor-products/update-a-product
api-reference/combined.oas.json post /vendor/products/{id}
Updates an existing product for the authenticated vendor.
# Update a Product option
Source: https://docs.mercurjs.com/api-reference/vendor-products/update-a-product-option
api-reference/combined.oas.json post /vendor/products/{id}/options/{option_id}
Updates an existing product option for the authenticated vendor.
# Update a Product status
Source: https://docs.mercurjs.com/api-reference/vendor-products/update-a-product-status
api-reference/combined.oas.json post /vendor/products/{id}/status
Updates an existing product status for the authenticated vendor.
# Update a Product variant
Source: https://docs.mercurjs.com/api-reference/vendor-products/update-a-product-variant
api-reference/combined.oas.json post /vendor/products/{id}/variants/{variant_id}
Updates an existing product variant for the authenticated vendor.
# Batch buy rules
Source: https://docs.mercurjs.com/api-reference/vendor-promotions/batch-buy-rules
api-reference/combined.oas.json post /vendor/promotions/{id}/buy-rules/batch
Performs batch create/delete operation on buy-rules
# Batch rules
Source: https://docs.mercurjs.com/api-reference/vendor-promotions/batch-rules
api-reference/combined.oas.json post /vendor/promotions/{id}/rules/batch
Performs batch create/delete operation on rules
# Batch target rules
Source: https://docs.mercurjs.com/api-reference/vendor-promotions/batch-target-rules
api-reference/combined.oas.json post /vendor/promotions/{id}/target-rules/batch
Performs batch create/delete operation on target-rules
# Create promotion
Source: https://docs.mercurjs.com/api-reference/vendor-promotions/create-promotion
api-reference/combined.oas.json post /vendor/promotions
Creates a new promotion for the authenticated vendor.
# Delete promotion
Source: https://docs.mercurjs.com/api-reference/vendor-promotions/delete-promotion
api-reference/combined.oas.json delete /vendor/promotions/{id}
Deletes promotion by id for the authenticated vendor.
# Get promotion
Source: https://docs.mercurjs.com/api-reference/vendor-promotions/get-promotion
api-reference/combined.oas.json get /vendor/promotions/{id}
Retrieves promotion by id for the authenticated vendor.
# List Promotions
Source: https://docs.mercurjs.com/api-reference/vendor-promotions/list-promotions
api-reference/combined.oas.json get /vendor/promotions
Retrieves a list of promotions for the authenticated vendor.
# List Rule Attribute Options of a Rule Type
Source: https://docs.mercurjs.com/api-reference/vendor-promotions/list-rule-attribute-options-of-a-rule-type
api-reference/combined.oas.json get /vendor/promotions/rule-attribute-options/{rule_type}
Retrieve a list of potential rule attributes for the promotion and application method types specified in the query parameters.
# List Rules of a Promotion
Source: https://docs.mercurjs.com/api-reference/vendor-promotions/list-rules-of-a-promotion
api-reference/combined.oas.json get /vendor/promotions/{id}/{rule_type}
Retrieve a list of rules in a promotion.
# Update promotion
Source: https://docs.mercurjs.com/api-reference/vendor-promotions/update-promotion
api-reference/combined.oas.json post /vendor/promotions/{id}
Updates a new promotion for the authenticated vendor.
# Get region
Source: https://docs.mercurjs.com/api-reference/vendor-regions/get-region
api-reference/combined.oas.json get /vendor/regions/{id}
Retrieves region by id.
# List regions
Source: https://docs.mercurjs.com/api-reference/vendor-regions/list-regions
api-reference/combined.oas.json get /vendor/regions
Retrieves a list of regions.
# Create a request to admin
Source: https://docs.mercurjs.com/api-reference/vendor-requests/create-a-request-to-admin
api-reference/combined.oas.json post /vendor/requests
Creates a request to admin to accept new resource
# Get request by id
Source: https://docs.mercurjs.com/api-reference/vendor-requests/get-request-by-id
api-reference/combined.oas.json get /vendor/requests/{id}
Retrieves a request by id for the authenticated vendor.
# List requests
Source: https://docs.mercurjs.com/api-reference/vendor-requests/list-requests
api-reference/combined.oas.json get /vendor/requests
Retrieves submited requests list
# Update request data
Source: https://docs.mercurjs.com/api-reference/vendor-requests/update-request-data
api-reference/combined.oas.json post /vendor/requests/{id}
Updates specified request payload.
# Create reservation
Source: https://docs.mercurjs.com/api-reference/vendor-reservations/create-reservation
api-reference/combined.oas.json post /vendor/reservations
Creates new reservation
# Delete reservation
Source: https://docs.mercurjs.com/api-reference/vendor-reservations/delete-reservation
api-reference/combined.oas.json delete /vendor/reservations/{id}
Deletes reservation by id for the authenticated vendor.
# Get reservation
Source: https://docs.mercurjs.com/api-reference/vendor-reservations/get-reservation
api-reference/combined.oas.json get /vendor/reservations/{id}
Retrieves reservation by id for the authenticated vendor.
# List Reservations
Source: https://docs.mercurjs.com/api-reference/vendor-reservations/list-reservations
api-reference/combined.oas.json get /vendor/reservations
Retrieves a list of reservations for the authenticated vendor.
# Update reservation
Source: https://docs.mercurjs.com/api-reference/vendor-reservations/update-reservation
api-reference/combined.oas.json post /vendor/reservations/{id}
Updates an existing reservation for the authenticated vendor.
# Get return request by id
Source: https://docs.mercurjs.com/api-reference/vendor-return-requests/get-return-request-by-id
api-reference/combined.oas.json get /vendor/return-request/{id}
Retrieves a request by id for the authenticated vendor.
# List return requests
Source: https://docs.mercurjs.com/api-reference/vendor-return-requests/list-return-requests
api-reference/combined.oas.json get /vendor/return-request
Retrieves requests list
# Update return request by id
Source: https://docs.mercurjs.com/api-reference/vendor-return-requests/update-return-request-by-id
api-reference/combined.oas.json post /vendor/return-request/{id}
Updates a request by id for the authenticated vendor.
# Add Damaged Item to Return
Source: https://docs.mercurjs.com/api-reference/vendor-returns/add-damaged-item-to-return
api-reference/combined.oas.json post /vendor/returns/{id}/dismiss-items
Add damaged items, whose quantity is to be dismissed, to a return.
# Add received Item to Return
Source: https://docs.mercurjs.com/api-reference/vendor-returns/add-received-item-to-return
api-reference/combined.oas.json post /vendor/returns/{id}/receive-items
Add received items to return.
# Confirm Return Receival
Source: https://docs.mercurjs.com/api-reference/vendor-returns/confirm-return-receival
api-reference/combined.oas.json post /vendor/returns/{id}/receive/confirm
Confirm a return receival process.
# Get return
Source: https://docs.mercurjs.com/api-reference/vendor-returns/get-return
api-reference/combined.oas.json get /vendor/returns/{id}
Retrieves return by id for the authenticated vendor.
# List Returns
Source: https://docs.mercurjs.com/api-reference/vendor-returns/list-returns
api-reference/combined.oas.json get /vendor/returns
Retrieves a list of returns for the authenticated vendor.
# Remove Damaged Item from Return
Source: https://docs.mercurjs.com/api-reference/vendor-returns/remove-damaged-item-from-return
api-reference/combined.oas.json delete /vendor/returns/{id}/dismiss-items/{action_id}
Remove a damaged item, whose quantity is to be dismissed, in the return by the ID of the item's `RECEIVE_DAMAGED_RETURN_ITEM` action.
# Remove received Item from Return
Source: https://docs.mercurjs.com/api-reference/vendor-returns/remove-received-item-from-return
api-reference/combined.oas.json delete /vendor/returns/{id}/receive-items/{action_id}
Remove a received item
# Start Return Receival
Source: https://docs.mercurjs.com/api-reference/vendor-returns/start-return-receival
api-reference/combined.oas.json post /vendor/returns/{id}/receive
Start a return receival process to be later confirmed.
# Update Damaged Item of Return
Source: https://docs.mercurjs.com/api-reference/vendor-returns/update-damaged-item-of-return
api-reference/combined.oas.json post /vendor/returns/{id}/dismiss-items/{action_id}
Update a damaged item, whose quantity is to be dismissed, in the return by the ID of the item's `RECEIVE_DAMAGED_RETURN_ITEM` action.
# Update received Item of Return
Source: https://docs.mercurjs.com/api-reference/vendor-returns/update-received-item-of-return
api-reference/combined.oas.json post /vendor/returns/{id}/receive-items/{action_id}
Update a received item.
# Get a review by id
Source: https://docs.mercurjs.com/api-reference/vendor-reviews/get-a-review-by-id
api-reference/combined.oas.json get /vendor/sellers/me/reviews/{id}
Retrieves a review by id for the authenticated vendor.
# Get reviews of the current seller
Source: https://docs.mercurjs.com/api-reference/vendor-reviews/get-reviews-of-the-current-seller
api-reference/combined.oas.json get /vendor/sellers/me/reviews
Retrieves the reviews about the seller associated with the authenticated user.
# Update a Review
Source: https://docs.mercurjs.com/api-reference/vendor-reviews/update-a-review
api-reference/combined.oas.json post /vendor/sellers/me/reviews/{id}
Updates seller_note for the review of specified id
# List Sales Channels
Source: https://docs.mercurjs.com/api-reference/vendor-sales-channels/list-sales-channels
api-reference/combined.oas.json get /vendor/sales-channels
Retrieves a list of Sales Channels for authenticated vendor.
# Create a Seller
Source: https://docs.mercurjs.com/api-reference/vendor-sellers/create-a-seller
api-reference/combined.oas.json post /vendor/sellers
Creates a request to create a new seller with an initial owner member.
# Get Current Seller
Source: https://docs.mercurjs.com/api-reference/vendor-sellers/get-current-seller
api-reference/combined.oas.json get /vendor/sellers/me
Retrieves the seller associated with the authenticated user.
# Update Current Seller
Source: https://docs.mercurjs.com/api-reference/vendor-sellers/update-current-seller
api-reference/combined.oas.json post /vendor/sellers/me
Updates the seller associated with the authenticated user.
# Create a Shipping Option
Source: https://docs.mercurjs.com/api-reference/vendor-shipping-options/create-a-shipping-option
api-reference/combined.oas.json post /vendor/shipping-options
Creates a Shipping Option for authenticated vendor.
# Delete a Shipping Option
Source: https://docs.mercurjs.com/api-reference/vendor-shipping-options/delete-a-shipping-option
api-reference/combined.oas.json delete /vendor/shipping-options/{id}
Deletes a Shipping Option.
# Get a Shipping Option
Source: https://docs.mercurjs.com/api-reference/vendor-shipping-options/get-a-shipping-option
api-reference/combined.oas.json get /vendor/shipping-options/{id}
Retrieves a Shipping Option by its ID.
# List Shipping Options
Source: https://docs.mercurjs.com/api-reference/vendor-shipping-options/list-shipping-options
api-reference/combined.oas.json get /vendor/shipping-options
Retrieves a list of Shipping Options for authenticated vendor.
# Update a Shipping Option
Source: https://docs.mercurjs.com/api-reference/vendor-shipping-options/update-a-shipping-option
api-reference/combined.oas.json post /vendor/shipping-options/{id}
Updates a Shipping Option.
# Create a Shipping profile
Source: https://docs.mercurjs.com/api-reference/vendor-shipping-profiles/create-a-shipping-profile
api-reference/combined.oas.json post /vendor/shipping-profiles
Creates a Shipping profile.
# Delete shipping profile
Source: https://docs.mercurjs.com/api-reference/vendor-shipping-profiles/delete-shipping-profile
api-reference/combined.oas.json delete /vendor/shipping-profiles/{id}
Deletes shipping profile by id for the authenticated vendor.
# Get shipping profile
Source: https://docs.mercurjs.com/api-reference/vendor-shipping-profiles/get-shipping-profile
api-reference/combined.oas.json get /vendor/shipping-profiles/{id}
Retrieves a shipping profile by id.
# List shipping profiles
Source: https://docs.mercurjs.com/api-reference/vendor-shipping-profiles/list-shipping-profiles
api-reference/combined.oas.json get /vendor/shipping-profiles
Retrieves a list of shipping profiles.
# Update a Shipping profile
Source: https://docs.mercurjs.com/api-reference/vendor-shipping-profiles/update-a-shipping-profile
api-reference/combined.oas.json post /vendor/shipping-profiles/{id}
Updates a Shipping profile.
# GetStoreStatistics
Source: https://docs.mercurjs.com/api-reference/vendor-statistics/getstorestatistics
api-reference/combined.oas.json get /vendor/statistics
Retrieves store statistics.
# Create a Fulfillment Set
Source: https://docs.mercurjs.com/api-reference/vendor-stock-locations/create-a-fulfillment-set
api-reference/combined.oas.json post /vendor/stock-locations/{id}/fulfillment-sets
Creates a Fulfillment Set for a Stock Location.
# Create a Stock Location
Source: https://docs.mercurjs.com/api-reference/vendor-stock-locations/create-a-stock-location
api-reference/combined.oas.json post /vendor/stock-locations
Creates a Stock Location.
# Delete stock location
Source: https://docs.mercurjs.com/api-reference/vendor-stock-locations/delete-stock-location
api-reference/combined.oas.json delete /vendor/stock-locations/{id}
Deletes stock location by id for the authenticated vendor.
# Get Stock Location
Source: https://docs.mercurjs.com/api-reference/vendor-stock-locations/get-stock-location
api-reference/combined.oas.json get /vendor/stock-locations/{id}
Retrieves a Stock Location by id.
# List Stock Locations
Source: https://docs.mercurjs.com/api-reference/vendor-stock-locations/list-stock-locations
api-reference/combined.oas.json get /vendor/stock-locations
Retrieves a list of Stock Locations.
# Update Stock Location
Source: https://docs.mercurjs.com/api-reference/vendor-stock-locations/update-stock-location
api-reference/combined.oas.json post /vendor/stock-locations/{id}
Updates a Stock Location.
# Update Stock Location Fulfillment Providers
Source: https://docs.mercurjs.com/api-reference/vendor-stock-locations/update-stock-location-fulfillment-providers
api-reference/combined.oas.json post /vendor/stock-locations/{id}/fulfillment-providers
Updates the fulfillment providers of a Stock Location.
# Update Stock Location Sales Channels
Source: https://docs.mercurjs.com/api-reference/vendor-stock-locations/update-stock-location-sales-channels
api-reference/combined.oas.json post /vendor/stock-locations/{id}/sales-channels
Updates the sales channels of a Stock Location.
# Get store
Source: https://docs.mercurjs.com/api-reference/vendor-stores/get-store
api-reference/combined.oas.json get /vendor/stores/{id}
Retrieves a Store by id.
# List Stores
Source: https://docs.mercurjs.com/api-reference/vendor-stores/list-stores
api-reference/combined.oas.json get /vendor/stores
Retrieves a list of stores.
# Admin Panel
Source: https://docs.mercurjs.com/components/admin-panel
## Admin Panel Overview
The admin panel is built on top of Medusa's admin framework, providing a powerful and extensible interface for managing your marketplace.
## Custom Features
### Commission System
Our platform includes a sophisticated commission management system that allows for flexible commission structures:
#### Marketplace commission settings
* **Multiple Rule Types**:
* Seller-specific rules
* Product category-based rules
* Product type-based rules
* Site-wide default rules
* **Calculation Methods**:
* Percentage-based commissions
* Flat-rate commissions
* Tax-inclusive/exclusive options
* Minimum and maximum commission limits
You can find more information here:
Commission
### Marketplace Configuration
The marketplace configuration section allows administrators to manage global marketplace settings and rules:
#### Configuration Rules
* **Product Request System**: Toggle the product request submission system
* **Product Approval Requirements**: Enable/disable mandatory product approval
* **Product Import**: Control product import functionality
You can find more information here:
Marketplace Settings
### Requests Panel
The requests panel is a communication interface between sellers and marketplace administrator. They can request certain actions to be performed:
* **New Seller Applications**: Review a new seller account.
* **New Product Submissions**: Review a new product listings.
* **Product Collection Request**: Review a new product collection.
* **Product Category Request**: Review a new product category.
* **Review Remove Request**: Review a submission to remove unfair review.
* **Product Type Request**: Review a new product type.
* **Product Tag Request**: Review a new product tag.
Requests are submitted by sellers to the marketplace administrator for review. Once the administrator makes a decision, the action is automatically executed by the Mercur backend.
You can find more information on requests here:
Requests
### Sellers Panel
The sellers panel provides tools for managing marketplace vendors:
* **Seller Profiles**: View and manage seller information
* **Store Suspension**: Activate or suspend seller accounts
* **Product Management**: Oversee seller product listings
* **Order Management**: List seller orders
* **Customer groups Management**: List seller customer groups
# Backend Architecture
Source: https://docs.mercurjs.com/components/backend
Understand how Mercur extends Medusa using a modular plugin architecture and a powerful customization layer.
# Backend Architecture
Mercur’s backend is built directly on top of the **Medusa Framework**.\
Instead of replacing Medusa or hiding its internals, Mercur uses Medusa’s native plugin mechanism to introduce all marketplace logic-keeping the entire system transparent, modular, and fully extensible.
This allows developers to build custom marketplace functionality the same way they would build a custom Medusa project, while also having access to Mercur’s marketplace services, workflows, and APIs.
Check Mercur main repository:
Github
***
# Architecture Overview
Mercur extends Medusa through a set of modular Medusa plugins.\
Together, Medusa + Mercur form a single backend application with a unified API surface.
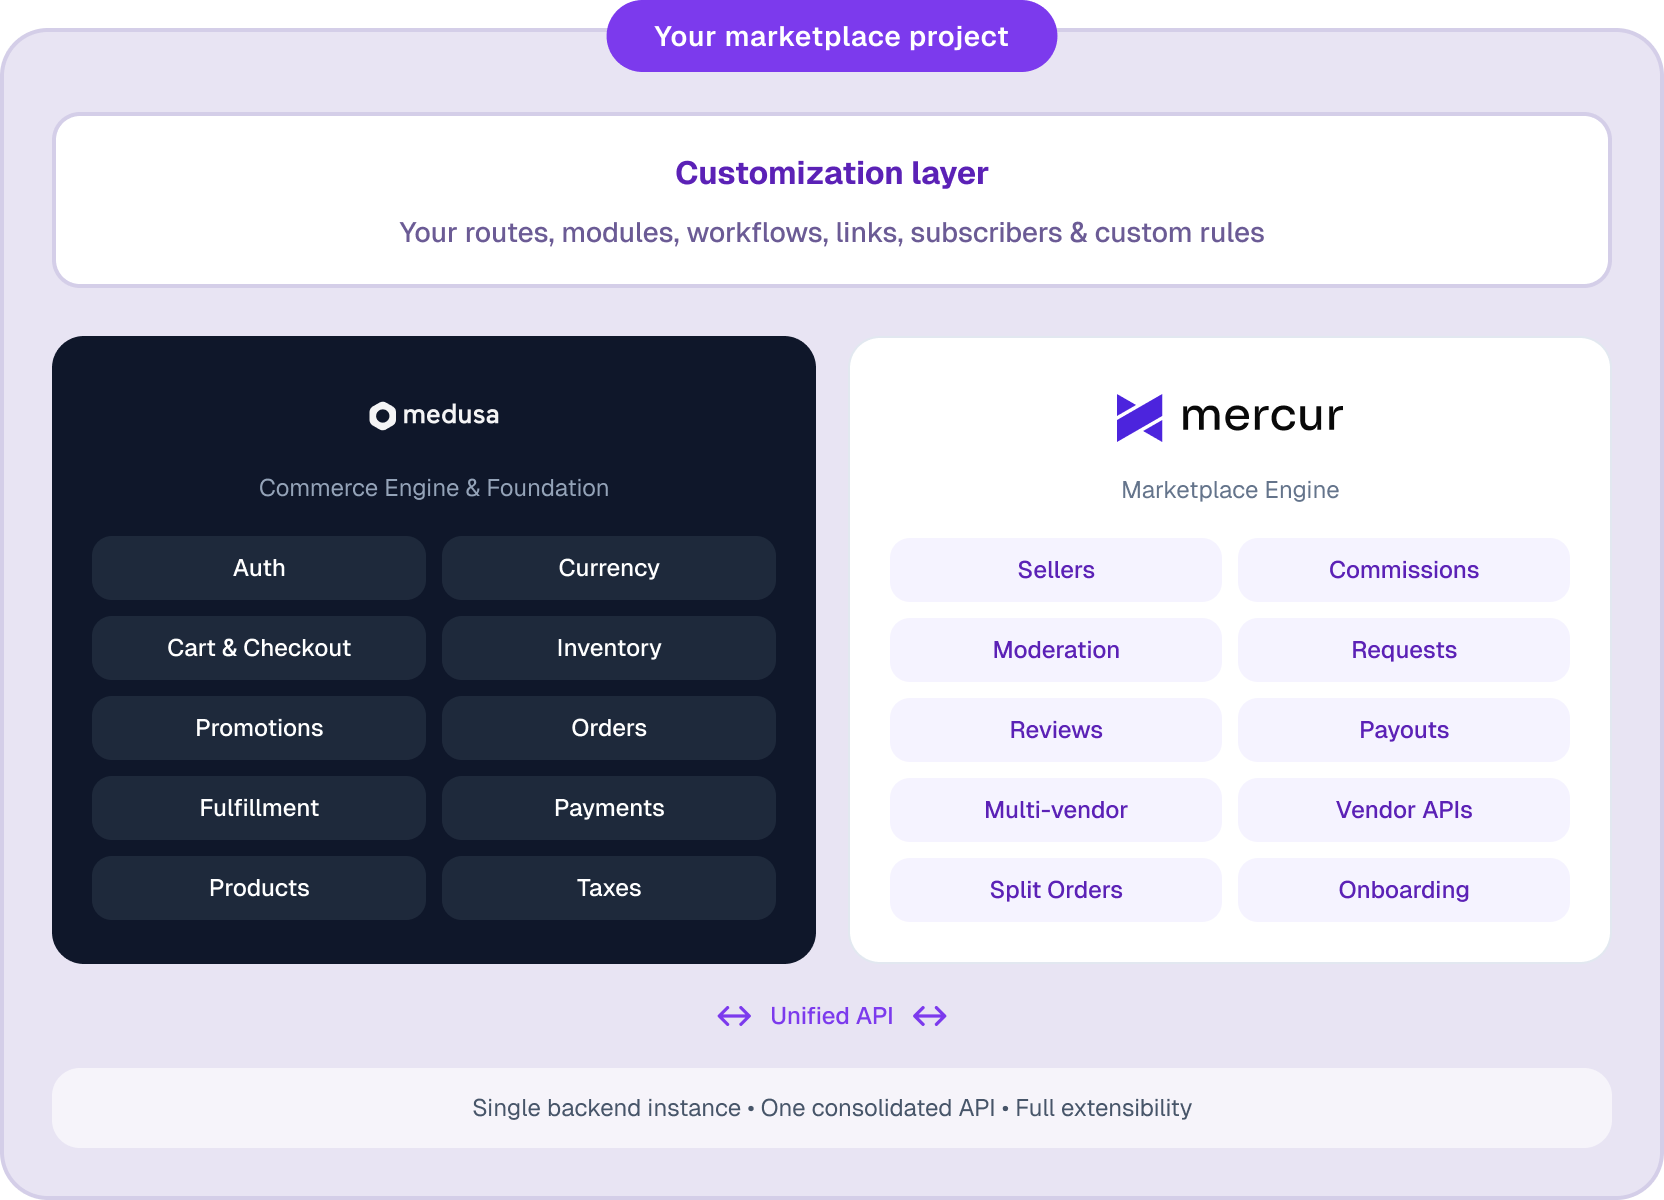 The structure consists of three layers:
### **1. Medusa Core (commerce engine)**
Handles core commerce primitives: products, pricing, carts, orders, customers, payments, inventory, fulfillment, etc.
### **2. Mercur (marketplace engine)**
Adds marketplace domain logic: sellers, commissions, moderation, requests, reviews, payouts, multi-vendor flows, and vendor-facing APIs.
### **3. Customization Layer (your code)**
Your project’s own routes, modules, workflows, links, subscribers, and custom rules - built exactly the same way you customize a standard Medusa project.
You can extend **both Medusa and Mercur** through this customization layer.\
This gives you access to all Medusa APIs and all Mercur APIs as one combined system, while keeping your domain-specific logic separated and easy to maintain.
***
# Plugin-Based Marketplace Architecture
Mercur is delivered as a **collection of Medusa plugins**, each implemented as a separate npm package.
This has several advantages:
* Install only the packages your project needs
* Keep upgrades isolated and predictable
* Clean overrides and customizations
* Full compatibility with Medusa’s architecture
* Your custom code stays separate from Mercur’s internals
Typical setup includes packages like:
* `@mercurjs/framework`
* `@mercurjs/b2c-core`
* `@mercurjs/commission`
* `@mercurjs/requests`
* `@mercurjs/reviews`
* `@mercurjs/algolia`
* `@mercurjs/resend`
* `@mercurjs/payment-stripe-connect`
More packages are being added for advanced or niche marketplace cases, such as subscriptions or B2B procurement flows.
***
# Unified Medusa + Mercur API
Because Mercur is implemented as Medusa plugins, the backend exposes **one unified API** containing:
* All Medusa Admin API endpoints
* All Medusa Store API endpoints
* All Mercur Admin API endpoints
* All Mercur Vendor API endpoints
* All Mercur Store API endpoints
Everything runs inside a single Medusa server instance.
No separate services, no proxying - a single consolidated backend.
***
# Three APIs and Actors
Mercur introduces three API surfaces built on Medusa’s routing system:
### **Admin API**
For platform operators managing the marketplace.
### **Vendor API**
A dedicated API for sellers, giving access only to their own products, orders, reviews, and Marketplace features.
### **Store API**
Customer-facing commerce operations.
Mercur defines three actors:
* **User (Admin)**
* **Seller**
* **Customer**
Medusa’s authentication middleware ensures the correct actor accesses the correct API.
***
# Customizing Mercur
Everything in Mercur is built using **Medusa Framework conventions**, which means you can customize Mercur in the exact same way you customize any Medusa project - modules, workflows, routes, links, subscribers, scheduled jobs, data models, and more.
Learn more about the underlying customization patterns in the\
[**Framework**](../framework) section.
***
# Using the Mercur CLI
The Mercur CLI provides the fastest path to starting a project.\
It automatically:
* scaffolds a full Medusa application
* installs and configures all Mercur packages
* prepares environment variables
* seeds initial data
* and creates a **clean, empty customization layer** for your project code
This means you start with:
* A ready-to-run Medusa + Mercur backend
* Clear separation between Mercur code and your custom code
* A structure designed for maintainability and upgrades
* Full access to Medusa and Mercur APIs out of the box
The CLI essentially gives you the ideal development foundation:\
a fresh customization layer on top of a fully wired marketplace engine.
***
# Why This Architecture Matters
This design gives you:
* **All of Medusa’s flexibility**
* **All of Mercur’s marketplace capabilities**
* Safe and predictable upgrades
* Separation of your custom logic from vendor code
* Long-term maintainability
* No vendor lock-in (MIT-licensed, plugin-based, transparent)
* A single, unified backend instead of a distributed patchwork
It is the best combination for projects that require both marketplace complexity and full control over the backend architecture.
***
# B2C Marketplace Storefront
Source: https://docs.mercurjs.com/components/storefront
# B2C Marketplace Storefront Features
Our B2C Marketplace Storefront implementation is a powerful, customizable storefront designed for B2C marketplaces, built to work perfectly with other MercurJS components.
Check our implementation of Storefront:
Github
## Core Features
### Home Page
* Trending listings section powered by Algolia search
* Shop by category navigation
* Banner section for promotions
* Shop by style section
* Blog section for content marketing
### Product Management
* Advanced product listing with Algolia-powered search
* Product variants support (size, color, etc.)
* Product details page with:
* High-quality image gallery
* Product measurements
* Shipping information
* Seller information
* Product reviews
* Related products
### Shopping Experience
* Wishlist functionality
* Advanced filtering options:
* Price range
* Size
* Color
* Condition
* Seller rating
* Sorting capabilities:
* Price (ascending/descending)
* Newest first
* Popularity
### User Features
* User authentication (login/register)
* User profile management
* Order history
* Address management
* Review system
* Wishlist management
### Seller Features
* Dedicated seller pages
* Seller ratings and reviews
* Seller information display
## Technical Integration with Mercur
The storefront is built as part of the Mercur ecosystem, which provides:
1. **Backend Integration**
* Seamless integration with Mercur's backend services
* MedusaJS as the foundation for e-commerce functionality
* RESTful API endpoints for all marketplace operations
2. **Search and Discovery**
* Algolia integration for powerful search capabilities
* Faceted search for precise product filtering
* Real-time search results
3. **Payment Processing**
* Stripe integration for secure payments
* Support for multiple payment methods
* Secure transaction handling
# Vendor Panel
Source: https://docs.mercurjs.com/components/vendor-panel
## Overview
The Vendor Panel is a powerful platform that enables vendors to manage their online store, products, orders, and customer interactions. This guide provides an overview of the main features available in the panel.
Check our implementation of Vendor Panel:
Github
## Core Features
### Dashboard
* Overview of store performance and key metrics
* Quick access to important information and actions
### Company Profile
* Manage company details
* Update business information
### Orders Management
* View and manage customer orders
* Track order status and fulfillment
* Process and update order information
* Handle customer inquiries related to orders
### Product Management
* Create and manage product listings
* Organize products into collections and categories
* Update product details, pricing, and inventory
* Manage product images and descriptions
### Inventory Control
* Track stock levels across products and locations
* Manage inventory reservations
### Customer Management
* View customer information and order history
* Manage customer groups
* Monitor and respond to customer reviews
### Promotions and Marketing
* Create and manage promotional campaigns
* Set up special offers and discounts
* Manage price lists for different customer segments
### TalkJS based Messaging System
* Communicate with customers
* Handle customer inquiries
* Track conversation history
## Getting Started
To begin using the Vendor Panel:
1. Log in to your vendor account
2. Complete your store profile setup
3. Configure your store settings
4. Start adding products and managing your store
# Marketplace commission
Source: https://docs.mercurjs.com/core-concepts/commission
Marketplace admin can set commission rates in various combinations, which enables to charge different commission for different product types, categories, sellers etc.
# Commission rule reference types
Each commission rule has its reference. A reference entity types are listed below. There are simple (one `reference_id` at once), and combined types, that take into account more than one reference at once. Each combination (`reference` and `reference_id`) are required to be unique.
* `site` - default commission applied for all products in the marketplace, can be overriden by other rules,
* `product_type` - applied to products of specified type,
* `product_category` - applied to products from specified category,
* `seller+product_category` - applied to products from specified category, and sold by specified seller,
* `seller+product_type` - applied to products of specified type, and sold by specified seller,
* `seller` - applied to products sold by specified seller.
# Commission rules priority
Multiple different condition rates can be applied to each of the items in order. That's why some of the rules are more important that others, and during commission calculation process only one is applied. Rule reference types priority is described below.
1. `seller+product_type`
2. `seller+product_category`
3. `seller`
4. `product_type`
5. `product_category`
6. `site`
# Commission rate
Each rule should have applicable rate attached. Commission rate entity describes the details on how the commission should be calculated. Available options:
* `type` - `flat` or `percentage`
* `percentage_rate` - applicable if `type` is `percentage`
* `include_tax` - indicates if commission should be calculated including tax
* `price_set_id` - applicable if `type` is `flat`
* `max_price_set_id` - maximum commission value
* `min_price_set_id` - minimum commission value
# Commission rate types
* `flat` - share for marketplace is a fixed amount,
* `percentage` - share for marketplace is a percent of price.
# Calculation
```mermaid theme={null}
flowchart LR
id1(Take order line_item)
id2(Select applicable rule)
id3{Select associated rate}
id4a(Select appropiate price from price_set, return as a value)
id4b(Calculate % of the line_item price, return as a value)
id5(Clamp commission value between min_price/max_price)
id6(Save commission_line)
id1-->id2
id2-->id3
id3--type == flat-->id4a
id3--type == percentage-->id4b
id4a-->id5
id4b-->id5
id5-->id6
```
# Database models
```mermaid theme={null}
erDiagram
commission_rule ||--o| commission_rate : has
commission_rule {
uuid id
string name
string reference
string reference_id
}
commission_rate {
uuid id
string type
float percentage_rate
bool include_tax
string price_set_id
string max_price_set_id
string min_price_set_id
}
commission_line {
uuid id
string item_line_id
string rule_id
string currency_code
float value
}
```
# Marketplace settings
Source: https://docs.mercurjs.com/core-concepts/marketplace-settings
# Settings reference
Currently there are three settings the marketplace admin can change:
* `require_product_approval` - decide whether seller-added products require admin approval before becoming ready to list,
* `product_request_enabled` - allow sellers to propose new products for inclusion in the catalog,
* `product_import_enabled` - allow sellers to import products via `csv` file.
All settings are `false` by default.
# Example Scenarios
1. \*\* Require Admin Approval ON, Sellers Can Request Products ON\*\*:
* Sellers can list inventory for global products.
* Sellers can request new global/unique products.
* All inventory and product additions require admin approval.
2. **Require Admin Approval OFF**:
* Sellers freely add products without needing admin approval.
* Admin does not need to manage requests or approve listings.
# Verification middleware
The middleware `checkConfigurationRule` is used to restrict route availability according to the setting value, and can be found in `@mercurjs/b2c-core/src/shared/infra/http/middlewares/check-configuration-rule.ts`. It takes two arguments, `rule_type` and `expected_value`.
Advanced users can use it to modify the default Mercur behaviour.
# Notifications
Source: https://docs.mercurjs.com/core-concepts/notifications
# Overview
Mercur uses a notification system that supports multiple channels including email and in-app feeds. The system is built using the Resend service for email notifications and a local notification provider for in-app feeds.
## Notification Channels
* **Email**: Used for transactional emails and important updates
* **Feed**: Used for in-app notifications in the admin panel
* **Seller Feed**: Used for in-app notifications in the seller dashboard
## Email Notifications
### Buyer Notifications
1. **Account Created**
* Template: `buyerAccountCreatedEmailTemplate`
* Trigger: When a new buyer account is created
* Content: Welcome message with buyer's name
2. **New Order**
* Template: `buyerNewOrderEmailTemplate`
* Trigger: When an order is placed
* Content: Order confirmation with order details and items
3. **Order Canceled**
* Template: `buyerCancelOrderEmailTemplate`
* Trigger: When an order is canceled
* Content: Order cancellation confirmation with order details
4. **Order Shipped**
* Template: `buyerOrderShippedEmailTemplate`
* Trigger: When an order is shipped
* Content: Shipping confirmation with tracking details
### Seller Notifications
1. **Account Submission**
* Template: `sellerAccountSubmissionEmailTemplate`
* Trigger: When a seller submits their account for review
* Content: Confirmation of submission receipt with seller's name
2. **Account Approval**
* Template: `sellerAccountApprovedEmailTemplate`
* Trigger: When admin approves a seller's account
* Content: Approval confirmation with seller's name
3. **Account Rejection**
* Template: `sellerAccountRejectedEmailTemplate`
* Trigger: When admin rejects a seller's account
* Content: Rejection notification
4. **Product Approval**
* Template: `sellerProductApprovedEmailTemplate`
* Trigger: When admin accepts a seller's product listing
* Content: Approval notification
5. **Product Rejection**
* Template: `sellerProductRejectedEmailTemplate`
* Trigger: When admin rejects a seller's product listing
* Content: Rejection notification
6. **Team Invitation**
* Template: `sellerTeamInviteEmailTemplate`
* Trigger: When a seller is invited to join a team
* Content:
* Invitation details
* Store name
* Team member name
* Registration link
7. **New Order**
* Template: `sellerNewOrderEmailTemplate`
* Trigger: When a new order is placed
* Content:
* Order ID
* Customer name
* Order details
* Seller name
8. **New Seller Invitation**
* Template: `newSellerInvitation`
* Trigger: When marketplace administrator invites seller to join the platform
* Content: Registration link and platform information
### Admin Notifications
1. **Request Management**
* New Seller Request: `adminSellerRequestCreatedEmailTemplate`
## In-App Notifications
### Admin Feed
* New request notifications
* Other system notifications (Medusa defaults)
### Seller Feed
* **Product Requests** - approved/rejected
* **Product Category Requests** - approved/rejected
* **Product Collection Requests** - approved/rejected
* **Product Type Requests** - approved/rejected
* **Product Tag Requests** - approved/rejected
* **Order Notifications** - new order created
## System Notifications
1. **Password Reset**
* Template: `forgotPasswordEmailTemplate`
* Trigger: When a user requests a password reset
* Content: Password reset link and instructions
# Order Splitting
Source: https://docs.mercurjs.com/core-concepts/order-splitting
Order splitting allows you to split orders and payments between multiple vendors.
# Order Set
`OrderSet` is the entity that represents a group of orders that will be created from a cart.
`OrderSet` uses related orders to calculate totals and other properties for admin and storefront customers.
`SplitOrderPayment` is a partial payment information, only relevant for current seller.
```mermaid theme={null}
graph TD
subgraph MarketplaceModule[Marketplace Module]
OrderSet
end
subgraph CustomerModule[Customer Module]
Customer
end
subgraph OrderModule[Order Module]
Order
end
subgraph SplitOrderPaymentMod[Split Order Payment Module]
SplitOrderPayment
end
OrderSet --> Customer
OrderSet --> Order
Order --> SplitOrderPayment
```
# Payouts
Source: https://docs.mercurjs.com/core-concepts/payouts
Mercur comes with a `Payout` module that allows you to manage payout accounts, onboardings and money transfers.
Mercur by default supports{" "}
Stripe Connect as a payout provider.
```mermaid theme={null}
graph TD
subgraph SellerModule[Seller Module]
Seller
end
subgraph PayoutModule[Payout Module]
PayoutAccount
Payout
Onboarding
end
Seller --> PayoutAccount
PayoutAccount -->|One-to-Many| Payout
PayoutAccount -->|One-to-One| Onboarding
```
# Seller Onboarding Flow
```mermaid theme={null}
graph TD
subgraph SellerActions[Seller Actions]
A[Seller Creates Payout Account] --> B[Seller Creates Onboarding]
B --> C[Seller Completes Onboarding]
end
subgraph PayoutProvider[Payout Provider Actions]
C --> D[Payout Provider Consumes Webhook Event]
D --> E[Payout Provider Validates Onboarding]
E --> F[Payout Provider Authorizes Payout Account]
F --> G[Update Payout Account Status to Active]
end
```
# Payout Flow
Payout events can be consumed by subscribing to the `payout.succeeded` and `payout.failed` events. This allows you to perform actions like sending notification emails to sellers when payouts are processed successfully or fail.
```mermaid theme={null}
graph TD
subgraph PayoutFlow[Payout Flow]
A[Start Midnight Cron Job] --> B[List Orders Without Payout]
B --> C{Validate Seller Details}
C -->|Valid| D[Create Payout Using Payout Provider]
C -->|Invalid| H[End Process]
D -->|Success| G[Emit Success Event]
D -->|Failure| E[Emit Fail Event]
end
```
# Requests
Source: https://docs.mercurjs.com/core-concepts/requests
# Seller requests
Seller requests is a solution for sellers to create entity proposals. Each request needs to be reviewed by marketplace admin before it goes live.
### Request types
* `product` - create a new product. Admin can later set this `product` as a global product, or seller-specific.
* `product_collection` - create a new product collection.
* `product_type` - create a new product type.
* `product_category` - create a new product category.
* `review_remove` - ask to remove the unfair review from customer.
### Workflow
1. Seller creates a request by specifying proposed entity payload. His request is saved in the database with `pending` status.
2. Marketplace administrator has a list of all requests. They can be filtered by their type or status. After reviewing the request payload, he has to make a decision if the request should be approved or rejected.
3. If the administrator rejects the request, the entry changes status to `rejected`. Admin can also provide a note for the request submitter explaining his decision. Seller can be notified via email about the status change.
4. If the administrator approves the request, the entry changes status to `approved`, and appropiate resource will be created using payload provided by the submitter. Seller can be notified via email about the status change.
```mermaid theme={null}
flowchart LR
id1(Seller creates a request)
id2[(Request saved in the DB)]
id3{Admin reviews request}
id4a(Approved)
id4b(Rejected)
id5a(Resource is created)
id5b(Admin note is created)
id6(Notification is sent)
id1-->id2
id2-->id3
id3-->id4a
id3-->id4b
id4a-->id5a
id4b-->id5b
id5a-.->id6
id5b-.->id6;
```
### Example
1. Seller wants to create a request for new `product_category`. He performs following request:
```
POST /api/vendor/requests
{
"request": {
"type": "product_category",
"data": {
"name": "Smartwatches",
"description": "Lorem ipsum dolor sit amet, consectetur adipiscing elit",
"parent_category_id": null
}
}
}
```
A following response is returned by server:
```
201 CREATED
{
"id": "req_xxxx",
"type": "product_category",
"data": {
"name": "Smartwatches",
"description": "Lorem ipsum dolor sit amet, consectetur adipiscing elit",
"parent_category_id": null
},
"submitter_id": "xyz",
"reviewer_id": null,
"reviewer_note": null,
"status": "pending"
}
```
2. Administrator lists pending requests by performing request:
```
GET /api/admin/requests?status=pending
```
3. Administrator wants to accept the request, so performs update request with `accepted` status.
```
POST /api/admin/requests/req_xxxx
{
"status": "accepted",
"reviewer_note": "LGTM"
}
```
4. The product category is created, and admin gets a following response from the server:
```
200 OK
{
"id": "req_xxxx",
"status": "accepted",
"createdResourceType": "product_category",
"createdResource": {
"id": "pcat_yyyy",
...
}
}
```
5. If notifications are set up, Seller can be sent a message about the status update.
# Seller registration request
If the seller wants to sign up for the platform, he has to create a registration request. The flow is very similar to other types of requests.
### Workflow
1. User creates a seller sign up request.
2. Marketplace administrator has a list of all requests. They can be filtered by their type or status. After reviewing the request payload, he has to make a decision if the request should be approved or rejected.
3. If the administrator rejects the sign up request, the entry changes status to `rejected`. Admin can also provide a note for the request submitter explaining his decision. Submitter can be notified via email about the status change.
4. If the administrator approves the sign up request, the entry changes status to `approved`, and seller is created. Submitter can be notified via email about the status change.
# Order return requests
Marketplace customers, who want to return the order, partially or as a whole, can create `OrderReturnRequest`. Inside this object the customer provides array of the tuples `line_item_id` and `quantity`, as well as the `customer_note` (return reason).
### Workflow
1. Customer creates order return request, the status is `pending`
2. Seller reviews the return request. The review can have one of the following outcomes: `refunded`, `withdrawn` or `escalated`.
3. If the seller accepts the return, sets the status to `refunded`, and proceeds with the return and refund.
4. If the request does not meet the return criteria, seller sets the status to `withdrawn`, and provides the reason.
5. If the seller disagrees with the return reason, sets the status to `escalated`.
6. Requests with the `escalated` status are reviewed by the marketplace admin who makes the final decision. The decision can be either `refunded` or `canceled`. Admin can also provide the reason behind his decision.
```mermaid theme={null}
flowchart LR
id1(Customer creates request)
id2[(Request saved in the DB)]
id3{Seller reviews request}
id4a(Refunded)
id4b(Withdrawn)
id4c(Escalated)
id5a(Seller proceeds with the return and refund procedure)
id5b(Seller note is created)
id5c{Admin reviews request}
id6a(Refunded)
id6b(Canceled)
id7a(Seller proceeds with the return and refund procedure)
id7b(Admin note is created)
id1-->id2
id2-->id3
id3-->id4a
id3-->id4b
id3-->id4c
id4a-->id5a
id4b-->id5b
id4c-->id5c
id5c-->id6a
id5c-->id6b
id6a-->id7a
id6b-->id7b
```
# Requests events reference
### Seller Registration Events
* `requests.seller.created` - Triggered when a new seller registration request is created
* `requests.seller.accepted` - Triggered when a seller registration request is approved by admin
* `requests.seller.rejected` - Triggered when a seller registration request is rejected by admin
### Product Category Events
* `requests.product_category.accepted` - Triggered when a product category creation request is approved
* `requests.product_category.rejected` - Triggered when a product category creation request is rejected
### Product Collection Events
* `requests.product_collection.accepted` - Triggered when a product collection creation request is approved
* `requests.product_collection.rejected` - Triggered when a product collection creation request is rejected
### Product Events
* `requests.product.created` - Triggered when a new product creation request is submitted
* `requests.product.accepted` - Triggered when a product creation request is approved
* `requests.product.rejected` - Triggered when a product creation request is rejected
### Product Type Events
* `requests.product_type.accepted` - Triggered when a product type creation request is approved
* `requests.product_type.rejected` - Triggered when a product type creation request is rejected
### Product Tag Events
* `requests.product_tag.accepted` - Triggered when a product tag creation request is approved
* `requests.product_tag.rejected` - Triggered when a product tag creation request is rejected
### Generic Event
* `requests.*.created` - A generic event triggered when any type of request is created
# Product/seller reviews
Source: https://docs.mercurjs.com/core-concepts/reviews
# Product reviews
Each customer is able to create a review about the product. The review object consists of integer rating value (1-5) and optional text comment (up to 300 characters). The average rating can be calculated in order to display on the product page. The customer can also list all the reviews he created.
### Example - Customer creates product review
```
POST /api/store/reviews
{
"order_id": "ord_xxx",
"reference": "product",
"reference_id": "prod_xxx",
"rating": 5,
"customer_note": "Very good product"
}
```
### Example - List reviews
```
GET /api/store/reviews?offset=0&limit=50
```
# Seller reviews
Similarly to product reviews, customer can also create a review on the sellers. This type of review also includes integer rating value and comment.
Seller can respond to the review, or escalate to marketplace administrator, if he thinks that the review is against the rules or unfair.
### Example - Customer creates seller review
```
POST /api/store/reviews
{
"order_id": "ord_xxx",
"reference": "seller",
"reference_id": "sel_xxx",
"rating": 2,
"customer_note": "Not very good seller"
}
```
### Example - Seller responds to the review
```
POST /api/vendor/sellers/me/reviews/rev_xxx
{
"seller_note": "We are very sorry about your inconvenience"
}
```
### Escalating reviews
Seller can request to delete the review using `requests`. After submitting the request the marketplace administrator makes the decision to delete the review or not.
```
POST /api/vendor/requests
{
"request": {
"type": "review_remove",
"data": {
"review_id": "rev_xxx",
"reason": "I consider this review unfair"
}
}
}
```
```mermaid theme={null}
flowchart LR
id1(Seller creates a request)
id2[(Request saved in the DB)]
id3{Admin reviews request}
id4a(Approved)
id4b(Rejected)
id5a(Review is deleted)
id5b(Admin note is created)
id6(Notification is sent)
id1-->id2
id2-->id3
id3-->id4a
id3-->id4b
id4a-->id5a
id4b-->id5b
id5a-.->id6
id5b-.->id6;
```
# Seller
Source: https://docs.mercurjs.com/core-concepts/seller
Mercur comes with a `Seller` module that allows you to manage seller products, team members, orders, stock locations and shipping options.
# Entities
* `Seller`
* `Member`
* `Invite`
* `Onboarding`
# Seller
In Mercur, the `Seller` is the entity that represents member group in the marketplace.
You can think of a seller as a group of members that share the same products, orders etc.
Seller can be in state `ACTIVE`, which allows him to use the platform, or in state `SUSPENDED`, which prevents him from using the platform, except order and fulfillment management.
By default, a seller is linked to Medusa's default entities such as:
* `Product`
* `Order`
* `Return`
* `Stock Location`
* `Service Zone`
* `Shipping Option`
* `Shipping Profile`
* `Fulfillment Set`
* `Promotion`
* `Campaign`
* `Price List`
* `Customer Group`
* `Inventory Item`
```mermaid theme={null}
graph LR
subgraph SellerModule[Seller Module]
Seller
end
subgraph InventoryModule[Inventory Module]
InventoryItem
end
subgraph CustomerModule[Customer Module]
CustomerGroup
end
subgraph PricingModule[Pricing Module]
PriceList
end
subgraph PromotionModule[Promotion Module]
Promotion
Campaign
end
subgraph ProductModule[Product Module]
Product
end
subgraph OrderModule[Order Module]
Return
Order
end
subgraph FulfillmentModule[Fulfillment Module]
ServiceZone
ShippingOption
ShippingProfile
FulfillmentSet
end
subgraph StockLocationModule[Stock Location Module]
StockLocation
end
Seller --> Product
Seller --> Order
Seller --> Return
Seller --> ServiceZone
Seller --> ShippingOption
Seller --> ShippingProfile
Seller --> StockLocation
Seller --> FulfillmentSet
Seller --> Promotion
Seller --> Campaign
Seller --> PriceList
Seller --> CustomerGroup
Seller --> InventoryItem
```
# Member
`Member` is the entity that represents a user in the marketplace that can manage seller products, orders, service zones etc.
```mermaid theme={null}
graph TD
subgraph SellerModule[Seller Module]
Seller
Member
end
Seller -->|One-to-Many| Member
```
# Member Invite
`Member Invite` is the entity that represents a pending member invitation to a seller in the marketplace.
```mermaid theme={null}
graph TD
subgraph SellerModule[Seller Module]
Seller
Invite
end
Seller -->|One-to-Many| Invite
```
# Onboarding
`Onboarding` is the entity that holds the information about current state of the onboarding of a seller.
```mermaid theme={null}
graph TD
subgraph SellerModule[Seller Module]
Seller
Onboarding
end
Seller -->|One-to-One| Onboarding
```
# Get Started
Source: https://docs.mercurjs.com/get-started
Learn how to install and run Mercur using the CLI or manual setup.
There are two ways of installing Mercur: the CLI script or manual installation.
# **Install with the Mercur CLI**
The Mercur CLI provides a guided setup and configures all required components automatically.
**Step 1**: Install `mercur-cli` using NPM:
```bash theme={null}
npm i -g mercur-cli
```
**Step 2**: Run CLI installation:
```bash theme={null}
mercur-cli install
```
or
```bash theme={null}
npx mercur-cli install
```
The script will guide you through the installation process. You will have to enter project name and database connection parameters. Also, you'll be asked if you want to install Mercur Storefront and Vendor panel.
**Step 3**: After installation is done, move to the project catalog and start the servers:
```bash theme={null}
cd
mercur-cli dev
```
The script automatically configures environment variables, and runs seed. The default credentials for created users are:
**Vendor:**
```
email: seller@mercurjs.com
password: secret
```
**Admin:**
```
email: admin@mercurjs.com
password: admin
```
# **Manual installation**
Manual installation gives you full control over the Medusa and Mercur setup.
**Step 1**: Create empty Medusa application using tool:
```bash theme={null}
npx create-medusa-app@latest my-medusa-store
```
**Step 2**: Install following dependencies:
```
@mercurjs/framework
@mercurjs/b2c-core
@mercurjs/commission
@mercurjs/reviews
@mercurjs/requests
@mercurjs/algolia
@mercurjs/resend
@mercurjs/payment-stripe-connect
```
First two packages: `@mercurjs/framework` and `@mercurjs/b2c-core` are required, the rest of them are optional. We strongly recommend installing them all to avoid problems and missing features.
**Step 3**: Configure plugins in `medusa-config.ts`
```
import { defineConfig, loadEnv } from '@medusajs/framework/utils'
loadEnv(process.env.NODE_ENV || 'development', process.cwd())
module.exports = defineConfig({
projectConfig: {
databaseUrl: process.env.DATABASE_URL,
http: {
storeCors: process.env.STORE_CORS!,
adminCors: process.env.ADMIN_CORS!,
// @ts-expect-error: vendorCors is not a valid config
vendorCors: process.env.VENDOR_CORS!,
authCors: process.env.AUTH_CORS!,
jwtSecret: process.env.JWT_SECRET || 'supersecret',
cookieSecret: process.env.COOKIE_SECRET || 'supersecret'
}
},
plugins: [
{
resolve: '@mercurjs/b2c-core',
options: {}
},
{
resolve: '@mercurjs/commission',
options: {}
},
{
resolve: '@mercurjs/algolia',
options: {
apiKey: process.env.ALGOLIA_API_KEY,
appId: process.env.ALGOLIA_APP_ID
}
},
{
resolve: '@mercurjs/reviews',
options: {}
},
{
resolve: '@mercurjs/requests',
options: {}
},
{
resolve: '@mercurjs/resend',
options: {}
}
],
modules: [
{
resolve: '@medusajs/medusa/payment',
options: {
providers: [
{
resolve:
'@mercurjs/payment-stripe-connect/providers/stripe-connect',
id: 'stripe-connect',
options: {
apiKey: process.env.STRIPE_SECRET_API_KEY
}
}
]
}
},
{
resolve: '@medusajs/medusa/notification',
options: {
providers: [
{
resolve: '@mercurjs/resend/providers/resend',
id: 'resend',
options: {
channels: ['email'],
api_key: process.env.RESEND_API_KEY,
from: process.env.RESEND_FROM_EMAIL
}
},
{
resolve: '@medusajs/medusa/notification-local',
id: 'local',
options: {
channels: ['feed', 'seller_feed']
}
}
]
}
}
]
})
```
**Step 4**: Configure database credentials in the `.env` file
```
# Replace user, password, address and port parameters with your values
DATABASE_URL=postgres://[user]:[password]@[address]:[port]/$DB_NAME
# For example:
DATABASE_URL=postgres://postgres:postgres@localhost:5432/$DB_NAME
```
Do not delete `$DB_NAME` from the connection string. You'll be prompted to choose database name during the next step.
**Step 5**: Configure rest of your environment variables
```
STRIPE_SECRET_API_KEY=
STRIPE_CONNECTED_ACCOUNTS_WEBHOOK_SECRET=
RESEND_API_KEY=
RESEND_FROM_EMAIL=
ALGOLIA_APP_ID=
ALGOLIA_API_KEY=
VITE_TALK_JS_APP_ID=
VITE_TALK_JS_SECRET_API_KEY=
STORE_CORS=
ADMIN_CORS=
VENDOR_CORS=
VENDOR_PANEL_URL=
STOREFRONT_URL=
BACKEND_URL=
```
**Step 6**: Setup database and run migrations
```bash theme={null}
yarn medusa db:create && yarn medusa db:migrate
```
**Step 7**: Create admin user
```bash theme={null}
npx medusa user --email --password
```
**Step 8**: Run application
```bash theme={null}
yarn dev
```
# **You're ready to build**
You now have a working Mercur marketplace environment.
# LLM
Source: https://docs.mercurjs.com/help/llm
How Mercur documentation is optimized for LLMs.
# LLM
Mercur’s documentation is optimized to be easily indexed and understood by Large Language Models (LLMs).\
\
This helps AI tools answer technical questions about Mercur more accurately by giving them a clear map of the documentation structure.
LLM indexing works similarly to how a sitemap helps search engines: AI tools read a structured file describing your docs and use it to locate relevant content quickly.
***
## llms.txt
The `llms.txt` file is an industry standard (see [llmstxt.org](https://llmstxt.org)) designed to help LLMs:
* understand the structure of your documentation
* discover all available pages
* resolve links and relationships between topics
* retrieve page descriptions
* provide more precise answers to developers
Your documentation site automatically includes an `llms.txt` file at the root of the project.\
It stays up to date with your docs structure and requires no maintenance.
To view it, append `/llms.txt` to your documentation URL:
[https://docs.mercurjs.com/llms.txt](https://docs.mercurjs.com/llms.txt)
***
## llms-full.txt
The `llms-full.txt` file contains the *entire contents* of your documentation in a single file.\
LLMs can use it to analyze the full context of your docs when providing answers, explanations, or troubleshooting steps.
You can view it at:
[https://docs.mercurjs.com/llms-full.txt](https://docs.mercurjs.com/llms-full.txt)
# MCP
Source: https://docs.mercurjs.com/help/mcp
Use MCP tools to query Mercur documentation directly from your AI environment.
# MCP
Mercur exposes an MCP server that allows AI tools to **query Mercur documentation directly**.\
This ensures assistants can provide accurate, context-aware answers based on the actual docs instead of relying on assumptions.
***
# Available Tool
## **SearchMercurJsDocumentation**
This MCP tool enables AI assistants to search across all Mercur documentation.\
It returns:
* relevant excerpts
* page titles
* direct documentation links
Useful when you need to locate API references, understand how a module works, or retrieve examples quickly during development.
***
# MCP Server URL
Your MCP server is available at:
[https://docs.mercurjs.com/mcp](https://docs.mercurjs.com/mcp)
You can connect this URL to any MCP-compatible environment.
***
# Connecting the MCP Server
Use the tabs below to connect the Mercur MCP server in different environments:
1. Press Cmd
* Shift
* P
2. Search for **Open MCP settings**
3. Select **Add custom MCP**
Add the following to your `mcp.json`:
```json theme={null}
{
"mcpServers": {
"mercur": {
"url": "https://docs.mercurjs.com/mcp"
}
}
}
```
Restart Cursor and ask:\
**“What MCP tools are available?”**
See Cursor docs for more: [https://docs.cursor.com/en/context/mcp](https://docs.cursor.com/en/context/mcp)
Create a file at:\
`.vscode/mcp.json`
```json theme={null}
{
"servers": {
"mercur": {
"type": "http",
"url": "https://docs.mercurjs.com/mcp"
}
}
}
```
Open the Copilot Chat panel and ask:\
**“List available MCP servers.”**
See VS Code docs for more: [https://code.visualstudio.com/docs/copilot/chat/mcp-servers](https://code.visualstudio.com/docs/copilot/chat/mcp-servers)
1. Go to Claude → Settings → **Connectors**
2. Select **Add custom connector**
3. Enter:
* **Name**: Mercur
* **URL**: `https://docs.mercurjs.com/mcp`
4. Save
In chat, click the **attachments (+)** button and select your Mercur MCP connector.
See Claude connector docs:\
[https://modelcontextprotocol.io/docs/tutorials/use-remote-mcp-server](https://modelcontextprotocol.io/docs/tutorials/use-remote-mcp-server)
```bash theme={null}
claude mcp add --transport http mercur https://docs.mercurjs.com/mcp
```
```bash theme={null}
claude mcp list
```
Now Claude Code can query Mercur documentation directly.
Docs: [https://docs.anthropic.com/en/docs/claude-code/mcp](https://docs.anthropic.com/en/docs/claude-code/mcp)
***
# Support
Source: https://docs.mercurjs.com/help/support
How to get help, ask questions, or report issues related to Mercur.
# Support
If you need help with Mercur, have questions, or want to report a bug, you can reach us through any of the channels below.\
\
We do our best to respond as quickly as possible.
***
## GitHub Issues
Use GitHub Issues to report bugs, unexpected behavior, or missing functionality.
👉 [https://github.com/mercurjs/mercur/issues](https://github.com/mercurjs/mercur/issues)
We actively monitor new issues and aim to respond and update them as fast as we can.
***
## GitHub Discussions
If you have questions, need guidance, or want to start a broader conversation about Mercur:
👉 [https://github.com/mercurjs/mercur/discussions](https://github.com/mercurjs/mercur/discussions)
This is the best place for:
* implementation questions
* architectural discussions
* suggestions
* general help from the community
***
## Direct Contact
If you prefer to reach out privately, you can contact us directly.
* **Email:** [hello@mercurjs.com](mailto:hello@mercurjs.com)
* **Contact form:** [https://www.mercurjs.com/contact](https://www.mercurjs.com/contact)
We’ll get back to you as soon as possible.
***
# Algolia search engine
Source: https://docs.mercurjs.com/integrations/algolia
### Introduction
Mercur uses Algolia as a search engine to boost product search accuracy and serving trending/recommended items. The integration features auto product indexing, whenever any of the product attributes was changed or a new product review is created.
### Setup
In order to use Algolia, an account is needed. After registration, enter `ALGOLIA_APP_ID` and `ALGOLIA_API_KEY` obtained from the Algolia dashboard into the `.env` file.
### Configuration
See the full settings reference here!
### Events
In order to persist consistency between database and Algolia, every time any change in indexed entities happens an event is emitted, for example:
* `algolia.products.changed`
* `algolia.products.deleted`
We use also intermediate events, that also should trigger synchronization with Algolia (of related products):
* `algolia.intermediate.fulfillment_set.changed`
* `algolia.intermediate.service_zone.changed`
* `algolia.intermediate.shipping_option.changed`
* `algolia.intermediate.stock_location.changed`
* `algolia.intermediate.inventory_item.changed`
Each event is connected to the subscriber, which is responsible for refetching the entity and updating it in Algolia.
# Resend email service
Source: https://docs.mercurjs.com/integrations/resend
### Introduction
Mercur uses Resend as an email service provider to handle notifications. The integration enables sending emails for various events such as order confirmations, password resets, and seller notifications.
### Setup
To use Resend with Mercur, you'll need to:
1. Create a Resend account at resend.com
2. Obtain your API key from the Resend dashboard
3. Add the following environment variables to your `.env` file:
```
RESEND_API_KEY=your_api_key_here
RESEND_FROM_EMAIL=sender_email_address
```
# Stripe Payments
Source: https://docs.mercurjs.com/integrations/stripe
### Introduction
Mercur uses Stripe as the default payment and payout provider. The integration enables secure payment processing, automatic payouts to sellers, and commission handling for marketplace transactions.
### Setup
To use Stripe with Mercur, you'll need to:
1. Create a Stripe account at stripe.com
2. Enable Stripe Connect in your Stripe Dashboard
3. Obtain your API keys from the Stripe Dashboard
4. Add the following environment variables to your `.env` file:
```
STRIPE_SECRET_KEY=your_secret_key_here
STRIPE_WEBHOOK_SECRET=your_webhook_secret_here
```
### Stripe Connect Configuration
**Enable Stripe Connect**:
* Go to your Stripe Dashboard
* Navigate to Settings > Connect settings
* Enable Connect and configure your account settings
* Set up your Connect branding and terms of service
### Seller Onboarding
Sellers need to complete the Stripe Connect onboarding process to receive payouts:
1. **Create Payout Account**:
* Sellers create a payout account through the vendor panel
* System generates a Stripe Connect onboarding link
* Sellers complete the onboarding process
2. **Onboarding Flow**:
```mermaid theme={null}
graph TD
A[Seller Creates Account] --> B[Stripe Onboarding]
B --> C[Provide Business Details]
C --> D[Add Bank Account]
D --> E[Complete Verification]
E --> F[Account Active]
```
### Commission Setup
Configure commission rates in the admin panel. Marketplace commission is deducted from payout amount.
1. **Commission Types**:
* Percentage-based: Set a percentage of the order total
* Flat rate: Set a fixed amount per order
2. **Commission Rules**:
* Set different rates for different product types
* Configure rates per seller
* Set category-specific rates
* Define global default rates
### Testing
**Test Cards**:
```
Success: 4242 4242 4242 4242
Decline: 4000 0000 0000 0002
```
### Additional Resources
* [Stripe Documentation](https://stripe.com/docs)
* [Stripe Connect Guide](https://stripe.com/docs/connect)
* [Stripe API Reference](https://stripe.com/docs/api)
# Introduction
Source: https://docs.mercurjs.com/introduction
Mercur is an open-source marketplace engine designed to support diverse and highly customized marketplace types.
Building a marketplace shouldn’t mean choosing between expensive custom development and rigid SaaS platforms with transaction fees. After building multiple marketplaces from scratch, we saw the same pattern repeat itself: traditional e-commerce tools work well until a project requires multi-actor workflows, vendor-specific rules, onboarding steps, commissions, payouts, or any form of marketplace logic that extends beyond a single merchant.
Marketplace systems are different from stores - they need their own logic.
**That’s why we created Mercur.**
Mercur is an open-core **marketplace engine** designed for developers who need both the freedom of custom development and the stability of a structured, well-designed foundation. Instead of forcing your marketplace into predefined templates or rigid “marketplace modes,” Mercur provides a clean domain layer built specifically for multi-vendor systems.
Whether you’re building a B2C marketplace, a B2B marketplace, a rental or service marketplace, a niche vertical marketplace, or an entirely new hybrid model - Mercur gives you the building blocks to develop faster with marketplace logic ready.
It focuses on the crucial marketplaces logic: sellers, onboarding, moderation flows, commissions, multi-vendor cart and checkout, payouts, splitting, and all cross-actor operations. And because it’s built with customization in mind, you can adapt or replace any part of it when your business model demands something unique.
***
# **What is Mercur**
Mercur is a marketplace platform built on top of the **Medusa Framework**.
Medusa provides the underlying commerce engine - products, pricing, carts, orders, fulfillment, and events - while Mercur builds the marketplace domain layer on top of it.
Mercur keeps the commerce Medusa foundation, while giving you a complete engine for multi-vendor logic.
On top of Medusa’s core, Mercur introduces marketplace entities and workflows such as sellers, onboarding, product requests, commissions, reviews, return escalations, order splitting, vendor payouts, and dedicated Admin, Seller, and Storefront APIs.
It comes with three optional interfaces that demonstrate best practices and accelerate development:
* an **Admin Panel** for marketplace operators,
* a **Seller Panel** for vendor teams,
* and a **Storefront** ready for marketplace scenarios.
Mercur is designed to be deeply customizable. Every workflow is built with extension points, every model can be extended using Medusa’s framework, and every route can be overridden when custom behavior is required.
The structure consists of three layers:
### **1. Medusa Core (commerce engine)**
Handles core commerce primitives: products, pricing, carts, orders, customers, payments, inventory, fulfillment, etc.
### **2. Mercur (marketplace engine)**
Adds marketplace domain logic: sellers, commissions, moderation, requests, reviews, payouts, multi-vendor flows, and vendor-facing APIs.
### **3. Customization Layer (your code)**
Your project’s own routes, modules, workflows, links, subscribers, and custom rules - built exactly the same way you customize a standard Medusa project.
You can extend **both Medusa and Mercur** through this customization layer.\
This gives you access to all Medusa APIs and all Mercur APIs as one combined system, while keeping your domain-specific logic separated and easy to maintain.
***
# Plugin-Based Marketplace Architecture
Mercur is delivered as a **collection of Medusa plugins**, each implemented as a separate npm package.
This has several advantages:
* Install only the packages your project needs
* Keep upgrades isolated and predictable
* Clean overrides and customizations
* Full compatibility with Medusa’s architecture
* Your custom code stays separate from Mercur’s internals
Typical setup includes packages like:
* `@mercurjs/framework`
* `@mercurjs/b2c-core`
* `@mercurjs/commission`
* `@mercurjs/requests`
* `@mercurjs/reviews`
* `@mercurjs/algolia`
* `@mercurjs/resend`
* `@mercurjs/payment-stripe-connect`
More packages are being added for advanced or niche marketplace cases, such as subscriptions or B2B procurement flows.
***
# Unified Medusa + Mercur API
Because Mercur is implemented as Medusa plugins, the backend exposes **one unified API** containing:
* All Medusa Admin API endpoints
* All Medusa Store API endpoints
* All Mercur Admin API endpoints
* All Mercur Vendor API endpoints
* All Mercur Store API endpoints
Everything runs inside a single Medusa server instance.
No separate services, no proxying - a single consolidated backend.
***
# Three APIs and Actors
Mercur introduces three API surfaces built on Medusa’s routing system:
### **Admin API**
For platform operators managing the marketplace.
### **Vendor API**
A dedicated API for sellers, giving access only to their own products, orders, reviews, and Marketplace features.
### **Store API**
Customer-facing commerce operations.
Mercur defines three actors:
* **User (Admin)**
* **Seller**
* **Customer**
Medusa’s authentication middleware ensures the correct actor accesses the correct API.
***
# Customizing Mercur
Everything in Mercur is built using **Medusa Framework conventions**, which means you can customize Mercur in the exact same way you customize any Medusa project - modules, workflows, routes, links, subscribers, scheduled jobs, data models, and more.
Learn more about the underlying customization patterns in the\
[**Framework**](../framework) section.
***
# Using the Mercur CLI
The Mercur CLI provides the fastest path to starting a project.\
It automatically:
* scaffolds a full Medusa application
* installs and configures all Mercur packages
* prepares environment variables
* seeds initial data
* and creates a **clean, empty customization layer** for your project code
This means you start with:
* A ready-to-run Medusa + Mercur backend
* Clear separation between Mercur code and your custom code
* A structure designed for maintainability and upgrades
* Full access to Medusa and Mercur APIs out of the box
The CLI essentially gives you the ideal development foundation:\
a fresh customization layer on top of a fully wired marketplace engine.
***
# Why This Architecture Matters
This design gives you:
* **All of Medusa’s flexibility**
* **All of Mercur’s marketplace capabilities**
* Safe and predictable upgrades
* Separation of your custom logic from vendor code
* Long-term maintainability
* No vendor lock-in (MIT-licensed, plugin-based, transparent)
* A single, unified backend instead of a distributed patchwork
It is the best combination for projects that require both marketplace complexity and full control over the backend architecture.
***
# B2C Marketplace Storefront
Source: https://docs.mercurjs.com/components/storefront
# B2C Marketplace Storefront Features
Our B2C Marketplace Storefront implementation is a powerful, customizable storefront designed for B2C marketplaces, built to work perfectly with other MercurJS components.
Check our implementation of Storefront:
Github
## Core Features
### Home Page
* Trending listings section powered by Algolia search
* Shop by category navigation
* Banner section for promotions
* Shop by style section
* Blog section for content marketing
### Product Management
* Advanced product listing with Algolia-powered search
* Product variants support (size, color, etc.)
* Product details page with:
* High-quality image gallery
* Product measurements
* Shipping information
* Seller information
* Product reviews
* Related products
### Shopping Experience
* Wishlist functionality
* Advanced filtering options:
* Price range
* Size
* Color
* Condition
* Seller rating
* Sorting capabilities:
* Price (ascending/descending)
* Newest first
* Popularity
### User Features
* User authentication (login/register)
* User profile management
* Order history
* Address management
* Review system
* Wishlist management
### Seller Features
* Dedicated seller pages
* Seller ratings and reviews
* Seller information display
## Technical Integration with Mercur
The storefront is built as part of the Mercur ecosystem, which provides:
1. **Backend Integration**
* Seamless integration with Mercur's backend services
* MedusaJS as the foundation for e-commerce functionality
* RESTful API endpoints for all marketplace operations
2. **Search and Discovery**
* Algolia integration for powerful search capabilities
* Faceted search for precise product filtering
* Real-time search results
3. **Payment Processing**
* Stripe integration for secure payments
* Support for multiple payment methods
* Secure transaction handling
# Vendor Panel
Source: https://docs.mercurjs.com/components/vendor-panel
## Overview
The Vendor Panel is a powerful platform that enables vendors to manage their online store, products, orders, and customer interactions. This guide provides an overview of the main features available in the panel.
Check our implementation of Vendor Panel:
Github
## Core Features
### Dashboard
* Overview of store performance and key metrics
* Quick access to important information and actions
### Company Profile
* Manage company details
* Update business information
### Orders Management
* View and manage customer orders
* Track order status and fulfillment
* Process and update order information
* Handle customer inquiries related to orders
### Product Management
* Create and manage product listings
* Organize products into collections and categories
* Update product details, pricing, and inventory
* Manage product images and descriptions
### Inventory Control
* Track stock levels across products and locations
* Manage inventory reservations
### Customer Management
* View customer information and order history
* Manage customer groups
* Monitor and respond to customer reviews
### Promotions and Marketing
* Create and manage promotional campaigns
* Set up special offers and discounts
* Manage price lists for different customer segments
### TalkJS based Messaging System
* Communicate with customers
* Handle customer inquiries
* Track conversation history
## Getting Started
To begin using the Vendor Panel:
1. Log in to your vendor account
2. Complete your store profile setup
3. Configure your store settings
4. Start adding products and managing your store
# Marketplace commission
Source: https://docs.mercurjs.com/core-concepts/commission
Marketplace admin can set commission rates in various combinations, which enables to charge different commission for different product types, categories, sellers etc.
# Commission rule reference types
Each commission rule has its reference. A reference entity types are listed below. There are simple (one `reference_id` at once), and combined types, that take into account more than one reference at once. Each combination (`reference` and `reference_id`) are required to be unique.
* `site` - default commission applied for all products in the marketplace, can be overriden by other rules,
* `product_type` - applied to products of specified type,
* `product_category` - applied to products from specified category,
* `seller+product_category` - applied to products from specified category, and sold by specified seller,
* `seller+product_type` - applied to products of specified type, and sold by specified seller,
* `seller` - applied to products sold by specified seller.
# Commission rules priority
Multiple different condition rates can be applied to each of the items in order. That's why some of the rules are more important that others, and during commission calculation process only one is applied. Rule reference types priority is described below.
1. `seller+product_type`
2. `seller+product_category`
3. `seller`
4. `product_type`
5. `product_category`
6. `site`
# Commission rate
Each rule should have applicable rate attached. Commission rate entity describes the details on how the commission should be calculated. Available options:
* `type` - `flat` or `percentage`
* `percentage_rate` - applicable if `type` is `percentage`
* `include_tax` - indicates if commission should be calculated including tax
* `price_set_id` - applicable if `type` is `flat`
* `max_price_set_id` - maximum commission value
* `min_price_set_id` - minimum commission value
# Commission rate types
* `flat` - share for marketplace is a fixed amount,
* `percentage` - share for marketplace is a percent of price.
# Calculation
```mermaid theme={null}
flowchart LR
id1(Take order line_item)
id2(Select applicable rule)
id3{Select associated rate}
id4a(Select appropiate price from price_set, return as a value)
id4b(Calculate % of the line_item price, return as a value)
id5(Clamp commission value between min_price/max_price)
id6(Save commission_line)
id1-->id2
id2-->id3
id3--type == flat-->id4a
id3--type == percentage-->id4b
id4a-->id5
id4b-->id5
id5-->id6
```
# Database models
```mermaid theme={null}
erDiagram
commission_rule ||--o| commission_rate : has
commission_rule {
uuid id
string name
string reference
string reference_id
}
commission_rate {
uuid id
string type
float percentage_rate
bool include_tax
string price_set_id
string max_price_set_id
string min_price_set_id
}
commission_line {
uuid id
string item_line_id
string rule_id
string currency_code
float value
}
```
# Marketplace settings
Source: https://docs.mercurjs.com/core-concepts/marketplace-settings
# Settings reference
Currently there are three settings the marketplace admin can change:
* `require_product_approval` - decide whether seller-added products require admin approval before becoming ready to list,
* `product_request_enabled` - allow sellers to propose new products for inclusion in the catalog,
* `product_import_enabled` - allow sellers to import products via `csv` file.
All settings are `false` by default.
# Example Scenarios
1. \*\* Require Admin Approval ON, Sellers Can Request Products ON\*\*:
* Sellers can list inventory for global products.
* Sellers can request new global/unique products.
* All inventory and product additions require admin approval.
2. **Require Admin Approval OFF**:
* Sellers freely add products without needing admin approval.
* Admin does not need to manage requests or approve listings.
# Verification middleware
The middleware `checkConfigurationRule` is used to restrict route availability according to the setting value, and can be found in `@mercurjs/b2c-core/src/shared/infra/http/middlewares/check-configuration-rule.ts`. It takes two arguments, `rule_type` and `expected_value`.
Advanced users can use it to modify the default Mercur behaviour.
# Notifications
Source: https://docs.mercurjs.com/core-concepts/notifications
# Overview
Mercur uses a notification system that supports multiple channels including email and in-app feeds. The system is built using the Resend service for email notifications and a local notification provider for in-app feeds.
## Notification Channels
* **Email**: Used for transactional emails and important updates
* **Feed**: Used for in-app notifications in the admin panel
* **Seller Feed**: Used for in-app notifications in the seller dashboard
## Email Notifications
### Buyer Notifications
1. **Account Created**
* Template: `buyerAccountCreatedEmailTemplate`
* Trigger: When a new buyer account is created
* Content: Welcome message with buyer's name
2. **New Order**
* Template: `buyerNewOrderEmailTemplate`
* Trigger: When an order is placed
* Content: Order confirmation with order details and items
3. **Order Canceled**
* Template: `buyerCancelOrderEmailTemplate`
* Trigger: When an order is canceled
* Content: Order cancellation confirmation with order details
4. **Order Shipped**
* Template: `buyerOrderShippedEmailTemplate`
* Trigger: When an order is shipped
* Content: Shipping confirmation with tracking details
### Seller Notifications
1. **Account Submission**
* Template: `sellerAccountSubmissionEmailTemplate`
* Trigger: When a seller submits their account for review
* Content: Confirmation of submission receipt with seller's name
2. **Account Approval**
* Template: `sellerAccountApprovedEmailTemplate`
* Trigger: When admin approves a seller's account
* Content: Approval confirmation with seller's name
3. **Account Rejection**
* Template: `sellerAccountRejectedEmailTemplate`
* Trigger: When admin rejects a seller's account
* Content: Rejection notification
4. **Product Approval**
* Template: `sellerProductApprovedEmailTemplate`
* Trigger: When admin accepts a seller's product listing
* Content: Approval notification
5. **Product Rejection**
* Template: `sellerProductRejectedEmailTemplate`
* Trigger: When admin rejects a seller's product listing
* Content: Rejection notification
6. **Team Invitation**
* Template: `sellerTeamInviteEmailTemplate`
* Trigger: When a seller is invited to join a team
* Content:
* Invitation details
* Store name
* Team member name
* Registration link
7. **New Order**
* Template: `sellerNewOrderEmailTemplate`
* Trigger: When a new order is placed
* Content:
* Order ID
* Customer name
* Order details
* Seller name
8. **New Seller Invitation**
* Template: `newSellerInvitation`
* Trigger: When marketplace administrator invites seller to join the platform
* Content: Registration link and platform information
### Admin Notifications
1. **Request Management**
* New Seller Request: `adminSellerRequestCreatedEmailTemplate`
## In-App Notifications
### Admin Feed
* New request notifications
* Other system notifications (Medusa defaults)
### Seller Feed
* **Product Requests** - approved/rejected
* **Product Category Requests** - approved/rejected
* **Product Collection Requests** - approved/rejected
* **Product Type Requests** - approved/rejected
* **Product Tag Requests** - approved/rejected
* **Order Notifications** - new order created
## System Notifications
1. **Password Reset**
* Template: `forgotPasswordEmailTemplate`
* Trigger: When a user requests a password reset
* Content: Password reset link and instructions
# Order Splitting
Source: https://docs.mercurjs.com/core-concepts/order-splitting
Order splitting allows you to split orders and payments between multiple vendors.
# Order Set
`OrderSet` is the entity that represents a group of orders that will be created from a cart.
`OrderSet` uses related orders to calculate totals and other properties for admin and storefront customers.
`SplitOrderPayment` is a partial payment information, only relevant for current seller.
```mermaid theme={null}
graph TD
subgraph MarketplaceModule[Marketplace Module]
OrderSet
end
subgraph CustomerModule[Customer Module]
Customer
end
subgraph OrderModule[Order Module]
Order
end
subgraph SplitOrderPaymentMod[Split Order Payment Module]
SplitOrderPayment
end
OrderSet --> Customer
OrderSet --> Order
Order --> SplitOrderPayment
```
# Payouts
Source: https://docs.mercurjs.com/core-concepts/payouts
Mercur comes with a `Payout` module that allows you to manage payout accounts, onboardings and money transfers.
Mercur by default supports{" "}
Stripe Connect as a payout provider.
```mermaid theme={null}
graph TD
subgraph SellerModule[Seller Module]
Seller
end
subgraph PayoutModule[Payout Module]
PayoutAccount
Payout
Onboarding
end
Seller --> PayoutAccount
PayoutAccount -->|One-to-Many| Payout
PayoutAccount -->|One-to-One| Onboarding
```
# Seller Onboarding Flow
```mermaid theme={null}
graph TD
subgraph SellerActions[Seller Actions]
A[Seller Creates Payout Account] --> B[Seller Creates Onboarding]
B --> C[Seller Completes Onboarding]
end
subgraph PayoutProvider[Payout Provider Actions]
C --> D[Payout Provider Consumes Webhook Event]
D --> E[Payout Provider Validates Onboarding]
E --> F[Payout Provider Authorizes Payout Account]
F --> G[Update Payout Account Status to Active]
end
```
# Payout Flow
Payout events can be consumed by subscribing to the `payout.succeeded` and `payout.failed` events. This allows you to perform actions like sending notification emails to sellers when payouts are processed successfully or fail.
```mermaid theme={null}
graph TD
subgraph PayoutFlow[Payout Flow]
A[Start Midnight Cron Job] --> B[List Orders Without Payout]
B --> C{Validate Seller Details}
C -->|Valid| D[Create Payout Using Payout Provider]
C -->|Invalid| H[End Process]
D -->|Success| G[Emit Success Event]
D -->|Failure| E[Emit Fail Event]
end
```
# Requests
Source: https://docs.mercurjs.com/core-concepts/requests
# Seller requests
Seller requests is a solution for sellers to create entity proposals. Each request needs to be reviewed by marketplace admin before it goes live.
### Request types
* `product` - create a new product. Admin can later set this `product` as a global product, or seller-specific.
* `product_collection` - create a new product collection.
* `product_type` - create a new product type.
* `product_category` - create a new product category.
* `review_remove` - ask to remove the unfair review from customer.
### Workflow
1. Seller creates a request by specifying proposed entity payload. His request is saved in the database with `pending` status.
2. Marketplace administrator has a list of all requests. They can be filtered by their type or status. After reviewing the request payload, he has to make a decision if the request should be approved or rejected.
3. If the administrator rejects the request, the entry changes status to `rejected`. Admin can also provide a note for the request submitter explaining his decision. Seller can be notified via email about the status change.
4. If the administrator approves the request, the entry changes status to `approved`, and appropiate resource will be created using payload provided by the submitter. Seller can be notified via email about the status change.
```mermaid theme={null}
flowchart LR
id1(Seller creates a request)
id2[(Request saved in the DB)]
id3{Admin reviews request}
id4a(Approved)
id4b(Rejected)
id5a(Resource is created)
id5b(Admin note is created)
id6(Notification is sent)
id1-->id2
id2-->id3
id3-->id4a
id3-->id4b
id4a-->id5a
id4b-->id5b
id5a-.->id6
id5b-.->id6;
```
### Example
1. Seller wants to create a request for new `product_category`. He performs following request:
```
POST /api/vendor/requests
{
"request": {
"type": "product_category",
"data": {
"name": "Smartwatches",
"description": "Lorem ipsum dolor sit amet, consectetur adipiscing elit",
"parent_category_id": null
}
}
}
```
A following response is returned by server:
```
201 CREATED
{
"id": "req_xxxx",
"type": "product_category",
"data": {
"name": "Smartwatches",
"description": "Lorem ipsum dolor sit amet, consectetur adipiscing elit",
"parent_category_id": null
},
"submitter_id": "xyz",
"reviewer_id": null,
"reviewer_note": null,
"status": "pending"
}
```
2. Administrator lists pending requests by performing request:
```
GET /api/admin/requests?status=pending
```
3. Administrator wants to accept the request, so performs update request with `accepted` status.
```
POST /api/admin/requests/req_xxxx
{
"status": "accepted",
"reviewer_note": "LGTM"
}
```
4. The product category is created, and admin gets a following response from the server:
```
200 OK
{
"id": "req_xxxx",
"status": "accepted",
"createdResourceType": "product_category",
"createdResource": {
"id": "pcat_yyyy",
...
}
}
```
5. If notifications are set up, Seller can be sent a message about the status update.
# Seller registration request
If the seller wants to sign up for the platform, he has to create a registration request. The flow is very similar to other types of requests.
### Workflow
1. User creates a seller sign up request.
2. Marketplace administrator has a list of all requests. They can be filtered by their type or status. After reviewing the request payload, he has to make a decision if the request should be approved or rejected.
3. If the administrator rejects the sign up request, the entry changes status to `rejected`. Admin can also provide a note for the request submitter explaining his decision. Submitter can be notified via email about the status change.
4. If the administrator approves the sign up request, the entry changes status to `approved`, and seller is created. Submitter can be notified via email about the status change.
# Order return requests
Marketplace customers, who want to return the order, partially or as a whole, can create `OrderReturnRequest`. Inside this object the customer provides array of the tuples `line_item_id` and `quantity`, as well as the `customer_note` (return reason).
### Workflow
1. Customer creates order return request, the status is `pending`
2. Seller reviews the return request. The review can have one of the following outcomes: `refunded`, `withdrawn` or `escalated`.
3. If the seller accepts the return, sets the status to `refunded`, and proceeds with the return and refund.
4. If the request does not meet the return criteria, seller sets the status to `withdrawn`, and provides the reason.
5. If the seller disagrees with the return reason, sets the status to `escalated`.
6. Requests with the `escalated` status are reviewed by the marketplace admin who makes the final decision. The decision can be either `refunded` or `canceled`. Admin can also provide the reason behind his decision.
```mermaid theme={null}
flowchart LR
id1(Customer creates request)
id2[(Request saved in the DB)]
id3{Seller reviews request}
id4a(Refunded)
id4b(Withdrawn)
id4c(Escalated)
id5a(Seller proceeds with the return and refund procedure)
id5b(Seller note is created)
id5c{Admin reviews request}
id6a(Refunded)
id6b(Canceled)
id7a(Seller proceeds with the return and refund procedure)
id7b(Admin note is created)
id1-->id2
id2-->id3
id3-->id4a
id3-->id4b
id3-->id4c
id4a-->id5a
id4b-->id5b
id4c-->id5c
id5c-->id6a
id5c-->id6b
id6a-->id7a
id6b-->id7b
```
# Requests events reference
### Seller Registration Events
* `requests.seller.created` - Triggered when a new seller registration request is created
* `requests.seller.accepted` - Triggered when a seller registration request is approved by admin
* `requests.seller.rejected` - Triggered when a seller registration request is rejected by admin
### Product Category Events
* `requests.product_category.accepted` - Triggered when a product category creation request is approved
* `requests.product_category.rejected` - Triggered when a product category creation request is rejected
### Product Collection Events
* `requests.product_collection.accepted` - Triggered when a product collection creation request is approved
* `requests.product_collection.rejected` - Triggered when a product collection creation request is rejected
### Product Events
* `requests.product.created` - Triggered when a new product creation request is submitted
* `requests.product.accepted` - Triggered when a product creation request is approved
* `requests.product.rejected` - Triggered when a product creation request is rejected
### Product Type Events
* `requests.product_type.accepted` - Triggered when a product type creation request is approved
* `requests.product_type.rejected` - Triggered when a product type creation request is rejected
### Product Tag Events
* `requests.product_tag.accepted` - Triggered when a product tag creation request is approved
* `requests.product_tag.rejected` - Triggered when a product tag creation request is rejected
### Generic Event
* `requests.*.created` - A generic event triggered when any type of request is created
# Product/seller reviews
Source: https://docs.mercurjs.com/core-concepts/reviews
# Product reviews
Each customer is able to create a review about the product. The review object consists of integer rating value (1-5) and optional text comment (up to 300 characters). The average rating can be calculated in order to display on the product page. The customer can also list all the reviews he created.
### Example - Customer creates product review
```
POST /api/store/reviews
{
"order_id": "ord_xxx",
"reference": "product",
"reference_id": "prod_xxx",
"rating": 5,
"customer_note": "Very good product"
}
```
### Example - List reviews
```
GET /api/store/reviews?offset=0&limit=50
```
# Seller reviews
Similarly to product reviews, customer can also create a review on the sellers. This type of review also includes integer rating value and comment.
Seller can respond to the review, or escalate to marketplace administrator, if he thinks that the review is against the rules or unfair.
### Example - Customer creates seller review
```
POST /api/store/reviews
{
"order_id": "ord_xxx",
"reference": "seller",
"reference_id": "sel_xxx",
"rating": 2,
"customer_note": "Not very good seller"
}
```
### Example - Seller responds to the review
```
POST /api/vendor/sellers/me/reviews/rev_xxx
{
"seller_note": "We are very sorry about your inconvenience"
}
```
### Escalating reviews
Seller can request to delete the review using `requests`. After submitting the request the marketplace administrator makes the decision to delete the review or not.
```
POST /api/vendor/requests
{
"request": {
"type": "review_remove",
"data": {
"review_id": "rev_xxx",
"reason": "I consider this review unfair"
}
}
}
```
```mermaid theme={null}
flowchart LR
id1(Seller creates a request)
id2[(Request saved in the DB)]
id3{Admin reviews request}
id4a(Approved)
id4b(Rejected)
id5a(Review is deleted)
id5b(Admin note is created)
id6(Notification is sent)
id1-->id2
id2-->id3
id3-->id4a
id3-->id4b
id4a-->id5a
id4b-->id5b
id5a-.->id6
id5b-.->id6;
```
# Seller
Source: https://docs.mercurjs.com/core-concepts/seller
Mercur comes with a `Seller` module that allows you to manage seller products, team members, orders, stock locations and shipping options.
# Entities
* `Seller`
* `Member`
* `Invite`
* `Onboarding`
# Seller
In Mercur, the `Seller` is the entity that represents member group in the marketplace.
You can think of a seller as a group of members that share the same products, orders etc.
Seller can be in state `ACTIVE`, which allows him to use the platform, or in state `SUSPENDED`, which prevents him from using the platform, except order and fulfillment management.
By default, a seller is linked to Medusa's default entities such as:
* `Product`
* `Order`
* `Return`
* `Stock Location`
* `Service Zone`
* `Shipping Option`
* `Shipping Profile`
* `Fulfillment Set`
* `Promotion`
* `Campaign`
* `Price List`
* `Customer Group`
* `Inventory Item`
```mermaid theme={null}
graph LR
subgraph SellerModule[Seller Module]
Seller
end
subgraph InventoryModule[Inventory Module]
InventoryItem
end
subgraph CustomerModule[Customer Module]
CustomerGroup
end
subgraph PricingModule[Pricing Module]
PriceList
end
subgraph PromotionModule[Promotion Module]
Promotion
Campaign
end
subgraph ProductModule[Product Module]
Product
end
subgraph OrderModule[Order Module]
Return
Order
end
subgraph FulfillmentModule[Fulfillment Module]
ServiceZone
ShippingOption
ShippingProfile
FulfillmentSet
end
subgraph StockLocationModule[Stock Location Module]
StockLocation
end
Seller --> Product
Seller --> Order
Seller --> Return
Seller --> ServiceZone
Seller --> ShippingOption
Seller --> ShippingProfile
Seller --> StockLocation
Seller --> FulfillmentSet
Seller --> Promotion
Seller --> Campaign
Seller --> PriceList
Seller --> CustomerGroup
Seller --> InventoryItem
```
# Member
`Member` is the entity that represents a user in the marketplace that can manage seller products, orders, service zones etc.
```mermaid theme={null}
graph TD
subgraph SellerModule[Seller Module]
Seller
Member
end
Seller -->|One-to-Many| Member
```
# Member Invite
`Member Invite` is the entity that represents a pending member invitation to a seller in the marketplace.
```mermaid theme={null}
graph TD
subgraph SellerModule[Seller Module]
Seller
Invite
end
Seller -->|One-to-Many| Invite
```
# Onboarding
`Onboarding` is the entity that holds the information about current state of the onboarding of a seller.
```mermaid theme={null}
graph TD
subgraph SellerModule[Seller Module]
Seller
Onboarding
end
Seller -->|One-to-One| Onboarding
```
# Get Started
Source: https://docs.mercurjs.com/get-started
Learn how to install and run Mercur using the CLI or manual setup.
There are two ways of installing Mercur: the CLI script or manual installation.
# **Install with the Mercur CLI**
The Mercur CLI provides a guided setup and configures all required components automatically.
**Step 1**: Install `mercur-cli` using NPM:
```bash theme={null}
npm i -g mercur-cli
```
**Step 2**: Run CLI installation:
```bash theme={null}
mercur-cli install
```
or
```bash theme={null}
npx mercur-cli install
```
The script will guide you through the installation process. You will have to enter project name and database connection parameters. Also, you'll be asked if you want to install Mercur Storefront and Vendor panel.
**Step 3**: After installation is done, move to the project catalog and start the servers:
```bash theme={null}
cd
mercur-cli dev
```
The script automatically configures environment variables, and runs seed. The default credentials for created users are:
**Vendor:**
```
email: seller@mercurjs.com
password: secret
```
**Admin:**
```
email: admin@mercurjs.com
password: admin
```
# **Manual installation**
Manual installation gives you full control over the Medusa and Mercur setup.
**Step 1**: Create empty Medusa application using tool:
```bash theme={null}
npx create-medusa-app@latest my-medusa-store
```
**Step 2**: Install following dependencies:
```
@mercurjs/framework
@mercurjs/b2c-core
@mercurjs/commission
@mercurjs/reviews
@mercurjs/requests
@mercurjs/algolia
@mercurjs/resend
@mercurjs/payment-stripe-connect
```
First two packages: `@mercurjs/framework` and `@mercurjs/b2c-core` are required, the rest of them are optional. We strongly recommend installing them all to avoid problems and missing features.
**Step 3**: Configure plugins in `medusa-config.ts`
```
import { defineConfig, loadEnv } from '@medusajs/framework/utils'
loadEnv(process.env.NODE_ENV || 'development', process.cwd())
module.exports = defineConfig({
projectConfig: {
databaseUrl: process.env.DATABASE_URL,
http: {
storeCors: process.env.STORE_CORS!,
adminCors: process.env.ADMIN_CORS!,
// @ts-expect-error: vendorCors is not a valid config
vendorCors: process.env.VENDOR_CORS!,
authCors: process.env.AUTH_CORS!,
jwtSecret: process.env.JWT_SECRET || 'supersecret',
cookieSecret: process.env.COOKIE_SECRET || 'supersecret'
}
},
plugins: [
{
resolve: '@mercurjs/b2c-core',
options: {}
},
{
resolve: '@mercurjs/commission',
options: {}
},
{
resolve: '@mercurjs/algolia',
options: {
apiKey: process.env.ALGOLIA_API_KEY,
appId: process.env.ALGOLIA_APP_ID
}
},
{
resolve: '@mercurjs/reviews',
options: {}
},
{
resolve: '@mercurjs/requests',
options: {}
},
{
resolve: '@mercurjs/resend',
options: {}
}
],
modules: [
{
resolve: '@medusajs/medusa/payment',
options: {
providers: [
{
resolve:
'@mercurjs/payment-stripe-connect/providers/stripe-connect',
id: 'stripe-connect',
options: {
apiKey: process.env.STRIPE_SECRET_API_KEY
}
}
]
}
},
{
resolve: '@medusajs/medusa/notification',
options: {
providers: [
{
resolve: '@mercurjs/resend/providers/resend',
id: 'resend',
options: {
channels: ['email'],
api_key: process.env.RESEND_API_KEY,
from: process.env.RESEND_FROM_EMAIL
}
},
{
resolve: '@medusajs/medusa/notification-local',
id: 'local',
options: {
channels: ['feed', 'seller_feed']
}
}
]
}
}
]
})
```
**Step 4**: Configure database credentials in the `.env` file
```
# Replace user, password, address and port parameters with your values
DATABASE_URL=postgres://[user]:[password]@[address]:[port]/$DB_NAME
# For example:
DATABASE_URL=postgres://postgres:postgres@localhost:5432/$DB_NAME
```
Do not delete `$DB_NAME` from the connection string. You'll be prompted to choose database name during the next step.
**Step 5**: Configure rest of your environment variables
```
STRIPE_SECRET_API_KEY=
STRIPE_CONNECTED_ACCOUNTS_WEBHOOK_SECRET=
RESEND_API_KEY=
RESEND_FROM_EMAIL=
ALGOLIA_APP_ID=
ALGOLIA_API_KEY=
VITE_TALK_JS_APP_ID=
VITE_TALK_JS_SECRET_API_KEY=
STORE_CORS=
ADMIN_CORS=
VENDOR_CORS=
VENDOR_PANEL_URL=
STOREFRONT_URL=
BACKEND_URL=
```
**Step 6**: Setup database and run migrations
```bash theme={null}
yarn medusa db:create && yarn medusa db:migrate
```
**Step 7**: Create admin user
```bash theme={null}
npx medusa user --email --password
```
**Step 8**: Run application
```bash theme={null}
yarn dev
```
# **You're ready to build**
You now have a working Mercur marketplace environment.
# LLM
Source: https://docs.mercurjs.com/help/llm
How Mercur documentation is optimized for LLMs.
# LLM
Mercur’s documentation is optimized to be easily indexed and understood by Large Language Models (LLMs).\
\
This helps AI tools answer technical questions about Mercur more accurately by giving them a clear map of the documentation structure.
LLM indexing works similarly to how a sitemap helps search engines: AI tools read a structured file describing your docs and use it to locate relevant content quickly.
***
## llms.txt
The `llms.txt` file is an industry standard (see [llmstxt.org](https://llmstxt.org)) designed to help LLMs:
* understand the structure of your documentation
* discover all available pages
* resolve links and relationships between topics
* retrieve page descriptions
* provide more precise answers to developers
Your documentation site automatically includes an `llms.txt` file at the root of the project.\
It stays up to date with your docs structure and requires no maintenance.
To view it, append `/llms.txt` to your documentation URL:
[https://docs.mercurjs.com/llms.txt](https://docs.mercurjs.com/llms.txt)
***
## llms-full.txt
The `llms-full.txt` file contains the *entire contents* of your documentation in a single file.\
LLMs can use it to analyze the full context of your docs when providing answers, explanations, or troubleshooting steps.
You can view it at:
[https://docs.mercurjs.com/llms-full.txt](https://docs.mercurjs.com/llms-full.txt)
# MCP
Source: https://docs.mercurjs.com/help/mcp
Use MCP tools to query Mercur documentation directly from your AI environment.
# MCP
Mercur exposes an MCP server that allows AI tools to **query Mercur documentation directly**.\
This ensures assistants can provide accurate, context-aware answers based on the actual docs instead of relying on assumptions.
***
# Available Tool
## **SearchMercurJsDocumentation**
This MCP tool enables AI assistants to search across all Mercur documentation.\
It returns:
* relevant excerpts
* page titles
* direct documentation links
Useful when you need to locate API references, understand how a module works, or retrieve examples quickly during development.
***
# MCP Server URL
Your MCP server is available at:
[https://docs.mercurjs.com/mcp](https://docs.mercurjs.com/mcp)
You can connect this URL to any MCP-compatible environment.
***
# Connecting the MCP Server
Use the tabs below to connect the Mercur MCP server in different environments:
1. Press Cmd
* Shift
* P
2. Search for **Open MCP settings**
3. Select **Add custom MCP**
Add the following to your `mcp.json`:
```json theme={null}
{
"mcpServers": {
"mercur": {
"url": "https://docs.mercurjs.com/mcp"
}
}
}
```
Restart Cursor and ask:\
**“What MCP tools are available?”**
See Cursor docs for more: [https://docs.cursor.com/en/context/mcp](https://docs.cursor.com/en/context/mcp)
Create a file at:\
`.vscode/mcp.json`
```json theme={null}
{
"servers": {
"mercur": {
"type": "http",
"url": "https://docs.mercurjs.com/mcp"
}
}
}
```
Open the Copilot Chat panel and ask:\
**“List available MCP servers.”**
See VS Code docs for more: [https://code.visualstudio.com/docs/copilot/chat/mcp-servers](https://code.visualstudio.com/docs/copilot/chat/mcp-servers)
1. Go to Claude → Settings → **Connectors**
2. Select **Add custom connector**
3. Enter:
* **Name**: Mercur
* **URL**: `https://docs.mercurjs.com/mcp`
4. Save
In chat, click the **attachments (+)** button and select your Mercur MCP connector.
See Claude connector docs:\
[https://modelcontextprotocol.io/docs/tutorials/use-remote-mcp-server](https://modelcontextprotocol.io/docs/tutorials/use-remote-mcp-server)
```bash theme={null}
claude mcp add --transport http mercur https://docs.mercurjs.com/mcp
```
```bash theme={null}
claude mcp list
```
Now Claude Code can query Mercur documentation directly.
Docs: [https://docs.anthropic.com/en/docs/claude-code/mcp](https://docs.anthropic.com/en/docs/claude-code/mcp)
***
# Support
Source: https://docs.mercurjs.com/help/support
How to get help, ask questions, or report issues related to Mercur.
# Support
If you need help with Mercur, have questions, or want to report a bug, you can reach us through any of the channels below.\
\
We do our best to respond as quickly as possible.
***
## GitHub Issues
Use GitHub Issues to report bugs, unexpected behavior, or missing functionality.
👉 [https://github.com/mercurjs/mercur/issues](https://github.com/mercurjs/mercur/issues)
We actively monitor new issues and aim to respond and update them as fast as we can.
***
## GitHub Discussions
If you have questions, need guidance, or want to start a broader conversation about Mercur:
👉 [https://github.com/mercurjs/mercur/discussions](https://github.com/mercurjs/mercur/discussions)
This is the best place for:
* implementation questions
* architectural discussions
* suggestions
* general help from the community
***
## Direct Contact
If you prefer to reach out privately, you can contact us directly.
* **Email:** [hello@mercurjs.com](mailto:hello@mercurjs.com)
* **Contact form:** [https://www.mercurjs.com/contact](https://www.mercurjs.com/contact)
We’ll get back to you as soon as possible.
***
# Algolia search engine
Source: https://docs.mercurjs.com/integrations/algolia
### Introduction
Mercur uses Algolia as a search engine to boost product search accuracy and serving trending/recommended items. The integration features auto product indexing, whenever any of the product attributes was changed or a new product review is created.
### Setup
In order to use Algolia, an account is needed. After registration, enter `ALGOLIA_APP_ID` and `ALGOLIA_API_KEY` obtained from the Algolia dashboard into the `.env` file.
### Configuration
See the full settings reference here!
### Events
In order to persist consistency between database and Algolia, every time any change in indexed entities happens an event is emitted, for example:
* `algolia.products.changed`
* `algolia.products.deleted`
We use also intermediate events, that also should trigger synchronization with Algolia (of related products):
* `algolia.intermediate.fulfillment_set.changed`
* `algolia.intermediate.service_zone.changed`
* `algolia.intermediate.shipping_option.changed`
* `algolia.intermediate.stock_location.changed`
* `algolia.intermediate.inventory_item.changed`
Each event is connected to the subscriber, which is responsible for refetching the entity and updating it in Algolia.
# Resend email service
Source: https://docs.mercurjs.com/integrations/resend
### Introduction
Mercur uses Resend as an email service provider to handle notifications. The integration enables sending emails for various events such as order confirmations, password resets, and seller notifications.
### Setup
To use Resend with Mercur, you'll need to:
1. Create a Resend account at resend.com
2. Obtain your API key from the Resend dashboard
3. Add the following environment variables to your `.env` file:
```
RESEND_API_KEY=your_api_key_here
RESEND_FROM_EMAIL=sender_email_address
```
# Stripe Payments
Source: https://docs.mercurjs.com/integrations/stripe
### Introduction
Mercur uses Stripe as the default payment and payout provider. The integration enables secure payment processing, automatic payouts to sellers, and commission handling for marketplace transactions.
### Setup
To use Stripe with Mercur, you'll need to:
1. Create a Stripe account at stripe.com
2. Enable Stripe Connect in your Stripe Dashboard
3. Obtain your API keys from the Stripe Dashboard
4. Add the following environment variables to your `.env` file:
```
STRIPE_SECRET_KEY=your_secret_key_here
STRIPE_WEBHOOK_SECRET=your_webhook_secret_here
```
### Stripe Connect Configuration
**Enable Stripe Connect**:
* Go to your Stripe Dashboard
* Navigate to Settings > Connect settings
* Enable Connect and configure your account settings
* Set up your Connect branding and terms of service
### Seller Onboarding
Sellers need to complete the Stripe Connect onboarding process to receive payouts:
1. **Create Payout Account**:
* Sellers create a payout account through the vendor panel
* System generates a Stripe Connect onboarding link
* Sellers complete the onboarding process
2. **Onboarding Flow**:
```mermaid theme={null}
graph TD
A[Seller Creates Account] --> B[Stripe Onboarding]
B --> C[Provide Business Details]
C --> D[Add Bank Account]
D --> E[Complete Verification]
E --> F[Account Active]
```
### Commission Setup
Configure commission rates in the admin panel. Marketplace commission is deducted from payout amount.
1. **Commission Types**:
* Percentage-based: Set a percentage of the order total
* Flat rate: Set a fixed amount per order
2. **Commission Rules**:
* Set different rates for different product types
* Configure rates per seller
* Set category-specific rates
* Define global default rates
### Testing
**Test Cards**:
```
Success: 4242 4242 4242 4242
Decline: 4000 0000 0000 0002
```
### Additional Resources
* [Stripe Documentation](https://stripe.com/docs)
* [Stripe Connect Guide](https://stripe.com/docs/connect)
* [Stripe API Reference](https://stripe.com/docs/api)
# Introduction
Source: https://docs.mercurjs.com/introduction
Mercur is an open-source marketplace engine designed to support diverse and highly customized marketplace types.
Building a marketplace shouldn’t mean choosing between expensive custom development and rigid SaaS platforms with transaction fees. After building multiple marketplaces from scratch, we saw the same pattern repeat itself: traditional e-commerce tools work well until a project requires multi-actor workflows, vendor-specific rules, onboarding steps, commissions, payouts, or any form of marketplace logic that extends beyond a single merchant.
Marketplace systems are different from stores - they need their own logic.
**That’s why we created Mercur.**
Mercur is an open-core **marketplace engine** designed for developers who need both the freedom of custom development and the stability of a structured, well-designed foundation. Instead of forcing your marketplace into predefined templates or rigid “marketplace modes,” Mercur provides a clean domain layer built specifically for multi-vendor systems.
Whether you’re building a B2C marketplace, a B2B marketplace, a rental or service marketplace, a niche vertical marketplace, or an entirely new hybrid model - Mercur gives you the building blocks to develop faster with marketplace logic ready.
It focuses on the crucial marketplaces logic: sellers, onboarding, moderation flows, commissions, multi-vendor cart and checkout, payouts, splitting, and all cross-actor operations. And because it’s built with customization in mind, you can adapt or replace any part of it when your business model demands something unique.
***
# **What is Mercur**
Mercur is a marketplace platform built on top of the **Medusa Framework**.
Medusa provides the underlying commerce engine - products, pricing, carts, orders, fulfillment, and events - while Mercur builds the marketplace domain layer on top of it.
Mercur keeps the commerce Medusa foundation, while giving you a complete engine for multi-vendor logic.
On top of Medusa’s core, Mercur introduces marketplace entities and workflows such as sellers, onboarding, product requests, commissions, reviews, return escalations, order splitting, vendor payouts, and dedicated Admin, Seller, and Storefront APIs.
It comes with three optional interfaces that demonstrate best practices and accelerate development:
* an **Admin Panel** for marketplace operators,
* a **Seller Panel** for vendor teams,
* and a **Storefront** ready for marketplace scenarios.
Mercur is designed to be deeply customizable. Every workflow is built with extension points, every model can be extended using Medusa’s framework, and every route can be overridden when custom behavior is required.
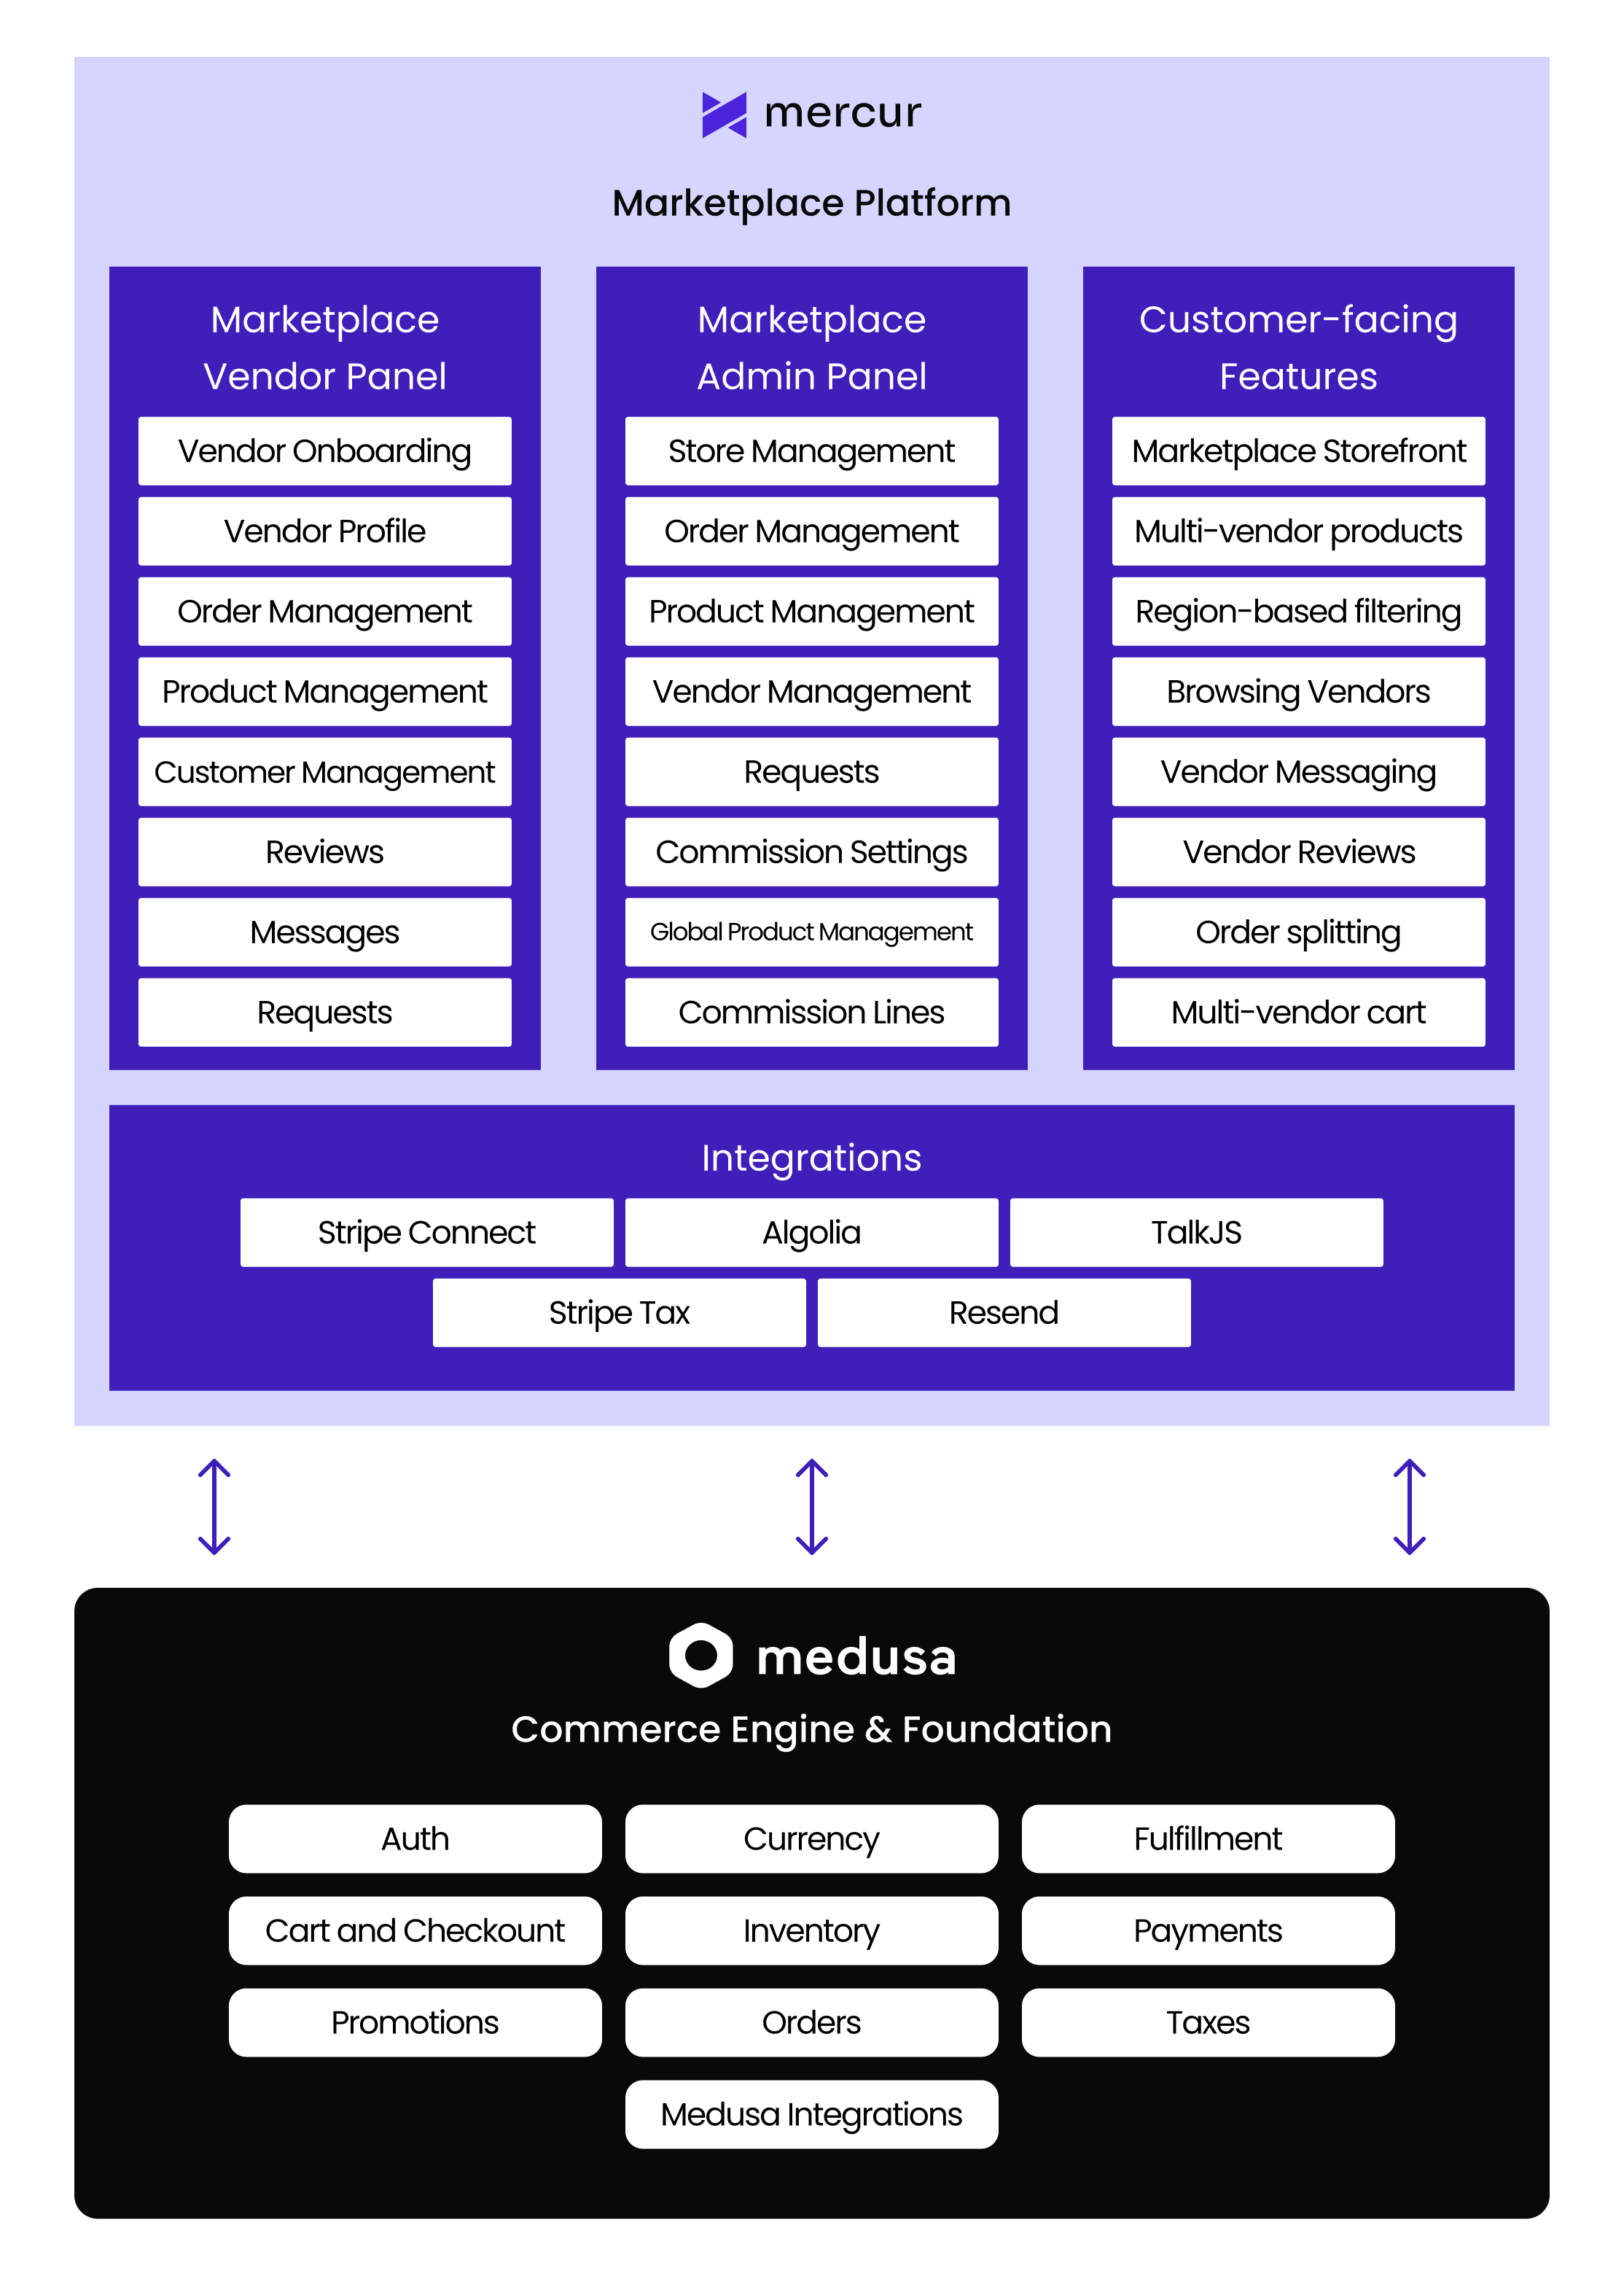 ***
# **Why Mercur**
## **Built on a modern stack**
Mercur runs on a modern TypeScript backend powered by Medusa framework, giving you a proven foundation for products, carts, orders, promotions, and payments.
This frees you to focus entirely on the marketplace layer instead of re-implementing basic commerce logic.
Mercur also integrates cleanly with widely-used technologies like Resend (notifications), Algolia (search), and Stripe Connect (payouts), giving you production-ready components out of the box while keeping everything replaceable when needed.
## **Developer-first philosophy**
Mercur follows Medusa’s conventions: TypeScript throughout, workflow engine, events, modular plugins, and a clearly defined customization model. Developers can extend logic without patching core code or working around hidden internals. **The platform stays predictable even as complexity grows.**
## **Full extensibility and ownership**
Mercur is fully open-core and MIT-licensed.
**There are no transaction fees, no commercial lock-in, and no constraints that dictate how your marketplace must behave.** You own the entire codebase, can host it anywhere, and can extend or replace any component - workflows, models, APIs, or integrations.
It’s a platform you can use as a foundation without surrendering autonomy over your product.
# Medusa Cloud deployment
Source: https://docs.mercurjs.com/medusa-cloud
Install and deploy Mercur on Medusa Cloud
### Introduction
Medusa Cloud is a dedicated hosting service for Medusa-based applications. It automatically detects changes on your repository, pulls and builds the code, sets up a database, Redis and file storage.
In order to start using Medusa Cloud, head to the Medusa Cloud signup page. After registration is complete and your account is active, you should authorize the Medusa Cloud Github app in your organization/account.
Medusa Cloud hosts only backend and admin panel.
### Setup
1. On the main dashboard view, click "Create project" button.
2. Thanks to the Github integration, Medusa Cloud can access your codebase and automatically pull the code. Choose your Mercur repository from the list and click "Continue".
***
# **Why Mercur**
## **Built on a modern stack**
Mercur runs on a modern TypeScript backend powered by Medusa framework, giving you a proven foundation for products, carts, orders, promotions, and payments.
This frees you to focus entirely on the marketplace layer instead of re-implementing basic commerce logic.
Mercur also integrates cleanly with widely-used technologies like Resend (notifications), Algolia (search), and Stripe Connect (payouts), giving you production-ready components out of the box while keeping everything replaceable when needed.
## **Developer-first philosophy**
Mercur follows Medusa’s conventions: TypeScript throughout, workflow engine, events, modular plugins, and a clearly defined customization model. Developers can extend logic without patching core code or working around hidden internals. **The platform stays predictable even as complexity grows.**
## **Full extensibility and ownership**
Mercur is fully open-core and MIT-licensed.
**There are no transaction fees, no commercial lock-in, and no constraints that dictate how your marketplace must behave.** You own the entire codebase, can host it anywhere, and can extend or replace any component - workflows, models, APIs, or integrations.
It’s a platform you can use as a foundation without surrendering autonomy over your product.
# Medusa Cloud deployment
Source: https://docs.mercurjs.com/medusa-cloud
Install and deploy Mercur on Medusa Cloud
### Introduction
Medusa Cloud is a dedicated hosting service for Medusa-based applications. It automatically detects changes on your repository, pulls and builds the code, sets up a database, Redis and file storage.
In order to start using Medusa Cloud, head to the Medusa Cloud signup page. After registration is complete and your account is active, you should authorize the Medusa Cloud Github app in your organization/account.
Medusa Cloud hosts only backend and admin panel.
### Setup
1. On the main dashboard view, click "Create project" button.
2. Thanks to the Github integration, Medusa Cloud can access your codebase and automatically pull the code. Choose your Mercur repository from the list and click "Continue".
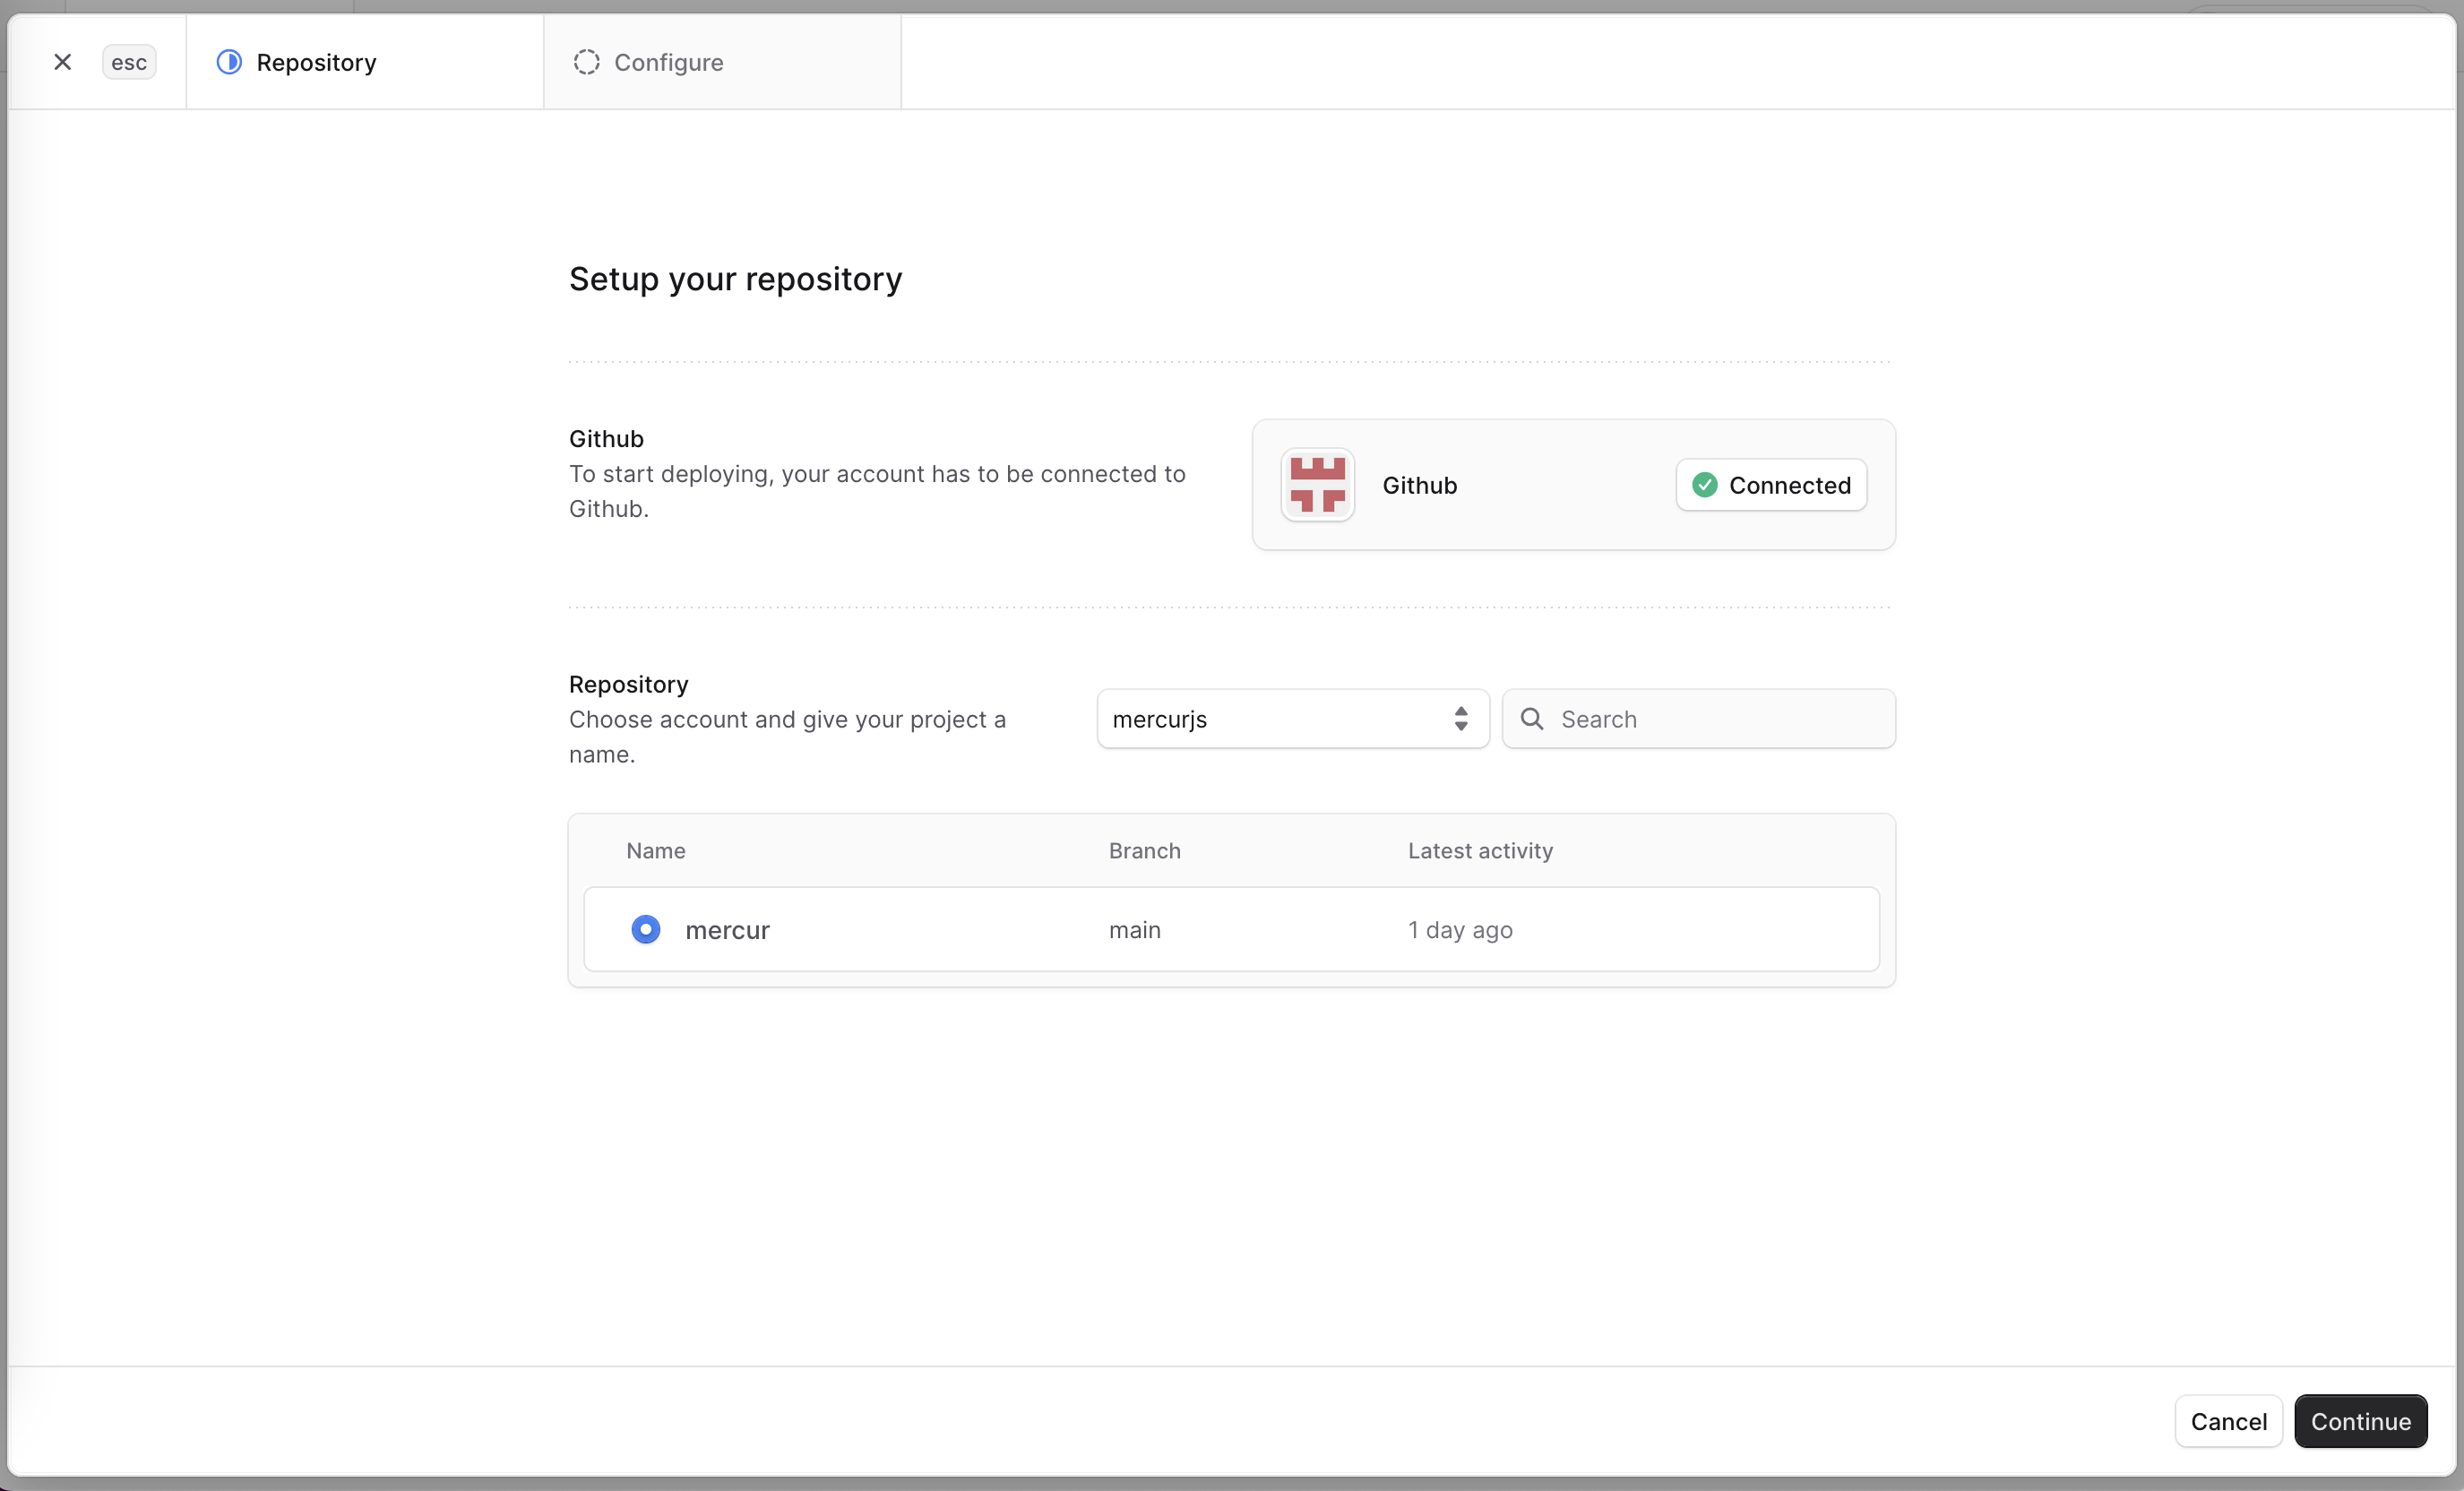 3. Under project details, choose a name for your project. You can also pick your custom subdomain.
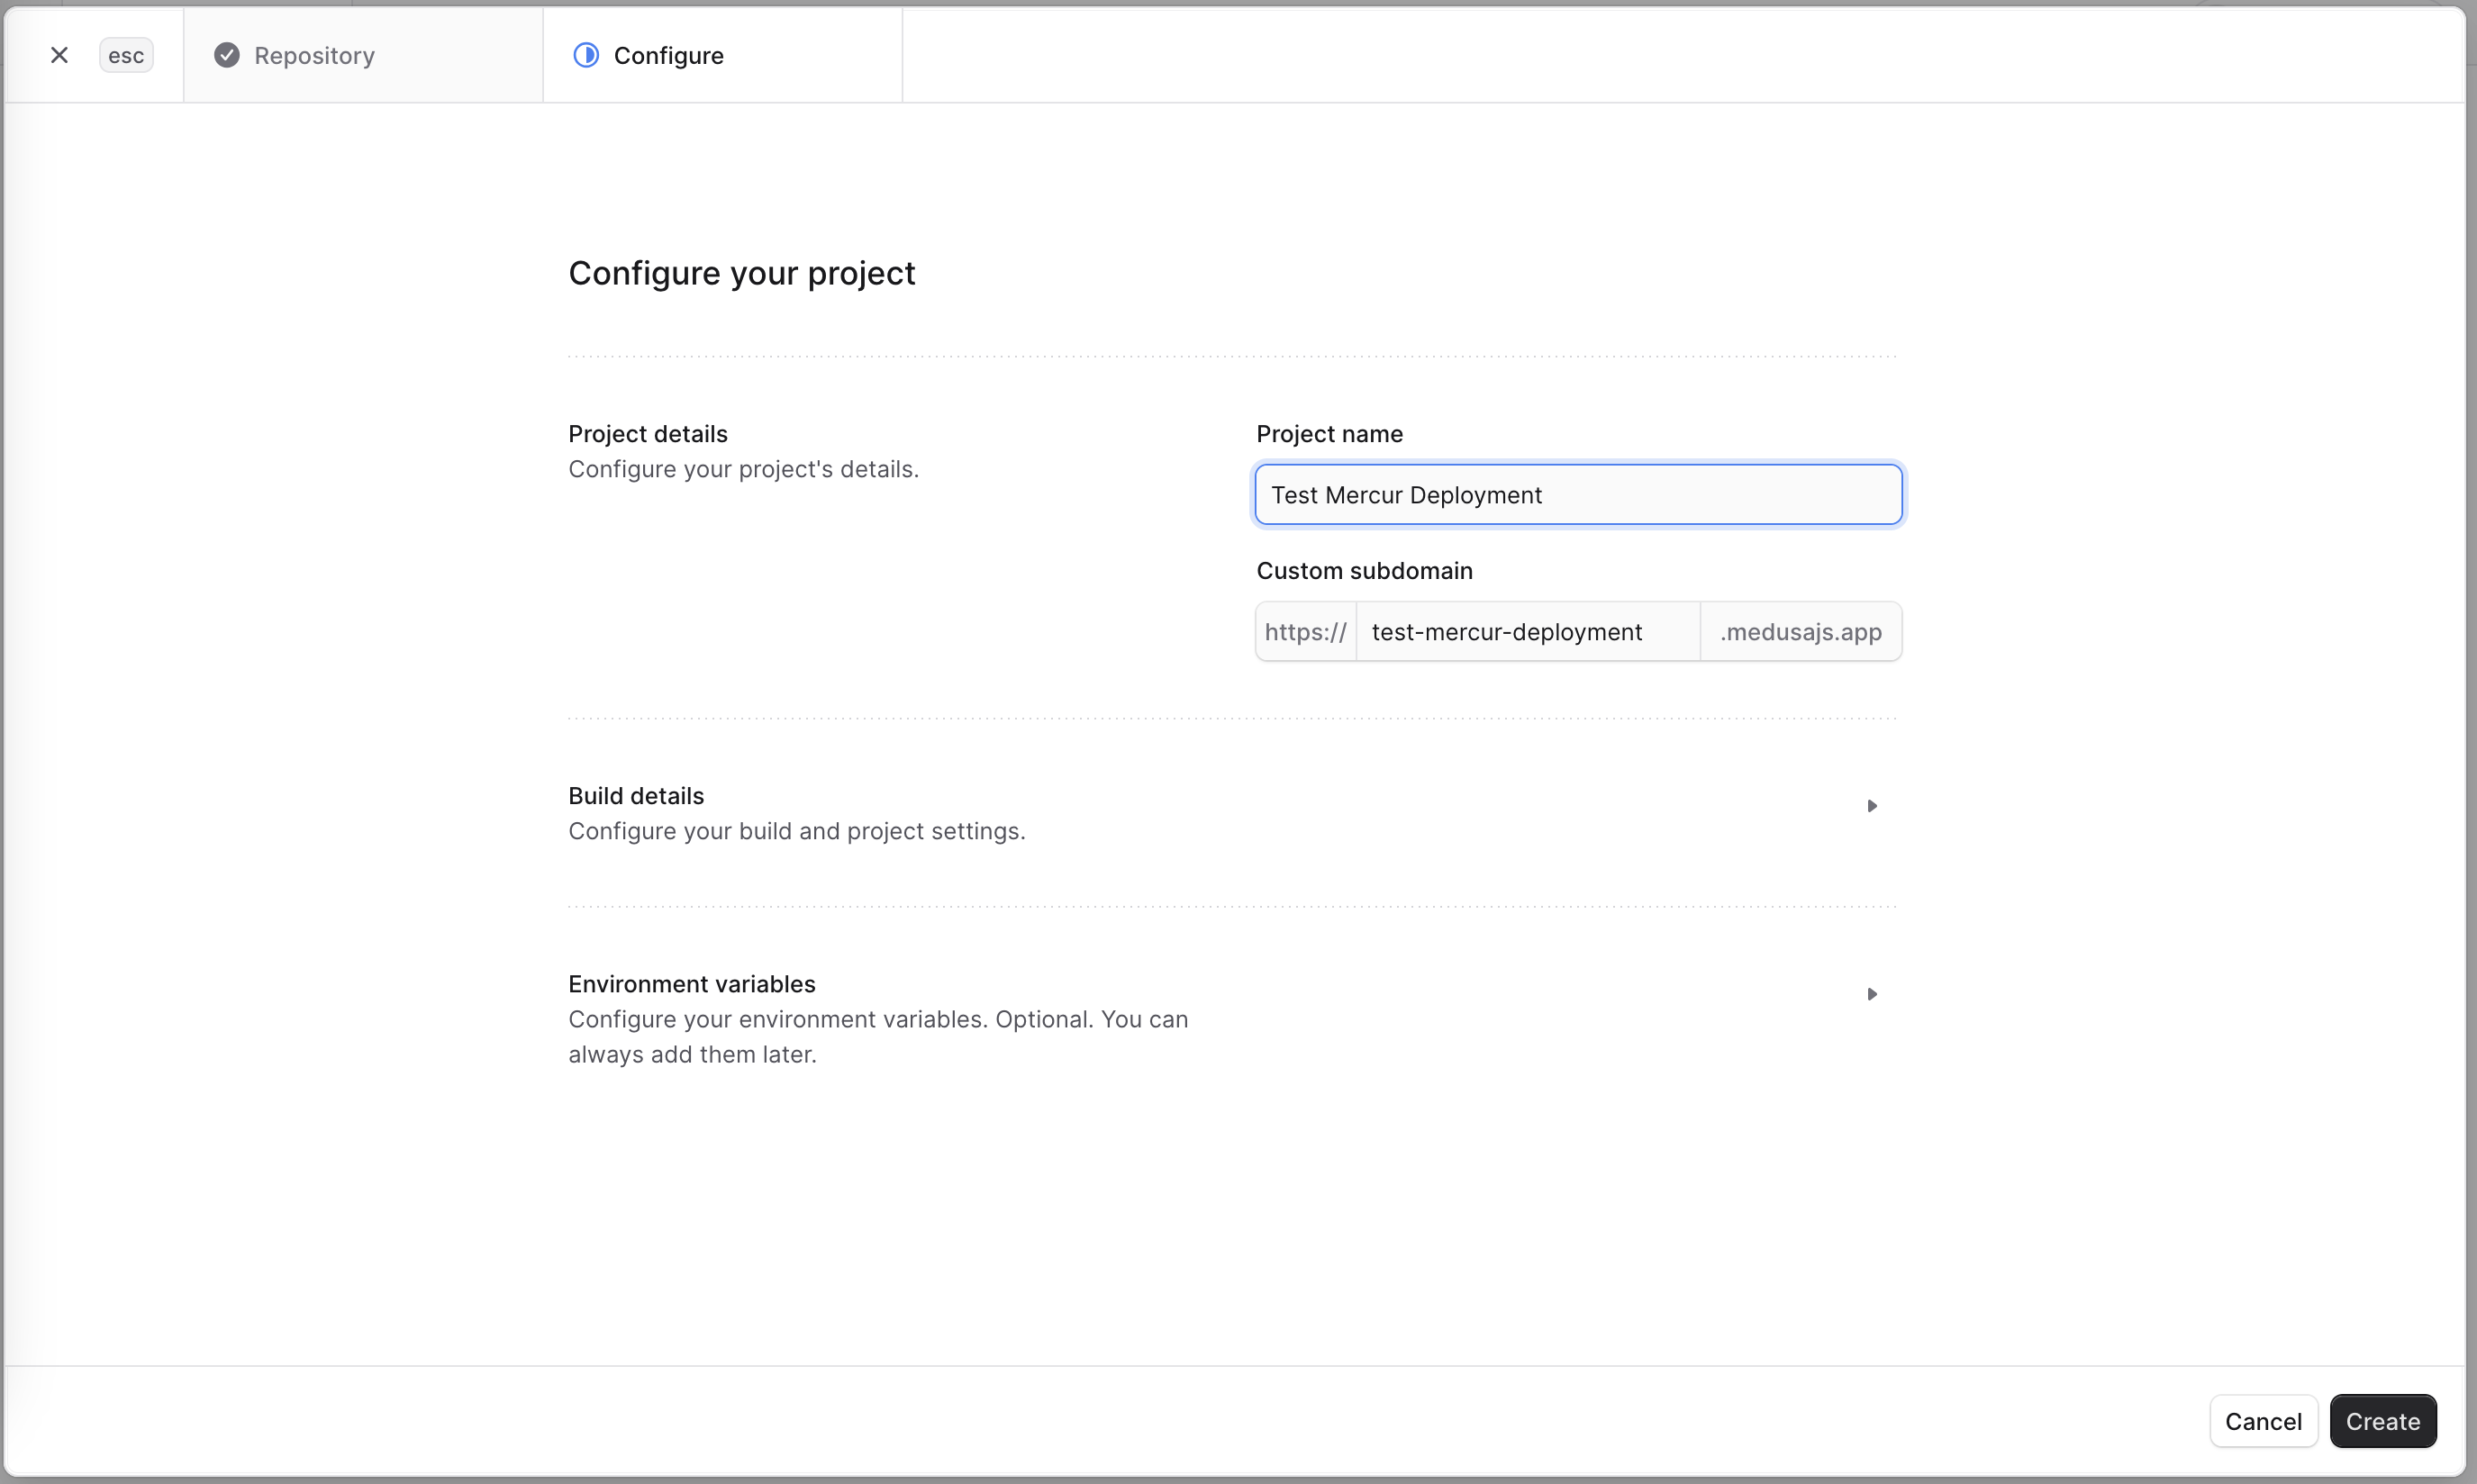 4. Head to the "Build details" section. First, under "Project root directory" enter "/apps/backend". Then, choose the first admin user credentials.
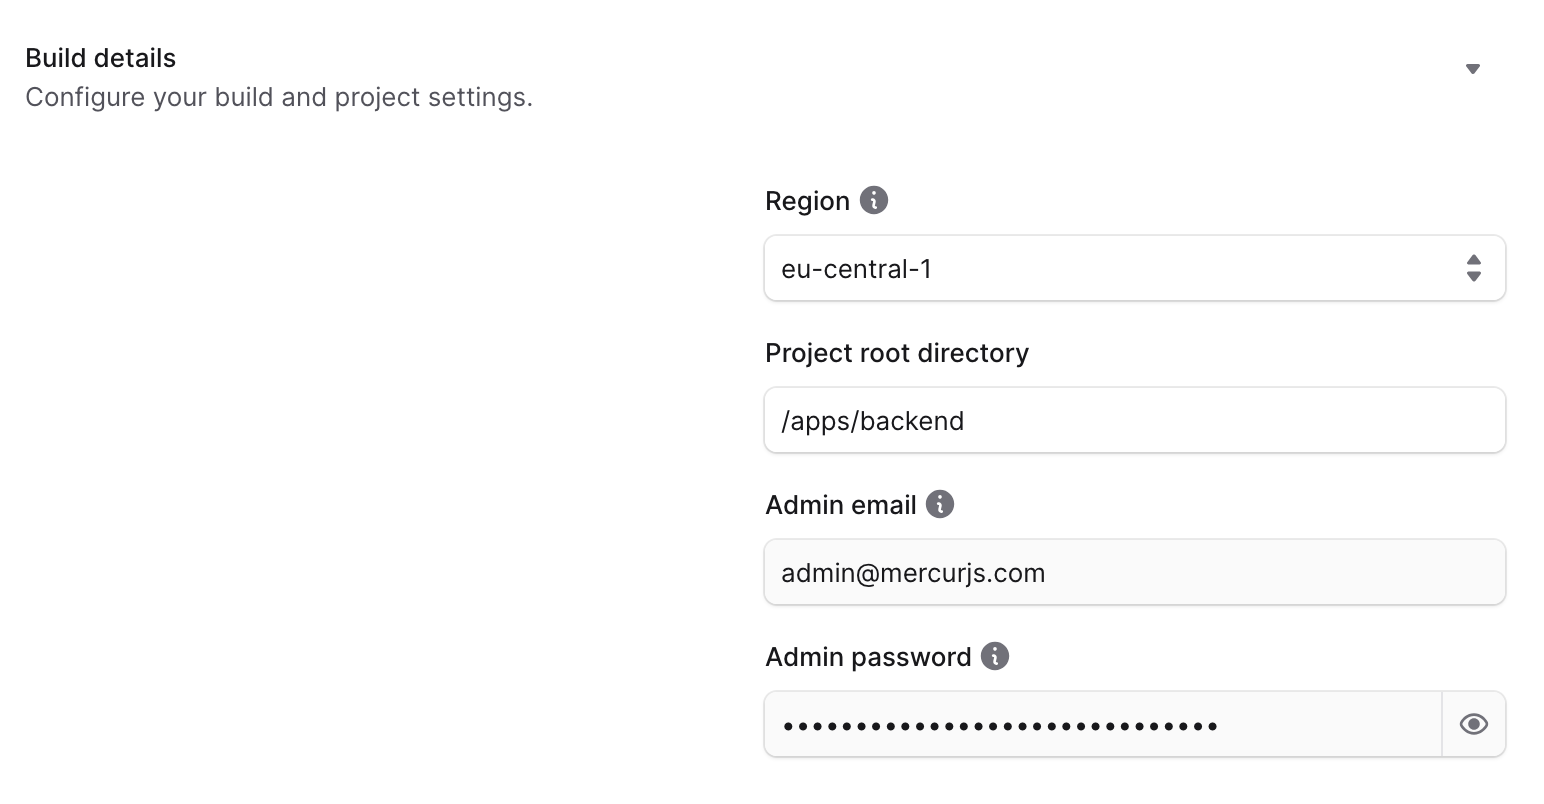 5. Last configuration step is about environment variables. Remember, Medusa Cloud automatically sets up a database, Redis and file storage, so you don't have to worry about them.
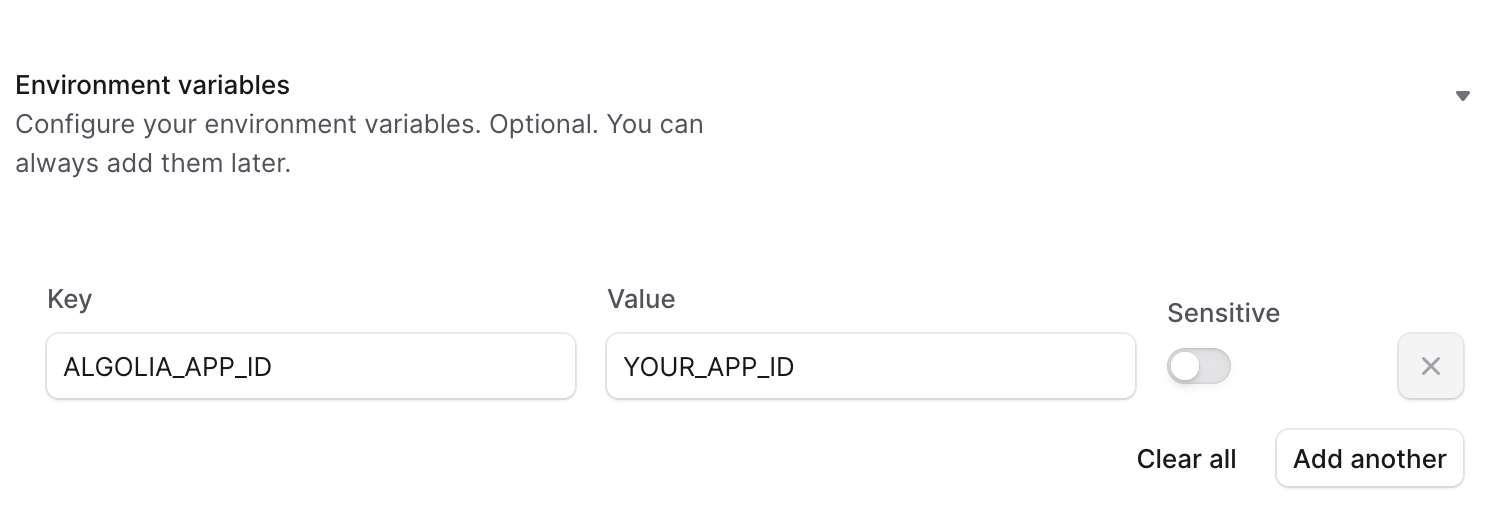 Only the following variables should be set:
```
STRIPE_SECRET_API_KEY=
STRIPE_CONNECTED_ACCOUNTS_WEBHOOK_SECRET=
RESEND_API_KEY=
RESEND_FROM_EMAIL=
ALGOLIA_APP_ID=
ALGOLIA_API_KEY=
VITE_TALK_JS_APP_ID=
VITE_TALK_JS_SECRET_API_KEY=
STORE_CORS=
ADMIN_CORS=
VENDOR_CORS=
VENDOR_PANEL_URL=
STOREFRONT_URL=
BACKEND_URL=
```
6. After completing those steps, click "Create". The build and deploy process will start, and it can take a few minutes to complete.
Later, you can change those variables in environment settings, as well as change the deployment branch. Medusa Cloud will automatically pull and rebuild your environment if a new commit is pushed on this branch.
Only the following variables should be set:
```
STRIPE_SECRET_API_KEY=
STRIPE_CONNECTED_ACCOUNTS_WEBHOOK_SECRET=
RESEND_API_KEY=
RESEND_FROM_EMAIL=
ALGOLIA_APP_ID=
ALGOLIA_API_KEY=
VITE_TALK_JS_APP_ID=
VITE_TALK_JS_SECRET_API_KEY=
STORE_CORS=
ADMIN_CORS=
VENDOR_CORS=
VENDOR_PANEL_URL=
STOREFRONT_URL=
BACKEND_URL=
```
6. After completing those steps, click "Create". The build and deploy process will start, and it can take a few minutes to complete.
Later, you can change those variables in environment settings, as well as change the deployment branch. Medusa Cloud will automatically pull and rebuild your environment if a new commit is pushed on this branch.
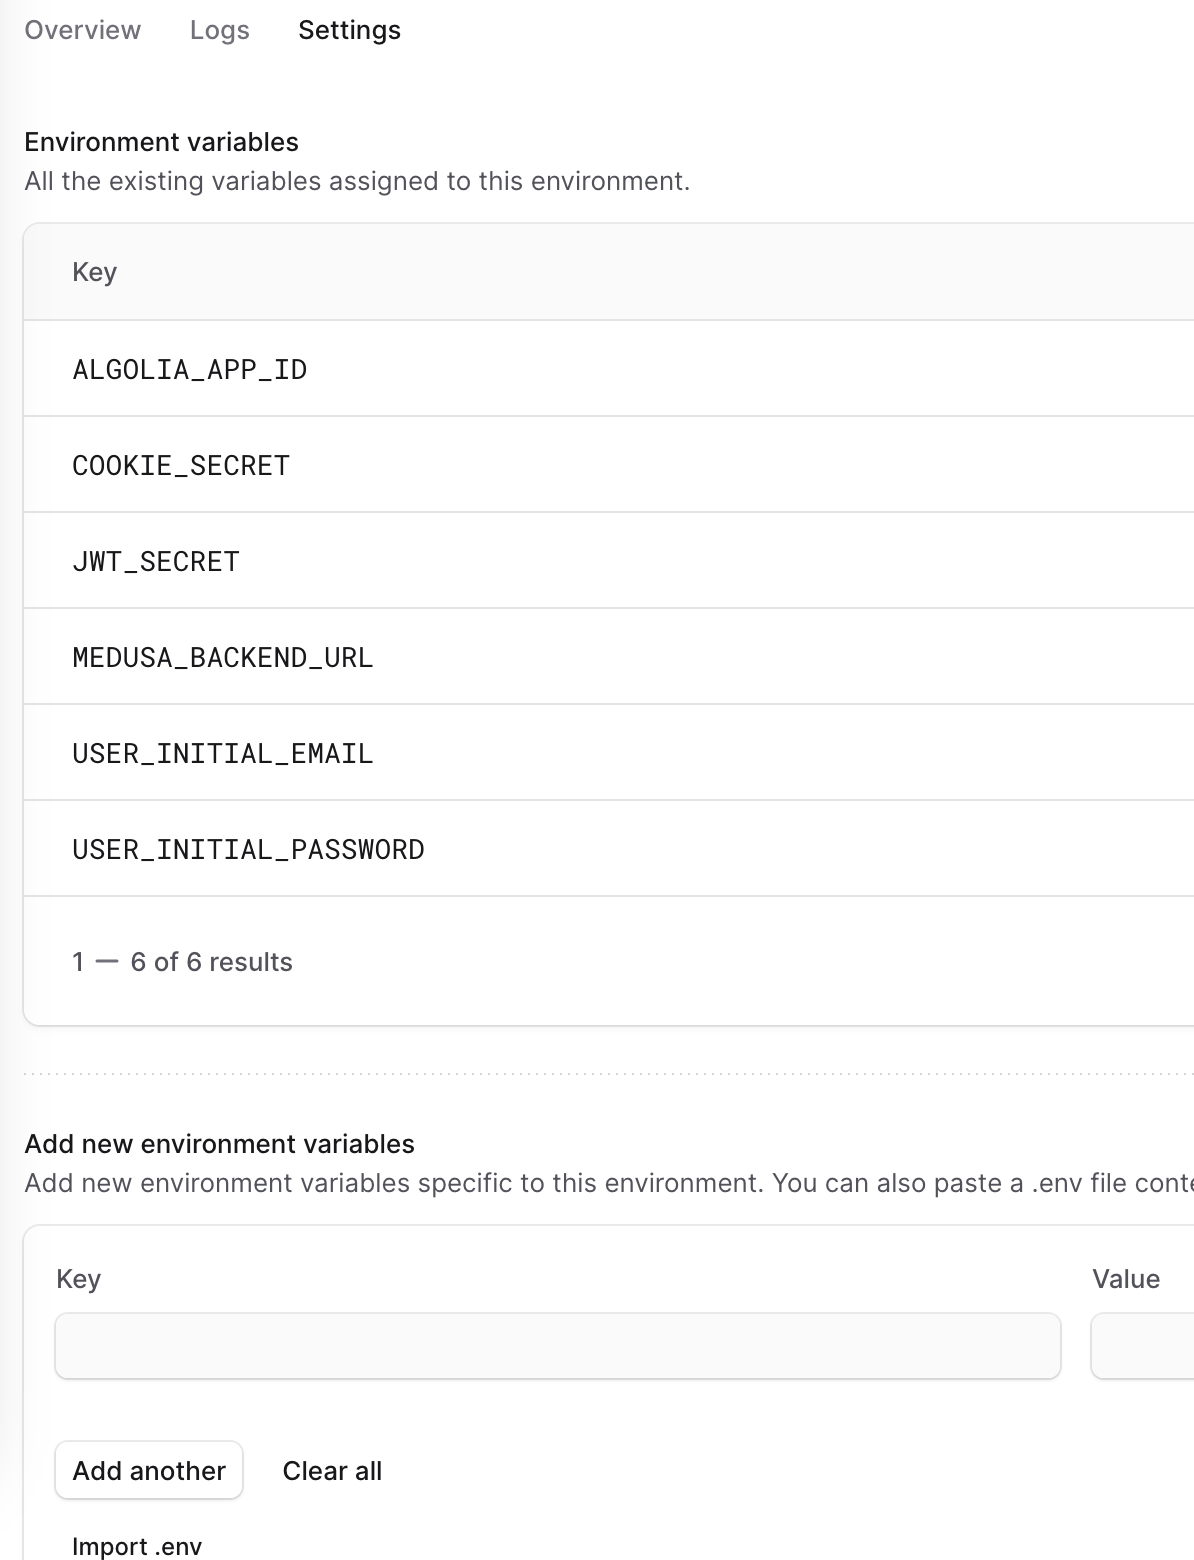
 # Core commerce modules
Source: https://docs.mercurjs.com/product/core-commerce-modules
Learn how Mercur builds on Medusa’s core commerce modules
# Core commerce modules
Mercur is built on top of **Medusa’s core commerce modules**.\
These modules provide the foundational commerce primitives used in every Mercur marketplace: products, pricing, carts, orders, customers, payments, fulfillment, inventory, and more.
Mercur does **not replace** these modules.\
Instead, it creates additional marketplace domain logic - such as sellers, commissions, order splitting, payouts, requests, reviews, and vendor-level operations.
Below is an overview of every Medusa core module, along with a short description and a reference link to the official Medusa documentation where you can learn more about each module.
***
Handles API key management and authentication for programmatic access.
Provides authentication flows, hashing utilities, and identity management.
Manages carts, line items, promotions, and total calculations. Used by Mercur for multi-vendor cart orchestration.
Defines currencies and formatting rules.
Stores customer profiles, addresses, and preferences.
Handles fulfillment providers and shipping. Mercur extends it with vendor-level fulfillment flows.
Controls stock levels, reservations, and inventory adjustments.
Manages orders, statuses, and returns. Mercur extends it with multi-seller order splitting logic.
Integrates payment providers and transaction flows. Used by Mercur for multi-vendor payments and payouts.
Defines pricing structures, price lists, and contextual price calculations.
Defines products, variants, options, and collections. Mercur adds seller ownership, moderation, and request flows.
Handles discounts, promotion rules, and coupon codes.
Manages regions, currencies, and tax settings for contextual pricing.
Supports product availability across multiple sales channels.
Defines physical or virtual locations where inventory is stored.
Stores global configuration and metadata for the storefront.
Manages tax rules and region-based tax calculations.
Handles internal user accounts. Mercur extends this with vendor roles and permissions.
***
By keeping all Medusa modules intact and fully accessible, Mercur ensures developers retain complete control over both the **commerce layer** and the **marketplace domain layer**.
***
# Core Infrastructure Modules
Source: https://docs.mercurjs.com/product/core-infrastructure-modules
Learn how Mercur uses Medusa’s core infrastructure modules for events, files, notifications, caching, workflows, and more.
Mercur builds on top of **Medusa’s core infrastructure modules** to provide a scalable, event-driven, and extendable foundation for marketplace logic.
These modules provide the architectural capabilities that power Mercur’s internals:
* Event emission and subscribers
* Workflows and distributed transaction orchestration
* File storage (local or cloud)
* Notification pipelines (email, SMS, internal channels)
* Caching and performance
* Distributed locking
* Analytics
Mercur uses these modules exactly as Medusa designed them and layers marketplace-specific behaviors on top.
Below is a list of all Medusa core infrastructure modules.
***
Tracks system and user events (such as cart updates or order placements) and forwards them to analytics providers.
Provides high-performance caching for frequently accessed data. Supports Redis, Memcached, and custom providers.
Implements the publish/subscribe system used to emit events and run subscribers. Supports Local and Redis providers.
Handles file upload, retrieval, and storage. Used for assets such as product images. Supports Local and S3 providers.
Provides distributed locking to prevent race conditions during concurrent operations. Supports Redis and PostgreSQL providers.
Sends notifications through channels like email or SMS. Supports SendGrid, Resend, Slack, and Local providers.
Tracks and manages the execution of workflows and steps with strong consistency guarantees. Supports In-Memory and Redis engines.
***
# How Mercur Uses These Modules
Mercur relies on Medusa’s infrastructure layer to power marketplace-specific concerns:
* Event Module → seller actions, approval flows, requests, commissions
* Workflow Engine → multi-step processes like onboarding, payouts, order splitting
* File Module → seller product images, documents, attachments
* Caching Module → all cart-related operations
* Locking Module → concurrency protection for order splitting and inventory updates
* Notification Module → seller/admin notifications
* Analytics Module → seller performance and buyer activity tracking
By building on Medusa’s infrastructure modules, Mercur ensures performance, and full compatibility with the broader Medusa ecosystem - while letting you extend or swap providers as needed for your marketplace architecture.
***
# Framework
Source: https://docs.mercurjs.com/product/framework
Learn how Mercur builds on Medusa’s Framework to stay fully extensible and customizable.
# Framework
Mercur is built on top of the **Medusa Framework**, not just Medusa’s commerce modules.\
This is important because the Framework provides the low-level building blocks developers use to customize, extend, and orchestrate complex commerce applications.
Mercur was designed to **preserve 100% of Medusa’s extensibility** meaning every concept from Medusa’s Framework remains available:
* You can add modules
* Extend data models
* Build custom workflows
* Hook into events
* Define API routes
* Run scheduled jobs
* Link data across modules
* Package extensions into plugins
This ensures that Mercur remains open, transparent, and easy for teams to build on without losing the power of Medusa.
Below are the core Medusa Framework concepts Mercur is built on.
***
# Framework components
A globally accessible dependency container that stores all registered modules, services, workflows, and tools. Used across API routes, workflows, subscribers, jobs, and scripts.
Encapsulated domain units with their own data models, services, and logic. Mercur adds marketplace modules on top of Medusa’s module system.
Mechanism for linking data models across isolated modules while preserving module boundaries. Supports linking Mercur marketplace models to Medusa core models.
Database tables defined inside modules using Medusa’s Data Modeling Language (DML). Used throughout Mercur’s marketplace-specific modules.
File-based REST endpoints used to expose module and workflow logic to clients. Mercur uses this to define Storefront, Admin, and Vendor Panel APIs.
Durable, step-based, rollback-safe units of business logic. Mercur relies heavily on workflows for commissions, order splitting, payouts, onboarding, and more.
Event-driven architecture for reacting to operations (e.g., order.placed). Mercur uses subscribers for notifications, indexing, moderation, and vendor operations.
Cron-based or interval-based recurring jobs. Useful for background tasks such as syncing, cleanup, or analytics aggregation in Mercur.
Bundled, reusable packages containing modules, routes, workflows, jobs, links, subscribers, and more. Mercur itself is delivered as modular packages compatible with this system.
***
# Why this matters
Mercur extends Medusa and it does not constrain it.
Because Mercur keeps Medusa’s entire Framework intact:
* You can build custom modules the same way you would in Medusa.
* You can extend core marketplace logic using module links.
* You can add your own workflows into Mercur’s flows.
* You can hook into Mercur’s events with subscribers.
* You can introduce new API routes or extend existing ones.
* You can package your own marketplace extensions into plugins.
This means Mercur acts as a **native layer on top of Medusa**, not a closed system.
Everything Medusa can do, Mercur also can do.
And everything Mercur adds you can extend or replace same as Medusa core logic.
This makes Mercur suitable for custom marketplace architectures where long-term ownership and deep extensibility are required.
***
# Attribute Module
Source: https://docs.mercurjs.com/product/modules/b2c-core/attribute/attribute-concept
Learn about the Attribute Module and how to use it in your application
# Attribute Module
In this section of the documentation, you will find resources to learn more about the Attribute Module and how to use it in your application.
Mercur has product attribute related features available out-of-the-box through the Attribute Module. A [module](https://docs.medusajs.com/learn/fundamentals/modules) is a standalone package that provides features for a single domain. Each of Mercur's marketplace features are placed in custom modules, such as this Attribute Module.
Learn more about why modules are isolated in [this documentation](https://docs.medusajs.com/learn/fundamentals/modules/isolation).
## Attribute Features
* **Attribute Management**: Create and manage custom product attributes (e.g., Material, Size, Color, Condition) that can be applied to products.
* **Flexible Attribute Values**: Store actual values assigned to products and manage predefined possible values for dropdown/select attributes.
* **Category-Specific Attributes**: Associate attributes with product categories to define which attributes are applicable for products in each category.
* **Multiple UI Components**: Support for different attribute input types including select, multivalue, unit, toggle, textarea, and color picker.
* **Product Organization**: Link products to attribute values for enhanced filtering and search capabilities.
***
## How to Use the Attribute Module
In your Medusa application, you build flows around Commerce Modules. A flow is built as a [Workflow](https://docs.medusajs.com/learn/fundamentals/workflows), which is a special function composed of a series of steps that guarantees data consistency and reliable roll-back mechanism.
You can build custom workflows and steps. Mercur provides pre-built workflows for common attribute operations in the `@mercurjs/b2c-core` package.
For example, the `createAttributesWorkflow`:
```ts title="src/workflows/attribute/create-attributes.ts" theme={null}
import { LinkDefinition } from "@medusajs/framework/types"
import { Modules } from "@medusajs/framework/utils"
import {
WorkflowData,
WorkflowResponse,
createWorkflow,
transform,
when,
} from "@medusajs/framework/workflows-sdk"
import { createRemoteLinkStep } from "@medusajs/medusa/core-flows"
import { CreateAttributeDTO } from "@mercurjs/framework"
import { createAttributesStep } from "../steps/create-attributes"
export const createAttributesWorkflow = createWorkflow(
"create-attributes",
(input: WorkflowData<{ attributes: CreateAttributeDTO[] }>) => {
const attributesWithoutExternalRelations = transform(
input,
({ attributes }) => {
return attributes.map((attribute) => {
delete attribute.product_category_ids
return attribute
})
}
)
const createdAttributes = createAttributesStep(
attributesWithoutExternalRelations
)
const productCategoryLinks: LinkDefinition[] = transform(
{ input, createdAttributes },
({ input, createdAttributes }) => {
return createdAttributes
.map((attribute, idx) => {
const inputAttribute = input.attributes[idx]
return (
inputAttribute.product_category_ids?.map((productCategoryId) => ({
[Modules.PRODUCT]: {
product_category_id: productCategoryId,
},
attribute: {
attribute_id: attribute.id,
},
})) || []
)
})
.flat()
}
)
when({ productCategoryLinks }, ({ productCategoryLinks }) => {
return productCategoryLinks.length > 0
}).then(() => {
createRemoteLinkStep(productCategoryLinks)
})
return new WorkflowResponse(createdAttributes)
}
)
```
You can then execute the workflow in your custom API routes:
### API Route
```ts title="src/api/admin/attributes/route.ts" theme={null}
import { MedusaRequest, MedusaResponse } from '@medusajs/framework'
import { ContainerRegistrationKeys } from '@medusajs/framework/utils'
import { createAttributesWorkflow } from '../../../workflows/attribute/workflows'
export const POST = async (
req: MedusaRequest,
res: MedusaResponse
) => {
const query = req.scope.resolve(ContainerRegistrationKeys.QUERY)
// Execute the createAttributesWorkflow
const { result } = await createAttributesWorkflow(req.scope).run({
input: { attributes: [req.validatedBody] }
})
const {
data: [attribute]
} = await query.graph({
entity: 'attribute',
filters: {
id: result[0].id
},
...req.queryConfig
})
res.status(201).json({ attribute })
}
```
Learn more about workflows in [this documentation](https://docs.medusajs.com/learn/fundamentals/workflows).
***
# Concepts
In this document, you'll learn about the main concepts related to attributes in Mercur.
## Attribute
An attribute is a custom property that can be applied to products to provide additional product information and enable better filtering. It is represented by the [Attribute data model](../data-model/attribute-module-data-reference#attribute).
An attribute holds information about:
* The name and description of the attribute (e.g., "Material", "Size")
* A unique handle for programmatic access
* Whether it's required or filterable
* The UI component type for rendering (select, multivalue, unit, toggle, textarea, color\_picker)
* Predefined possible values
* Actual values assigned to products
Attributes can be associated with product categories to define which attributes are applicable for products in that category. For example, an "Electronics" category might have "Battery Life" and "Screen Size" attributes, while a "Clothing" category might have "Material" and "Size" attributes.
***
## Attribute Value
An attribute value, represented by the [AttributeValue](../data-model/attribute-module-data-reference#attributevalue) data model, is the actual value assigned to a specific product for a given attribute.
For example, if you have a "Material" attribute, one product might have an attribute value of "Cotton" while another has "Silk". These are the actual values stored per product, not the predefined list.
A product can have multiple attribute values, one for each attribute that applies to it.
***
## Attribute Possible Value
An attribute possible value, represented by the [AttributePossibleValue](../data-model/attribute-module-data-reference#attributepossiblevalue) data model, defines the predefined list of allowed values for an attribute.
This is particularly useful for attributes rendered as dropdowns or select inputs, where you want to provide a curated list of options to choose from.
For example, for a "Material" attribute, you might define possible values of:
* Cotton (rank: 1)
* Polyester (rank: 2)
* Silk (rank: 3)
The `rank` property determines the display order of these options in the UI.
***
## UI Component Types
Each attribute can specify a UI component type that determines how it should be rendered in the admin panel or storefront:
* **select**: Standard dropdown with single selection from predefined possible values
* **multivalue**: Multiple selection from predefined possible values
* **unit**: Numeric value with a unit of measurement (e.g., "10 kg", "15 cm")
* **toggle**: Boolean on/off switch
* **text\_area**: Multi-line text input for longer descriptions
* **color\_picker**: Color selection interface for color attributes
This flexibility allows marketplace administrators to create appropriate input experiences for different types of product information.
***
## Filterable Attributes
The `is_filterable` property on an attribute determines whether it should be used in product filtering and faceted search.
When enabled, the attribute values can be used to:
* Filter products in the storefront (e.g., "Show only Cotton products")
* Create faceted navigation (e.g., "Material: Cotton (23 products)")
* Power search engine filters (e.g., Algolia facets)
This is essential for creating rich product discovery experiences in the marketplace.
***
## Required Attributes
The `is_required` property on an attribute determines whether sellers must provide a value for this attribute when creating or editing products.
This is useful for enforcing data quality in the marketplace. For example, you might make "Condition" a required attribute for a second-hand marketplace to ensure all products have this information.
***
## Use Cases
**1. Enhanced Product Filtering**
Create rich filtering experiences by defining attributes like Size, Color, Material, and Condition.
**2. Category-Specific Properties**
Define different attributes for different product categories (e.g., "Battery Life" for electronics, "Fabric Type" for clothing).
**3. Dynamic Product Forms**
Use the `ui_component` property to automatically generate appropriate input fields in seller dashboards.
**4. Search Engine Integration**
Filterable attributes can be synced to search engines like Algolia for powerful faceted search.
**5. Data Quality Enforcement**
Use required attributes to ensure sellers provide essential product information.
# Attribute Module Links
Source: https://docs.mercurjs.com/product/modules/b2c-core/attribute/attribute-links
Module links for the Attribute Module
# Links between Attribute Module and Other Modules
This document showcases the module links defined between the Attribute Module and other Commerce Modules.
## Summary
The Attribute Module has the following links to other modules:
| First Data Model | Second Data Model | Type | Description |
| ---------------- | ----------------- | --------------------- | -------------------------------------------------------------- |
| Product | AttributeValue | Stored - many-to-many | Associates products with their attribute values |
| ProductCategory | Attribute | Stored - many-to-many | Associates product categories with their applicable attributes |
***
## Product Module
Mercur defines a link between the Product Module's `Product` data model and the Attribute Module's `AttributeValue` data model. This allows products to have multiple attribute values assigned to them (e.g., Material: "Cotton", Color: "Blue").
### Retrieve with Query
To retrieve the attribute values of a product with Query, pass `attribute_value_link.attribute_value.*` in `fields`:
```ts theme={null}
const { data: products } = await query.graph({
entity: "product",
fields: [
"*",
"attribute_value_link.attribute_value.*",
"attribute_value_link.attribute_value.attribute.*",
],
})
// products[0].attribute_value_link[0].attribute_value
// products[0].attribute_value_link[0].attribute_value.attribute
```
```ts theme={null}
import { useQueryGraphStep } from "@medusajs/medusa/core-flows"
// ...
const { data: products } = useQueryGraphStep({
entity: "product",
fields: [
"*",
"attribute_value_link.attribute_value.*",
"attribute_value_link.attribute_value.attribute.*",
],
})
// products[0].attribute_value_link[0].attribute_value
```
### Manage with Link
To manage the attribute values of a product, use Link:
```ts theme={null}
import { Modules } from "@medusajs/framework/utils"
// ...
await link.create({
[Modules.PRODUCT]: {
product_id: "prod_123",
},
attribute: {
attribute_value_id: "attr_val_123",
},
})
```
```ts theme={null}
import { createRemoteLinkStep } from "@medusajs/medusa/core-flows"
// ...
createRemoteLinkStep({
[Modules.PRODUCT]: {
product_id: "prod_123",
},
attribute: {
attribute_value_id: "attr_val_123",
},
})
```
***
## Product Module - Categories
Mercur defines a link between the Product Module's `ProductCategory` data model and the Attribute Module's `Attribute` data model. This allows product categories to define which attributes are applicable for products in that category (e.g., "Electronics" category might have "Battery Life" and "Screen Size" attributes).
### Retrieve with Query
To retrieve the attributes of a product category with Query, pass `attribute_link.attribute.*` in `fields`:
```ts theme={null}
const { data: categories } = await query.graph({
entity: "product_category",
fields: [
"*",
"attribute_link.attribute.*",
],
})
// categories[0].attribute_link[0].attribute
```
```ts theme={null}
import { useQueryGraphStep } from "@medusajs/medusa/core-flows"
// ...
const { data: categories } = useQueryGraphStep({
entity: "product_category",
fields: [
"*",
"attribute_link.attribute.*",
],
})
// categories[0].attribute_link[0].attribute
```
### Manage with Link
To manage the attributes of a product category, use Link:
```ts theme={null}
import { Modules } from "@medusajs/framework/utils"
// ...
await link.create({
[Modules.PRODUCT]: {
product_category_id: "pcat_123",
},
attribute: {
attribute_id: "attr_123",
},
})
```
```ts theme={null}
import { createRemoteLinkStep } from "@medusajs/medusa/core-flows"
// ...
createRemoteLinkStep({
[Modules.PRODUCT]: {
product_category_id: "pcat_123",
},
attribute: {
attribute_id: "attr_123",
},
})
```
# Attribute Module Data Models
Source: https://docs.mercurjs.com/product/modules/b2c-core/attribute/attributes-data-models-ref
Reference documentation for the Attribute Module data models
## Relations Overview
| Relationship | Type | Description |
| ---------------------------------- | ----------- | ------------------------------------- |
| Attribute → AttributeValue | One-to-Many | An attribute has many values |
| Attribute → AttributePossibleValue | One-to-Many | An attribute has many possible values |
## Data Models
* [Attribute](#attribute)
* [AttributeValue](#attributevalue)
* [AttributePossibleValue](#attributepossiblevalue)
## Attribute
This documentation provides a reference to the Attribute data model. It belongs to the Attribute Module.
[View source code](https://github.com/mercurjs/mercur/blob/main/packages/modules/b2c-core/src/modules/attribute/models/attribute.ts)
| Field | Type | Description |
| ----------------- | --------------------------------------------------------------------------------------- | ------------------------------------------------------------------------- |
| `id` | `PrimaryKeyModifier` | The ID of the attribute. |
| `name` | `TextProperty` | The name of the attribute |
| `description` | `TextProperty` | The description of the attribute |
| `is_required` | `BooleanProperty` | Whether the attribute is required. Defaults to `false`. |
| `is_filterable` | `BooleanProperty` | Whether the attribute is filterable. Defaults to `true`. |
| `handle` | `TextProperty` | The unique handle of the attribute |
| `ui_component` | `EnumProperty<["select", "multivalue", "unit", "toggle", "text_area", "color_picker"]>` | The UI component type for rendering the attribute. Defaults to `select`. |
| `metadata` | `JSONProperty` | Holds custom data in key-value pairs. |
| `values` | `HasMany` | The associated [AttributeValue](#attributevalue) records. |
| `possible_values` | `HasMany` | The associated [AttributePossibleValue](#attributepossiblevalue) records. |
## AttributeValue
This documentation provides a reference to the AttributeValue data model. It belongs to the Attribute Module.
[View source code](https://github.com/mercurjs/mercur/blob/main/packages/modules/b2c-core/src/modules/attribute/models/attribute-value.ts)
| Field | Type | Description |
| ----------- | -------------------------------- | --------------------------------------- |
| `id` | `PrimaryKeyModifier` | The ID of the attribute value. |
| `value` | `TextProperty` | The value of the attribute value |
| `rank` | `NumberProperty` | The rank of the attribute value |
| `metadata` | `JSONProperty` | Holds custom data in key-value pairs. |
| `attribute` | `BelongsTo` | The associated [Attribute](#attribute). |
## AttributePossibleValue
This documentation provides a reference to the AttributePossibleValue data model. It belongs to the Attribute Module.
[View source code](https://github.com/mercurjs/mercur/blob/main/packages/modules/b2c-core/src/modules/attribute/models/attribute-possible-value.ts)
| Field | Type | Description |
| ----------- | -------------------------------- | ----------------------------------------- |
| `id` | `PrimaryKeyModifier` | The ID of the attribute possible value. |
| `value` | `TextProperty` | The value of the attribute possible value |
| `rank` | `NumberProperty` | The rank of the attribute possible value |
| `metadata` | `JSONProperty` | Holds custom data in key-value pairs. |
| `attribute` | `BelongsTo` | The associated [Attribute](#attribute). |
# Attribute Module Service Reference
Source: https://docs.mercurjs.com/product/modules/b2c-core/attribute/attributes-services
Reference documentation for the Attribute Module service methods
# IAttributeModuleService Reference
This section of the documentation provides a reference to the `IAttributeModuleService` interface's methods. This is the interface developers use to use the functionalities provided by the Attribute Module.
You should only use the methods in this reference when implementing complex customizations. For common cases, check out available workflows instead.
The main service interface for the Attribute Module.
## Methods
* [createAttributes](#createattributes)
* [updateAttributes](#updateattributes)
* [deleteAttributes](#deleteattributes)
* [retrieveAttribute](#retrieveattribute)
* [listAttributes](#listattributes)
* [listAndCountAttributes](#listandcountattributes)
* [softDeleteAttributes](#softdeleteattributes)
* [restoreAttributes](#restoreattributes)
* [createAttributeValues](#createattributevalues)
* [updateAttributeValues](#updateattributevalues)
* [deleteAttributeValues](#deleteattributevalues)
* [retrieveAttributeValue](#retrieveattributevalue)
* [listAttributeValues](#listattributevalues)
* [listAndCountAttributeValues](#listandcountattributevalues)
* [softDeleteAttributeValues](#softdeleteattributevalues)
* [restoreAttributeValues](#restoreattributevalues)
* [createAttributePossibleValues](#createattributepossiblevalues)
* [updateAttributePossibleValues](#updateattributepossiblevalues)
* [deleteAttributePossibleValues](#deleteattributepossiblevalues)
* [retrieveAttributePossibleValue](#retrieveattributepossiblevalue)
* [listAttributePossibleValues](#listattributepossiblevalues)
* [listAndCountAttributePossibleValues](#listandcountattributepossiblevalues)
* [softDeleteAttributePossibleValues](#softdeleteattributepossiblevalues)
* [restoreAttributePossibleValues](#restoreattributepossiblevalues)
* [updateAttributeWithUpsertOrReplacePossibleValues](#updateattributewithupsertorreplacepossiblevalues)
***
# createAttributes
This section provides a reference to the `createAttributes` method. This belongs to the Attribute Module.
## createAttributes(data, sharedContext?): Promise\
This method creates attributes.
### Example
```ts theme={null}
const attributes = await attributeModuleService.createAttributes([
{
name: "Material",
handle: "material",
ui_component: "select",
is_filterable: true,
is_required: false,
possible_values: [
{ value: "Cotton", rank: 1 },
{ value: "Polyester", rank: 2 },
],
},
])
```
### Parameters
The attributes to be created.
The name of the attribute.
The description of the attribute.
The unique handle of the attribute.
Whether the attribute is filterable.
Whether the attribute is required.
The UI component type for rendering the attribute.
Holds custom data in key-value pairs.
The predefined possible values for the attribute.
The value of the attribute possible value.
The rank of the attribute possible value.
Holds custom data in key-value pairs.
The IDs of product categories to associate with this attribute.
A context used to share resources, such as transaction manager, between the application and the module.
### Returns
The created attributes.
## createAttributes(data, sharedContext?): Promise\
This method creates an attribute.
### Example
```ts theme={null}
const attribute = await attributeModuleService.createAttributes({
name: "Size",
handle: "size",
ui_component: "select",
is_filterable: true,
})
```
### Parameters
The attribute to be created.
The name of the attribute.
The description of the attribute.
The unique handle of the attribute.
Whether the attribute is filterable.
Whether the attribute is required.
The UI component type for rendering the attribute.
Holds custom data in key-value pairs.
The predefined possible values for the attribute.
The value of the attribute possible value.
The rank of the attribute possible value.
Holds custom data in key-value pairs.
The IDs of product categories to associate with this attribute.
A context used to share resources, such as transaction manager, between the application and the module.
### Returns
The created attribute.
***
# updateAttributeWithUpsertOrReplacePossibleValues
This section provides a reference to the `updateAttributeWithUpsertOrReplacePossibleValues` method. This belongs to the Attribute Module.
## updateAttributeWithUpsertOrReplacePossibleValues(input, sharedContext?): Promise\
This method updates an attribute and upserts or replaces its possible values in a single operation. If `id` is not provided for `possible_values` entries, it will lookup the database by `attributePossibleValue.value` to update or create accordingly.
### Example
```ts theme={null}
await attributeModuleService.updateAttributeWithUpsertOrReplacePossibleValues({
id: "attr_123",
name: "Updated Material",
possible_values: [
{ id: "attr_pos_val_1", value: "Cotton", rank: 1 },
{ value: "Silk", rank: 3 }, // Will be created
],
})
```
### Parameters
The attribute(s) to update with possible values to upsert.
The ID of the attribute to update.
The name of the attribute.
The description of the attribute.
The unique handle of the attribute.
Whether the attribute is filterable.
Whether the attribute is required.
Holds custom data in key-value pairs.
The possible values to upsert.
The ID of the existing possible value (for updates).
The value of the attribute possible value.
The rank of the attribute possible value.
Holds custom data in key-value pairs.
The ID of the attribute this value belongs to.
The product categories to associate with this attribute.
A context used to share resources, such as transaction manager, between the application and the module.
### Returns
Resolves when the attribute and its possible values are updated successfully.
***
# listAttributes
This section provides a reference to the `listAttributes` method. This belongs to the Attribute Module.
This method retrieves a paginated list of attributes based on optional filters and configuration.
## Example
To retrieve a list of attributes using their IDs:
```ts theme={null}
const attributes = await attributeModuleService.listAttributes({
id: ["attr_123", "attr_321"],
})
```
To retrieve filterable attributes:
```ts theme={null}
const attributes = await attributeModuleService.listAttributes({
is_filterable: true,
})
```
By default, only the first `15` records are retrieved. You can control pagination by specifying the `skip` and `take` properties of the `config` parameter:
```ts theme={null}
const attributes = await attributeModuleService.listAttributes(
{
id: ["attr_123", "attr_321"],
},
{
take: 20,
skip: 2,
}
)
```
## Parameters
The filters to apply on the retrieved attributes.
The IDs to filter the attributes by.
Filter attributes by their names.
Filter attributes by their handles.
Filter by whether attributes are filterable.
Filter by whether attributes are required.
Filter attributes by their UI component type.
The configurations determining how the attribute is retrieved. Its properties, such as `select` or `relations`, accept the attributes or relations associated with an attribute.
An array of strings, each being attribute names of the entity to retrieve in the result.
A number indicating the number of records to skip before retrieving the results.
A number indicating the number of records to return in the result.
An array of strings, each being relation names of the entity to retrieve in the result. For example, `["possible_values", "values"]`.
An object used to specify how to sort the returned records. Its keys are the names of attributes of the entity, and a key's value can either be `ASC` to sort retrieved records in an ascending order, or `DESC` to sort retrieved records in a descending order.
A boolean indicating whether deleted records should also be retrieved as part of the result.
A context used to share resources, such as transaction manager, between the application and the module.
## Returns
The list of attributes.
***
# retrieveAttribute
This section provides a reference to the `retrieveAttribute` method. This belongs to the Attribute Module.
This method retrieves an attribute by its ID.
## Example
```ts theme={null}
const attribute = await attributeModuleService.retrieveAttribute("attr_123")
```
To retrieve relationships:
```ts theme={null}
const attribute = await attributeModuleService.retrieveAttribute(
"attr_123",
{
relations: ["possible_values", "values"],
}
)
```
## Parameters
The ID of the attribute.
The configurations determining how the attribute is retrieved. Its properties, such as `select` or `relations`, accept the attributes or relations associated with an attribute.
An array of strings, each being attribute names of the entity to retrieve in the result.
A number indicating the number of records to skip before retrieving the results.
A number indicating the number of records to return in the result.
An array of strings, each being relation names of the entity to retrieve in the result. For example, `["possible_values", "values"]`.
An object used to specify how to sort the returned records.
A boolean indicating whether deleted records should also be retrieved as part of the result.
A context used to share resources, such as transaction manager, between the application and the module.
## Returns
The retrieved attribute.
The ID of the attribute.
The name of the attribute.
The description of the attribute.
The unique handle of the attribute.
Whether the attribute is filterable.
Whether the attribute is required.
The UI component type for rendering the attribute.
Holds custom data in key-value pairs.
The created date of the attribute.
The updated date of the attribute.
The associated possible values (if included in relations).
The ID of the attribute possible value.
The value of the attribute possible value.
The rank of the attribute possible value.
Holds custom data in key-value pairs.
The created date of the possible value.
The associated attribute values (if included in relations).
The ID of the attribute value.
The value of the attribute value.
The rank of the attribute value.
Holds custom data in key-value pairs.
***
# updateAttributes
This section provides a reference to the `updateAttributes` method. This belongs to the Attribute Module.
## updateAttributes(id, data, sharedContext?): Promise\
This method updates an existing attribute.
### Example
```ts theme={null}
const attribute = await attributeModuleService.updateAttributes("attr_123", {
name: "Updated Material",
is_filterable: false,
})
```
### Parameters
The ID of the attribute.
The attributes to update in the attribute.
The name of the attribute.
The description of the attribute.
The unique handle of the attribute.
Whether the attribute is filterable.
Whether the attribute is required.
Holds custom data in key-value pairs.
A context used to share resources, such as transaction manager, between the application and the module.
### Returns
The updated attribute.
The ID of the attribute.
The name of the attribute.
The description of the attribute.
The unique handle of the attribute.
Whether the attribute is filterable.
Whether the attribute is required.
The UI component type for rendering the attribute.
Holds custom data in key-value pairs.
The created date of the attribute.
The updated date of the attribute.
***
# deleteAttributes
This section provides a reference to the `deleteAttributes` method. This belongs to the Attribute Module.
## deleteAttributes(ids, sharedContext?): Promise\
This method deletes attributes by their IDs.
### Example
```ts theme={null}
await attributeModuleService.deleteAttributes(["attr_123", "attr_321"])
```
### Parameters
The IDs of the attributes.
A context used to share resources, such as transaction manager, between the application and the module.
### Returns
Resolves when the attributes are deleted successfully.
## deleteAttributes(id, sharedContext?): Promise\
This method deletes an attribute by its ID.
### Example
```ts theme={null}
await attributeModuleService.deleteAttributes("attr_123")
```
### Parameters
The ID of the attribute.
A context used to share resources, such as transaction manager, between the application and the module.
### Returns
Resolves when the attribute is deleted successfully.
***
# listAndCountAttributes
This section provides a reference to the `listAndCountAttributes` method. This belongs to the Attribute Module.
This method retrieves a paginated list of attributes along with the total count of available attributes satisfying the provided filters.
## Example
To retrieve a list of attributes using their IDs:
```ts theme={null}
const [attributes, count] = await attributeModuleService.listAndCountAttributes({
id: ["attr_123", "attr_321"],
})
```
By default, only the first `15` records are retrieved. You can control pagination by specifying the `skip` and `take` properties of the `config` parameter:
```ts theme={null}
const [attributes, count] = await attributeModuleService.listAndCountAttributes(
{
id: ["attr_123", "attr_321"],
},
{
take: 20,
skip: 2,
}
)
```
## Parameters
The filters to apply on the retrieved attributes.
The IDs to filter the attributes by.
Filter attributes by their names.
Filter attributes by their handles.
Filter by whether attributes are filterable.
Filter by whether attributes are required.
Filter attributes by their UI component type.
The configurations determining how the attribute is retrieved.
An array of strings, each being attribute names of the entity to retrieve in the result.
A number indicating the number of records to skip before retrieving the results.
A number indicating the number of records to return in the result.
An array of strings, each being relation names of the entity to retrieve in the result.
An object used to specify how to sort the returned records.
A boolean indicating whether deleted records should also be retrieved as part of the result.
A context used to share resources, such as transaction manager, between the application and the module.
## Returns
The list of attributes along with their total count.
***
# softDeleteAttributes
This section provides a reference to the `softDeleteAttributes` method. This belongs to the Attribute Module.
This method soft deletes attributes by their IDs.
## Example
```ts theme={null}
await attributeModuleService.softDeleteAttributes([
"attr_123",
"attr_321",
])
```
## Parameters
The IDs of the attributes.
An object that is used to specify an entity's related entities that should be soft-deleted when the main entity is soft-deleted.
A context used to share resources, such as transaction manager, between the application and the module.
## Returns
An object that includes the IDs of related records that were also soft deleted. If there are no related records, the promise resolves to `void`.
***
# restoreAttributes
This section provides a reference to the `restoreAttributes` method. This belongs to the Attribute Module.
This method restores soft deleted attributes by their IDs.
## Example
```ts theme={null}
await attributeModuleService.restoreAttributes(["attr_123", "attr_321"])
```
## Parameters
The IDs of the attributes.
Configurations determining which relations to restore along with each of the attribute.
A context used to share resources, such as transaction manager, between the application and the module.
## Returns
An object that includes the IDs of related records that were restored. If there are no related records restored, the promise resolves to `void`.
***
# createAttributeValues
This section provides a reference to the `createAttributeValues` method. This belongs to the Attribute Module.
This method creates attribute values.
## Example
```ts theme={null}
const attributeValues = await attributeModuleService.createAttributeValues([
{
attribute_id: "attr_123",
value: "Large",
rank: 1,
},
])
```
## Parameters
The attribute values to be created.
The value of the attribute value.
The rank of the attribute value.
The ID of the attribute this value belongs to.
Holds custom data in key-value pairs.
A context used to share resources, such as transaction manager, between the application and the module.
## Returns
The created attribute values.
***
# updateAttributeValues
This section provides a reference to the `updateAttributeValues` method. This belongs to the Attribute Module.
This method updates existing attribute values.
## Example
```ts theme={null}
const attributeValues = await attributeModuleService.updateAttributeValues([
{
id: "attr_val_123",
value: "Extra Large",
rank: 4,
},
])
```
## Parameters
The attribute values to update.
The ID of the attribute value.
The value of the attribute value.
The rank of the attribute value.
Holds custom data in key-value pairs.
A context used to share resources, such as transaction manager, between the application and the module.
## Returns
The updated attribute values.
***
# deleteAttributeValues
This section provides a reference to the `deleteAttributeValues` method. This belongs to the Attribute Module.
This method deletes attribute values by their IDs.
## Example
```ts theme={null}
await attributeModuleService.deleteAttributeValues(["attr_val_123", "attr_val_321"])
```
## Parameters
The IDs of the attribute values.
A context used to share resources, such as transaction manager, between the application and the module.
## Returns
Resolves when the attribute values are deleted successfully.
***
# listAttributeValues
This section provides a reference to the `listAttributeValues` method. This belongs to the Attribute Module.
This method retrieves a paginated list of attribute values based on optional filters and configuration.
## Example
```ts theme={null}
const attributeValues = await attributeModuleService.listAttributeValues({
attribute_id: "attr_123",
})
```
## Parameters
The filters to apply on the retrieved attribute values.
The IDs to filter the attribute values by.
Filter attribute values by their attribute IDs.
Filter attribute values by their values.
The configurations determining how the attribute value is retrieved.
An array of strings, each being attribute names of the entity to retrieve in the result.
A number indicating the number of records to skip before retrieving the results.
A number indicating the number of records to return in the result.
An array of strings, each being relation names of the entity to retrieve in the result.
An object used to specify how to sort the returned records.
A context used to share resources, such as transaction manager, between the application and the module.
## Returns
The list of attribute values.
***
# retrieveAttributeValue
This section provides a reference to the `retrieveAttributeValue` method. This belongs to the Attribute Module.
This method retrieves an attribute value by its ID.
## Example
```ts theme={null}
const attributeValue = await attributeModuleService.retrieveAttributeValue("attr_val_123")
```
## Parameters
The ID of the attribute value.
The configurations determining how the attribute value is retrieved.
An array of strings, each being attribute names of the entity to retrieve in the result.
An array of strings, each being relation names of the entity to retrieve in the result.
An object used to specify how to sort the returned records.
A context used to share resources, such as transaction manager, between the application and the module.
## Returns
The retrieved attribute value.
The ID of the attribute value.
The value of the attribute value.
The rank of the attribute value.
Holds custom data in key-value pairs.
***
# listAndCountAttributeValues
This section provides a reference to the `listAndCountAttributeValues` method. This belongs to the Attribute Module.
This method retrieves a paginated list of attribute values along with the total count of available attribute values satisfying the provided filters.
## Example
```ts theme={null}
const [attributeValues, count] = await attributeModuleService.listAndCountAttributeValues({
attribute_id: "attr_123",
})
```
## Parameters
The filters to apply on the retrieved attribute values.
The IDs to filter the attribute values by.
Filter attribute values by their attribute IDs.
Filter attribute values by their values.
The configurations determining how the attribute value is retrieved.
An array of strings, each being attribute names of the entity to retrieve in the result.
A number indicating the number of records to skip before retrieving the results.
A number indicating the number of records to return in the result.
An array of strings, each being relation names of the entity to retrieve in the result.
An object used to specify how to sort the returned records.
A context used to share resources, such as transaction manager, between the application and the module.
## Returns
The list of attribute values along with their total count.
***
# softDeleteAttributeValues
This section provides a reference to the `softDeleteAttributeValues` method. This belongs to the Attribute Module.
This method soft deletes attribute values by their IDs.
## Example
```ts theme={null}
await attributeModuleService.softDeleteAttributeValues([
"attr_val_123",
"attr_val_321",
])
```
## Parameters
The IDs of the attribute values.
A context used to share resources, such as transaction manager, between the application and the module.
## Returns
An object that includes the IDs of related records that were also soft deleted. If there are no related records, the promise resolves to `void`.
***
# restoreAttributeValues
This section provides a reference to the `restoreAttributeValues` method. This belongs to the Attribute Module.
This method restores soft deleted attribute values by their IDs.
## Example
```ts theme={null}
await attributeModuleService.restoreAttributeValues(["attr_val_123", "attr_val_321"])
```
## Parameters
The IDs of the attribute values.
A context used to share resources, such as transaction manager, between the application and the module.
## Returns
An object that includes the IDs of related records that were restored. If there are no related records restored, the promise resolves to `void`.
***
# createAttributePossibleValues
This section provides a reference to the `createAttributePossibleValues` method. This belongs to the Attribute Module.
This method creates attribute possible values.
## Example
```ts theme={null}
const possibleValues = await attributeModuleService.createAttributePossibleValues([
{
attribute_id: "attr_123",
value: "Small",
rank: 1,
},
])
```
## Parameters
The attribute possible values to be created.
The ID of the attribute this possible value belongs to.
The value of the attribute possible value.
The rank of the attribute possible value.
Holds custom data in key-value pairs.
A context used to share resources, such as transaction manager, between the application and the module.
## Returns
The created attribute possible values.
***
# updateAttributePossibleValues
This section provides a reference to the `updateAttributePossibleValues` method. This belongs to the Attribute Module.
This method updates existing attribute possible values.
## Example
```ts theme={null}
const possibleValues = await attributeModuleService.updateAttributePossibleValues([
{
id: "attr_pos_val_123",
value: "Extra Small",
rank: 0,
},
])
```
## Parameters
The attribute possible values to update.
The ID of the attribute possible value.
The value of the attribute possible value.
The rank of the attribute possible value.
Holds custom data in key-value pairs.
A context used to share resources, such as transaction manager, between the application and the module.
## Returns
The updated attribute possible values.
***
# deleteAttributePossibleValues
This section provides a reference to the `deleteAttributePossibleValues` method. This belongs to the Attribute Module.
This method deletes attribute possible values by their IDs.
## Example
```ts theme={null}
await attributeModuleService.deleteAttributePossibleValues([
"attr_pos_val_123",
"attr_pos_val_321",
])
```
## Parameters
The IDs of the attribute possible values.
A context used to share resources, such as transaction manager, between the application and the module.
## Returns
Resolves when the attribute possible values are deleted successfully.
***
# listAttributePossibleValues
This section provides a reference to the `listAttributePossibleValues` method. This belongs to the Attribute Module.
This method retrieves a paginated list of attribute possible values based on optional filters and configuration.
## Example
```ts theme={null}
const possibleValues = await attributeModuleService.listAttributePossibleValues({
attribute_id: "attr_123",
})
```
## Parameters
The filters to apply on the retrieved attribute possible values.
The IDs to filter the attribute possible values by.
Filter attribute possible values by their attribute IDs.
Filter attribute possible values by their values.
The configurations determining how the attribute possible value is retrieved.
An array of strings, each being attribute names of the entity to retrieve in the result.
A number indicating the number of records to skip before retrieving the results.
A number indicating the number of records to return in the result.
An array of strings, each being relation names of the entity to retrieve in the result.
An object used to specify how to sort the returned records.
A context used to share resources, such as transaction manager, between the application and the module.
## Returns
The list of attribute possible values.
***
# retrieveAttributePossibleValue
This section provides a reference to the `retrieveAttributePossibleValue` method. This belongs to the Attribute Module.
This method retrieves an attribute possible value by its ID.
## Example
```ts theme={null}
const possibleValue = await attributeModuleService.retrieveAttributePossibleValue(
"attr_pos_val_123"
)
```
## Parameters
The ID of the attribute possible value.
The configurations determining how the attribute possible value is retrieved.
An array of strings, each being attribute names of the entity to retrieve in the result.
An array of strings, each being relation names of the entity to retrieve in the result.
An object used to specify how to sort the returned records.
A context used to share resources, such as transaction manager, between the application and the module.
## Returns
The retrieved attribute possible value.
The ID of the attribute possible value.
The value of the attribute possible value.
The rank of the attribute possible value.
Holds custom data in key-value pairs.
The created date of the possible value.
***
# listAndCountAttributePossibleValues
This section provides a reference to the `listAndCountAttributePossibleValues` method. This belongs to the Attribute Module.
This method retrieves a paginated list of attribute possible values along with the total count of available attribute possible values satisfying the provided filters.
## Example
```ts theme={null}
const [possibleValues, count] = await attributeModuleService.listAndCountAttributePossibleValues({
attribute_id: "attr_123",
})
```
## Parameters
The filters to apply on the retrieved attribute possible values.
The IDs to filter the attribute possible values by.
Filter attribute possible values by their attribute IDs.
Filter attribute possible values by their values.
The configurations determining how the attribute possible value is retrieved.
An array of strings, each being attribute names of the entity to retrieve in the result.
A number indicating the number of records to skip before retrieving the results.
A number indicating the number of records to return in the result.
An array of strings, each being relation names of the entity to retrieve in the result.
An object used to specify how to sort the returned records.
A context used to share resources, such as transaction manager, between the application and the module.
## Returns
The list of attribute possible values along with their total count.
***
# softDeleteAttributePossibleValues
This section provides a reference to the `softDeleteAttributePossibleValues` method. This belongs to the Attribute Module.
This method soft deletes attribute possible values by their IDs.
## Example
```ts theme={null}
await attributeModuleService.softDeleteAttributePossibleValues([
"attr_pos_val_123",
"attr_pos_val_321",
])
```
## Parameters
The IDs of the attribute possible values.
A context used to share resources, such as transaction manager, between the application and the module.
## Returns
An object that includes the IDs of related records that were also soft deleted. If there are no related records, the promise resolves to `void`.
***
# restoreAttributePossibleValues
This section provides a reference to the `restoreAttributePossibleValues` method. This belongs to the Attribute Module.
This method restores soft deleted attribute possible values by their IDs.
## Example
```ts theme={null}
await attributeModuleService.restoreAttributePossibleValues([
"attr_pos_val_123",
"attr_pos_val_321",
])
```
## Parameters
The IDs of the attribute possible values.
A context used to share resources, such as transaction manager, between the application and the module.
## Returns
An object that includes the IDs of related records that were restored. If there are no related records restored, the promise resolves to `void`.
# Configuration Module
Source: https://docs.mercurjs.com/product/modules/b2c-core/configuration/configuration-concept
Learn about the Configuration Module and how to use it in your application
# Configuration Module
In this section of the documentation, you will find resources to learn more about the Configuration Module and how to use it in your application.
Mercur has marketplace configuration features available out-of-the-box through the Configuration Module. A [module](https://docs.medusajs.com/learn/fundamentals/modules) is a standalone package that provides features for a single domain. Each of Mercur's marketplace features are placed in custom modules, such as this Configuration Module.
Learn more about why modules are isolated in [this documentation](https://docs.medusajs.com/learn/fundamentals/modules/isolation).
## Configuration Features
* **Marketplace Settings Management**: Create and manage marketplace-wide configuration rules that control platform behavior.
* **Dynamic Rule Checking**: Programmatically check whether specific features are enabled at runtime.
* **Default Values**: Fall back to predefined default values when rules aren't explicitly configured in the database.
* **Feature Toggles**: Enable or disable key marketplace features such as product approval requirements and import capabilities.
***
## How to Use the Configuration Module
In your Medusa application, you build flows around Commerce Modules. A flow is built as a [Workflow](https://docs.medusajs.com/learn/fundamentals/workflows), which is a special function composed of a series of steps that guarantees data consistency and reliable roll-back mechanism.
You can build custom workflows and steps. Mercur provides pre-built workflows for common configuration operations in the `@mercurjs/b2c-core` package.
For example, the `createConfigurationRuleWorkflow`:
```ts title="src/workflows/configuration/create-configuration-rule.ts" theme={null}
import { WorkflowResponse, createWorkflow } from '@medusajs/workflows-sdk'
import { CreateConfigurationRuleDTO } from '@mercurjs/framework'
import { createConfigurationRuleStep } from '../steps'
export const createConfigurationRuleWorkflow = createWorkflow(
'create-configuration-rule',
function (input: CreateConfigurationRuleDTO) {
return new WorkflowResponse(createConfigurationRuleStep(input))
}
)
```
You can then execute the workflow in your custom API routes:
### API Route
```ts title="src/api/admin/configuration/route.ts" theme={null}
import { MedusaRequest, MedusaResponse } from "@medusajs/framework"
import { createConfigurationRuleWorkflow } from '../../../workflows/configuration/workflows'
export const POST = async (
req: MedusaRequest,
res: MedusaResponse
) => {
// Execute the createConfigurationRuleWorkflow
const { result: configuration_rule } =
await createConfigurationRuleWorkflow.run({
container: req.scope,
input: req.validatedBody
})
res.status(201).json({ configuration_rule })
}
```
Learn more about workflows in [this documentation](https://docs.medusajs.com/learn/fundamentals/workflows).
***
# Concepts
In this document, you'll learn about the main concepts related to marketplace configuration in Mercur.
## Configuration Rule
A configuration rule is a marketplace-wide setting that controls the behavior of specific platform features. It is represented by the [ConfigurationRule data model](../data-model/configuration-module-data-reference#configurationrule).
A configuration rule holds information about:
* The type of rule being configured
* Whether the rule is currently enabled
* Created and updated timestamps
Each rule type controls a specific aspect of the marketplace's functionality and can be toggled on or off by marketplace administrators.
***
## Rule Types
Mercur supports four configuration rule types that control key marketplace behaviors:
### global\_product\_catalog
Controls whether the marketplace uses a global product catalog where all sellers share the same product definitions.
* **Default**: `false`
* **When enabled**: Products are shared across sellers (managed centrally)
* **When disabled**: Each seller manages their own unique products
### require\_product\_approval
Controls whether products added by sellers require administrator approval before becoming available to customers.
* **Default**: `false`
* **When enabled**: New products remain in "draft" status until admin approves
* **When disabled**: Seller products go live immediately
### product\_request\_enabled
Controls whether sellers can submit requests to create new marketplace-wide products, categories, collections, and other resources.
* **Default**: `true`
* **When enabled**: Sellers can submit proposals for new marketplace resources
* **When disabled**: Request submission functionality is unavailable to sellers
### product\_import\_enabled
Controls whether sellers can import products in bulk using CSV files.
* **Default**: `true`
* **When enabled**: Sellers have access to bulk product import functionality
* **When disabled**: Sellers must create products one by one through the UI
***
## Default Values
The Configuration Module implements a fallback system to ensure the marketplace can function even when rules aren't explicitly stored in the database.
Each rule type has a predefined default value:
```ts theme={null}
const ConfigurationRuleDefaults = new Map([
['global_product_catalog', false],
['product_request_enabled', true],
['require_product_approval', false],
['product_import_enabled', true],
])
```
When checking if a rule is enabled, the system:
1. First attempts to retrieve the rule from the database
2. If not found, returns the default value
3. If an error occurs, falls back to the default value
This ensures the marketplace remains functional during initial setup or if configuration rules are accidentally deleted.
***
## Dynamic Rule Checking
The `isRuleEnabled` method allows programmatic checking of configuration rules at runtime:
```ts theme={null}
const isApprovalRequired = await configurationModuleService.isRuleEnabled(
"require_product_approval"
)
if (isApprovalRequired) {
// Set product status to draft
productData.status = "draft"
} else {
// Publish product immediately
productData.status = "published"
}
```
This pattern is used throughout Mercur to conditionally enable or disable features based on marketplace configuration.
***
## Configuration in Middleware
Mercur provides a `checkConfigurationRule` utility function for use in API route middlewares:
```ts theme={null}
import { checkConfigurationRule } from "@mercurjs/framework"
// In a middleware
const isEnabled = await checkConfigurationRule(
req.scope,
"product_request_enabled"
)
if (!isEnabled) {
return res.status(403).json({
message: "Product request functionality is disabled"
})
}
```
This allows routes to be conditionally enabled or disabled based on marketplace settings, providing flexibility in how the platform is operated.
***
## Use Cases
**1. Curated Marketplace**
Enable `require_product_approval` to manually review all products before they go live, ensuring quality control.
**2. Open Marketplace**
Disable `require_product_approval` to allow sellers to list products immediately, reducing administrative overhead.
**3. Centralized Catalog**
Enable `global_product_catalog` for marketplaces where products are managed centrally and sellers only manage inventory.
**4. Seller-Driven Growth**
Enable `product_request_enabled` to allow sellers to propose new product categories and types, growing the catalog organically.
**5. Controlled Product Import**
Disable `product_import_enabled` during initial marketplace launch to ensure data quality, then enable it once processes are established.
# Configuration Module Data Models
Source: https://docs.mercurjs.com/product/modules/b2c-core/configuration/configuration-data-models-ref
Reference documentation for the Configuration Module data models
## Relations Overview
This module has no relations to other data models.
## Data Models
* [ConfigurationRule](#configurationrule)
## ConfigurationRule
This documentation provides a reference to the ConfigurationRule data model. It belongs to the Configuration Module.
[View source code](https://github.com/mercurjs/mercur/blob/main/packages/modules/b2c-core/src/modules/configuration/models/configuration-rule.ts)
| Field | Type | Description |
| ------------ | --------------------------------------------------------------------------------------------------------------------------- | --------------------------------------------------------- |
| `id` | `PrimaryKeyModifier` | The ID of the configuration rule. |
| `rule_type` | `EnumProperty<["global_product_catalog", "require_product_approval", "product_request_enabled", "product_import_enabled"]>` | The type of the configuration rule. This field is unique. |
| `is_enabled` | `BooleanProperty` | Whether the configuration rule is enabled. |
# Configuration Module Service Reference
Source: https://docs.mercurjs.com/product/modules/b2c-core/configuration/configuration-services
Reference documentation for the Configuration Module service methods
# IConfigurationModuleService Reference
This section of the documentation provides a reference to the `IConfigurationModuleService` interface's methods. This is the interface developers use to use the functionalities provided by the Configuration Module.
You should only use the methods in this reference when implementing complex customizations. For common cases, check out available workflows instead.
The main service interface for the Configuration Module.
## Methods
* [createConfigurationRules](#createconfigurationrules)
* [updateConfigurationRules](#updateconfigurationrules)
* [deleteConfigurationRules](#deleteconfigurationrules)
* [retrieveConfigurationRule](#retrieveconfigurationrule)
* [listConfigurationRules](#listconfigurationrules)
* [listAndCountConfigurationRules](#listandcountconfigurationrules)
* [softDeleteConfigurationRules](#softdeleteconfigurationrules)
* [restoreConfigurationRules](#restoreconfigurationrules)
* [isRuleEnabled](#isruleenabled)
***
# createConfigurationRules
This section provides a reference to the `createConfigurationRules` method. This belongs to the Configuration Module.
## createConfigurationRules(data, sharedContext?): Promise\
This method creates configuration rules.
### Example
```ts theme={null}
const rules = await configurationModuleService.createConfigurationRules([
{
rule_type: "require_product_approval",
is_enabled: true,
},
{
rule_type: "product_import_enabled",
is_enabled: false,
},
])
```
### Parameters
The configuration rules to be created.
The type of the configuration rule.
Whether the configuration rule is enabled.
A context used to share resources, such as transaction manager, between the application and the module.
### Returns
The created configuration rules.
## createConfigurationRules(data, sharedContext?): Promise\
This method creates a configuration rule.
### Example
```ts theme={null}
const rule = await configurationModuleService.createConfigurationRules({
rule_type: "require_product_approval",
is_enabled: true,
})
```
### Parameters
The configuration rule to be created.
The type of the configuration rule.
Whether the configuration rule is enabled.
A context used to share resources, such as transaction manager, between the application and the module.
### Returns
The created configuration rule.
***
# updateConfigurationRules
This section provides a reference to the `updateConfigurationRules` method. This belongs to the Configuration Module.
## updateConfigurationRules(id, data, sharedContext?): Promise\
This method updates an existing configuration rule.
### Example
```ts theme={null}
const rule = await configurationModuleService.updateConfigurationRules("conf_123", {
is_enabled: false,
})
```
### Parameters
The ID of the configuration rule.
The attributes to update in the configuration rule.
Whether the configuration rule is enabled.
A context used to share resources, such as transaction manager, between the application and the module.
### Returns
The updated configuration rule.
The ID of the configuration rule.
The type of the configuration rule.
Whether the configuration rule is enabled.
The created date of the configuration rule.
The updated date of the configuration rule.
***
# deleteConfigurationRules
This section provides a reference to the `deleteConfigurationRules` method. This belongs to the Configuration Module.
## deleteConfigurationRules(ids, sharedContext?): Promise\
This method deletes configuration rules by their IDs.
### Example
```ts theme={null}
await configurationModuleService.deleteConfigurationRules(["conf_123", "conf_321"])
```
### Parameters
The IDs of the configuration rules.
A context used to share resources, such as transaction manager, between the application and the module.
### Returns
Resolves when the configuration rules are deleted successfully.
## deleteConfigurationRules(id, sharedContext?): Promise\
This method deletes a configuration rule by its ID.
### Example
```ts theme={null}
await configurationModuleService.deleteConfigurationRules("conf_123")
```
### Parameters
The ID of the configuration rule.
A context used to share resources, such as transaction manager, between the application and the module.
### Returns
Resolves when the configuration rule is deleted successfully.
***
# retrieveConfigurationRule
This section provides a reference to the `retrieveConfigurationRule` method. This belongs to the Configuration Module.
This method retrieves a configuration rule by its ID.
## Example
```ts theme={null}
const rule = await configurationModuleService.retrieveConfigurationRule("conf_123")
```
## Parameters
The ID of the configuration rule.
The configurations determining how the configuration rule is retrieved.
An array of strings, each being attribute names of the entity to retrieve in the result.
A number indicating the number of records to skip before retrieving the results.
A number indicating the number of records to return in the result.
An array of strings, each being relation names of the entity to retrieve in the result.
An object used to specify how to sort the returned records.
A boolean indicating whether deleted records should also be retrieved as part of the result.
A context used to share resources, such as transaction manager, between the application and the module.
## Returns
The retrieved configuration rule.
The ID of the configuration rule.
The type of the configuration rule.
Whether the configuration rule is enabled.
The created date of the configuration rule.
The updated date of the configuration rule.
***
# listConfigurationRules
This section provides a reference to the `listConfigurationRules` method. This belongs to the Configuration Module.
This method retrieves a paginated list of configuration rules based on optional filters and configuration.
## Example
To retrieve a list of configuration rules using their IDs:
```ts theme={null}
const rules = await configurationModuleService.listConfigurationRules({
id: ["conf_123", "conf_321"],
})
```
To retrieve enabled rules:
```ts theme={null}
const rules = await configurationModuleService.listConfigurationRules({
is_enabled: true,
})
```
By default, only the first `15` records are retrieved. You can control pagination by specifying the `skip` and `take` properties of the `config` parameter:
```ts theme={null}
const rules = await configurationModuleService.listConfigurationRules(
{
rule_type: "require_product_approval",
},
{
take: 20,
skip: 2,
}
)
```
## Parameters
The filters to apply on the retrieved configuration rules.
The IDs to filter the configuration rules by.
Filter configuration rules by their rule types.
Filter by whether configuration rules are enabled.
The configurations determining how the configuration rule is retrieved.
An array of strings, each being attribute names of the entity to retrieve in the result.
A number indicating the number of records to skip before retrieving the results.
A number indicating the number of records to return in the result.
An array of strings, each being relation names of the entity to retrieve in the result.
An object used to specify how to sort the returned records.
A boolean indicating whether deleted records should also be retrieved as part of the result.
A context used to share resources, such as transaction manager, between the application and the module.
## Returns
The list of configuration rules.
***
# listAndCountConfigurationRules
This section provides a reference to the `listAndCountConfigurationRules` method. This belongs to the Configuration Module.
This method retrieves a paginated list of configuration rules along with the total count of available configuration rules satisfying the provided filters.
## Example
To retrieve a list of configuration rules using their IDs:
```ts theme={null}
const [rules, count] = await configurationModuleService.listAndCountConfigurationRules({
id: ["conf_123", "conf_321"],
})
```
By default, only the first `15` records are retrieved. You can control pagination by specifying the `skip` and `take` properties of the `config` parameter:
```ts theme={null}
const [rules, count] = await configurationModuleService.listAndCountConfigurationRules(
{
is_enabled: true,
},
{
take: 20,
skip: 2,
}
)
```
## Parameters
The filters to apply on the retrieved configuration rules.
The IDs to filter the configuration rules by.
Filter configuration rules by their rule types.
Filter by whether configuration rules are enabled.
The configurations determining how the configuration rule is retrieved.
An array of strings, each being attribute names of the entity to retrieve in the result.
A number indicating the number of records to skip before retrieving the results.
A number indicating the number of records to return in the result.
An array of strings, each being relation names of the entity to retrieve in the result.
An object used to specify how to sort the returned records.
A boolean indicating whether deleted records should also be retrieved as part of the result.
A context used to share resources, such as transaction manager, between the application and the module.
## Returns
The list of configuration rules along with their total count.
***
# softDeleteConfigurationRules
This section provides a reference to the `softDeleteConfigurationRules` method. This belongs to the Configuration Module.
This method soft deletes configuration rules by their IDs.
## Example
```ts theme={null}
await configurationModuleService.softDeleteConfigurationRules([
"conf_123",
"conf_321",
])
```
## Parameters
The IDs of the configuration rules.
An object that is used to specify an entity's related entities that should be soft-deleted when the main entity is soft-deleted.
A context used to share resources, such as transaction manager, between the application and the module.
## Returns
An object that includes the IDs of related records that were also soft deleted. If there are no related records, the promise resolves to `void`.
***
# restoreConfigurationRules
This section provides a reference to the `restoreConfigurationRules` method. This belongs to the Configuration Module.
This method restores soft deleted configuration rules by their IDs.
## Example
```ts theme={null}
await configurationModuleService.restoreConfigurationRules(["conf_123", "conf_321"])
```
## Parameters
The IDs of the configuration rules.
Configurations determining which relations to restore along with each of the configuration rule.
A context used to share resources, such as transaction manager, between the application and the module.
## Returns
An object that includes the IDs of related records that were restored. If there are no related records restored, the promise resolves to `void`.
***
# isRuleEnabled
This section provides a reference to the `isRuleEnabled` method. This belongs to the Configuration Module.
This method checks whether a specific configuration rule is enabled. If the rule doesn't exist in the database, it returns the default value for that rule type.
## Example
```ts theme={null}
const isEnabled = await configurationModuleService.isRuleEnabled("require_product_approval")
```
## Parameters
The type of the configuration rule to check. Can be `global_product_catalog`, `require_product_approval`, `product_request_enabled`, or `product_import_enabled`.
## Returns
A boolean indicating whether the configuration rule is enabled.
# Marketplace Module
Source: https://docs.mercurjs.com/product/modules/b2c-core/marketplace/marketplace-concept
Learn about the Marketplace Module and how to use it in your application
# Marketplace Module
In this section of the documentation, you will find resources to learn more about the Marketplace Module and how to use it in your application.
Mercur has order set management features available out-of-the-box through the Marketplace Module. A [module](https://docs.medusajs.com/learn/fundamentals/modules) is a standalone package that provides features for a single domain. Each of Mercur's marketplace features are placed in custom modules, such as this Marketplace Module.
Learn more about why modules are isolated in [this documentation](https://docs.medusajs.com/learn/fundamentals/modules/isolation).
## Marketplace Features
* **Order Set Management**: Group multiple vendor orders from a single customer checkout into an order set for unified tracking.
* **Multi-Vendor Order Tracking**: Associate multiple orders with a single cart and payment collection when customers purchase from multiple sellers.
* **Order Aggregation**: Calculate aggregated totals, status, and fulfillment information across all orders in a set.
* **Unified Customer View**: Provide customers with a single view of their multi-vendor orders while maintaining individual order records per seller.
***
## How to Use the Marketplace Module
In your Medusa application, you build flows around Commerce Modules. A flow is built as a [Workflow](https://docs.medusajs.com/learn/fundamentals/workflows), which is a special function composed of a series of steps that guarantees data consistency and reliable roll-back mechanism.
You can build custom workflows and steps. Mercur provides pre-built workflows for marketplace operations in the `@mercurjs/b2c-core` package.
For example, the `getFormattedOrderSetListWorkflow`:
```ts title="src/workflows/order-set/get-formatted-order-set-list.ts" theme={null}
import { deduplicate } from '@medusajs/framework/utils'
import {
WorkflowResponse,
createWorkflow,
transform
} from '@medusajs/framework/workflows-sdk'
import { useQueryGraphStep } from '@medusajs/medusa/core-flows'
import { formatOrderSets } from '../utils'
export const getFormattedOrderSetListWorkflow = createWorkflow(
'get-formatted-order-set-list',
function (input: {
fields?: string[]
filters?: Record
pagination?: {
skip: number
take?: number
order?: Record
}
}) {
const fields = transform(input, ({ fields }) => {
return deduplicate([
...(fields ?? []),
'id',
'display_id',
'customer.*',
'cart.*',
'payment_collection.*',
'orders.id',
'orders.status',
'orders.payment_status',
'orders.fulfillment_status',
'orders.total',
'orders.subtotal',
'orders.tax_total',
'orders.items.*',
'orders.fulfillments.*'
])
})
const { data, metadata } = useQueryGraphStep({
entity: 'order_set',
fields,
filters: input.filters,
pagination: input.pagination
})
const formattedOrderSets = transform(data, formatOrderSets)
return new WorkflowResponse({ data: formattedOrderSets, metadata })
}
)
```
You can then execute the workflow in your custom API routes, scheduled jobs, or subscribers:
### API Route
```ts title="src/api/admin/order-sets/route.ts" theme={null}
import { MedusaRequest, MedusaResponse } from '@medusajs/framework'
import { ContainerRegistrationKeys } from '@medusajs/framework/utils'
import { getFormattedOrderSetListWorkflow } from '../../../workflows/order-set/workflows'
export const GET = async (req: MedusaRequest, res: MedusaResponse) => {
const { filterableFields, queryConfig } = req
if (filterableFields['order_id']) {
const query = req.scope.resolve(ContainerRegistrationKeys.QUERY)
const {
data: [order_set]
} = await query.graph({
entity: 'order_set_order',
fields: ['order_set_id'],
filters: {
order_id: req.filterableFields['order_id']
}
})
delete filterableFields['order_id']
filterableFields['id'] = order_set.order_set_id
}
const {
result: { data, metadata }
} = await getFormattedOrderSetListWorkflow(req.scope).run({
input: {
fields: queryConfig.fields,
filters: filterableFields,
pagination: queryConfig.pagination
}
})
res.json({
order_sets: data,
count: metadata!.count,
offset: metadata!.skip,
limit: metadata!.take
})
}
```
### Subscriber
```ts title="src/subscribers/notification-admin-new-order-set.ts" theme={null}
import { ContainerRegistrationKeys, Modules } from '@medusajs/framework/utils'
import { SubscriberArgs, SubscriberConfig } from '@medusajs/medusa'
import { OrderSetWorkflowEvents } from '@mercurjs/framework'
export default async function newOrderSetAdminNotifyHandler({
event,
container
}: SubscriberArgs<{ id: string }>) {
const notificationService = container.resolve(Modules.NOTIFICATION)
const query = container.resolve(ContainerRegistrationKeys.QUERY)
const { id: orderSetId } = event.data
const {
data: [order_set]
} = await query.graph({
entity: 'order_set',
fields: ['orders.id'],
filters: {
id: orderSetId
}
})
if (!order_set || order_set.orders.length < 2) {
return
}
await notificationService.createNotifications({
to: '',
channel: 'feed',
template: 'admin-ui',
content: {
subject: `New Order Set Placed`
},
data: {
title: `New order set placed`,
description: 'Someone has placed a new order from multiple sellers 🔔',
redirect: '/admin/orders'
}
})
}
export const config: SubscriberConfig = {
event: OrderSetWorkflowEvents.PLACED,
context: {
subscriberId: 'new-order-set-admin-notify-handler'
}
}
```
Learn more about workflows in [this documentation](https://docs.medusajs.com/learn/fundamentals/workflows).
***
# Concepts
In this document, you'll learn about the main concepts related to order sets in Mercur.
## Order Set
An order set is a grouping of multiple orders created from a single cart in a multi-vendor marketplace. It is represented by the [OrderSet data model](../data-model/marketplace-module-data-reference#orderset).
When a customer checks out a cart containing products from multiple sellers, Mercur:
1. Creates one `OrderSet` to represent the entire purchase
2. Creates individual `Order` records for each seller
3. Links all orders to the order set
An order set holds information about:
* The cart that was used for the purchase
* The customer who made the purchase
* The sales channel where the purchase was made
* The payment collection containing payment details
* All individual seller orders created from the cart
This architecture allows the marketplace to maintain both a unified customer view (the order set) and individual seller order management.
***
## Why Order Sets?
In a traditional single-vendor e-commerce platform, one cart results in one order. In a multi-vendor marketplace, this creates complexity:
**Without Order Sets:**
* Customer sees multiple separate orders (confusing UX)
* No unified tracking for a single purchase session
* Difficult to aggregate totals and status
* Payment tracking becomes fragmented
**With Order Sets:**
* Customer sees one unified order set (better UX)
* Single reference point for the entire purchase
* Easy aggregation of totals across vendors
* Simplified payment and fulfillment tracking
***
## Order Set Properties
### Display ID
The `display_id` is an auto-incrementing number that provides a user-friendly reference for the order set (e.g., #1001, #1002). This is what customers see instead of the UUID.
### Linked Entities
An order set maintains read-only links to:
* **Customer**: The customer who placed the order
* **Cart**: The cart that was converted to orders
* **SalesChannel**: The channel where the purchase was made
* **PaymentCollection**: The payment information for the entire order set
***
## Formatted Order Sets
Mercur provides a `formatOrderSets` utility that aggregates information from individual orders to present unified order set data:
**Aggregated Properties:**
* **status**: Overall order set status (derived from individual order statuses)
* **payment\_status**: Overall payment status (from payment collection)
* **fulfillment\_status**: Overall fulfillment status (across all orders)
* **total**: Sum of all order totals
* **subtotal**: Sum of all order subtotals
* **tax\_total**: Sum of all tax amounts
* **shipping\_total**: Sum of all shipping amounts
This allows displaying a single "order" to customers while maintaining separate orders for each seller behind the scenes.
***
## Use Cases
**1. Multi-Vendor Checkout**
Customer adds products from 3 different sellers to cart and checks out once, creating 1 order set with 3 individual orders.
**2. Customer Order History**
Display unified order history to customers, showing order sets rather than confusing them with multiple orders per purchase.
**3. Admin Order Management**
Administrators can view all orders from a single checkout session grouped together for support and analytics.
**4. Payment Reconciliation**
Track that a single payment collection was split across multiple vendor orders through the order set.
**5. Fulfillment Tracking**
Monitor overall fulfillment progress across all sellers involved in a single customer purchase.
# Marketplace Module Data Models
Source: https://docs.mercurjs.com/product/modules/b2c-core/marketplace/marketplace-data-model-reference
Reference documentation for the Marketplace Module data models
## Relations Overview
| Relationship | Type | Description |
| ---------------------------------------------- | ------------------- | ----------------------------------------------- |
| OrderSet → Cart (Cart Module) | Read-only - has one | An order set is created from a cart |
| OrderSet → Customer (Customer Module) | Read-only - has one | An order set belongs to a customer |
| OrderSet → SalesChannel (Sales Channel Module) | Read-only - has one | An order set is associated with a sales channel |
| OrderSet → PaymentCollection (Payment Module) | Read-only - has one | An order set has a payment collection |
## Data Models
* [OrderSet](#orderset)
## OrderSet
This documentation provides a reference to the OrderSet data model. It belongs to the Marketplace Module.
[View source code](https://github.com/mercurjs/mercur/blob/main/packages/modules/b2c-core/src/modules/marketplace/models/order-set.ts)
| Field | Type | Description |
| ----------------------- | -------------------------------- | ------------------------------------------------------- |
| `id` | `PrimaryKeyModifier` | The ID of the order set. |
| `display_id` | `NumberProperty` | The display ID of the order set |
| `sales_channel_id` | `TextProperty` | The ID of the order set's sales channel. |
| `cart_id` | `TextProperty` | The ID of the cart that the order set was created from. |
| `customer_id` | `TextProperty` | The ID of the order set's customer. |
| `payment_collection_id` | `TextProperty` | The ID of the order set's payment collection. |
# Marketplace Module Links
Source: https://docs.mercurjs.com/product/modules/b2c-core/marketplace/marketplace-links
Module links for the Marketplace Module
# Links between Marketplace Module and Other Modules
This document showcases the module links defined between the Marketplace Module and other Commerce Modules.
## Summary
The Marketplace Module has the following links to other modules:
Read-only links are used to query data across modules, but the relations aren't stored in a pivot table in the database.
| First Data Model | Second Data Model | Type | Description |
| ---------------- | ----------------- | -------------------- | -------------------------------------------------------- |
| OrderSet | Order | Stored - one-to-many | Associates an order set with its multiple vendor orders |
| OrderSet | Customer | Read-only - has one | Retrieves the customer who owns the order set |
| OrderSet | Cart | Read-only - has one | Retrieves the cart that was used to create the order set |
| OrderSet | SalesChannel | Read-only - has one | Retrieves the sales channel of the order set |
| OrderSet | PaymentCollection | Read-only - has one | Retrieves the payment collection for the order set |
***
## Order Module
Mercur defines a link between the Marketplace Module's `OrderSet` data model and the Order Module's `Order` data model. This allows an order set to be associated with multiple orders (one per seller in a multi-vendor cart).
### Retrieve with Query
To retrieve the orders of an order set with Query, pass `order.*` in `fields`:
```ts theme={null}
const { data: orderSets } = await query.graph({
entity: "order_set",
fields: [
"*",
"order.*",
],
})
// orderSets[0].order
```
```ts theme={null}
import { useQueryGraphStep } from "@medusajs/medusa/core-flows"
// ...
const { data: orderSets } = useQueryGraphStep({
entity: "order_set",
fields: [
"*",
"order.*",
],
})
// orderSets[0].order
```
### Manage with Link
To manage the orders of an order set, use Link:
```ts theme={null}
import { Modules } from "@medusajs/framework/utils"
// ...
await link.create({
marketplace: {
order_set_id: "ordset_123",
},
[Modules.ORDER]: {
order_id: "ord_123",
},
})
```
```ts theme={null}
import { createRemoteLinkStep } from "@medusajs/medusa/core-flows"
// ...
createRemoteLinkStep({
marketplace: {
order_set_id: "ordset_123",
},
[Modules.ORDER]: {
order_id: "ord_123",
},
})
```
***
## Customer Module
Mercur defines a read-only link between the Marketplace Module's `OrderSet` data model and the Customer Module's `Customer` data model. Because the link is read-only from the `OrderSet`'s side, you can only retrieve the customer of an order set, and not the other way around.
### Retrieve with Query
To retrieve the customer of an order set with Query, pass `customer.*` in `fields`:
```ts theme={null}
const { data: orderSets } = await query.graph({
entity: "order_set",
fields: [
"*",
"customer.*",
],
})
// orderSets[0].customer
```
```ts theme={null}
import { useQueryGraphStep } from "@medusajs/medusa/core-flows"
// ...
const { data: orderSets } = useQueryGraphStep({
entity: "order_set",
fields: [
"*",
"customer.*",
],
})
// orderSets[0].customer
```
***
## Cart Module
Mercur defines a read-only link between the Marketplace Module's `OrderSet` data model and the Cart Module's `Cart` data model. Because the link is read-only from the `OrderSet`'s side, you can only retrieve the cart of an order set, and not the other way around.
The cart of an order set is determined by the `cart_id` property of the `OrderSet` data model.
### Retrieve with Query
To retrieve the cart of an order set with Query, pass `cart.*` in `fields`:
```ts theme={null}
const { data: orderSets } = await query.graph({
entity: "order_set",
fields: [
"*",
"cart.*",
],
})
// orderSets[0].cart
```
```ts theme={null}
import { useQueryGraphStep } from "@medusajs/medusa/core-flows"
// ...
const { data: orderSets } = useQueryGraphStep({
entity: "order_set",
fields: [
"*",
"cart.*",
],
})
// orderSets[0].cart
```
***
## Sales Channel Module
Mercur defines a read-only link between the Marketplace Module's `OrderSet` data model and the Sales Channel Module's `SalesChannel` data model. Because the link is read-only from the `OrderSet`'s side, you can only retrieve the sales channel of an order set, and not the other way around.
The sales channel of an order set is determined by the `sales_channel_id` property of the `OrderSet` data model.
### Retrieve with Query
To retrieve the sales channel of an order set with Query, pass `sales_channel.*` in `fields`:
```ts theme={null}
const { data: orderSets } = await query.graph({
entity: "order_set",
fields: [
"*",
"sales_channel.*",
],
})
// orderSets[0].sales_channel
```
```ts theme={null}
import { useQueryGraphStep } from "@medusajs/medusa/core-flows"
// ...
const { data: orderSets } = useQueryGraphStep({
entity: "order_set",
fields: [
"*",
"sales_channel.*",
],
})
// orderSets[0].sales_channel
```
***
## Payment Module
Mercur defines a read-only link between the Marketplace Module's `OrderSet` data model and the Payment Module's `PaymentCollection` data model. Because the link is read-only from the `OrderSet`'s side, you can only retrieve the payment collection of an order set, and not the other way around.
The payment collection of an order set is determined by the `payment_collection_id` property of the `OrderSet` data model.
### Retrieve with Query
To retrieve the payment collection of an order set with Query, pass `payment_collection.*` in `fields`:
```ts theme={null}
const { data: orderSets } = await query.graph({
entity: "order_set",
fields: [
"*",
"payment_collection.*",
],
})
// orderSets[0].payment_collection
```
```ts theme={null}
import { useQueryGraphStep } from "@medusajs/medusa/core-flows"
// ...
const { data: orderSets } = useQueryGraphStep({
entity: "order_set",
fields: [
"*",
"payment_collection.*",
],
})
// orderSets[0].payment_collection
```
# Marketplace Module Service Reference
Source: https://docs.mercurjs.com/product/modules/b2c-core/marketplace/marketplace-service
Reference documentation for the Marketplace Module service methods
# IMarketplaceModuleService Reference
This section of the documentation provides a reference to the `IMarketplaceModuleService` interface's methods. This is the interface developers use to use the functionalities provided by the Marketplace Module.
You should only use the methods in this reference when implementing complex customizations. For common cases, check out available workflows instead.
The main service interface for the Marketplace Module.
## Methods
* [createOrderSets](#createordersets)
* [updateOrderSets](#updateordersets)
* [deleteOrderSets](#deleteordersets)
* [retrieveOrderSet](#retrieveorderset)
* [listOrderSets](#listordersets)
* [listAndCountOrderSets](#listandcountordersets)
* [softDeleteOrderSets](#softdeleteordersets)
* [restoreOrderSets](#restoreordersets)
***
# createOrderSets
This section provides a reference to the `createOrderSets` method. This belongs to the Marketplace Module.
## createOrderSets(data, sharedContext?): Promise\
This method creates order sets.
### Example
```ts theme={null}
const orderSets = await marketplaceModuleService.createOrderSets([
{
cart_id: "cart_123",
customer_id: "cus_123",
sales_channel_id: "sc_123",
payment_collection_id: "paycol_123",
},
])
```
### Parameters
The order sets to be created.
The ID of the cart that the order set was created from.
The ID of the customer who owns the order set.
The ID of the sales channel the order set belongs to.
The ID of the payment collection associated with the order set.
A context used to share resources, such as transaction manager, between the application and the module.
### Returns
The created order sets.
## createOrderSets(data, sharedContext?): Promise\
This method creates an order set.
### Example
```ts theme={null}
const orderSet = await marketplaceModuleService.createOrderSets({
cart_id: "cart_123",
customer_id: "cus_123",
sales_channel_id: "sc_123",
payment_collection_id: "paycol_123",
})
```
### Parameters
The order set to be created.
The ID of the cart that the order set was created from.
The ID of the customer who owns the order set.
The ID of the sales channel the order set belongs to.
The ID of the payment collection associated with the order set.
A context used to share resources, such as transaction manager, between the application and the module.
### Returns
The created order set.
***
# updateOrderSets
This section provides a reference to the `updateOrderSets` method. This belongs to the Marketplace Module.
## updateOrderSets(id, data, sharedContext?): Promise\
This method updates an existing order set.
### Example
```ts theme={null}
const orderSet = await marketplaceModuleService.updateOrderSets("ordset_123", {
payment_collection_id: "paycol_456",
})
```
### Parameters
The ID of the order set.
The attributes to update in the order set.
The ID of the cart that the order set was created from.
The ID of the customer who owns the order set.
The ID of the sales channel the order set belongs to.
The ID of the payment collection associated with the order set.
A context used to share resources, such as transaction manager, between the application and the module.
### Returns
The updated order set.
The ID of the order set.
The display ID of the order set.
The ID of the cart that the order set was created from.
The ID of the customer who owns the order set.
The ID of the sales channel the order set belongs to.
The ID of the payment collection associated with the order set.
The created date of the order set.
The updated date of the order set.
***
# deleteOrderSets
This section provides a reference to the `deleteOrderSets` method. This belongs to the Marketplace Module.
## deleteOrderSets(ids, sharedContext?): Promise\
This method deletes order sets by their IDs.
### Example
```ts theme={null}
await marketplaceModuleService.deleteOrderSets(["ordset_123", "ordset_321"])
```
### Parameters
The IDs of the order sets.
A context used to share resources, such as transaction manager, between the application and the module.
### Returns
Resolves when the order sets are deleted successfully.
## deleteOrderSets(id, sharedContext?): Promise\
This method deletes an order set by its ID.
### Example
```ts theme={null}
await marketplaceModuleService.deleteOrderSets("ordset_123")
```
### Parameters
The ID of the order set.
A context used to share resources, such as transaction manager, between the application and the module.
### Returns
Resolves when the order set is deleted successfully.
***
# retrieveOrderSet
This section provides a reference to the `retrieveOrderSet` method. This belongs to the Marketplace Module.
This method retrieves an order set by its ID.
## Example
```ts theme={null}
const orderSet = await marketplaceModuleService.retrieveOrderSet("ordset_123")
```
To retrieve relationships:
```ts theme={null}
const orderSet = await marketplaceModuleService.retrieveOrderSet(
"ordset_123",
{
relations: ["customer", "cart", "sales_channel"],
}
)
```
## Parameters
The ID of the order set.
The configurations determining how the order set is retrieved. Its properties, such as `select` or `relations`, accept the attributes or relations associated with an order set.
An array of strings, each being attribute names of the entity to retrieve in the result.
A number indicating the number of records to skip before retrieving the results.
A number indicating the number of records to return in the result.
An array of strings, each being relation names of the entity to retrieve in the result. Use Query to retrieve linked data models from other modules.
An object used to specify how to sort the returned records.
A boolean indicating whether deleted records should also be retrieved as part of the result.
A context used to share resources, such as transaction manager, between the application and the module.
## Returns
The retrieved order set.
The ID of the order set.
The display ID of the order set.
The ID of the cart that the order set was created from.
The ID of the customer who owns the order set.
The ID of the sales channel the order set belongs to.
The ID of the payment collection associated with the order set.
The created date of the order set.
The updated date of the order set.
The associated customer (if included in relations).
The associated cart (if included in relations).
The associated sales channel (if included in relations).
The associated payment collection (if included in relations).
***
# listOrderSets
This section provides a reference to the `listOrderSets` method. This belongs to the Marketplace Module.
This method retrieves a paginated list of order sets based on optional filters and configuration.
## Example
To retrieve a list of order sets using their IDs:
```ts theme={null}
const orderSets = await marketplaceModuleService.listOrderSets({
id: ["ordset_123", "ordset_321"],
})
```
To retrieve order sets for a specific customer:
```ts theme={null}
const orderSets = await marketplaceModuleService.listOrderSets({
customer_id: "cus_123",
})
```
By default, only the first `15` records are retrieved. You can control pagination by specifying the `skip` and `take` properties of the `config` parameter:
```ts theme={null}
const orderSets = await marketplaceModuleService.listOrderSets(
{
customer_id: "cus_123",
},
{
take: 20,
skip: 2,
}
)
```
## Parameters
The filters to apply on the retrieved order sets.
The IDs to filter the order sets by.
Filter order sets by their cart IDs.
Filter order sets by their customer IDs.
Filter order sets by their sales channel IDs.
Filter order sets by their payment collection IDs.
Filter order sets by their display IDs.
The configurations determining how the order set is retrieved. Its properties, such as `select` or `relations`, accept the attributes or relations associated with an order set.
An array of strings, each being attribute names of the entity to retrieve in the result.
A number indicating the number of records to skip before retrieving the results.
A number indicating the number of records to return in the result.
An array of strings, each being relation names of the entity to retrieve in the result.
An object used to specify how to sort the returned records. Its keys are the names of attributes of the entity, and a key's value can either be `ASC` to sort retrieved records in an ascending order, or `DESC` to sort retrieved records in a descending order.
A boolean indicating whether deleted records should also be retrieved as part of the result.
A context used to share resources, such as transaction manager, between the application and the module.
## Returns
The list of order sets.
***
# listAndCountOrderSets
This section provides a reference to the `listAndCountOrderSets` method. This belongs to the Marketplace Module.
This method retrieves a paginated list of order sets along with the total count of available order sets satisfying the provided filters.
## Example
To retrieve a list of order sets using their IDs:
```ts theme={null}
const [orderSets, count] = await marketplaceModuleService.listAndCountOrderSets({
id: ["ordset_123", "ordset_321"],
})
```
By default, only the first `15` records are retrieved. You can control pagination by specifying the `skip` and `take` properties of the `config` parameter:
```ts theme={null}
const [orderSets, count] = await marketplaceModuleService.listAndCountOrderSets(
{
customer_id: "cus_123",
},
{
take: 20,
skip: 2,
}
)
```
## Parameters
The filters to apply on the retrieved order sets.
The IDs to filter the order sets by.
Filter order sets by their cart IDs.
Filter order sets by their customer IDs.
Filter order sets by their sales channel IDs.
Filter order sets by their payment collection IDs.
Filter order sets by their display IDs.
The configurations determining how the order set is retrieved.
An array of strings, each being attribute names of the entity to retrieve in the result.
A number indicating the number of records to skip before retrieving the results.
A number indicating the number of records to return in the result.
An array of strings, each being relation names of the entity to retrieve in the result.
An object used to specify how to sort the returned records.
A boolean indicating whether deleted records should also be retrieved as part of the result.
A context used to share resources, such as transaction manager, between the application and the module.
## Returns
The list of order sets along with their total count.
***
# softDeleteOrderSets
This section provides a reference to the `softDeleteOrderSets` method. This belongs to the Marketplace Module.
This method soft deletes order sets by their IDs.
## Example
```ts theme={null}
await marketplaceModuleService.softDeleteOrderSets([
"ordset_123",
"ordset_321",
])
```
## Parameters
The IDs of the order sets.
An object that is used to specify an entity's related entities that should be soft-deleted when the main entity is soft-deleted.
A context used to share resources, such as transaction manager, between the application and the module.
## Returns
An object that includes the IDs of related records that were also soft deleted. If there are no related records, the promise resolves to `void`.
***
# restoreOrderSets
This section provides a reference to the `restoreOrderSets` method. This belongs to the Marketplace Module.
This method restores soft deleted order sets by their IDs.
## Example
```ts theme={null}
await marketplaceModuleService.restoreOrderSets(["ordset_123", "ordset_321"])
```
## Parameters
The IDs of the order sets.
Configurations determining which relations to restore along with each of the order set.
A context used to share resources, such as transaction manager, between the application and the module.
## Returns
An object that includes the IDs of related records that were restored. If there are no related records restored, the promise resolves to `void`.
# Payout Module
Source: https://docs.mercurjs.com/product/modules/b2c-core/payout/payout-concept
Learn about the Payout Module and how to use it in your application
# Payout Module
In this section of the documentation, you will find resources to learn more about the Payout Module and how to use it in your application.
Mercur has seller payout features available out-of-the-box through the Payout Module. A [module](https://docs.medusajs.com/learn/fundamentals/modules) is a standalone package that provides features for a single domain. Each of Mercur's marketplace features are placed in custom modules, such as this Payout Module.
Learn more about why modules are isolated in [this documentation](https://docs.medusajs.com/learn/fundamentals/modules/isolation).
## Payout Features
* **Payout Account Management**: Create and manage seller payout accounts integrated with payment providers like Stripe Connect.
* **Seller Onboarding**: Handle the onboarding process for sellers to connect their bank accounts and receive payments.
* **Automated Payouts**: Process payouts to sellers automatically based on completed orders.
* **Payout Reversals**: Handle refunds and chargebacks by creating payout reversals.
* **Webhook Integration**: Process asynchronous events from payment providers to update account status.
***
## How to Use the Payout Module
In your Medusa application, you build flows around Commerce Modules. A flow is built as a [Workflow](https://docs.medusajs.com/learn/fundamentals/workflows), which is a special function composed of a series of steps that guarantees data consistency and reliable roll-back mechanism.
You can build custom workflows and steps. Mercur provides pre-built workflows for payout operations in the `@mercurjs/b2c-core` package.
For example, the `processPayoutWebhookActionWorkflow`:
```ts src/workflows/payout/process-payout-webhook-action.ts theme={null}
import { when } from '@medusajs/framework/workflows-sdk'
import { createWorkflow } from '@medusajs/workflows-sdk'
import {
PayoutAccountStatus,
PayoutWebhookAction,
PayoutWebhookActionAndDataResponse
} from '@mercurjs/framework'
import { updatePayoutAccountStep } from '../steps'
type ProcessPayoutWebhookActionInput = {
action: PayoutWebhookActionAndDataResponse['action']
data: PayoutWebhookActionAndDataResponse['data']
}
export const processPayoutWebhookActionWorkflow = createWorkflow(
'process-payout-action',
function (input: ProcessPayoutWebhookActionInput) {
// Conditional workflow execution based on webhook action
when(
{ action: input.action },
({ action }) => action === PayoutWebhookAction.ACCOUNT_AUTHORIZED
).then(() => {
updatePayoutAccountStep({
id: input.data.account_id,
status: PayoutAccountStatus.ACTIVE
})
})
}
)
```
You can then execute the workflow in your subscribers:
### Subscriber
```ts src/subscribers/payout-webhook.ts theme={null}
import { SubscriberArgs, SubscriberConfig } from "@medusajs/framework"
import {
PayoutWebhookActionPayload,
PayoutWebhookEvents,
} from "@mercurjs/framework"
import { PAYOUT_MODULE } from "../modules/payout"
import { PayoutModuleService } from "../modules/payout"
import { processPayoutWebhookActionWorkflow } from "../workflows/payout/workflows"
export default async function payoutWebhookHandler({
event,
container,
}: SubscriberArgs) {
const payoutService: PayoutModuleService = container.resolve(PAYOUT_MODULE)
const input = event.data
// Handle Buffer serialization
if (input.rawData?.type === "Buffer") {
input.rawData = Buffer.from(input.rawData.data)
}
// Validate webhook and determine action
const actionAndData = await payoutService.getWebhookActionAndData(input)
if (!actionAndData) {
return
}
// Process the webhook action
await processPayoutWebhookActionWorkflow(container).run({
input: {
action: actionAndData.action,
data: actionAndData.data,
},
})
}
export const config: SubscriberConfig = {
event: PayoutWebhookEvents.ACCOUNT_WEBHOOK_RECEIVED,
context: {
subscriberId: "payout-account-webhook-handler",
},
}
```
***
# Concepts
In this document, you'll learn about the main concepts related to payouts in Mercur.
## Payout Account
A payout account represents a seller's connection to a payment provider for receiving funds from the marketplace. It is represented by the [PayoutAccount data model](../data-model/payout-module-data-reference#payoutaccount).
A payout account holds information about:
* The seller's reference ID in the external provider's system (e.g., Stripe Connect account ID)
* Account status (pending, active, disabled)
* Provider-specific account data
* Associated onboarding record
* History of payouts
Each seller must create and complete verification for a payout account before they can receive payments from orders.
***
## Payout Account Status
A payout account can be in one of three states:
### pending
The account is created but not yet fully verified. The seller needs to complete the onboarding process by providing business information, bank account details, and identity verification.
### active
The account is fully verified and authorized to receive payouts. The seller has completed all required steps in the onboarding flow.
### disabled
The account has been deactivated, either by the seller, the marketplace administrator, or the payment provider. No payouts can be sent to disabled accounts.
***
## Onboarding
The onboarding process guides sellers through connecting their payout account with the payment provider. It is represented by the [Onboarding data model](../data-model/payout-module-data-reference#onboarding).
### Onboarding Flow
1. **Create Payout Account**: Seller initiates account creation through the vendor panel
2. **Initialize Onboarding**: System generates an onboarding URL from the payment provider (e.g., Stripe Connect onboarding link)
3. **Complete Verification**: Seller completes identity and business verification on the provider's platform
4. **Webhook Callback**: Provider sends webhook to notify account authorization
5. **Account Activation**: System updates account status to `active` via webhook handler
The onboarding record stores:
* Provider-specific data (e.g., onboarding URL, session ID)
* Context data (e.g., redirect URLs)
***
## Payout
A payout represents a money transfer from the marketplace to a seller. It is represented by the [Payout data model](../data-model/payout-module-data-reference#payout).
Payouts are created automatically by the marketplace system (not manually by sellers) when:
* An order is completed
* The seller's payout account is active
* The commission has been calculated
A payout includes:
* The amount being transferred
* Currency code
* Provider transfer data (e.g., Stripe transfer ID)
* Associated payout account
***
## Payout Reversal
A payout reversal represents a refund or chargeback of a previous payout. It is represented by the [PayoutReversal data model](../data-model/payout-module-data-reference#payoutreversal).
Reversals are created when:
* A customer receives a refund for their order
* A chargeback occurs
* An order is canceled after payout
The reversal amount is deducted from the seller's future payouts or handled through the payment provider's dispute resolution process.
***
## Webhook Processing
Mercur uses webhooks from payment providers to handle asynchronous payout events:
### Webhook Actions
* **account\_authorized**: Seller completed onboarding, account is now active
* **account\_deauthorized**: Seller disconnected their account
* **account\_requires\_action**: Additional verification required
The `payout-webhook` subscriber listens for webhook events, validates the signature, determines the action, and executes the appropriate workflow to update account status.
***
## Automated Payout Schedule
The `daily-payouts` scheduled job runs every day at midnight to process pending payouts:
**Process:**
1. Query database for orders without associated payouts
2. Batch orders in groups of 100 for performance
3. Emit payout events with staggered delays to avoid overwhelming the payment provider
4. Each event triggers payout creation workflow
5. Failed events are retried up to 3 times
This ensures sellers receive payments automatically without manual intervention.
***
## Use Cases
**1. Seller Onboarding** New sellers create payout accounts and complete Stripe Connect onboarding to receive marketplace payments.
**2. Automated Seller Payments** Daily job processes all completed orders and transfers funds to sellers automatically, minus marketplace commission.
**3. Refund Handling** When customers receive refunds, payout reversals are created to deduct amounts from seller accounts.
**4. Account Verification** Webhook integration keeps payout account status synchronized with Stripe's verification process.
**5. Multi-Currency Support** Payouts support multiple currencies, allowing international marketplaces to pay sellers in their local currency.
# Payout Module Data Models
Source: https://docs.mercurjs.com/product/modules/b2c-core/payout/payout-data-model-reference
Reference documentation for the Payout Module data models
## Relations Overview
| Relationship | Type | Description |
| -------------------------- | ----------- | ------------------------------------------ |
| PayoutAccount → Onboarding | One-to-One | A payout account has one onboarding record |
| PayoutAccount → Payout | One-to-Many | A payout account has many payouts |
| Payout → PayoutReversal | One-to-Many | A payout can have many reversals |
## Data Models
* [PayoutAccount](#payoutaccount)
* [Onboarding](#onboarding)
* [Payout](#payout)
* [PayoutReversal](#payoutreversal)
## PayoutAccount
This documentation provides a reference to the PayoutAccount data model. It belongs to the Payout Module.
[View source code](https://github.com/mercurjs/mercur/blob/main/packages/modules/b2c-core/src/modules/payout/models/payout-account.ts)
| Field | Type | Description |
| -------------- | ------------------------------------------------- | ------------------------------------------------------------------------------------------------- |
| `id` | `PrimaryKeyModifier` | The ID of the payout account. |
| `status` | `EnumProperty<["pending", "active", "disabled"]>` | The status of the payout account. Defaults to `pending`. |
| `reference_id` | `TextProperty` | The ID of the payout account in the external provider's system (e.g., Stripe Connect account ID). |
| `data` | `JSONProperty` | The data returned by the payout provider when the account is created. |
| `context` | `JSONProperty` | Additional context data for the payout account. |
| `onboarding` | `HasOne` | The associated [Onboarding](#onboarding) record. |
| `payouts` | `HasMany` | The associated [Payout](#payout) records. |
## Onboarding
This documentation provides a reference to the Onboarding data model. It belongs to the Payout Module.
[View source code](https://github.com/mercurjs/mercur/blob/main/packages/modules/b2c-core/src/modules/payout/models/onboarding.ts)
| Field | Type | Description |
| ---------------- | -------------------------------- | ---------------------------------------------------- |
| `id` | `PrimaryKeyModifier` | The ID of the onboarding. |
| `data` | `JSONProperty` | The onboarding data returned by the payout provider. |
| `context` | `JSONProperty` | Additional context data for the onboarding process. |
| `payout_account` | `BelongsTo` | The associated [PayoutAccount](#payoutaccount). |
## Payout
This documentation provides a reference to the Payout data model. It belongs to the Payout Module.
[View source code](https://github.com/mercurjs/mercur/blob/main/packages/modules/b2c-core/src/modules/payout/models/payout.ts)
| Field | Type | Description |
| ---------------- | -------------------------------- | ------------------------------------------------------------------------------ |
| `id` | `PrimaryKeyModifier` | The ID of the payout. |
| `currency_code` | `TextProperty` | The ISO 3 currency code of the payout. For example, `usd`. |
| `amount` | `BigNumberProperty` | The amount of the payout |
| `data` | `JSONProperty` | The payout data returned by the payout provider (e.g., Stripe payout details). |
| `payout_account` | `BelongsTo` | The associated [PayoutAccount](#payoutaccount). |
| `reversals` | `HasMany` | The associated [PayoutReversal](#payoutreversal) records. |
## PayoutReversal
This documentation provides a reference to the PayoutReversal data model. It belongs to the Payout Module.
[View source code](https://github.com/mercurjs/mercur/blob/main/packages/modules/b2c-core/src/modules/payout/models/payout-reversal.ts)
| Field | Type | Description |
| --------------- | -------------------------------- | ------------------------------------------------------------------- |
| `id` | `PrimaryKeyModifier` | The ID of the payout reversal. |
| `currency_code` | `TextProperty` | The ISO 3 currency code of the payout reversal. For example, `usd`. |
| `amount` | `BigNumberProperty` | The amount of the payout reversal |
| `data` | `JSONProperty` | The reversal data returned by the payout provider. |
| `payout` | `BelongsTo` | The associated [Payout](#payout). |
# Payout Module Links
Source: https://docs.mercurjs.com/product/modules/b2c-core/payout/payout-links
Module links for the Payout Module
# Links between Payout Module and Other Modules
This document showcases the module links defined between the Payout Module and other Commerce Modules.
## Summary
The Payout Module has the following links to other modules:
| First Data Model | Second Data Model | Type | Description |
| ---------------- | ----------------- | -------------------- | -------------------------------------------------------- |
| Order | Payout | Stored - one-to-many | Associates an order with its payout transfers to sellers |
| Seller | PayoutAccount | Stored - one-to-one | Associates a seller with their payout account |
***
## Order Module
Mercur defines a link between the Order Module's `Order` data model and the Payout Module's `Payout` data model. This allows tracking which payouts were created for a specific order.
### Retrieve with Query
To retrieve the payouts of an order with Query, pass `payout.*` in `fields`:
```ts theme={null}
const { data: orders } = await query.graph({
entity: "order",
fields: [
"*",
"payout.*",
],
})
// orders[0].payout
```
```ts theme={null}
import { useQueryGraphStep } from "@medusajs/medusa/core-flows"
// ...
const { data: orders } = useQueryGraphStep({
entity: "order",
fields: [
"*",
"payout.*",
],
})
// orders[0].payout
```
### Manage with Link
To manage the payouts of an order, use Link:
```ts theme={null}
import { Modules } from "@medusajs/framework/utils"
// ...
await link.create({
[Modules.ORDER]: {
order_id: "ord_123",
},
payout: {
payout_id: "pout_123",
},
})
```
```ts theme={null}
import { createRemoteLinkStep } from "@medusajs/medusa/core-flows"
// ...
createRemoteLinkStep({
[Modules.ORDER]: {
order_id: "ord_123",
},
payout: {
payout_id: "pout_123",
},
})
```
***
## Seller Module
Mercur defines a link between the Seller Module's `Seller` data model and the Payout Module's `PayoutAccount` data model. This allows each seller to have a payout account for receiving payments from the marketplace.
### Retrieve with Query
To retrieve the payout account of a seller with Query, pass `payout_account.*` in `fields`:
```ts theme={null}
const { data: sellers } = await query.graph({
entity: "seller",
fields: [
"*",
"payout_account.*",
],
})
// sellers[0].payout_account
```
```ts theme={null}
import { useQueryGraphStep } from "@medusajs/medusa/core-flows"
// ...
const { data: sellers } = useQueryGraphStep({
entity: "seller",
fields: [
"*",
"payout_account.*",
],
})
// sellers[0].payout_account
```
### Manage with Link
To manage the payout account of a seller, use Link:
```ts theme={null}
// ...
await link.create({
seller: {
seller_id: "sel_123",
},
payout: {
payout_account_id: "pacc_123",
},
})
```
```ts theme={null}
import { createRemoteLinkStep } from "@medusajs/medusa/core-flows"
// ...
createRemoteLinkStep({
seller: {
seller_id: "sel_123",
},
payout: {
payout_account_id: "pacc_123",
},
})
```
# Payout Module Service Reference
Source: https://docs.mercurjs.com/product/modules/b2c-core/payout/payout-services
Reference documentation for the Payout Module service methods
# IPayoutModuleService Reference
This section of the documentation provides a reference to the `IPayoutModuleService` interface's methods. This is the interface developers use to use the functionalities provided by the Payout Module.
You should only use the methods in this reference when implementing complex customizations. For common cases, check out available workflows instead.
The main service interface for the Payout Module.
## Methods
### PayoutAccount Methods
* [createPayoutAccount](#createpayoutaccount)
* [updatePayoutAccounts](#updatepayoutaccounts)
* [deletePayoutAccounts](#deletepayoutaccounts)
* [retrievePayoutAccount](#retrievepayoutaccount)
* [listPayoutAccounts](#listpayoutaccounts)
* [listAndCountPayoutAccounts](#listandcountpayoutaccounts)
* [softDeletePayoutAccounts](#softdeletepayoutaccounts)
* [restorePayoutAccounts](#restorepayoutaccounts)
* [syncStripeAccount](#syncstripeaccount)
### Onboarding Methods
* [initializeOnboarding](#initializeonboarding)
* [updateOnboardings](#updateonboardings)
* [deleteOnboardings](#deleteonboardings)
* [retrieveOnboarding](#retrieveonboarding)
* [listOnboardings](#listonboardings)
* [listAndCountOnboardings](#listandcountonboardings)
* [softDeleteOnboardings](#softdeleteonboardings)
* [restoreOnboardings](#restoreonboardings)
### Payout Methods
* [createPayout](#createpayout)
* [createPayouts](#createpayouts)
* [updatePayouts](#updatepayouts)
* [deletePayouts](#deletepayouts)
* [retrievePayout](#retrievepayout)
* [listPayouts](#listpayouts)
* [listAndCountPayouts](#listandcountpayouts)
* [softDeletePayouts](#softdeletepayouts)
* [restorePayouts](#restorepayouts)
### Payout Reversal Methods
* [createPayoutReversal](#createpayoutreversal)
* [createPayoutReversals](#createpayoutreversals)
* [updatePayoutReversals](#updatepayoutreversals)
* [deletePayoutReversals](#deletepayoutreversals)
* [retrievePayoutReversal](#retrievepayoutreversal)
* [listPayoutReversals](#listpayoutreversals)
* [listAndCountPayoutReversals](#listandcountpayoutreversals)
* [softDeletePayoutReversals](#softdeletepayoutreversals)
* [restorePayoutReversals](#restorepayoutreversals)
### Webhook Methods
* [getWebhookActionAndData](#getwebhookactionanddata)
***
# createPayoutAccount
This section provides a reference to the `createPayoutAccount` method. This belongs to the Payout Module.
This method creates a payout account by initializing it with the payout provider (e.g., Stripe Connect).
## Example
```ts theme={null}
const payoutAccount = await payoutModuleService.createPayoutAccount({
context: {
seller_id: "sel_123",
country: "US",
business_type: "company",
},
})
```
## Parameters
The payout account to be created.
Context data passed to the payout provider (e.g., seller information, business details for Stripe Connect account creation).
A context used to share resources, such as transaction manager, between the application and the module.
## Returns
The created payout account.
The ID of the payout account.
The ID of the payout account in the external provider's system (e.g., Stripe Connect account ID).
The data returned by the payout provider when the account is created.
The status of the payout account.
The created date of the payout account.
The updated date of the payout account.
***
# syncStripeAccount
This section provides a reference to the `syncStripeAccount` method. This belongs to the Payout Module.
This method syncs a payout account with the Stripe Connect account status. It fetches the latest account details from Stripe and updates the local payout account status based on whether the account is fully verified and authorized.
## Example
```ts theme={null}
const payoutAccount = await payoutModuleService.syncStripeAccount("pacc_123")
```
## Parameters
The ID of the payout account to sync.
A context used to share resources, such as transaction manager, between the application and the module.
## Returns
The synced payout account with updated status.
The ID of the payout account.
The ID of the payout account in Stripe.
The complete Stripe account data.
The updated status of the payout account. Set to `active` if the Stripe account is fully verified and authorized.
The created date of the payout account.
The updated date of the payout account.
***
# initializeOnboarding
This section provides a reference to the `initializeOnboarding` method. This belongs to the Payout Module.
This method initializes or updates the onboarding process for a payout account with the payout provider. If an onboarding record already exists, it updates it; otherwise, it creates a new one.
## Example
```ts theme={null}
const onboarding = await payoutModuleService.initializeOnboarding({
payout_account_id: "pacc_123",
context: {
refresh_url: "https://example.com/onboarding",
return_url: "https://example.com/dashboard",
},
})
```
## Parameters
The onboarding data.
The ID of the payout account to initialize onboarding for.
Context data passed to the payout provider (e.g., redirect URLs for Stripe Connect onboarding flow).
A context used to share resources, such as transaction manager, between the application and the module.
## Returns
The initialized or updated onboarding record.
The ID of the onboarding.
The onboarding data returned by the payout provider (e.g., Stripe onboarding URL).
Additional context data for the onboarding process.
The created date of the onboarding.
The updated date of the onboarding.
***
# createPayout
This section provides a reference to the `createPayout` method. This belongs to the Payout Module.
This method creates a payout by processing a money transfer through the payout provider (e.g., Stripe Transfer).
## Example
```ts theme={null}
const payout = await payoutModuleService.createPayout({
amount: 10000,
currency_code: "usd",
account_id: "pacc_123",
transaction_id: "txn_123",
source_transaction: "ch_456",
})
```
## Parameters
The payout to be created.
The amount to transfer to the seller.
The ISO 3 currency code. For example, `usd`.
The ID of the payout account to transfer funds to.
The ID of the transaction related to this payout.
The ID of the source transaction (e.g., Stripe charge ID).
A context used to share resources, such as transaction manager, between the application and the module.
## Returns
The created payout.
The ID of the payout.
The amount of the payout.
The ISO 3 currency code of the payout.
The payout data returned by the payout provider (e.g., Stripe transfer details).
The created date of the payout.
The updated date of the payout.
***
# createPayoutReversal
This section provides a reference to the `createPayoutReversal` method. This belongs to the Payout Module.
This method creates a payout reversal by reversing a previous payout through the payout provider.
## Example
```ts theme={null}
const reversal = await payoutModuleService.createPayoutReversal({
payout_id: "pout_123",
amount: 5000,
currency_code: "usd",
})
```
## Parameters
The payout reversal to be created.
The ID of the payout to reverse.
The amount to reverse.
The ISO 3 currency code. For example, `usd`.
A context used to share resources, such as transaction manager, between the application and the module.
## Returns
The created payout reversal.
The ID of the payout reversal.
The amount of the reversal.
The ISO 3 currency code of the reversal.
The reversal data returned by the payout provider.
The created date of the payout reversal.
The updated date of the payout reversal.
***
# getWebhookActionAndData
This section provides a reference to the `getWebhookActionAndData` method. This belongs to the Payout Module.
This method processes webhook events from the payout provider and returns the action type and associated data.
## Example
```ts theme={null}
const result = await payoutModuleService.getWebhookActionAndData({
data: webhookEvent,
rawData: req.rawBody,
headers: req.headers,
})
```
## Parameters
The webhook payload data.
The parsed webhook event data.
The raw webhook body (needed for signature verification).
The webhook request headers (contains signature).
## Returns
The webhook action and associated data.
The action type determined from the webhook event.
The data associated with the webhook action.
The ID of the payout account affected by this webhook.
***
# updatePayoutAccounts
This section provides a reference to the `updatePayoutAccounts` method. This belongs to the Payout Module.
## updatePayoutAccounts(id, data, sharedContext?): Promise\
This method updates an existing payout account.
### Example
```ts theme={null}
const payoutAccount = await payoutModuleService.updatePayoutAccounts("pacc_123", {
status: "active",
})
```
### Parameters
The ID of the payout account.
The attributes to update in the payout account.
The ID of the payout account in the external provider's system.
The data returned by the payout provider.
The status of the payout account.
Additional context data for the payout account.
A context used to share resources, such as transaction manager, between the application and the module.
### Returns
The updated payout account.
The ID of the payout account.
The ID of the payout account in the external provider's system.
The data returned by the payout provider.
The status of the payout account.
The created date of the payout account.
The updated date of the payout account.
***
# deletePayoutAccounts
This section provides a reference to the `deletePayoutAccounts` method. This belongs to the Payout Module.
## deletePayoutAccounts(ids, sharedContext?): Promise\
This method deletes payout accounts by their IDs.
### Example
```ts theme={null}
await payoutModuleService.deletePayoutAccounts(["pacc_123", "pacc_321"])
```
### Parameters
The IDs of the payout accounts.
A context used to share resources, such as transaction manager, between the application and the module.
### Returns
Resolves when the payout accounts are deleted successfully.
## deletePayoutAccounts(id, sharedContext?): Promise\
This method deletes a payout account by its ID.
### Example
```ts theme={null}
await payoutModuleService.deletePayoutAccounts("pacc_123")
```
### Parameters
The ID of the payout account.
A context used to share resources, such as transaction manager, between the application and the module.
### Returns
Resolves when the payout account is deleted successfully.
***
# retrievePayoutAccount
This section provides a reference to the `retrievePayoutAccount` method. This belongs to the Payout Module.
This method retrieves a payout account by its ID.
## Example
```ts theme={null}
const payoutAccount = await payoutModuleService.retrievePayoutAccount("pacc_123")
```
To retrieve relationships:
```ts theme={null}
const payoutAccount = await payoutModuleService.retrievePayoutAccount(
"pacc_123",
{
relations: ["onboarding", "payouts"],
}
)
```
## Parameters
The ID of the payout account.
The configurations determining how the payout account is retrieved.
An array of strings, each being attribute names of the entity to retrieve in the result.
A number indicating the number of records to skip before retrieving the results.
A number indicating the number of records to return in the result.
An array of strings, each being relation names of the entity to retrieve in the result. For example, `["onboarding", "payouts"]`.
An object used to specify how to sort the returned records.
A boolean indicating whether deleted records should also be retrieved as part of the result.
A context used to share resources, such as transaction manager, between the application and the module.
## Returns
The retrieved payout account.
The ID of the payout account.
The ID of the payout account in the external provider's system.
The data returned by the payout provider.
The status of the payout account.
The created date of the payout account.
The updated date of the payout account.
***
# listPayoutAccounts
This section provides a reference to the `listPayoutAccounts` method. This belongs to the Payout Module.
This method retrieves a paginated list of payout accounts based on optional filters and configuration.
## Example
```ts theme={null}
const payoutAccounts = await payoutModuleService.listPayoutAccounts({
status: "active",
})
```
By default, only the first `15` records are retrieved. You can control pagination:
```ts theme={null}
const payoutAccounts = await payoutModuleService.listPayoutAccounts(
{
status: "active",
},
{
take: 20,
skip: 2,
}
)
```
## Parameters
The filters to apply on the retrieved payout accounts.
The IDs to filter the payout accounts by.
Filter payout accounts by their provider reference IDs.
Filter payout accounts by their status.
The configurations determining how the payout account is retrieved.
An array of strings, each being attribute names of the entity to retrieve in the result.
A number indicating the number of records to skip before retrieving the results.
A number indicating the number of records to return in the result.
An array of strings, each being relation names of the entity to retrieve in the result.
An object used to specify how to sort the returned records.
A boolean indicating whether deleted records should also be retrieved as part of the result.
A context used to share resources, such as transaction manager, between the application and the module.
## Returns
The list of payout accounts.
***
# listAndCountPayoutAccounts
This section provides a reference to the `listAndCountPayoutAccounts` method. This belongs to the Payout Module.
This method retrieves a paginated list of payout accounts along with the total count of available payout accounts satisfying the provided filters.
## Example
```ts theme={null}
const [payoutAccounts, count] = await payoutModuleService.listAndCountPayoutAccounts({
status: "active",
})
```
## Parameters
The filters to apply on the retrieved payout accounts.
The IDs to filter the payout accounts by.
Filter payout accounts by their provider reference IDs.
Filter payout accounts by their status.
The configurations determining how the payout account is retrieved.
An array of strings, each being attribute names of the entity to retrieve in the result.
A number indicating the number of records to skip before retrieving the results.
A number indicating the number of records to return in the result.
An array of strings, each being relation names of the entity to retrieve in the result.
An object used to specify how to sort the returned records.
A boolean indicating whether deleted records should also be retrieved as part of the result.
A context used to share resources, such as transaction manager, between the application and the module.
## Returns
The list of payout accounts along with their total count.
***
# softDeletePayoutAccounts
This section provides a reference to the `softDeletePayoutAccounts` method. This belongs to the Payout Module.
This method soft deletes payout accounts by their IDs.
## Example
```ts theme={null}
await payoutModuleService.softDeletePayoutAccounts([
"pacc_123",
"pacc_321",
])
```
## Parameters
The IDs of the payout accounts.
An object that is used to specify an entity's related entities that should be soft-deleted when the main entity is soft-deleted.
A context used to share resources, such as transaction manager, between the application and the module.
## Returns
An object that includes the IDs of related records that were also soft deleted. If there are no related records, the promise resolves to `void`.
***
# restorePayoutAccounts
This section provides a reference to the `restorePayoutAccounts` method. This belongs to the Payout Module.
This method restores soft deleted payout accounts by their IDs.
## Example
```ts theme={null}
await payoutModuleService.restorePayoutAccounts(["pacc_123", "pacc_321"])
```
## Parameters
The IDs of the payout accounts.
Configurations determining which relations to restore along with each of the payout account.
A context used to share resources, such as transaction manager, between the application and the module.
## Returns
An object that includes the IDs of related records that were restored. If there are no related records restored, the promise resolves to `void`.
***
# updateOnboardings
This section provides a reference to the `updateOnboardings` method. This belongs to the Payout Module.
## updateOnboardings(id, data, sharedContext?): Promise\
This method updates an existing onboarding record.
### Example
```ts theme={null}
const onboarding = await payoutModuleService.updateOnboardings("onb_123", {
data: { url: "https://connect.stripe.com/setup/..." },
})
```
### Parameters
The ID of the onboarding.
The attributes to update in the onboarding.
The onboarding data returned by the payout provider.
Additional context data for the onboarding process.
A context used to share resources, such as transaction manager, between the application and the module.
### Returns
The updated onboarding.
***
# deleteOnboardings
This section provides a reference to the `deleteOnboardings` method. This belongs to the Payout Module.
## deleteOnboardings(ids, sharedContext?): Promise\
This method deletes onboardings by their IDs.
### Example
```ts theme={null}
await payoutModuleService.deleteOnboardings(["onb_123", "onb_321"])
```
### Parameters
The IDs of the onboardings.
A context used to share resources, such as transaction manager, between the application and the module.
### Returns
Resolves when the onboardings are deleted successfully.
## deleteOnboardings(id, sharedContext?): Promise\
This method deletes an onboarding by its ID.
### Example
```ts theme={null}
await payoutModuleService.deleteOnboardings("onb_123")
```
### Parameters
The ID of the onboarding.
A context used to share resources, such as transaction manager, between the application and the module.
### Returns
Resolves when the onboarding is deleted successfully.
***
# retrieveOnboarding
This section provides a reference to the `retrieveOnboarding` method. This belongs to the Payout Module.
This method retrieves an onboarding by its ID.
## Example
```ts theme={null}
const onboarding = await payoutModuleService.retrieveOnboarding("onb_123")
```
## Parameters
The ID of the onboarding.
The configurations determining how the onboarding is retrieved.
An array of strings, each being attribute names of the entity to retrieve in the result.
An array of strings, each being relation names of the entity to retrieve in the result.
An object used to specify how to sort the returned records.
A boolean indicating whether deleted records should also be retrieved as part of the result.
A context used to share resources, such as transaction manager, between the application and the module.
## Returns
The retrieved onboarding.
The ID of the onboarding.
The onboarding data returned by the payout provider.
Additional context data for the onboarding process.
The created date of the onboarding.
The updated date of the onboarding.
***
# listOnboardings
This section provides a reference to the `listOnboardings` method. This belongs to the Payout Module.
This method retrieves a paginated list of onboardings based on optional filters and configuration.
## Example
```ts theme={null}
const onboardings = await payoutModuleService.listOnboardings({
payout_account_id: "pacc_123",
})
```
## Parameters
The filters to apply on the retrieved onboardings.
The IDs to filter the onboardings by.
Filter onboardings by their payout account IDs.
The configurations determining how the onboarding is retrieved.
An array of strings, each being attribute names of the entity to retrieve in the result.
A number indicating the number of records to skip before retrieving the results.
A number indicating the number of records to return in the result.
An array of strings, each being relation names of the entity to retrieve in the result.
An object used to specify how to sort the returned records.
A boolean indicating whether deleted records should also be retrieved as part of the result.
A context used to share resources, such as transaction manager, between the application and the module.
## Returns
The list of onboardings.
***
# listAndCountOnboardings
This section provides a reference to the `listAndCountOnboardings` method. This belongs to the Payout Module.
This method retrieves a paginated list of onboardings along with the total count of available onboardings satisfying the provided filters.
## Example
```ts theme={null}
const [onboardings, count] = await payoutModuleService.listAndCountOnboardings({
payout_account_id: "pacc_123",
})
```
## Parameters
The filters to apply on the retrieved onboardings.
The IDs to filter the onboardings by.
Filter onboardings by their payout account IDs.
The configurations determining how the onboarding is retrieved.
An array of strings, each being attribute names of the entity to retrieve in the result.
A number indicating the number of records to skip before retrieving the results.
A number indicating the number of records to return in the result.
An array of strings, each being relation names of the entity to retrieve in the result.
An object used to specify how to sort the returned records.
A boolean indicating whether deleted records should also be retrieved as part of the result.
A context used to share resources, such as transaction manager, between the application and the module.
## Returns
The list of onboardings along with their total count.
***
# softDeleteOnboardings
This section provides a reference to the `softDeleteOnboardings` method. This belongs to the Payout Module.
This method soft deletes onboardings by their IDs.
## Example
```ts theme={null}
await payoutModuleService.softDeleteOnboardings([
"onb_123",
"onb_321",
])
```
## Parameters
The IDs of the onboardings.
An object that is used to specify an entity's related entities that should be soft-deleted when the main entity is soft-deleted.
A context used to share resources, such as transaction manager, between the application and the module.
## Returns
An object that includes the IDs of related records that were also soft deleted. If there are no related records, the promise resolves to `void`.
***
# restoreOnboardings
This section provides a reference to the `restoreOnboardings` method. This belongs to the Payout Module.
This method restores soft deleted onboardings by their IDs.
## Example
```ts theme={null}
await payoutModuleService.restoreOnboardings(["onb_123", "onb_321"])
```
## Parameters
The IDs of the onboardings.
Configurations determining which relations to restore along with each of the onboarding.
A context used to share resources, such as transaction manager, between the application and the module.
## Returns
An object that includes the IDs of related records that were restored. If there are no related records restored, the promise resolves to `void`.
***
# createPayouts
This section provides a reference to the `createPayouts` method. This belongs to the Payout Module.
## createPayouts(data, sharedContext?): Promise\
This method creates payouts.
### Example
```ts theme={null}
const payouts = await payoutModuleService.createPayouts([
{
amount: 10000,
currency_code: "usd",
payout_account_id: "pacc_123",
data: { transfer_id: "tr_123" },
},
])
```
### Parameters
The payouts to be created.
The amount of the payout.
The ISO 3 currency code. For example, `usd`.
The ID of the payout account.
The payout data from the provider.
A context used to share resources, such as transaction manager, between the application and the module.
### Returns
The created payouts.
***
# updatePayouts
This section provides a reference to the `updatePayouts` method. This belongs to the Payout Module.
## updatePayouts(id, data, sharedContext?): Promise\
This method updates an existing payout.
### Example
```ts theme={null}
const payout = await payoutModuleService.updatePayouts("pout_123", {
data: { status: "paid" },
})
```
### Parameters
The ID of the payout.
The attributes to update in the payout.
The amount of the payout.
The ISO 3 currency code.
The payout data from the provider.
A context used to share resources, such as transaction manager, between the application and the module.
### Returns
The updated payout.
***
# deletePayouts
This section provides a reference to the `deletePayouts` method. This belongs to the Payout Module.
## deletePayouts(ids, sharedContext?): Promise\
This method deletes payouts by their IDs.
### Example
```ts theme={null}
await payoutModuleService.deletePayouts(["pout_123", "pout_321"])
```
### Parameters
The IDs of the payouts.
A context used to share resources, such as transaction manager, between the application and the module.
### Returns
Resolves when the payouts are deleted successfully.
## deletePayouts(id, sharedContext?): Promise\
This method deletes a payout by its ID.
### Example
```ts theme={null}
await payoutModuleService.deletePayouts("pout_123")
```
### Parameters
The ID of the payout.
A context used to share resources, such as transaction manager, between the application and the module.
### Returns
Resolves when the payout is deleted successfully.
***
# retrievePayout
This section provides a reference to the `retrievePayout` method. This belongs to the Payout Module.
This method retrieves a payout by its ID.
## Example
```ts theme={null}
const payout = await payoutModuleService.retrievePayout("pout_123")
```
To retrieve relationships:
```ts theme={null}
const payout = await payoutModuleService.retrievePayout(
"pout_123",
{
relations: ["payout_account", "reversals"],
}
)
```
## Parameters
The ID of the payout.
The configurations determining how the payout is retrieved.
An array of strings, each being attribute names of the entity to retrieve in the result.
An array of strings, each being relation names of the entity to retrieve in the result. For example, `["payout_account", "reversals"]`.
An object used to specify how to sort the returned records.
A boolean indicating whether deleted records should also be retrieved as part of the result.
A context used to share resources, such as transaction manager, between the application and the module.
## Returns
The retrieved payout.
The ID of the payout.
The amount of the payout.
The ISO 3 currency code of the payout.
The payout data returned by the payout provider.
The created date of the payout.
The updated date of the payout.
***
# listPayouts
This section provides a reference to the `listPayouts` method. This belongs to the Payout Module.
This method retrieves a paginated list of payouts based on optional filters and configuration.
## Example
```ts theme={null}
const payouts = await payoutModuleService.listPayouts({
payout_account_id: "pacc_123",
})
```
## Parameters
The filters to apply on the retrieved payouts.
The IDs to filter the payouts by.
Filter payouts by their payout account IDs.
Filter payouts by their currency codes.
The configurations determining how the payout is retrieved.
An array of strings, each being attribute names of the entity to retrieve in the result.
A number indicating the number of records to skip before retrieving the results.
A number indicating the number of records to return in the result.
An array of strings, each being relation names of the entity to retrieve in the result.
An object used to specify how to sort the returned records.
A boolean indicating whether deleted records should also be retrieved as part of the result.
A context used to share resources, such as transaction manager, between the application and the module.
## Returns
The list of payouts.
***
# listAndCountPayouts
This section provides a reference to the `listAndCountPayouts` method. This belongs to the Payout Module.
This method retrieves a paginated list of payouts along with the total count of available payouts satisfying the provided filters.
## Example
```ts theme={null}
const [payouts, count] = await payoutModuleService.listAndCountPayouts({
payout_account_id: "pacc_123",
})
```
## Parameters
The filters to apply on the retrieved payouts.
The IDs to filter the payouts by.
Filter payouts by their payout account IDs.
Filter payouts by their currency codes.
The configurations determining how the payout is retrieved.
An array of strings, each being attribute names of the entity to retrieve in the result.
A number indicating the number of records to skip before retrieving the results.
A number indicating the number of records to return in the result.
An array of strings, each being relation names of the entity to retrieve in the result.
An object used to specify how to sort the returned records.
A boolean indicating whether deleted records should also be retrieved as part of the result.
A context used to share resources, such as transaction manager, between the application and the module.
## Returns
The list of payouts along with their total count.
***
# softDeletePayouts
This section provides a reference to the `softDeletePayouts` method. This belongs to the Payout Module.
This method soft deletes payouts by their IDs.
## Example
```ts theme={null}
await payoutModuleService.softDeletePayouts([
"pout_123",
"pout_321",
])
```
## Parameters
The IDs of the payouts.
An object that is used to specify an entity's related entities that should be soft-deleted when the main entity is soft-deleted.
A context used to share resources, such as transaction manager, between the application and the module.
## Returns
An object that includes the IDs of related records that were also soft deleted. If there are no related records, the promise resolves to `void`.
***
# restorePayouts
This section provides a reference to the `restorePayouts` method. This belongs to the Payout Module.
This method restores soft deleted payouts by their IDs.
## Example
```ts theme={null}
await payoutModuleService.restorePayouts(["pout_123", "pout_321"])
```
## Parameters
The IDs of the payouts.
Configurations determining which relations to restore along with each of the payout.
A context used to share resources, such as transaction manager, between the application and the module.
## Returns
An object that includes the IDs of related records that were restored. If there are no related records restored, the promise resolves to `void`.
***
# createPayoutReversals
This section provides a reference to the `createPayoutReversals` method. This belongs to the Payout Module.
## createPayoutReversals(data, sharedContext?): Promise\
This method creates payout reversals.
### Example
```ts theme={null}
const reversals = await payoutModuleService.createPayoutReversals([
{
amount: 5000,
currency_code: "usd",
payout_id: "pout_123",
data: { reversal_id: "trr_123" },
},
])
```
### Parameters
The payout reversals to be created.
The amount to reverse.
The ISO 3 currency code. For example, `usd`.
The ID of the payout being reversed.
The reversal data from the provider.
A context used to share resources, such as transaction manager, between the application and the module.
### Returns
The created payout reversals.
***
# updatePayoutReversals
This section provides a reference to the `updatePayoutReversals` method. This belongs to the Payout Module.
## updatePayoutReversals(id, data, sharedContext?): Promise\
This method updates an existing payout reversal.
### Example
```ts theme={null}
const reversal = await payoutModuleService.updatePayoutReversals("prev_123", {
data: { status: "succeeded" },
})
```
### Parameters
The ID of the payout reversal.
The attributes to update in the payout reversal.
The amount of the reversal.
The ISO 3 currency code.
The reversal data from the provider.
A context used to share resources, such as transaction manager, between the application and the module.
### Returns
The updated payout reversal.
***
# deletePayoutReversals
This section provides a reference to the `deletePayoutReversals` method. This belongs to the Payout Module.
## deletePayoutReversals(ids, sharedContext?): Promise\
This method deletes payout reversals by their IDs.
### Example
```ts theme={null}
await payoutModuleService.deletePayoutReversals(["prev_123", "prev_321"])
```
### Parameters
The IDs of the payout reversals.
A context used to share resources, such as transaction manager, between the application and the module.
### Returns
Resolves when the payout reversals are deleted successfully.
## deletePayoutReversals(id, sharedContext?): Promise\
This method deletes a payout reversal by its ID.
### Example
```ts theme={null}
await payoutModuleService.deletePayoutReversals("prev_123")
```
### Parameters
The ID of the payout reversal.
A context used to share resources, such as transaction manager, between the application and the module.
### Returns
Resolves when the payout reversal is deleted successfully.
***
# retrievePayoutReversal
This section provides a reference to the `retrievePayoutReversal` method. This belongs to the Payout Module.
This method retrieves a payout reversal by its ID.
## Example
```ts theme={null}
const reversal = await payoutModuleService.retrievePayoutReversal("prev_123")
```
## Parameters
The ID of the payout reversal.
The configurations determining how the payout reversal is retrieved.
An array of strings, each being attribute names of the entity to retrieve in the result.
An array of strings, each being relation names of the entity to retrieve in the result.
An object used to specify how to sort the returned records.
A boolean indicating whether deleted records should also be retrieved as part of the result.
A context used to share resources, such as transaction manager, between the application and the module.
## Returns
The retrieved payout reversal.
The ID of the payout reversal.
The amount of the reversal.
The ISO 3 currency code of the reversal.
The reversal data returned by the payout provider.
The created date of the payout reversal.
The updated date of the payout reversal.
***
# listPayoutReversals
This section provides a reference to the `listPayoutReversals` method. This belongs to the Payout Module.
This method retrieves a paginated list of payout reversals based on optional filters and configuration.
## Example
```ts theme={null}
const reversals = await payoutModuleService.listPayoutReversals({
payout_id: "pout_123",
})
```
## Parameters
The filters to apply on the retrieved payout reversals.
The IDs to filter the payout reversals by.
Filter payout reversals by their payout IDs.
Filter payout reversals by their currency codes.
The configurations determining how the payout reversal is retrieved.
An array of strings, each being attribute names of the entity to retrieve in the result.
A number indicating the number of records to skip before retrieving the results.
A number indicating the number of records to return in the result.
An array of strings, each being relation names of the entity to retrieve in the result.
An object used to specify how to sort the returned records.
A boolean indicating whether deleted records should also be retrieved as part of the result.
A context used to share resources, such as transaction manager, between the application and the module.
## Returns
The list of payout reversals.
***
# listAndCountPayoutReversals
This section provides a reference to the `listAndCountPayoutReversals` method. This belongs to the Payout Module.
This method retrieves a paginated list of payout reversals along with the total count of available payout reversals satisfying the provided filters.
## Example
```ts theme={null}
const [reversals, count] = await payoutModuleService.listAndCountPayoutReversals({
payout_id: "pout_123",
})
```
## Parameters
The filters to apply on the retrieved payout reversals.
The IDs to filter the payout reversals by.
Filter payout reversals by their payout IDs.
Filter payout reversals by their currency codes.
The configurations determining how the payout reversal is retrieved.
An array of strings, each being attribute names of the entity to retrieve in the result.
A number indicating the number of records to skip before retrieving the results.
A number indicating the number of records to return in the result.
An array of strings, each being relation names of the entity to retrieve in the result.
An object used to specify how to sort the returned records.
A boolean indicating whether deleted records should also be retrieved as part of the result.
A context used to share resources, such as transaction manager, between the application and the module.
## Returns
The list of payout reversals along with their total count.
***
# softDeletePayoutReversals
This section provides a reference to the `softDeletePayoutReversals` method. This belongs to the Payout Module.
This method soft deletes payout reversals by their IDs.
## Example
```ts theme={null}
await payoutModuleService.softDeletePayoutReversals([
"prev_123",
"prev_321",
])
```
## Parameters
The IDs of the payout reversals.
An object that is used to specify an entity's related entities that should be soft-deleted when the main entity is soft-deleted.
A context used to share resources, such as transaction manager, between the application and the module.
## Returns
An object that includes the IDs of related records that were also soft deleted. If there are no related records, the promise resolves to `void`.
***
# restorePayoutReversals
This section provides a reference to the `restorePayoutReversals` method. This belongs to the Payout Module.
This method restores soft deleted payout reversals by their IDs.
## Example
```ts theme={null}
await payoutModuleService.restorePayoutReversals(["prev_123", "prev_321"])
```
## Parameters
The IDs of the payout reversals.
Configurations determining which relations to restore along with each of the payout reversal.
A context used to share resources, such as transaction manager, between the application and the module.
## Returns
An object that includes the IDs of related records that were restored. If there are no related records restored, the promise resolves to `void`.
# Secondary Categories Module Data Models
Source: https://docs.mercurjs.com/product/modules/b2c-core/secondary-categories/sec-cat-data-model-reference
Reference documentation for the Secondary Categories Module data models
## Relations Overview
| Relationship | Type | Description |
| ---------------------------------------------------- | ------------------- | -------------------------------------------------- |
| SecondaryCategory → ProductCategory (Product Module) | Read-only - has one | A secondary category references a product category |
## Data Models
* [SecondaryCategory](#secondarycategory)
## SecondaryCategory
This documentation provides a reference to the SecondaryCategory data model. It belongs to the Secondary Categories Module.
[View source code](https://github.com/mercurjs/mercur/blob/main/packages/modules/b2c-core/src/modules/secondary_categories/models/secondary_category.ts)
| Field | Type | Description |
| ------------- | -------------------------------- | ----------------------------------------------------------------------- |
| `id` | `PrimaryKeyModifier` | The ID of the secondary category. |
| `category_id` | `TextProperty` | The ID of the product category that this secondary category references. |
# Secondary Category Module
Source: https://docs.mercurjs.com/product/modules/b2c-core/secondary-categories/secondary-categories-concept
Learn about the Secondary Category Module and how to use it in your application
# Secondary Category Module
In this section of the documentation, you will find resources to learn more about the Secondary Category Module and how to use it in your application.
Mercur has secondary product categorization features available out-of-the-box through the Secondary Category Module. A [module](https://docs.medusajs.com/learn/fundamentals/modules) is a standalone package that provides features for a single domain. Each of Mercur's marketplace features are placed in custom modules, such as this Secondary Category Module.
Learn more about why modules are isolated in [this documentation](https://docs.medusajs.com/learn/fundamentals/modules/isolation).
## Secondary Category Features
* **Flexible Product Categorization**: Allow products to belong to multiple categories beyond their primary category.
* **Category-Based Navigation**: Enable products to appear in multiple category browsing contexts.
* **Dynamic Category Assignment**: Add or remove secondary categories when creating or updating products.
* **Cross-Category Discovery**: Help customers discover products through multiple categorization paths.
***
## How to Use the Secondary Category Module
In your Medusa application, you build flows around Commerce Modules. A flow is built as a [Workflow](https://docs.medusajs.com/learn/fundamentals/workflows), which is a special function composed of a series of steps that guarantees data consistency and reliable roll-back mechanism.
Secondary categories are managed through workflow hooks on Medusa's core `updateProductsWorkflow`. Mercur extends this workflow to handle secondary category assignments:
```ts title="src/workflows/hooks/product-updated.ts" theme={null}
import { ContainerRegistrationKeys, Modules } from "@medusajs/framework/utils"
import { updateProductsWorkflow } from "@medusajs/medusa/core-flows"
import { Link } from "@medusajs/framework/modules-sdk"
import { SECONDARY_CATEGORY_MODULE } from "../../modules/secondary_categories"
import SecondaryCategoryModuleService from "../../modules/secondary_categories/service"
import secondaryCategoryProduct from "../../links/secondary-category-product"
export const updateProductSubcategories = async (
products,
additional_data,
container
) => {
const link: Link = container.resolve(ContainerRegistrationKeys.LINK)
const secondaryCategoryService: SecondaryCategoryModuleService =
container.resolve(SECONDARY_CATEGORY_MODULE)
const query = container.resolve(ContainerRegistrationKeys.QUERY)
const entries = additional_data?.secondary_categories ?? []
if (!entries.length || !products?.length) return
await Promise.all(
products.map(async (product) => {
const match = entries.find(e => e.product_id === product.id)
if (!match) return
const toAddIds = [...new Set(match.add ?? match.secondary_categories_ids ?? [])]
const toRemoveIds = [...new Set(match.remove ?? [])]
// Remove secondary categories
if (toRemoveIds.length) {
await Promise.all(
toRemoveIds.map(async (secId) => {
const secondaryCategories =
await secondaryCategoryService.listSecondaryCategories({
category_id: secId
})
const { data: [secondaryCategoryLink] } = await query.graph({
entity: secondaryCategoryProduct.entryPoint,
fields: ['secondary_category_id'],
filters: {
secondary_category_id: secondaryCategories.map(sc => sc.id),
product_id: product.id
}
})
await link.dismiss({
[Modules.PRODUCT]: { product_id: product.id },
[SECONDARY_CATEGORY_MODULE]: {
secondary_category_id: secondaryCategoryLink.secondary_category_id
}
})
})
)
}
// Add secondary categories
if (toAddIds.length) {
await Promise.all(
toAddIds.map((secId) =>
link.create({
[Modules.PRODUCT]: { product_id: product.id },
[SECONDARY_CATEGORY_MODULE]: { secondary_category_id: secId },
})
)
)
}
})
)
}
// Hook into Medusa's updateProductsWorkflow
updateProductsWorkflow.hooks.productsUpdated(
async ({ products, additional_data }, { container }) => {
await updateProductSubcategories(
products,
additional_data,
container
)
}
)
```
You can then use this in product update operations through Medusa's core workflow:
### Workflow Usage
```ts theme={null}
import { updateProductsWorkflow } from "@medusajs/medusa/core-flows"
// When updating products, pass secondary categories in additional_data
const { result } = await updateProductsWorkflow(container).run({
input: {
selector: { id: "prod_123" },
update: {
title: "Updated Product",
},
additional_data: {
secondary_categories: [
{
product_id: "prod_123",
add: ["pcat_summer", "pcat_sale"],
remove: ["pcat_winter"],
},
],
},
},
})
```
Learn more about workflows in [this documentation](https://docs.medusajs.com/learn/fundamentals/workflows).
***
# Concepts
In this document, you'll learn about the main concepts related to secondary categories in Mercur.
## Secondary Category
A secondary category is a reference to a Medusa product category that allows products to be organized under multiple categories simultaneously. It is represented by the [SecondaryCategory data model](../data-model/secondary-categories-module-data-reference#secondarycategory).
A secondary category holds:
* A unique ID
* A reference to a product category via `category_id`
Unlike primary categories (managed directly in the Product Module), secondary categories enable many-to-many relationships between products and categories.
***
## Primary vs Secondary Categories
### Primary Category
In Medusa's Product Module, each product can belong to multiple categories through the built-in many-to-many relationship. These are considered the product's **primary categories**.
### Secondary Category
Mercur's Secondary Category Module provides an **additional layer** of categorization:
* Products can be tagged with secondary categories
* Useful for cross-cutting concerns (e.g., "Sale Items", "Seasonal", "Featured")
* Separate from the primary category hierarchy
* Can be managed independently without affecting product category structure
***
## Why Secondary Categories?
**Use Case Example:**
A dress might have:
* **Primary Category**: Women's Clothing → Dresses
* **Secondary Categories**:
* Summer Collection
* Sale Items
* New Arrivals
* Wedding Guest Outfits
This allows the product to appear in multiple navigation contexts without disrupting the main category tree structure.
***
## Dynamic Assignment
Secondary categories can be dynamically assigned when creating or updating products through the `additional_data` parameter:
```ts theme={null}
{
additional_data: {
secondary_categories: [
{
product_id: "prod_123",
add: ["pcat_summer", "pcat_sale"], // Add these
remove: ["pcat_winter"], // Remove this
secondary_categories_ids: ["pcat_new"] // Alternative to 'add'
},
],
},
}
```
The system automatically:
1. Creates or retrieves secondary category records for the specified category IDs
2. Creates module links between products and secondary categories
3. Removes links for categories in the `remove` array
***
## Workflow Hook Integration
Secondary categories are managed through a workflow hook on Medusa's `updateProductsWorkflow`:
```ts theme={null}
updateProductsWorkflow.hooks.productsUpdated(
async ({ products, additional_data }, { container }) => {
await updateProductSubcategories(
products,
additional_data,
container
)
}
)
```
This ensures secondary categories are updated atomically with product updates, maintaining data consistency through Medusa's workflow system.
***
## Querying Products with Secondary Categories
When retrieving products, you can include secondary categories in the query fields:
```ts theme={null}
const { data: products } = await query.graph({
entity: "product",
fields: [
"*",
"*secondary_categories",
],
})
// products[0].secondary_categories
```
This is commonly included in product list and detail queries to display all categorization contexts.
***
## Use Cases
**1. Seasonal Collections**
Tag products with "Spring Collection", "Summer Sale", etc., without moving them from their primary categories.
**2. Special Promotions**
Group products under "Black Friday Deals" or "Clearance" without affecting their permanent category structure.
**3. Lifestyle Categories**
Create cross-category groupings like "Eco-Friendly", "Luxury", "Budget-Friendly" that span multiple product types.
**4. Featured Products**
Mark products as "Staff Picks", "Bestsellers", or "New Arrivals" for homepage and landing page display.
**5. Event-Based Grouping**
Organize products for specific events like "Wedding Collection", "Back to School", "Holiday Gifts" that cut across traditional categories.
# Secondary Category Module Links
Source: https://docs.mercurjs.com/product/modules/b2c-core/secondary-categories/secondary-category-links
Module links for the Secondary Category Module
# Links between Secondary Category Module and Other Modules
This document showcases the module links defined between the Secondary Category Module and other Commerce Modules.
## Summary
The Secondary Category Module has the following links to other modules:
| First Data Model | Second Data Model | Type | Description |
| ---------------- | ----------------- | --------------------- | ------------------------------------------------------------------------- |
| Product | SecondaryCategory | Stored - many-to-many | Associates products with secondary categories for additional organization |
***
## Product Module
Mercur defines a link between the Product Module's `Product` data model and the Secondary Category Module's `SecondaryCategory` data model. This allows products to be organized under secondary categories in addition to their primary category, enabling more flexible product categorization and navigation.
### Retrieve with Query
To retrieve the secondary categories of a product with Query, pass `secondary_category.*` in `fields`:
```ts theme={null}
const { data: products } = await query.graph({
entity: "product",
fields: [
"*",
"secondary_category.*",
],
})
// products[0].secondary_category
```
```ts theme={null}
import { useQueryGraphStep } from "@medusajs/medusa/core-flows"
// ...
const { data: products } = useQueryGraphStep({
entity: "product",
fields: [
"*",
"secondary_category.*",
],
})
// products[0].secondary_category
```
### Manage with Link
To manage the secondary categories of a product, use Link:
```ts theme={null}
import { Modules } from "@medusajs/framework/utils"
// ...
await link.create({
[Modules.PRODUCT]: {
product_id: "prod_123",
},
secondary_category: {
secondary_category_id: "sec_cat_123",
},
})
```
```ts theme={null}
import { createRemoteLinkStep } from "@medusajs/medusa/core-flows"
// ...
createRemoteLinkStep({
[Modules.PRODUCT]: {
product_id: "prod_123",
},
secondary_category: {
secondary_category_id: "sec_cat_123",
},
})
```
# Secondary Category Module Service Reference
Source: https://docs.mercurjs.com/product/modules/b2c-core/secondary-categories/secondary-category-services
Reference documentation for the Secondary Category Module service methods
# ISecondaryCategoryModuleService Reference
This section of the documentation provides a reference to the `ISecondaryCategoryModuleService` interface's methods. This is the interface developers use to use the functionalities provided by the Secondary Category Module.
You should only use the methods in this reference when implementing complex customizations. For common cases, check out available workflows instead.
The main service interface for the Secondary Category Module.
## Methods
* [createSecondaryCategories](#createsecondarycategories)
* [updateSecondaryCategories](#updatesecondarycategories)
* [deleteSecondaryCategories](#deletesecondarycategories)
* [retrieveSecondaryCategory](#retrievesecondarycategory)
* [listSecondaryCategories](#listsecondarycategories)
* [listAndCountSecondaryCategories](#listandcountsecondarycategories)
* [softDeleteSecondaryCategories](#softdeletesecondarycategories)
* [restoreSecondaryCategories](#restoresecondarycategories)
***
# createSecondaryCategories
This section provides a reference to the `createSecondaryCategories` method. This belongs to the Secondary Category Module.
## createSecondaryCategories(data, sharedContext?): Promise\
This method creates secondary categories.
### Example
```ts theme={null}
const secondaryCategories = await secondaryCategoryModuleService.createSecondaryCategories([
{
category_id: "pcat_123",
},
{
category_id: "pcat_456",
},
])
```
### Parameters
The secondary categories to be created.
The ID of the product category that this secondary category references.
A context used to share resources, such as transaction manager, between the application and the module.
### Returns
The created secondary categories.
## createSecondaryCategories(data, sharedContext?): Promise\
This method creates a secondary category.
### Example
```ts theme={null}
const secondaryCategory = await secondaryCategoryModuleService.createSecondaryCategories({
category_id: "pcat_123",
})
```
### Parameters
The secondary category to be created.
The ID of the product category that this secondary category references.
A context used to share resources, such as transaction manager, between the application and the module.
### Returns
The created secondary category.
***
# updateSecondaryCategories
This section provides a reference to the `updateSecondaryCategories` method. This belongs to the Secondary Category Module.
## updateSecondaryCategories(id, data, sharedContext?): Promise\
This method updates an existing secondary category.
### Example
```ts theme={null}
const secondaryCategory = await secondaryCategoryModuleService.updateSecondaryCategories("sec_cat_123", {
category_id: "pcat_789",
})
```
### Parameters
The ID of the secondary category.
The attributes to update in the secondary category.
The ID of the product category that this secondary category references.
A context used to share resources, such as transaction manager, between the application and the module.
### Returns
The updated secondary category.
The ID of the secondary category.
The ID of the product category that this secondary category references.
The created date of the secondary category.
The updated date of the secondary category.
***
# deleteSecondaryCategories
This section provides a reference to the `deleteSecondaryCategories` method. This belongs to the Secondary Category Module.
## deleteSecondaryCategories(ids, sharedContext?): Promise\
This method deletes secondary categories by their IDs.
### Example
```ts theme={null}
await secondaryCategoryModuleService.deleteSecondaryCategories(["sec_cat_123", "sec_cat_321"])
```
### Parameters
The IDs of the secondary categories.
A context used to share resources, such as transaction manager, between the application and the module.
### Returns
Resolves when the secondary categories are deleted successfully.
## deleteSecondaryCategories(id, sharedContext?): Promise\
This method deletes a secondary category by its ID.
### Example
```ts theme={null}
await secondaryCategoryModuleService.deleteSecondaryCategories("sec_cat_123")
```
### Parameters
The ID of the secondary category.
A context used to share resources, such as transaction manager, between the application and the module.
### Returns
Resolves when the secondary category is deleted successfully.
***
# retrieveSecondaryCategory
This section provides a reference to the `retrieveSecondaryCategory` method. This belongs to the Secondary Category Module.
This method retrieves a secondary category by its ID.
## Example
```ts theme={null}
const secondaryCategory = await secondaryCategoryModuleService.retrieveSecondaryCategory("sec_cat_123")
```
## Parameters
The ID of the secondary category.
The configurations determining how the secondary category is retrieved.
An array of strings, each being attribute names of the entity to retrieve in the result.
A number indicating the number of records to skip before retrieving the results.
A number indicating the number of records to return in the result.
An array of strings, each being relation names of the entity to retrieve in the result.
An object used to specify how to sort the returned records.
A boolean indicating whether deleted records should also be retrieved as part of the result.
A context used to share resources, such as transaction manager, between the application and the module.
## Returns
The retrieved secondary category.
The ID of the secondary category.
The ID of the product category that this secondary category references.
The created date of the secondary category.
The updated date of the secondary category.
The deleted date of the secondary category.
***
# listSecondaryCategories
This section provides a reference to the `listSecondaryCategories` method. This belongs to the Secondary Category Module.
This method retrieves a paginated list of secondary categories based on optional filters and configuration.
## Example
To retrieve a list of secondary categories using their IDs:
```ts theme={null}
const secondaryCategories = await secondaryCategoryModuleService.listSecondaryCategories({
id: ["sec_cat_123", "sec_cat_321"],
})
```
To retrieve secondary categories for a specific product category:
```ts theme={null}
const secondaryCategories = await secondaryCategoryModuleService.listSecondaryCategories({
category_id: "pcat_123",
})
```
By default, only the first `15` records are retrieved. You can control pagination by specifying the `skip` and `take` properties of the `config` parameter:
```ts theme={null}
const secondaryCategories = await secondaryCategoryModuleService.listSecondaryCategories(
{
category_id: "pcat_123",
},
{
take: 20,
skip: 2,
}
)
```
## Parameters
The filters to apply on the retrieved secondary categories.
The IDs to filter the secondary categories by.
Filter secondary categories by their product category IDs.
The configurations determining how the secondary category is retrieved.
An array of strings, each being attribute names of the entity to retrieve in the result.
A number indicating the number of records to skip before retrieving the results.
A number indicating the number of records to return in the result.
An array of strings, each being relation names of the entity to retrieve in the result.
An object used to specify how to sort the returned records.
A boolean indicating whether deleted records should also be retrieved as part of the result.
A context used to share resources, such as transaction manager, between the application and the module.
## Returns
The list of secondary categories.
***
# listAndCountSecondaryCategories
This section provides a reference to the `listAndCountSecondaryCategories` method. This belongs to the Secondary Category Module.
This method retrieves a paginated list of secondary categories along with the total count of available secondary categories satisfying the provided filters.
## Example
To retrieve a list of secondary categories using their IDs:
```ts theme={null}
const [secondaryCategories, count] = await secondaryCategoryModuleService.listAndCountSecondaryCategories({
id: ["sec_cat_123", "sec_cat_321"],
})
```
By default, only the first `15` records are retrieved. You can control pagination by specifying the `skip` and `take` properties of the `config` parameter:
```ts theme={null}
const [secondaryCategories, count] = await secondaryCategoryModuleService.listAndCountSecondaryCategories(
{
category_id: "pcat_123",
},
{
take: 20,
skip: 2,
}
)
```
## Parameters
The filters to apply on the retrieved secondary categories.
The IDs to filter the secondary categories by.
Filter secondary categories by their product category IDs.
The configurations determining how the secondary category is retrieved.
An array of strings, each being attribute names of the entity to retrieve in the result.
A number indicating the number of records to skip before retrieving the results.
A number indicating the number of records to return in the result.
An array of strings, each being relation names of the entity to retrieve in the result.
An object used to specify how to sort the returned records.
A boolean indicating whether deleted records should also be retrieved as part of the result.
A context used to share resources, such as transaction manager, between the application and the module.
## Returns
The list of secondary categories along with their total count.
***
# softDeleteSecondaryCategories
This section provides a reference to the `softDeleteSecondaryCategories` method. This belongs to the Secondary Category Module.
This method soft deletes secondary categories by their IDs.
## Example
```ts theme={null}
await secondaryCategoryModuleService.softDeleteSecondaryCategories([
"sec_cat_123",
"sec_cat_321",
])
```
## Parameters
The IDs of the secondary categories.
An object that is used to specify an entity's related entities that should be soft-deleted when the main entity is soft-deleted.
A context used to share resources, such as transaction manager, between the application and the module.
## Returns
An object that includes the IDs of related records that were also soft deleted. If there are no related records, the promise resolves to `void`.
***
# restoreSecondaryCategories
This section provides a reference to the `restoreSecondaryCategories` method. This belongs to the Secondary Category Module.
This method restores soft deleted secondary categories by their IDs.
## Example
```ts theme={null}
await secondaryCategoryModuleService.restoreSecondaryCategories(["sec_cat_123", "sec_cat_321"])
```
## Parameters
The IDs of the secondary categories.
Configurations determining which relations to restore along with each of the secondary category.
A context used to share resources, such as transaction manager, between the application and the module.
## Returns
An object that includes the IDs of related records that were restored. If there are no related records restored, the promise resolves to `void`.
# Seller Module
Source: https://docs.mercurjs.com/product/modules/b2c-core/seller/seller-concept
Learn about the Seller Module and how to use it in your application
# Seller Module
In this section of the documentation, you will find resources to learn more about the Seller Module and how to use it in your application.
Mercur has multi-vendor management features available out-of-the-box through the Seller Module. A [module](https://docs.medusajs.com/learn/fundamentals/modules) is a standalone package that provides features for a single domain. Each of Mercur's marketplace features are placed in custom modules, such as this Seller Module.
Learn more about why modules are isolated in [this documentation](https://docs.medusajs.com/learn/fundamentals/modules/isolation).
## Seller Features
* **Seller Management**: Create and manage seller accounts with business information and store status.
* **Team Member Management**: Handle multiple team members per seller with role-based access (owner, admin, member).
* **Member Invitations**: Send JWT-based invitations to team members with expiration and validation.
* **Seller Onboarding**: Track seller onboarding progress through multiple setup steps.
* **Store Status Control**: Manage seller store status (ACTIVE, INACTIVE, SUSPENDED) to control marketplace access.
* **Resource Isolation**: Each seller has isolated access to their own products, orders, inventory, and shipping configurations.
***
## How to Use the Seller Module
In your Medusa application, you build flows around Commerce Modules. A flow is built as a [Workflow](https://docs.medusajs.com/learn/fundamentals/workflows), which is a special function composed of a series of steps that guarantees data consistency and reliable roll-back mechanism.
You can build custom workflows and steps. Mercur provides pre-built workflows for seller operations in the `@mercurjs/b2c-core` package.
For example, the `createSellerWorkflow`:
```ts title="src/workflows/seller/create-seller.ts" theme={null}
import { transform } from "@medusajs/framework/workflows-sdk"
import { setAuthAppMetadataStep } from "@medusajs/medusa/core-flows"
import {
WorkflowResponse,
createHook,
createWorkflow,
} from "@medusajs/workflows-sdk"
import { CreateMemberDTO, CreateSellerDTO } from "@mercurjs/framework"
import {
createMemberStep,
createSellerOnboardingStep,
createSellerStep,
createSellerShippingProfileStep,
} from "../steps"
type CreateSellerWorkflowInput = {
seller: CreateSellerDTO
member: Omit
auth_identity_id: string
}
export const createSellerWorkflow = createWorkflow(
"create-seller",
function (input: CreateSellerWorkflowInput) {
// Create the seller
const seller = createSellerStep(input.seller)
// Create the first member (owner) with seller_id
const memberInput = transform(
{ seller, member: input.member },
({ member, seller }) => ({
...member,
seller_id: seller.id,
})
)
const member = createMemberStep(memberInput)
// Initialize onboarding tracker
createSellerOnboardingStep(seller)
// Link auth identity to seller member
setAuthAppMetadataStep({
authIdentityId: input.auth_identity_id,
actorType: "seller",
value: member.id,
})
// Create default shipping profile
createSellerShippingProfileStep(seller)
// Emit workflow hook for extensibility
const sellerCreatedHook = createHook("sellerCreated", {
sellerId: seller.id,
})
return new WorkflowResponse(seller, { hooks: [sellerCreatedHook] })
}
)
```
You can then execute the workflow in your custom API routes, scheduled jobs, or subscribers:
### Subscriber
```ts title="src/subscribers/seller-creation-request-accepted.ts" theme={null}
import { SubscriberArgs, SubscriberConfig } from "@medusajs/framework"
import {
RequestDTO,
SellerAccountRequestUpdatedEvent,
} from "@mercurjs/framework"
import { createSellerWorkflow } from "../workflows"
import { ContainerRegistrationKeys } from "@medusajs/framework/utils"
export default async function sellerCreationRequestAcceptedHandler({
event,
container,
}: SubscriberArgs) {
const logger = container.resolve(ContainerRegistrationKeys.LOGGER)
const request = event.data
// Execute the createSellerWorkflow when admin accepts seller registration
const { result: seller } = await createSellerWorkflow.run({
container,
input: {
member: request.data.member as any,
seller: request.data.seller as any,
auth_identity_id: request.data.auth_identity_id as string,
},
})
logger.info(
`Seller creation request accepted: ${request.id}, seller: ${seller.id}`
)
}
export const config: SubscriberConfig = {
event: SellerAccountRequestUpdatedEvent.ACCEPTED,
context: {
subscriberId: "seller-creation-request-accepted-handler",
},
}
```
Learn more about workflows in [this documentation](https://docs.medusajs.com/learn/fundamentals/workflows).
***
# Concepts
In this document, you'll learn about the main concepts related to sellers in Mercur.
## Seller
A seller is a vendor entity in the marketplace that can manage products, orders, and customers. It is represented by the [Seller data model](../data-model/seller-module-data-reference#seller).
A seller holds information about:
* Business details (name, description, contact information)
* Business address and tax identification
* Store status (ACTIVE, INACTIVE, SUSPENDED)
* A unique handle for storefront URLs
* Team members who can manage the seller's resources
* Onboarding progress
Each seller operates independently in the marketplace, with their own isolated resources including products, orders, inventory, shipping options, promotions, and customer groups.
***
## Store Status
A seller's store can be in one of three states:
### ACTIVE
The seller is fully operational and can:
* List and sell products
* Receive and fulfill orders
* Manage all marketplace resources
* Access the vendor panel
This is the default status for approved sellers.
### INACTIVE
The seller account exists but is not currently operational. This status might be used for:
* Sellers who haven't completed onboarding
* Temporarily closed stores
* Sellers taking a break from the marketplace
Inactive sellers cannot list products or process new orders.
### SUSPENDED
The seller has been suspended by marketplace administrators, typically due to:
* Policy violations
* Customer complaints
* Payment issues
Suspended sellers can only access order and fulfillment management to handle existing commitments, but cannot create new listings or receive new orders.
***
## Member
A member represents a user who can manage a seller's marketplace operations. It is represented by the [Member data model](../data-model/seller-module-data-reference#member).
### Member Roles
Members can have one of three roles:
**owner**: Full administrative control
* Manage seller business information
* Invite and remove team members
* Access financial and payout settings
* Delete the seller account
**admin**: Operational management
* Manage products, inventory, and orders
* Configure shipping and promotions
* View reports and analytics
* Cannot modify business settings or team members
**member**: Limited access
* View and fulfill orders
* Update inventory
* Cannot modify products or settings
This role-based system allows sellers to delegate responsibilities while maintaining control over sensitive operations.
***
## Member Invite
A member invite represents a pending invitation to join a seller's team. It is represented by the [MemberInvite data model](../data-model/seller-module-data-reference#memberinvite).
### Invitation Flow
1. **Existing member creates invite**: Owner or admin generates invitation with email and role
2. **JWT token generated**: System creates signed JWT token with 7-day expiration
3. **Email sent**: Invitation email with unique link sent to invitee
4. **Recipient accepts**: User clicks link and completes registration
5. **Token validation**: System verifies token is valid and not expired
6. **Member created**: New member account created and linked to seller
7. **Invite marked accepted**: Invite record updated to prevent reuse
The JWT token includes the invite ID and is signed with the application's JWT secret, ensuring secure invite handling.
***
## Seller Onboarding
Seller onboarding tracks the setup progress of new sellers through required steps. It is represented by the [SellerOnboarding data model](../data-model/seller-module-data-reference#selleronboarding).
### Onboarding Steps
**1. store\_information** (boolean)
* Business name, description, contact details
* Business address and tax ID
* Store branding (logo, photos)
**2. stripe\_connection** (boolean)
* Payout account creation
* Stripe Connect onboarding
* Bank account verification
**3. locations\_shipping** (boolean)
* Stock location setup
* Shipping zones and options
* Fulfillment configuration
**4. products** (boolean)
* First product creation
* Inventory setup
* Pricing configuration
The `isOnboardingCompleted` method checks if all four steps are complete, determining if the seller can start selling.
***
## Resource Isolation
The Seller Module implements multi-tenancy through module links, giving each seller their own isolated resources:
**Commerce Resources:**
* Products and inventory
* Orders and returns
* Customer groups
* Promotions and campaigns
* Price lists
**Fulfillment Resources:**
* Stock locations
* Fulfillment sets
* Service zones
* Shipping options
* Shipping profiles
This isolation ensures:
* Data security (sellers only see their own data)
* Independent operations (one seller's actions don't affect others)
* Scalability (resources scale per seller)
***
## Authentication Integration
The Seller Module integrates with Medusa's Auth Module to enable member authentication:
* Members are a custom actor type (`seller`)
* Auth identities store `member_id` in `app_metadata`
* Routes are protected with `authenticate("seller")` middleware
* Member ID is used to resolve seller ownership
This allows the same authentication system to handle customers, admin users, and seller members with different permissions.
***
## Use Cases
**1. Vendor Registration**
New vendors register, complete onboarding, and start selling on the marketplace.
**2. Team Collaboration**
Sellers invite team members with different roles to collaborate on store management.
**3. Store Suspension**
Marketplace admin suspends a seller for policy violations while allowing them to fulfill existing orders.
**4. Multi-Store Management**
A business creates multiple seller accounts for different brands or product lines.
**5. Status-Based Product Visibility**
When a seller is suspended, their products are automatically hidden from search results (via the status change subscriber).
# Seller Module Data Models
Source: https://docs.mercurjs.com/product/modules/b2c-core/seller/seller-data-model-reference
Reference documentation for the Seller Module data models
## Relations Overview
| Relationship | Type | Description |
| ------------------------- | ----------- | -------------------------------------------- |
| Seller → Member | One-to-Many | A seller has many team members |
| Seller → MemberInvite | One-to-Many | A seller has many pending member invitations |
| Seller → SellerOnboarding | One-to-One | A seller has one onboarding record |
## Data Models
* [Seller](#seller)
* [Member](#member)
* [MemberInvite](#memberinvite)
* [SellerOnboarding](#selleronboarding)
## Seller
This documentation provides a reference to the Seller data model. It belongs to the Seller Module.
[View source code](https://github.com/mercurjs/mercur/blob/main/packages/modules/b2c-core/src/modules/seller/models/seller.ts)
| Field | Type | Description |
| -------------- | --------------------------------------------------- | ------------------------------------------------------------ |
| `id` | `PrimaryKeyModifier` | The ID of the seller. |
| `store_status` | `EnumProperty<["ACTIVE", "INACTIVE", "SUSPENDED"]>` | The status of the seller's store. Defaults to `ACTIVE`. |
| `name` | `TextProperty` | The name of the seller |
| `handle` | `TextProperty` | The unique handle of the seller |
| `description` | `TextProperty` | The description of the seller |
| `photo` | `TextProperty` | The photo URL of the seller |
| `email` | `TextProperty` | The email of the seller |
| `phone` | `TextProperty` | The phone of the seller |
| `address_line` | `TextProperty` | The address line of the seller |
| `city` | `TextProperty` | The city of the seller |
| `state` | `TextProperty` | The state of the seller |
| `postal_code` | `TextProperty` | The postal code of the seller |
| `country_code` | `TextProperty` | The country code of the seller |
| `tax_id` | `TextProperty` | The tax ID of the seller |
| `members` | `HasMany` | The associated [Member](#member) records. |
| `invites` | `HasMany` | The associated [MemberInvite](#memberinvite) records. |
| `onboarding` | `HasOne` | The associated [SellerOnboarding](#selleronboarding) record. |
## Member
This documentation provides a reference to the Member data model. It belongs to the Seller Module.
[View source code](https://github.com/mercurjs/mercur/blob/main/packages/modules/b2c-core/src/modules/seller/models/member.ts)
| Field | Type | Description |
| -------- | -------------------------------------------- | ----------------------------------------------------------------- |
| `id` | `PrimaryKeyModifier` | The ID of the member. |
| `role` | `EnumProperty<["owner", "admin", "member"]>` | The role of the member in the seller's team. Defaults to `owner`. |
| `name` | `TextProperty` | The name of the member |
| `email` | `TextProperty` | The email of the member |
| `bio` | `TextProperty` | The bio of the member |
| `phone` | `TextProperty` | The phone of the member |
| `photo` | `TextProperty` | The photo URL of the member |
| `seller` | `BelongsTo` | The associated [Seller](#seller). |
## MemberInvite
This documentation provides a reference to the MemberInvite data model. It belongs to the Seller Module.
[View source code](https://github.com/mercurjs/mercur/blob/main/packages/modules/b2c-core/src/modules/seller/models/invite.ts)
| Field | Type | Description |
| ------------ | -------------------------------------------- | ------------------------------------------------------------------ |
| `id` | `PrimaryKeyModifier` | The ID of the member invite. |
| `email` | `TextProperty` | The email of the invited member. |
| `role` | `EnumProperty<["owner", "admin", "member"]>` | The role that will be assigned to the member. Defaults to `owner`. |
| `token` | `TextProperty` | The invitation token. |
| `expires_at` | `DateTimeProperty` | The date and time when the invitation expires. |
| `accepted` | `BooleanProperty` | Whether the invitation has been accepted. Defaults to `false`. |
| `seller` | `BelongsTo` | The associated [Seller](#seller). |
## SellerOnboarding
This documentation provides a reference to the SellerOnboarding data model. It belongs to the Seller Module.
[View source code](https://github.com/mercurjs/mercur/blob/main/packages/modules/b2c-core/src/modules/seller/models/onboarding.ts)
| Field | Type | Description |
| -------------------- | -------------------------------- | -------------------------------------------------------------------------------- |
| `id` | `PrimaryKeyModifier` | The ID of the seller onboarding. |
| `store_information` | `BooleanProperty` | Whether the store information step is completed. Defaults to `false`. |
| `stripe_connection` | `BooleanProperty` | Whether the Stripe connection step is completed. Defaults to `false`. |
| `locations_shipping` | `BooleanProperty` | Whether the locations and shipping setup step is completed. Defaults to `false`. |
| `products` | `BooleanProperty` | Whether the products setup step is completed. Defaults to `false`. |
| `seller` | `BelongsTo` | The associated [Seller](#seller). |
# Seller Module Links
Source: https://docs.mercurjs.com/product/modules/b2c-core/seller/seller-links
Module links for the Seller Module
# Links between Seller Module and Other Modules
This document showcases the module links defined between the Seller Module and other Commerce Modules.
## Summary
The Seller Module has the following links to other modules:
| First Data Model | Second Data Model | Type | Description |
| ---------------- | ----------------- | -------------------- | ------------------------------------------------ |
| Seller | Product | Stored - one-to-many | Associates a seller with their products |
| Seller | Order | Stored - one-to-many | Associates a seller with their orders |
| Seller | Return | Stored - one-to-many | Associates a seller with order returns |
| Seller | PayoutAccount | Stored - one-to-one | Associates a seller with their payout account |
| Seller | StockLocation | Stored - one-to-many | Associates a seller with their stock locations |
| Seller | FulfillmentSet | Stored - one-to-many | Associates a seller with their fulfillment sets |
| Seller | ServiceZone | Stored - one-to-many | Associates a seller with their service zones |
| Seller | ShippingOption | Stored - one-to-many | Associates a seller with their shipping options |
| Seller | ShippingProfile | Stored - one-to-many | Associates a seller with their shipping profiles |
| Seller | InventoryItem | Stored - one-to-many | Associates a seller with their inventory items |
| Seller | CustomerGroup | Stored - one-to-many | Associates a seller with their customer groups |
| Seller | PriceList | Stored - one-to-many | Associates a seller with their price lists |
| Seller | Promotion | Stored - one-to-many | Associates a seller with their promotions |
| Seller | Campaign | Stored - one-to-many | Associates a seller with their campaigns |
***
## Product Module
Mercur defines a link between the Seller Module's `Seller` data model and the Product Module's `Product` data model. This allows each seller to have their own products in the marketplace.
### Retrieve with Query
To retrieve the products of a seller with Query, pass `product.*` in `fields`:
```ts theme={null}
const { data: sellers } = await query.graph({
entity: "seller",
fields: [
"*",
"product.*",
],
})
// sellers[0].product
```
```ts theme={null}
import { useQueryGraphStep } from "@medusajs/medusa/core-flows"
// ...
const { data: sellers } = useQueryGraphStep({
entity: "seller",
fields: [
"*",
"product.*",
],
})
// sellers[0].product
```
### Manage with Link
To manage the products of a seller, use Link:
```ts theme={null}
import { Modules } from "@medusajs/framework/utils"
// ...
await link.create({
seller: {
seller_id: "sel_123",
},
[Modules.PRODUCT]: {
product_id: "prod_123",
},
})
```
```ts theme={null}
import { createRemoteLinkStep } from "@medusajs/medusa/core-flows"
// ...
createRemoteLinkStep({
seller: {
seller_id: "sel_123",
},
[Modules.PRODUCT]: {
product_id: "prod_123",
},
})
```
***
## Order Module
Mercur defines a link between the Seller Module's `Seller` data model and the Order Module's `Order` data model. This allows tracking which orders belong to each seller in the marketplace.
### Retrieve with Query
To retrieve the orders of a seller with Query, pass `order.*` in `fields`:
```ts theme={null}
const { data: sellers } = await query.graph({
entity: "seller",
fields: [
"*",
"order.*",
],
})
// sellers[0].order
```
```ts theme={null}
import { useQueryGraphStep } from "@medusajs/medusa/core-flows"
// ...
const { data: sellers } = useQueryGraphStep({
entity: "seller",
fields: [
"*",
"order.*",
],
})
// sellers[0].order
```
### Manage with Link
To manage the orders of a seller, use Link:
```ts theme={null}
import { Modules } from "@medusajs/framework/utils"
// ...
await link.create({
seller: {
seller_id: "sel_123",
},
[Modules.ORDER]: {
order_id: "ord_123",
},
})
```
```ts theme={null}
import { createRemoteLinkStep } from "@medusajs/medusa/core-flows"
// ...
createRemoteLinkStep({
seller: {
seller_id: "sel_123",
},
[Modules.ORDER]: {
order_id: "ord_123",
},
})
```
***
## Order Module - Returns
Mercur defines a link between the Seller Module's `Seller` data model and the Order Module's `Return` data model. This allows tracking which returns belong to each seller.
### Retrieve with Query
To retrieve the returns of a seller with Query, pass `return.*` in `fields`:
```ts theme={null}
const { data: sellers } = await query.graph({
entity: "seller",
fields: [
"*",
"return.*",
],
})
// sellers[0].return
```
```ts theme={null}
import { useQueryGraphStep } from "@medusajs/medusa/core-flows"
// ...
const { data: sellers } = useQueryGraphStep({
entity: "seller",
fields: [
"*",
"return.*",
],
})
// sellers[0].return
```
### Manage with Link
To manage the returns of a seller, use Link:
```ts theme={null}
import { Modules } from "@medusajs/framework/utils"
// ...
await link.create({
seller: {
seller_id: "sel_123",
},
[Modules.ORDER]: {
return_id: "ret_123",
},
})
```
```ts theme={null}
import { createRemoteLinkStep } from "@medusajs/medusa/core-flows"
// ...
createRemoteLinkStep({
seller: {
seller_id: "sel_123",
},
[Modules.ORDER]: {
return_id: "ret_123",
},
})
```
***
## Payout Module
Mercur defines a link between the Seller Module's `Seller` data model and the Payout Module's `PayoutAccount` data model. This allows each seller to have a payout account for receiving payments from the marketplace.
### Retrieve with Query
To retrieve the payout account of a seller with Query, pass `payout_account.*` in `fields`:
```ts theme={null}
const { data: sellers } = await query.graph({
entity: "seller",
fields: [
"*",
"payout_account.*",
],
})
// sellers[0].payout_account
```
```ts theme={null}
import { useQueryGraphStep } from "@medusajs/medusa/core-flows"
// ...
const { data: sellers } = useQueryGraphStep({
entity: "seller",
fields: [
"*",
"payout_account.*",
],
})
// sellers[0].payout_account
```
### Manage with Link
To manage the payout account of a seller, use Link:
```ts theme={null}
// ...
await link.create({
seller: {
seller_id: "sel_123",
},
payout: {
payout_account_id: "pacc_123",
},
})
```
```ts theme={null}
import { createRemoteLinkStep } from "@medusajs/medusa/core-flows"
// ...
createRemoteLinkStep({
seller: {
seller_id: "sel_123",
},
payout: {
payout_account_id: "pacc_123",
},
})
```
***
## Stock Location Module
Mercur defines a link between the Seller Module's `Seller` data model and the Stock Location Module's `StockLocation` data model. This allows each seller to have their own stock locations (warehouses).
### Retrieve with Query
To retrieve the stock locations of a seller with Query, pass `stock_location.*` in `fields`:
```ts theme={null}
const { data: sellers } = await query.graph({
entity: "seller",
fields: [
"*",
"stock_location.*",
],
})
// sellers[0].stock_location
```
```ts theme={null}
import { useQueryGraphStep } from "@medusajs/medusa/core-flows"
// ...
const { data: sellers } = useQueryGraphStep({
entity: "seller",
fields: [
"*",
"stock_location.*",
],
})
// sellers[0].stock_location
```
### Manage with Link
To manage the stock locations of a seller, use Link:
```ts theme={null}
import { Modules } from "@medusajs/framework/utils"
// ...
await link.create({
seller: {
seller_id: "sel_123",
},
[Modules.STOCK_LOCATION]: {
stock_location_id: "sloc_123",
},
})
```
```ts theme={null}
import { createRemoteLinkStep } from "@medusajs/medusa/core-flows"
// ...
createRemoteLinkStep({
seller: {
seller_id: "sel_123",
},
[Modules.STOCK_LOCATION]: {
stock_location_id: "sloc_123",
},
})
```
***
## Fulfillment Module
Mercur defines multiple links between the Seller Module and the Fulfillment Module to enable sellers to manage their own fulfillment configurations.
### FulfillmentSet
A link between `Seller` and `FulfillmentSet` allows sellers to have their own fulfillment sets.
#### Retrieve with Query
```ts theme={null}
const { data: sellers } = await query.graph({
entity: "seller",
fields: [
"*",
"fulfillment_set.*",
],
})
// sellers[0].fulfillment_set
```
```ts theme={null}
import { useQueryGraphStep } from "@medusajs/medusa/core-flows"
// ...
const { data: sellers } = useQueryGraphStep({
entity: "seller",
fields: [
"*",
"fulfillment_set.*",
],
})
// sellers[0].fulfillment_set
```
#### Manage with Link
```ts theme={null}
import { Modules } from "@medusajs/framework/utils"
// ...
await link.create({
seller: {
seller_id: "sel_123",
},
[Modules.FULFILLMENT]: {
fulfillment_set_id: "fset_123",
},
})
```
```ts theme={null}
import { createRemoteLinkStep } from "@medusajs/medusa/core-flows"
// ...
createRemoteLinkStep({
seller: {
seller_id: "sel_123",
},
[Modules.FULFILLMENT]: {
fulfillment_set_id: "fset_123",
},
})
```
### ServiceZone
A link between `Seller` and `ServiceZone` allows sellers to define their own service zones.
#### Retrieve with Query
```ts theme={null}
const { data: sellers } = await query.graph({
entity: "seller",
fields: [
"*",
"service_zone.*",
],
})
// sellers[0].service_zone
```
```ts theme={null}
import { useQueryGraphStep } from "@medusajs/medusa/core-flows"
// ...
const { data: sellers } = useQueryGraphStep({
entity: "seller",
fields: [
"*",
"service_zone.*",
],
})
// sellers[0].service_zone
```
#### Manage with Link
```ts theme={null}
import { Modules } from "@medusajs/framework/utils"
// ...
await link.create({
seller: {
seller_id: "sel_123",
},
[Modules.FULFILLMENT]: {
service_zone_id: "serzo_123",
},
})
```
```ts theme={null}
import { createRemoteLinkStep } from "@medusajs/medusa/core-flows"
// ...
createRemoteLinkStep({
seller: {
seller_id: "sel_123",
},
[Modules.FULFILLMENT]: {
service_zone_id: "serzo_123",
},
})
```
### ShippingOption
A link between `Seller` and `ShippingOption` allows sellers to configure their own shipping options.
#### Retrieve with Query
```ts theme={null}
const { data: sellers } = await query.graph({
entity: "seller",
fields: [
"*",
"shipping_option.*",
],
})
// sellers[0].shipping_option
```
```ts theme={null}
import { useQueryGraphStep } from "@medusajs/medusa/core-flows"
// ...
const { data: sellers } = useQueryGraphStep({
entity: "seller",
fields: [
"*",
"shipping_option.*",
],
})
// sellers[0].shipping_option
```
#### Manage with Link
```ts theme={null}
import { Modules } from "@medusajs/framework/utils"
// ...
await link.create({
seller: {
seller_id: "sel_123",
},
[Modules.FULFILLMENT]: {
shipping_option_id: "so_123",
},
})
```
```ts theme={null}
import { createRemoteLinkStep } from "@medusajs/medusa/core-flows"
// ...
createRemoteLinkStep({
seller: {
seller_id: "sel_123",
},
[Modules.FULFILLMENT]: {
shipping_option_id: "so_123",
},
})
```
### ShippingProfile
A link between `Seller` and `ShippingProfile` allows sellers to manage their own shipping profiles.
#### Retrieve with Query
```ts theme={null}
const { data: sellers } = await query.graph({
entity: "seller",
fields: [
"*",
"shipping_profile.*",
],
})
// sellers[0].shipping_profile
```
```ts theme={null}
import { useQueryGraphStep } from "@medusajs/medusa/core-flows"
// ...
const { data: sellers } = useQueryGraphStep({
entity: "seller",
fields: [
"*",
"shipping_profile.*",
],
})
// sellers[0].shipping_profile
```
#### Manage with Link
```ts theme={null}
import { Modules } from "@medusajs/framework/utils"
// ...
await link.create({
seller: {
seller_id: "sel_123",
},
[Modules.FULFILLMENT]: {
shipping_profile_id: "sp_123",
},
})
```
```ts theme={null}
import { createRemoteLinkStep } from "@medusajs/medusa/core-flows"
// ...
createRemoteLinkStep({
seller: {
seller_id: "sel_123",
},
[Modules.FULFILLMENT]: {
shipping_profile_id: "sp_123",
},
})
```
***
## Inventory Module
Mercur defines a link between the Seller Module's `Seller` data model and the Inventory Module's `InventoryItem` data model. This allows each seller to manage their own inventory items.
### Retrieve with Query
To retrieve the inventory items of a seller with Query, pass `inventory_item.*` in `fields`:
```ts theme={null}
const { data: sellers } = await query.graph({
entity: "seller",
fields: [
"*",
"inventory_item.*",
],
})
// sellers[0].inventory_item
```
```ts theme={null}
import { useQueryGraphStep } from "@medusajs/medusa/core-flows"
// ...
const { data: sellers } = useQueryGraphStep({
entity: "seller",
fields: [
"*",
"inventory_item.*",
],
})
// sellers[0].inventory_item
```
### Manage with Link
To manage the inventory items of a seller, use Link:
```ts theme={null}
import { Modules } from "@medusajs/framework/utils"
// ...
await link.create({
seller: {
seller_id: "sel_123",
},
[Modules.INVENTORY]: {
inventory_item_id: "iitem_123",
},
})
```
```ts theme={null}
import { createRemoteLinkStep } from "@medusajs/medusa/core-flows"
// ...
createRemoteLinkStep({
seller: {
seller_id: "sel_123",
},
[Modules.INVENTORY]: {
inventory_item_id: "iitem_123",
},
})
```
***
## Customer Module
Mercur defines a link between the Seller Module's `Seller` data model and the Customer Module's `CustomerGroup` data model. This allows sellers to create and manage their own customer groups for targeted marketing.
### Retrieve with Query
To retrieve the customer groups of a seller with Query, pass `customer_group.*` in `fields`:
```ts theme={null}
const { data: sellers } = await query.graph({
entity: "seller",
fields: [
"*",
"customer_group.*",
],
})
// sellers[0].customer_group
```
```ts theme={null}
import { useQueryGraphStep } from "@medusajs/medusa/core-flows"
// ...
const { data: sellers } = useQueryGraphStep({
entity: "seller",
fields: [
"*",
"customer_group.*",
],
})
// sellers[0].customer_group
```
### Manage with Link
To manage the customer groups of a seller, use Link:
```ts theme={null}
import { Modules } from "@medusajs/framework/utils"
// ...
await link.create({
seller: {
seller_id: "sel_123",
},
[Modules.CUSTOMER]: {
customer_group_id: "cgrp_123",
},
})
```
```ts theme={null}
import { createRemoteLinkStep } from "@medusajs/medusa/core-flows"
// ...
createRemoteLinkStep({
seller: {
seller_id: "sel_123",
},
[Modules.CUSTOMER]: {
customer_group_id: "cgrp_123",
},
})
```
***
## Pricing Module
Mercur defines a link between the Seller Module's `Seller` data model and the Pricing Module's `PriceList` data model. This allows sellers to create and manage their own price lists.
### Retrieve with Query
To retrieve the price lists of a seller with Query, pass `price_list.*` in `fields`:
```ts theme={null}
const { data: sellers } = await query.graph({
entity: "seller",
fields: [
"*",
"price_list.*",
],
})
// sellers[0].price_list
```
```ts theme={null}
import { useQueryGraphStep } from "@medusajs/medusa/core-flows"
// ...
const { data: sellers } = useQueryGraphStep({
entity: "seller",
fields: [
"*",
"price_list.*",
],
})
// sellers[0].price_list
```
### Manage with Link
To manage the price lists of a seller, use Link:
```ts theme={null}
import { Modules } from "@medusajs/framework/utils"
// ...
await link.create({
seller: {
seller_id: "sel_123",
},
[Modules.PRICING]: {
price_list_id: "pl_123",
},
})
```
```ts theme={null}
import { createRemoteLinkStep } from "@medusajs/medusa/core-flows"
// ...
createRemoteLinkStep({
seller: {
seller_id: "sel_123",
},
[Modules.PRICING]: {
price_list_id: "pl_123",
},
})
```
***
## Promotion Module
Mercur defines links between the Seller Module and the Promotion Module to enable sellers to manage their own promotions and campaigns.
### Promotion
A link between `Seller` and `Promotion` allows sellers to create their own promotions.
#### Retrieve with Query
```ts theme={null}
const { data: sellers } = await query.graph({
entity: "seller",
fields: [
"*",
"promotion.*",
],
})
// sellers[0].promotion
```
```ts theme={null}
import { useQueryGraphStep } from "@medusajs/medusa/core-flows"
// ...
const { data: sellers } = useQueryGraphStep({
entity: "seller",
fields: [
"*",
"promotion.*",
],
})
// sellers[0].promotion
```
#### Manage with Link
```ts theme={null}
import { Modules } from "@medusajs/framework/utils"
// ...
await link.create({
seller: {
seller_id: "sel_123",
},
[Modules.PROMOTION]: {
promotion_id: "promo_123",
},
})
```
```ts theme={null}
import { createRemoteLinkStep } from "@medusajs/medusa/core-flows"
// ...
createRemoteLinkStep({
seller: {
seller_id: "sel_123",
},
[Modules.PROMOTION]: {
promotion_id: "promo_123",
},
})
```
### Campaign
A link between `Seller` and `Campaign` allows sellers to organize promotions into campaigns.
#### Retrieve with Query
```ts theme={null}
const { data: sellers } = await query.graph({
entity: "seller",
fields: [
"*",
"campaign.*",
],
})
// sellers[0].campaign
```
```ts theme={null}
import { useQueryGraphStep } from "@medusajs/medusa/core-flows"
// ...
const { data: sellers } = useQueryGraphStep({
entity: "seller",
fields: [
"*",
"campaign.*",
],
})
// sellers[0].campaign
```
#### Manage with Link
```ts theme={null}
import { Modules } from "@medusajs/framework/utils"
// ...
await link.create({
seller: {
seller_id: "sel_123",
},
[Modules.PROMOTION]: {
campaign_id: "camp_123",
},
})
```
```ts theme={null}
import { createRemoteLinkStep } from "@medusajs/medusa/core-flows"
// ...
createRemoteLinkStep({
seller: {
seller_id: "sel_123",
},
[Modules.PROMOTION]: {
campaign_id: "camp_123",
},
})
```
# Seller Module Options
Source: https://docs.mercurjs.com/product/modules/b2c-core/seller/seller-module-options
Configuration options for the Seller Module
# Seller Module Options
In this document, you'll learn about the options of the Seller Module.
## validInviteDuration
The `validInviteDuration` option configures how long member invitation tokens remain valid before expiring.
**Type**: `number`\
**Default**: `604800000` (7 days in milliseconds)\
**Unit**: Milliseconds
When a seller invites a team member, a JWT token is generated with an expiration time. This option controls that duration.
For example, to set invitations to expire after 3 days:
```ts title="medusa-config.ts" theme={null}
module.exports = defineConfig({
// ...
modules: [
{
resolve: "@mercurjs/b2c-core",
options: {
seller: {
validInviteDuration: 259200000, // 3 days in milliseconds
},
},
},
],
})
```
### Calculation
To convert days to milliseconds:
```
days × 24 hours × 60 minutes × 60 seconds × 1000 milliseconds
```
**Common Values:**
* 1 day: `86400000`
* 3 days: `259200000`
* 7 days: `604800000` (default)
* 14 days: `1209600000`
* 30 days: `2592000000`
### Use Cases
**Shorter Duration (1-3 days)**
* High-security marketplaces
* Urgent team additions
* Reduces risk of token compromise
**Longer Duration (14-30 days)**
* Casual onboarding processes
* International teams across time zones
* Reduces need to resend invitations
# Seller Module Service Reference
Source: https://docs.mercurjs.com/product/modules/b2c-core/seller/seller-services
Reference documentation for the Seller Module service methods
# ISellerModuleService Reference
This section of the documentation provides a reference to the `ISellerModuleService` interface's methods. This is the interface developers use to use the functionalities provided by the Seller Module.
You should only use the methods in this reference when implementing complex customizations. For common cases, check out available workflows instead.
The main service interface for the Seller Module.
## Methods
### Seller Methods
* [createSellers](#createsellers)
* [updateSellers](#updatesellers)
* [deleteSellers](#deletesellers)
* [retrieveSeller](#retrieveseller)
* [listSellers](#listsellers)
* [listAndCountSellers](#listandcountsellers)
* [softDeleteSellers](#softdeletesellers)
* [restoreSellers](#restoresellers)
### Member Methods
* [createMembers](#createmembers)
* [updateMembers](#updatemembers)
* [deleteMembers](#deletemembers)
* [retrieveMember](#retrievemember)
* [listMembers](#listmembers)
* [listAndCountMembers](#listandcountmembers)
* [softDeleteMembers](#softdeletemembers)
* [restoreMembers](#restoremembers)
### Member Invite Methods
* [createMemberInvites](#creatememberinvites)
* [updateMemberInvites](#updatememberinvites)
* [deleteMemberInvites](#deletememberinvites)
* [retrieveMemberInvite](#retrievememberinvite)
* [listMemberInvites](#listmemberinvites)
* [listAndCountMemberInvites](#listandcountmemberinvites)
* [softDeleteMemberInvites](#softdeletememberinvites)
* [restoreMemberInvites](#restorememberinvites)
* [validateInviteToken](#validateinvitetoken)
### Seller Onboarding Methods
* [createSellerOnboardings](#createselleronboardings)
* [updateSellerOnboardings](#updateselleronboardings)
* [deleteSellerOnboardings](#deleteselleronboardings)
* [retrieveSellerOnboarding](#retrieveselleronboarding)
* [listSellerOnboardings](#listselleronboardings)
* [listAndCountSellerOnboardings](#listandcountselleronboardings)
* [softDeleteSellerOnboardings](#softdeleteselleronboardings)
* [restoreSellerOnboardings](#restoreselleronboardings)
* [isOnboardingCompleted](#isonboardingcompleted)
***
# createSellers
This section provides a reference to the `createSellers` method. This belongs to the Seller Module.
## createSellers(data, sharedContext?): Promise\
This method creates sellers.
### Example
```ts theme={null}
const sellers = await sellerModuleService.createSellers([
{
name: "Acme Store",
handle: "acme-store",
email: "contact@acme.com",
description: "Quality products for everyone",
},
])
```
### Parameters
The sellers to be created.
The name of the seller.
The unique handle of the seller.
The email of the seller.
The phone of the seller.
The description of the seller.
The photo URL of the seller.
The address line of the seller.
The city of the seller.
The state of the seller.
The postal code of the seller.
The country code of the seller.
The tax ID of the seller.
The status of the seller's store.
A context used to share resources, such as transaction manager, between the application and the module.
### Returns
The created sellers.
## createSellers(data, sharedContext?): Promise\
This method creates a seller.
### Example
```ts theme={null}
const seller = await sellerModuleService.createSellers({
name: "Acme Store",
handle: "acme-store",
})
```
### Parameters
The seller to be created.
The name of the seller.
The unique handle of the seller.
The email of the seller.
The phone of the seller.
The description of the seller.
The photo URL of the seller.
The address line of the seller.
The city of the seller.
The state of the seller.
The postal code of the seller.
The country code of the seller.
The tax ID of the seller.
The status of the seller's store.
A context used to share resources, such as transaction manager, between the application and the module.
### Returns
The created seller.
***
# updateSellers
This section provides a reference to the `updateSellers` method. This belongs to the Seller Module.
## updateSellers(id, data, sharedContext?): Promise\
This method updates an existing seller.
### Example
```ts theme={null}
const seller = await sellerModuleService.updateSellers("sel_123", {
name: "Updated Store Name",
description: "New description",
store_status: "ACTIVE",
})
```
### Parameters
The ID of the seller.
The attributes to update in the seller.
The name of the seller.
The email of the seller.
The phone of the seller.
The description of the seller.
The address line of the seller.
The city of the seller.
The state of the seller.
The postal code of the seller.
The country code of the seller.
The tax ID of the seller.
The unique handle of the seller.
The photo URL of the seller.
The status of the seller's store.
A context used to share resources, such as transaction manager, between the application and the module.
### Returns
The updated seller.
The ID of the seller.
The name of the seller.
The unique handle of the seller.
The email of the seller.
The phone of the seller.
The description of the seller.
The photo URL of the seller.
The address line of the seller.
The city of the seller.
The state of the seller.
The postal code of the seller.
The country code of the seller.
The tax ID of the seller.
The status of the seller's store.
The created date of the seller.
The updated date of the seller.
***
# deleteSellers
This section provides a reference to the `deleteSellers` method. This belongs to the Seller Module.
## deleteSellers(ids, sharedContext?): Promise\
This method deletes sellers by their IDs.
### Example
```ts theme={null}
await sellerModuleService.deleteSellers(["sel_123", "sel_321"])
```
### Parameters
The IDs of the sellers.
A context used to share resources, such as transaction manager, between the application and the module.
### Returns
Resolves when the sellers are deleted successfully.
## deleteSellers(id, sharedContext?): Promise\
This method deletes a seller by its ID.
### Example
```ts theme={null}
await sellerModuleService.deleteSellers("sel_123")
```
### Parameters
The ID of the seller.
A context used to share resources, such as transaction manager, between the application and the module.
### Returns
Resolves when the seller is deleted successfully.
***
# retrieveSeller
This section provides a reference to the `retrieveSeller` method. This belongs to the Seller Module.
This method retrieves a seller by its ID.
## Example
```ts theme={null}
const seller = await sellerModuleService.retrieveSeller("sel_123")
```
To retrieve relationships:
```ts theme={null}
const seller = await sellerModuleService.retrieveSeller(
"sel_123",
{
relations: ["members", "onboarding", "invites"],
}
)
```
## Parameters
The ID of the seller.
The configurations determining how the seller is retrieved. Its properties, such as `select` or `relations`, accept the attributes or relations associated with a seller.
An array of strings, each being attribute names of the entity to retrieve in the result.
A number indicating the number of records to skip before retrieving the results.
A number indicating the number of records to return in the result.
An array of strings, each being relation names of the entity to retrieve in the result. For example, `["members", "onboarding", "invites"]`.
An object used to specify how to sort the returned records.
A boolean indicating whether deleted records should also be retrieved as part of the result.
A context used to share resources, such as transaction manager, between the application and the module.
## Returns
The retrieved seller.
The ID of the seller.
The name of the seller.
The unique handle of the seller.
The email of the seller.
The phone of the seller.
The description of the seller.
The photo URL of the seller.
The address line of the seller.
The city of the seller.
The state of the seller.
The postal code of the seller.
The country code of the seller.
The tax ID of the seller.
The status of the seller's store.
The created date of the seller.
The updated date of the seller.
The associated members (if included in relations).
The associated onboarding record (if included in relations).
The associated member invites (if included in relations).
***
# listSellers
This section provides a reference to the `listSellers` method. This belongs to the Seller Module.
This method retrieves a paginated list of sellers based on optional filters and configuration.
## Example
To retrieve a list of sellers using their IDs:
```ts theme={null}
const sellers = await sellerModuleService.listSellers({
id: ["sel_123", "sel_321"],
})
```
To retrieve active sellers:
```ts theme={null}
const sellers = await sellerModuleService.listSellers({
store_status: "ACTIVE",
})
```
By default, only the first `15` records are retrieved. You can control pagination:
```ts theme={null}
const sellers = await sellerModuleService.listSellers(
{
store_status: "ACTIVE",
},
{
take: 20,
skip: 2,
}
)
```
## Parameters
The filters to apply on the retrieved sellers.
The IDs to filter the sellers by.
Filter sellers by their names.
Filter sellers by their handles.
Filter sellers by their email addresses.
Filter sellers by their store status.
The configurations determining how the seller is retrieved.
An array of strings, each being attribute names of the entity to retrieve in the result.
A number indicating the number of records to skip before retrieving the results.
A number indicating the number of records to return in the result.
An array of strings, each being relation names of the entity to retrieve in the result.
An object used to specify how to sort the returned records.
A boolean indicating whether deleted records should also be retrieved as part of the result.
A context used to share resources, such as transaction manager, between the application and the module.
## Returns
The list of sellers.
***
# listAndCountSellers
This section provides a reference to the `listAndCountSellers` method. This belongs to the Seller Module.
This method retrieves a paginated list of sellers along with the total count of available sellers satisfying the provided filters.
## Example
```ts theme={null}
const [sellers, count] = await sellerModuleService.listAndCountSellers({
store_status: "ACTIVE",
})
```
## Parameters
The filters to apply on the retrieved sellers.
The IDs to filter the sellers by.
Filter sellers by their names.
Filter sellers by their handles.
Filter sellers by their email addresses.
Filter sellers by their store status.
The configurations determining how the seller is retrieved.
An array of strings, each being attribute names of the entity to retrieve in the result.
A number indicating the number of records to skip before retrieving the results.
A number indicating the number of records to return in the result.
An array of strings, each being relation names of the entity to retrieve in the result.
An object used to specify how to sort the returned records.
A boolean indicating whether deleted records should also be retrieved as part of the result.
A context used to share resources, such as transaction manager, between the application and the module.
## Returns
The list of sellers along with their total count.
***
# softDeleteSellers
This section provides a reference to the `softDeleteSellers` method. This belongs to the Seller Module.
This method soft deletes sellers by their IDs.
## Example
```ts theme={null}
await sellerModuleService.softDeleteSellers([
"sel_123",
"sel_321",
])
```
## Parameters
The IDs of the sellers.
An object that is used to specify an entity's related entities that should be soft-deleted when the main entity is soft-deleted.
A context used to share resources, such as transaction manager, between the application and the module.
## Returns
An object that includes the IDs of related records that were also soft deleted. If there are no related records, the promise resolves to `void`.
***
# restoreSellers
This section provides a reference to the `restoreSellers` method. This belongs to the Seller Module.
This method restores soft deleted sellers by their IDs.
## Example
```ts theme={null}
await sellerModuleService.restoreSellers(["sel_123", "sel_321"])
```
## Parameters
The IDs of the sellers.
Configurations determining which relations to restore along with each of the seller.
A context used to share resources, such as transaction manager, between the application and the module.
## Returns
An object that includes the IDs of related records that were restored. If there are no related records restored, the promise resolves to `void`.
***
# createMembers
This section provides a reference to the `createMembers` method. This belongs to the Seller Module.
## createMembers(data, sharedContext?): Promise\
This method creates members.
### Example
```ts theme={null}
const members = await sellerModuleService.createMembers([
{
seller_id: "sel_123",
name: "John Doe",
email: "john@example.com",
role: "admin",
},
])
```
### Parameters
The members to be created.
The ID of the seller this member belongs to.
The name of the member.
The email of the member.
The role of the member in the seller's team.
The bio of the member.
The photo URL of the member.
The phone of the member.
A context used to share resources, such as transaction manager, between the application and the module.
### Returns
The created members.
## createMembers(data, sharedContext?): Promise\
This method creates a member.
### Example
```ts theme={null}
const member = await sellerModuleService.createMembers({
seller_id: "sel_123",
name: "John Doe",
email: "john@example.com",
role: "admin",
})
```
### Parameters
The member to be created.
The ID of the seller this member belongs to.
The name of the member.
The email of the member.
The role of the member in the seller's team.
The bio of the member.
The photo URL of the member.
The phone of the member.
A context used to share resources, such as transaction manager, between the application and the module.
### Returns
The created member.
***
# updateMembers
This section provides a reference to the `updateMembers` method. This belongs to the Seller Module.
## updateMembers(id, data, sharedContext?): Promise\
This method updates an existing member.
### Example
```ts theme={null}
const member = await sellerModuleService.updateMembers("mem_123", {
name: "Jane Doe",
role: "owner",
})
```
### Parameters
The ID of the member.
The attributes to update in the member.
The name of the member.
The email of the member.
The role of the member in the seller's team.
The bio of the member.
The photo URL of the member.
The phone of the member.
A context used to share resources, such as transaction manager, between the application and the module.
### Returns
The updated member.
The ID of the member.
The name of the member.
The email of the member.
The role of the member.
The bio of the member.
The photo URL of the member.
The phone of the member.
The created date of the member.
The updated date of the member.
***
# deleteMembers
This section provides a reference to the `deleteMembers` method. This belongs to the Seller Module.
## deleteMembers(ids, sharedContext?): Promise\
This method deletes members by their IDs.
### Example
```ts theme={null}
await sellerModuleService.deleteMembers(["mem_123", "mem_321"])
```
### Parameters
The IDs of the members.
A context used to share resources, such as transaction manager, between the application and the module.
### Returns
Resolves when the members are deleted successfully.
## deleteMembers(id, sharedContext?): Promise\
This method deletes a member by its ID.
### Example
```ts theme={null}
await sellerModuleService.deleteMembers("mem_123")
```
### Parameters
The ID of the member.
A context used to share resources, such as transaction manager, between the application and the module.
### Returns
Resolves when the member is deleted successfully.
***
# retrieveMember
This section provides a reference to the `retrieveMember` method. This belongs to the Seller Module.
This method retrieves a member by its ID.
## Example
```ts theme={null}
const member = await sellerModuleService.retrieveMember("mem_123")
```
To retrieve the seller relationship:
```ts theme={null}
const member = await sellerModuleService.retrieveMember(
"mem_123",
{
relations: ["seller"],
}
)
```
## Parameters
The ID of the member.
The configurations determining how the member is retrieved.
An array of strings, each being attribute names of the entity to retrieve in the result.
An array of strings, each being relation names of the entity to retrieve in the result. For example, `["seller"]`.
An object used to specify how to sort the returned records.
A boolean indicating whether deleted records should also be retrieved as part of the result.
A context used to share resources, such as transaction manager, between the application and the module.
## Returns
The retrieved member.
The ID of the member.
The name of the member.
The email of the member.
The role of the member.
The bio of the member.
The photo URL of the member.
The phone of the member.
The created date of the member.
The updated date of the member.
The associated seller (if included in relations).
***
# listMembers
This section provides a reference to the `listMembers` method. This belongs to the Seller Module.
This method retrieves a paginated list of members based on optional filters and configuration.
## Example
```ts theme={null}
const members = await sellerModuleService.listMembers({
seller_id: "sel_123",
})
```
To filter by role:
```ts theme={null}
const members = await sellerModuleService.listMembers({
seller_id: "sel_123",
role: "admin",
})
```
## Parameters
The filters to apply on the retrieved members.
The IDs to filter the members by.
Filter members by their seller IDs.
Filter members by their email addresses.
Filter members by their roles.
The configurations determining how the member is retrieved.
An array of strings, each being attribute names of the entity to retrieve in the result.
A number indicating the number of records to skip before retrieving the results.
A number indicating the number of records to return in the result.
An array of strings, each being relation names of the entity to retrieve in the result.
An object used to specify how to sort the returned records.
A boolean indicating whether deleted records should also be retrieved as part of the result.
A context used to share resources, such as transaction manager, between the application and the module.
## Returns
The list of members.
***
# listAndCountMembers
This section provides a reference to the `listAndCountMembers` method. This belongs to the Seller Module.
This method retrieves a paginated list of members along with the total count of available members satisfying the provided filters.
## Example
```ts theme={null}
const [members, count] = await sellerModuleService.listAndCountMembers({
seller_id: "sel_123",
})
```
## Parameters
The filters to apply on the retrieved members.
The IDs to filter the members by.
Filter members by their seller IDs.
Filter members by their email addresses.
Filter members by their roles.
The configurations determining how the member is retrieved.
An array of strings, each being attribute names of the entity to retrieve in the result.
A number indicating the number of records to skip before retrieving the results.
A number indicating the number of records to return in the result.
An array of strings, each being relation names of the entity to retrieve in the result.
An object used to specify how to sort the returned records.
A boolean indicating whether deleted records should also be retrieved as part of the result.
A context used to share resources, such as transaction manager, between the application and the module.
## Returns
The list of members along with their total count.
***
# softDeleteMembers
This section provides a reference to the `softDeleteMembers` method. This belongs to the Seller Module.
This method soft deletes members by their IDs.
## Example
```ts theme={null}
await sellerModuleService.softDeleteMembers([
"mem_123",
"mem_321",
])
```
## Parameters
The IDs of the members.
An object that is used to specify an entity's related entities that should be soft-deleted when the main entity is soft-deleted.
A context used to share resources, such as transaction manager, between the application and the module.
## Returns
An object that includes the IDs of related records that were also soft deleted. If there are no related records, the promise resolves to `void`.
***
# restoreMembers
This section provides a reference to the `restoreMembers` method. This belongs to the Seller Module.
This method restores soft deleted members by their IDs.
## Example
```ts theme={null}
await sellerModuleService.restoreMembers(["mem_123", "mem_321"])
```
## Parameters
The IDs of the members.
Configurations determining which relations to restore along with each of the member.
A context used to share resources, such as transaction manager, between the application and the module.
## Returns
An object that includes the IDs of related records that were restored. If there are no related records restored, the promise resolves to `void`.
***
# createMemberInvites
This section provides a reference to the `createMemberInvites` method. This belongs to the Seller Module.
This method creates member invites with automatically generated JWT tokens.
## createMemberInvites(data, sharedContext?): Promise\
### Example
```ts theme={null}
const invites = await sellerModuleService.createMemberInvites([
{
seller_id: "sel_123",
email: "newmember@example.com",
role: "member",
},
])
```
### Parameters
The member invites to be created.
The ID of the seller this invite belongs to.
The email of the invited member.
The role that will be assigned to the member.
A context used to share resources, such as transaction manager, between the application and the module.
### Returns
The created member invites with generated tokens.
The ID of the member invite.
The email of the invited member.
The role that will be assigned to the member.
The JWT invitation token.
The date and time when the invitation expires.
Whether the invitation has been accepted.
The created date of the invite.
The updated date of the invite.
***
# validateInviteToken
This section provides a reference to the `validateInviteToken` method. This belongs to the Seller Module.
This method validates a member invitation JWT token and returns the associated invite if valid.
## Example
```ts theme={null}
const invite = await sellerModuleService.validateInviteToken("eyJhbGciOiJIUzI1NiIsInR5cCI6IkpXVCJ9...")
```
## Parameters
The JWT invitation token to validate.
## Returns
The validated member invite.
The ID of the member invite.
The email of the invited member.
The role that will be assigned to the member.
The JWT invitation token.
The date and time when the invitation expires.
Whether the invitation has been accepted.
The created date of the invite.
The updated date of the invite.
This method throws an error if the invite has already been accepted or has expired.
***
# updateMemberInvites
This section provides a reference to the `updateMemberInvites` method. This belongs to the Seller Module.
## updateMemberInvites(id, data, sharedContext?): Promise\
This method updates an existing member invite.
### Example
```ts theme={null}
const invite = await sellerModuleService.updateMemberInvites("meminv_123", {
accepted: true,
})
```
### Parameters
The ID of the member invite.
The attributes to update in the member invite.
The email of the invited member.
The role that will be assigned to the member.
Whether the invitation has been accepted.
The JWT invitation token.
The date and time when the invitation expires.
A context used to share resources, such as transaction manager, between the application and the module.
### Returns
The updated member invite.
***
# deleteMemberInvites
This section provides a reference to the `deleteMemberInvites` method. This belongs to the Seller Module.
## deleteMemberInvites(ids, sharedContext?): Promise\
This method deletes member invites by their IDs.
### Example
```ts theme={null}
await sellerModuleService.deleteMemberInvites(["meminv_123", "meminv_321"])
```
### Parameters
The IDs of the member invites.
A context used to share resources, such as transaction manager, between the application and the module.
### Returns
Resolves when the member invites are deleted successfully.
## deleteMemberInvites(id, sharedContext?): Promise\
This method deletes a member invite by its ID.
### Example
```ts theme={null}
await sellerModuleService.deleteMemberInvites("meminv_123")
```
### Parameters
The ID of the member invite.
A context used to share resources, such as transaction manager, between the application and the module.
### Returns
Resolves when the member invite is deleted successfully.
***
# retrieveMemberInvite
This section provides a reference to the `retrieveMemberInvite` method. This belongs to the Seller Module.
This method retrieves a member invite by its ID.
## Example
```ts theme={null}
const invite = await sellerModuleService.retrieveMemberInvite("meminv_123")
```
To retrieve the seller relationship:
```ts theme={null}
const invite = await sellerModuleService.retrieveMemberInvite(
"meminv_123",
{
relations: ["seller"],
}
)
```
## Parameters
The ID of the member invite.
The configurations determining how the member invite is retrieved.
An array of strings, each being attribute names of the entity to retrieve in the result.
An array of strings, each being relation names of the entity to retrieve in the result. For example, `["seller"]`.
An object used to specify how to sort the returned records.
A boolean indicating whether deleted records should also be retrieved as part of the result.
A context used to share resources, such as transaction manager, between the application and the module.
## Returns
The retrieved member invite.
The ID of the member invite.
The email of the invited member.
The role that will be assigned to the member.
The JWT invitation token.
The date and time when the invitation expires.
Whether the invitation has been accepted.
The created date of the invite.
The updated date of the invite.
The associated seller (if included in relations).
***
# listMemberInvites
This section provides a reference to the `listMemberInvites` method. This belongs to the Seller Module.
This method retrieves a paginated list of member invites based on optional filters and configuration.
## Example
```ts theme={null}
const invites = await sellerModuleService.listMemberInvites({
seller_id: "sel_123",
accepted: false,
})
```
## Parameters
The filters to apply on the retrieved member invites.
The IDs to filter the member invites by.
Filter member invites by their seller IDs.
Filter member invites by their email addresses.
Filter member invites by whether they have been accepted.
The configurations determining how the member invite is retrieved.
An array of strings, each being attribute names of the entity to retrieve in the result.
A number indicating the number of records to skip before retrieving the results.
A number indicating the number of records to return in the result.
An array of strings, each being relation names of the entity to retrieve in the result.
An object used to specify how to sort the returned records.
A boolean indicating whether deleted records should also be retrieved as part of the result.
A context used to share resources, such as transaction manager, between the application and the module.
## Returns
The list of member invites.
***
# listAndCountMemberInvites
This section provides a reference to the `listAndCountMemberInvites` method. This belongs to the Seller Module.
This method retrieves a paginated list of member invites along with the total count of available member invites satisfying the provided filters.
## Example
```ts theme={null}
const [invites, count] = await sellerModuleService.listAndCountMemberInvites({
seller_id: "sel_123",
accepted: false,
})
```
## Parameters
The filters to apply on the retrieved member invites.
The IDs to filter the member invites by.
Filter member invites by their seller IDs.
Filter member invites by their email addresses.
Filter member invites by whether they have been accepted.
The configurations determining how the member invite is retrieved.
An array of strings, each being attribute names of the entity to retrieve in the result.
A number indicating the number of records to skip before retrieving the results.
A number indicating the number of records to return in the result.
An array of strings, each being relation names of the entity to retrieve in the result.
An object used to specify how to sort the returned records.
A boolean indicating whether deleted records should also be retrieved as part of the result.
A context used to share resources, such as transaction manager, between the application and the module.
## Returns
The list of member invites along with their total count.
***
# softDeleteMemberInvites
This section provides a reference to the `softDeleteMemberInvites` method. This belongs to the Seller Module.
This method soft deletes member invites by their IDs.
## Example
```ts theme={null}
await sellerModuleService.softDeleteMemberInvites([
"meminv_123",
"meminv_321",
])
```
## Parameters
The IDs of the member invites.
An object that is used to specify an entity's related entities that should be soft-deleted when the main entity is soft-deleted.
A context used to share resources, such as transaction manager, between the application and the module.
## Returns
An object that includes the IDs of related records that were also soft deleted. If there are no related records, the promise resolves to `void`.
***
# restoreMemberInvites
This section provides a reference to the `restoreMemberInvites` method. This belongs to the Seller Module.
This method restores soft deleted member invites by their IDs.
## Example
```ts theme={null}
await sellerModuleService.restoreMemberInvites(["meminv_123", "meminv_321"])
```
## Parameters
The IDs of the member invites.
Configurations determining which relations to restore along with each of the member invite.
A context used to share resources, such as transaction manager, between the application and the module.
## Returns
An object that includes the IDs of related records that were restored. If there are no related records restored, the promise resolves to `void`.
***
# createSellerOnboardings
This section provides a reference to the `createSellerOnboardings` method. This belongs to the Seller Module.
## createSellerOnboardings(data, sharedContext?): Promise\
This method creates seller onboarding records.
### Example
```ts theme={null}
const onboardings = await sellerModuleService.createSellerOnboardings([
{
seller_id: "sel_123",
store_information: true,
stripe_connection: false,
locations_shipping: false,
products: false,
},
])
```
### Parameters
The seller onboardings to be created.
The ID of the seller this onboarding belongs to.
Whether the store information step is completed.
Whether the Stripe connection step is completed.
Whether the locations and shipping setup step is completed.
Whether the products setup step is completed.
A context used to share resources, such as transaction manager, between the application and the module.
### Returns
The created seller onboardings.
***
# updateSellerOnboardings
This section provides a reference to the `updateSellerOnboardings` method. This belongs to the Seller Module.
## updateSellerOnboardings(id, data, sharedContext?): Promise\
This method updates an existing seller onboarding record.
### Example
```ts theme={null}
const onboarding = await sellerModuleService.updateSellerOnboardings("sel_onb_123", {
store_information: true,
stripe_connection: true,
})
```
### Parameters
The ID of the seller onboarding.
The attributes to update in the seller onboarding.
Whether the store information step is completed.
Whether the Stripe connection step is completed.
Whether the locations and shipping setup step is completed.
Whether the products setup step is completed.
A context used to share resources, such as transaction manager, between the application and the module.
### Returns
The updated seller onboarding.
The ID of the seller onboarding.
Whether the store information step is completed.
Whether the Stripe connection step is completed.
Whether the locations and shipping setup step is completed.
Whether the products setup step is completed.
The created date of the seller onboarding.
The updated date of the seller onboarding.
***
# isOnboardingCompleted
This section provides a reference to the `isOnboardingCompleted` method. This belongs to the Seller Module.
This method checks whether a seller has completed all onboarding steps.
## Example
```ts theme={null}
const isCompleted = await sellerModuleService.isOnboardingCompleted("sel_123")
```
## Parameters
The ID of the seller to check.
## Returns
A boolean indicating whether all onboarding steps are completed. Returns `true` if all four steps (`store_information`, `stripe_connection`, `locations_shipping`, `products`) are completed, otherwise `false`.
***
# deleteSellerOnboardings
This section provides a reference to the `deleteSellerOnboardings` method. This belongs to the Seller Module.
## deleteSellerOnboardings(ids, sharedContext?): Promise\
This method deletes seller onboardings by their IDs.
### Example
```ts theme={null}
await sellerModuleService.deleteSellerOnboardings(["sel_onb_123", "sel_onb_321"])
```
### Parameters
The IDs of the seller onboardings.
A context used to share resources, such as transaction manager, between the application and the module.
### Returns
Resolves when the seller onboardings are deleted successfully.
## deleteSellerOnboardings(id, sharedContext?): Promise\
This method deletes a seller onboarding by its ID.
### Example
```ts theme={null}
await sellerModuleService.deleteSellerOnboardings("sel_onb_123")
```
### Parameters
The ID of the seller onboarding.
A context used to share resources, such as transaction manager, between the application and the module.
### Returns
Resolves when the seller onboarding is deleted successfully.
***
# retrieveSellerOnboarding
This section provides a reference to the `retrieveSellerOnboarding` method. This belongs to the Seller Module.
This method retrieves a seller onboarding by its ID.
## Example
```ts theme={null}
const onboarding = await sellerModuleService.retrieveSellerOnboarding("sel_onb_123")
```
To retrieve the seller relationship:
```ts theme={null}
const onboarding = await sellerModuleService.retrieveSellerOnboarding(
"sel_onb_123",
{
relations: ["seller"],
}
)
```
## Parameters
The ID of the seller onboarding.
The configurations determining how the seller onboarding is retrieved.
An array of strings, each being attribute names of the entity to retrieve in the result.
An array of strings, each being relation names of the entity to retrieve in the result. For example, `["seller"]`.
An object used to specify how to sort the returned records.
A boolean indicating whether deleted records should also be retrieved as part of the result.
A context used to share resources, such as transaction manager, between the application and the module.
## Returns
The retrieved seller onboarding.
The ID of the seller onboarding.
Whether the store information step is completed.
Whether the Stripe connection step is completed.
Whether the locations and shipping setup step is completed.
Whether the products setup step is completed.
The created date of the seller onboarding.
The updated date of the seller onboarding.
The associated seller (if included in relations).
***
# listSellerOnboardings
This section provides a reference to the `listSellerOnboardings` method. This belongs to the Seller Module.
This method retrieves a paginated list of seller onboardings based on optional filters and configuration.
## Example
```ts theme={null}
const onboardings = await sellerModuleService.listSellerOnboardings({
seller_id: "sel_123",
})
```
## Parameters
The filters to apply on the retrieved seller onboardings.
The IDs to filter the seller onboardings by.
Filter seller onboardings by their seller IDs.
The configurations determining how the seller onboarding is retrieved.
An array of strings, each being attribute names of the entity to retrieve in the result.
A number indicating the number of records to skip before retrieving the results.
A number indicating the number of records to return in the result.
An array of strings, each being relation names of the entity to retrieve in the result.
An object used to specify how to sort the returned records.
A boolean indicating whether deleted records should also be retrieved as part of the result.
A context used to share resources, such as transaction manager, between the application and the module.
## Returns
The list of seller onboardings.
***
# listAndCountSellerOnboardings
This section provides a reference to the `listAndCountSellerOnboardings` method. This belongs to the Seller Module.
This method retrieves a paginated list of seller onboardings along with the total count of available seller onboardings satisfying the provided filters.
## Example
```ts theme={null}
const [onboardings, count] = await sellerModuleService.listAndCountSellerOnboardings({
seller_id: "sel_123",
})
```
## Parameters
The filters to apply on the retrieved seller onboardings.
The IDs to filter the seller onboardings by.
Filter seller onboardings by their seller IDs.
The configurations determining how the seller onboarding is retrieved.
An array of strings, each being attribute names of the entity to retrieve in the result.
A number indicating the number of records to skip before retrieving the results.
A number indicating the number of records to return in the result.
An array of strings, each being relation names of the entity to retrieve in the result.
An object used to specify how to sort the returned records.
A boolean indicating whether deleted records should also be retrieved as part of the result.
A context used to share resources, such as transaction manager, between the application and the module.
## Returns
The list of seller onboardings along with their total count.
***
# softDeleteSellerOnboardings
This section provides a reference to the `softDeleteSellerOnboardings` method. This belongs to the Seller Module.
This method soft deletes seller onboardings by their IDs.
## Example
```ts theme={null}
await sellerModuleService.softDeleteSellerOnboardings([
"sel_onb_123",
"sel_onb_321",
])
```
## Parameters
The IDs of the seller onboardings.
An object that is used to specify an entity's related entities that should be soft-deleted when the main entity is soft-deleted.
A context used to share resources, such as transaction manager, between the application and the module.
## Returns
An object that includes the IDs of related records that were also soft deleted. If there are no related records, the promise resolves to `void`.
***
# restoreSellerOnboardings
This section provides a reference to the `restoreSellerOnboardings` method. This belongs to the Seller Module.
This method restores soft deleted seller onboardings by their IDs.
## Example
```ts theme={null}
await sellerModuleService.restoreSellerOnboardings(["sel_onb_123", "sel_onb_321"])
```
## Parameters
The IDs of the seller onboardings.
Configurations determining which relations to restore along with each of the seller onboarding.
A context used to share resources, such as transaction manager, between the application and the module.
## Returns
An object that includes the IDs of related records that were restored. If there are no related records restored, the promise resolves to `void`.
# Split Order Payment Module Data Models
Source: https://docs.mercurjs.com/product/modules/b2c-core/split-order-payment/split-order-data-model-reference
Reference documentation for the Split Order Payment Module data models
## Relations Overview
| Relationship | Type | Description |
| ------------------------------------------------------ | ------------------- | ----------------------------------------------------- |
| SplitOrderPayment → PaymentCollection (Payment Module) | Read-only - has one | A split order payment references a payment collection |
## Data Models
* [SplitOrderPayment](#splitorderpayment)
## SplitOrderPayment
This documentation provides a reference to the SplitOrderPayment data model. It belongs to the Split Order Payment Module.
[View source code](https://github.com/mercurjs/mercur/blob/main/packages/modules/b2c-core/src/modules/split-order-payment/models/split-order-payment.ts)
| Field | Type | Description |
| ----------------------- | -------------------------------- | ---------------------------------------------------------------------------- |
| `id` | `PrimaryKeyModifier` | The ID of the split order payment. |
| `status` | `TextProperty` | The status of the split order payment. |
| `currency_code` | `TextProperty` | The ISO 3 currency code of the split order payment. For example, `usd`. |
| `authorized_amount` | `BigNumberProperty` | The authorized amount for this seller's portion of the order. |
| `captured_amount` | `BigNumberProperty` | The captured amount for this seller's portion of the order. Defaults to `0`. |
| `refunded_amount` | `BigNumberProperty` | The refunded amount for this seller's portion of the order. Defaults to `0`. |
| `payment_collection_id` | `TextProperty` | The ID of the payment collection that this split payment is part of. |
# Split Order Payment Module Links
Source: https://docs.mercurjs.com/product/modules/b2c-core/split-order-payment/split-order-links
Module links for the Split Order Payment Module
# Links between Split Order Payment Module and Other Modules
This document showcases the module links defined between the Split Order Payment Module and other Commerce Modules.
## Summary
The Split Order Payment Module has the following links to other modules:
| First Data Model | Second Data Model | Type | Description |
| ---------------- | ----------------- | ------------------- | --------------------------------------------------------------------------------------- |
| Order | SplitOrderPayment | Stored - one-to-one | Associates an order with its split payment record tracking the seller's payment portion |
***
## Order Module
Mercur defines a link between the Order Module's `Order` data model and the Split Order Payment Module's `SplitOrderPayment` data model. This allows tracking payment amounts (authorized, captured, refunded) specific to each seller's portion of an order in a multi-vendor marketplace.
### Retrieve with Query
To retrieve the split order payment of an order with Query, pass `split_order_payment.*` in `fields`:
```ts theme={null}
const { data: orders } = await query.graph({
entity: "order",
fields: [
"*",
"split_order_payment.*",
],
})
// orders[0].split_order_payment
```
```ts theme={null}
import { useQueryGraphStep } from "@medusajs/medusa/core-flows"
// ...
const { data: orders } = useQueryGraphStep({
entity: "order",
fields: [
"*",
"split_order_payment.*",
],
})
// orders[0].split_order_payment
```
### Manage with Link
To manage the split order payment of an order, use Link:
```ts theme={null}
import { Modules } from "@medusajs/framework/utils"
// ...
await link.create({
[Modules.ORDER]: {
order_id: "ord_123",
},
split_order_payment: {
split_order_payment_id: "sp_ord_pay_123",
},
})
```
```ts theme={null}
import { createRemoteLinkStep } from "@medusajs/medusa/core-flows"
// ...
createRemoteLinkStep({
[Modules.ORDER]: {
order_id: "ord_123",
},
split_order_payment: {
split_order_payment_id: "sp_ord_pay_123",
},
})
```
# Split Order Payment Module
Source: https://docs.mercurjs.com/product/modules/b2c-core/split-order-payment/split-order-payment-concept
Learn about the Split Order Payment Module and how to use it in your application
# Split Order Payment Module
In this section of the documentation, you will find resources to learn more about the Split Order Payment Module and how to use it in your application.
Mercur has payment splitting features available out-of-the-box through the Split Order Payment Module. A [module](https://docs.medusajs.com/learn/fundamentals/modules) is a standalone package that provides features for a single domain. Each of Mercur's marketplace features are placed in custom modules, such as this Split Order Payment Module.
Learn more about why modules are isolated in [this documentation](https://docs.medusajs.com/learn/fundamentals/modules/isolation).
## Split Order Payment Features
* **Payment Tracking per Seller**: Track payment amounts (authorized, captured, refunded) separately for each seller's portion of a multi-vendor order.
* **Payment Collection Association**: Link split payments to the main payment collection for the entire cart.
* **Automatic Status Updates**: Automatically update split payment status when the main payment is captured.
* **Refund Management**: Handle partial refunds specific to each seller's order.
* **Financial Reconciliation**: Maintain accurate payment records for commission calculation and payout processing.
***
## How to Use the Split Order Payment Module
In your Medusa application, you build flows around Commerce Modules. A flow is built as a [Workflow](https://docs.medusajs.com/learn/fundamentals/workflows), which is a special function composed of a series of steps that guarantees data consistency and reliable roll-back mechanism.
You can build custom workflows and steps. Mercur provides pre-built workflows for split payment operations in the `@mercurjs/b2c-core` package.
For example, the `markSplitOrderPaymentsAsCapturedWorkflow`:
```ts title="src/workflows/split-order-payment/mark-split-order-payments-as-captured.ts" theme={null}
import {
WorkflowResponse,
createWorkflow,
transform
} from '@medusajs/framework/workflows-sdk'
import { useQueryGraphStep } from '@medusajs/medusa/core-flows'
import { updateSplitOrderPaymentsStep } from '../steps'
export const markSplitOrderPaymentsAsCapturedWorkflow = createWorkflow(
{
name: 'mark-split-order-payments-as-captured'
},
function (payment_collection_id: string) {
// Query all split payments for this payment collection
const payments = useQueryGraphStep({
entity: 'split_order_payment',
fields: ['*'],
filters: {
payment_collection_id
}
})
// Transform to update payload
const updatePayload = transform(payments, (payments) => {
const entities = payments.data
return entities.map((p) => ({
id: p.id,
status: 'captured',
captured_amount: p.authorized_amount
}))
})
// Update all split payments to captured
const splitOrderPayments = updateSplitOrderPaymentsStep(updatePayload)
return new WorkflowResponse(splitOrderPayments)
}
)
```
You can then execute the workflow in your custom API routes, scheduled jobs, or subscribers:
### Subscriber
```ts title="src/subscribers/split-payment-payment-captured.ts" theme={null}
import { SubscriberArgs, SubscriberConfig } from '@medusajs/framework'
import { Modules, PaymentEvents } from '@medusajs/framework/utils'
import { markSplitOrderPaymentsAsCapturedWorkflow } from '../workflows/split-order-payment/workflows'
export default async function paymentCapturedHandler({
event,
container
}: SubscriberArgs<{ id: string }>) {
const payment_id = event.data.id
const paymentService = container.resolve(Modules.PAYMENT)
// Retrieve payment with its collection
const payment = await paymentService.retrievePayment(payment_id, {
relations: ['payment_collection']
})
// Mark all split payments as captured
await markSplitOrderPaymentsAsCapturedWorkflow.run({
container,
input: payment.payment_collection_id
})
}
export const config: SubscriberConfig = {
event: PaymentEvents.CAPTURED,
context: {
subscriberId: 'split-payment-payment-captured-handler'
}
}
```
Learn more about workflows in [this documentation](https://docs.medusajs.com/learn/fundamentals/workflows).
***
# Concepts
In this document, you'll learn about the main concepts related to split order payments in Mercur.
## Split Order Payment
A split order payment tracks the payment amounts specific to an individual seller's order within a multi-vendor purchase. It is represented by the [SplitOrderPayment data model](../data-model/split-order-payment-module-data-reference#splitorderpayment).
A split order payment holds information about:
* Payment status (authorized, captured, refunded)
* Authorized amount for this seller's portion
* Captured amount (funds actually received)
* Refunded amount (funds returned to customer)
* Currency code
* Associated payment collection ID
This allows the marketplace to track payment lifecycle events separately for each vendor involved in a multi-vendor order.
***
## Why Split Order Payments?
In a multi-vendor marketplace, when a customer checks out with products from multiple sellers:
**Payment Flow:**
1. Customer authorizes payment for the total cart amount (\$100)
2. Cart splits into 3 orders: Seller A ($40), Seller B ($35), Seller C (\$25)
3. Three `SplitOrderPayment` records are created, tracking each seller's portion
4. Payment is captured (\$100 total)
5. Each split payment updates to "captured" with their respective amounts
6. Commission is calculated per split payment
7. Payouts are processed to each seller (minus commission)
**Without Split Payments:**
* No way to track which seller's portion was captured/refunded
* Commission calculation would be difficult
* Payout processing would require complex lookups
* Refund handling would be ambiguous
**With Split Payments:**
* Clear payment tracking per seller
* Simple commission calculation
* Straightforward payout processing
* Accurate refund attribution
***
## Payment Lifecycle
### 1. Authorization
When a cart is completed:
* Main payment collection is created for the total amount
* Individual orders are created per seller
* `SplitOrderPayment` records are created with status `authorized`
* `authorized_amount` is set to each seller's order total
### 2. Capture
When payment is captured (either immediately or later):
* Main payment's `payment.captured` event is emitted
* Subscriber triggers `markSplitOrderPaymentsAsCapturedWorkflow`
* All split payments for the payment collection are updated:
* `status` → `captured`
* `captured_amount` → `authorized_amount`
### 3. Refund
When a refund is processed:
* Refund workflow identifies the specific seller's order
* `SplitOrderPayment` is updated:
* `refunded_amount` is incremented
* If fully refunded and `refunded_amount` equals `captured_amount`
This lifecycle tracking enables accurate financial reconciliation across the marketplace.
***
## Integration with Payment Module
Split order payments are tightly integrated with Medusa's Payment Module:
* **PaymentCollection**: The parent payment collection for the entire cart
* **Link**: One-to-one link between Order and SplitOrderPayment
* **Event-Driven**: Listens to `PaymentEvents.CAPTURED` to update split payment status
* **Automatic Sync**: Split payments stay synchronized with main payment lifecycle
This architecture separates concerns:
* **Payment Module**: Handles actual payment processing with providers
* **Split Order Payment Module**: Tracks seller-specific payment amounts
* **Payout Module**: Uses split payment data for seller payouts
***
## Status Values
Split order payments use string-based status tracking:
* **`authorized`**: Payment has been authorized but not yet captured
* **`captured`**: Payment has been captured and funds are secured
* **`refunded`**: Payment has been fully refunded to the customer
* **`partially_refunded`**: Some but not all funds have been refunded
The status field is flexible to accommodate provider-specific statuses or custom payment flows.
***
## Use Cases
**1. Multi-Vendor Checkout**
Customer purchases from 3 sellers; system creates 3 split payments tracking each seller's payment portion.
**2. Delayed Capture**
Marketplace authorizes payment on checkout but captures later (e.g., after shipping). Split payments track both authorization and capture timing.
**3. Partial Refunds**
Customer returns items from one seller; that seller's split payment tracks the refunded amount separately.
**4. Commission Calculation**
Commission module uses `captured_amount` from split payments to calculate marketplace fees per seller.
**5. Payout Processing**
Payout job queries orders with captured split payments to determine which sellers should receive funds.
**6. Financial Reporting**
Generate reports on authorized vs captured amounts per seller for cash flow analysis.
# Split Order Payment Module Service Reference
Source: https://docs.mercurjs.com/product/modules/b2c-core/split-order-payment/split-order-services
Reference documentation for the Split Order Payment Module service methods
# ISplitOrderPaymentModuleService Reference
This section of the documentation provides a reference to the `ISplitOrderPaymentModuleService` interface's methods. This is the interface developers use to use the functionalities provided by the Split Order Payment Module.
You should only use the methods in this reference when implementing complex customizations. For common cases, check out available workflows instead.
The main service interface for the Split Order Payment Module.
## Methods
* [createSplitOrderPayments](#createsplitorderpayments)
* [updateSplitOrderPayments](#updatesplitorderpayments)
* [deleteSplitOrderPayments](#deletesplitorderpayments)
* [retrieveSplitOrderPayment](#retrievesplitorderpayment)
* [listSplitOrderPayments](#listsplitorderpayments)
* [listAndCountSplitOrderPayments](#listandcountsplitorderpayments)
* [softDeleteSplitOrderPayments](#softdeletesplitorderpayments)
* [restoreSplitOrderPayments](#restoresplitorderpayments)
***
# createSplitOrderPayments
This section provides a reference to the `createSplitOrderPayments` method. This belongs to the Split Order Payment Module.
## createSplitOrderPayments(data, sharedContext?): Promise\
This method creates split order payments.
### Example
```ts theme={null}
const splitPayments = await splitOrderPaymentModuleService.createSplitOrderPayments([
{
order_id: "ord_123",
status: "authorized",
currency_code: "usd",
authorized_amount: 5000,
payment_collection_id: "paycol_123",
},
])
```
### Parameters
The split order payments to be created.
The ID of the order this split payment is associated with.
The status of the split order payment.
The ISO 3 currency code. For example, `usd`.
The authorized amount for this seller's portion of the order.
The ID of the payment collection that this split payment is part of.
A context used to share resources, such as transaction manager, between the application and the module.
### Returns
The created split order payments.
## createSplitOrderPayments(data, sharedContext?): Promise\
This method creates a split order payment.
### Example
```ts theme={null}
const splitPayment = await splitOrderPaymentModuleService.createSplitOrderPayments({
order_id: "ord_123",
status: "authorized",
currency_code: "usd",
authorized_amount: 5000,
payment_collection_id: "paycol_123",
})
```
### Parameters
The split order payment to be created.
The ID of the order this split payment is associated with.
The status of the split order payment.
The ISO 3 currency code. For example, `usd`.
The authorized amount for this seller's portion of the order.
The ID of the payment collection that this split payment is part of.
A context used to share resources, such as transaction manager, between the application and the module.
### Returns
The created split order payment.
***
# updateSplitOrderPayments
This section provides a reference to the `updateSplitOrderPayments` method. This belongs to the Split Order Payment Module.
## updateSplitOrderPayments(id, data, sharedContext?): Promise\
This method updates an existing split order payment.
### Example
```ts theme={null}
const splitPayment = await splitOrderPaymentModuleService.updateSplitOrderPayments("sp_ord_pay_123", {
status: "captured",
captured_amount: 5000,
})
```
### Parameters
The ID of the split order payment.
The attributes to update in the split order payment.
The status of the split order payment.
The authorized amount for this seller's portion of the order.
The captured amount for this seller's portion of the order.
The refunded amount for this seller's portion of the order.
A context used to share resources, such as transaction manager, between the application and the module.
### Returns
The updated split order payment.
The ID of the split order payment.
The status of the split order payment.
The ISO 3 currency code of the split order payment.
The authorized amount for this seller's portion of the order.
The captured amount for this seller's portion of the order.
The refunded amount for this seller's portion of the order.
The ID of the payment collection that this split payment is part of.
***
# deleteSplitOrderPayments
This section provides a reference to the `deleteSplitOrderPayments` method. This belongs to the Split Order Payment Module.
## deleteSplitOrderPayments(ids, sharedContext?): Promise\
This method deletes split order payments by their IDs.
### Example
```ts theme={null}
await splitOrderPaymentModuleService.deleteSplitOrderPayments(["sp_ord_pay_123", "sp_ord_pay_321"])
```
### Parameters
The IDs of the split order payments.
A context used to share resources, such as transaction manager, between the application and the module.
### Returns
Resolves when the split order payments are deleted successfully.
## deleteSplitOrderPayments(id, sharedContext?): Promise\
This method deletes a split order payment by its ID.
### Example
```ts theme={null}
await splitOrderPaymentModuleService.deleteSplitOrderPayments("sp_ord_pay_123")
```
### Parameters
The ID of the split order payment.
A context used to share resources, such as transaction manager, between the application and the module.
### Returns
Resolves when the split order payment is deleted successfully.
***
# retrieveSplitOrderPayment
This section provides a reference to the `retrieveSplitOrderPayment` method. This belongs to the Split Order Payment Module.
This method retrieves a split order payment by its ID.
## Example
```ts theme={null}
const splitPayment = await splitOrderPaymentModuleService.retrieveSplitOrderPayment("sp_ord_pay_123")
```
## Parameters
The ID of the split order payment.
The configurations determining how the split order payment is retrieved.
An array of strings, each being attribute names of the entity to retrieve in the result.
A number indicating the number of records to skip before retrieving the results.
A number indicating the number of records to return in the result.
An array of strings, each being relation names of the entity to retrieve in the result.
An object used to specify how to sort the returned records.
A boolean indicating whether deleted records should also be retrieved as part of the result.
A context used to share resources, such as transaction manager, between the application and the module.
## Returns
The retrieved split order payment.
The ID of the split order payment.
The status of the split order payment.
The ISO 3 currency code of the split order payment.
The authorized amount for this seller's portion of the order.
The captured amount for this seller's portion of the order.
The refunded amount for this seller's portion of the order.
The ID of the payment collection that this split payment is part of.
***
# listSplitOrderPayments
This section provides a reference to the `listSplitOrderPayments` method. This belongs to the Split Order Payment Module.
This method retrieves a paginated list of split order payments based on optional filters and configuration.
## Example
To retrieve split order payments for a specific payment collection:
```ts theme={null}
const splitPayments = await splitOrderPaymentModuleService.listSplitOrderPayments({
payment_collection_id: "paycol_123",
})
```
To filter by status:
```ts theme={null}
const splitPayments = await splitOrderPaymentModuleService.listSplitOrderPayments({
status: "captured",
})
```
By default, only the first `15` records are retrieved. You can control pagination:
```ts theme={null}
const splitPayments = await splitOrderPaymentModuleService.listSplitOrderPayments(
{
payment_collection_id: "paycol_123",
},
{
take: 20,
skip: 2,
}
)
```
## Parameters
The filters to apply on the retrieved split order payments.
The IDs to filter the split order payments by.
Filter split order payments by their payment collection IDs.
Filter split order payments by their status.
Filter split order payments by their currency codes.
The configurations determining how the split order payment is retrieved.
An array of strings, each being attribute names of the entity to retrieve in the result.
A number indicating the number of records to skip before retrieving the results.
A number indicating the number of records to return in the result.
An array of strings, each being relation names of the entity to retrieve in the result.
An object used to specify how to sort the returned records.
A boolean indicating whether deleted records should also be retrieved as part of the result.
A context used to share resources, such as transaction manager, between the application and the module.
## Returns
The list of split order payments.
***
# listAndCountSplitOrderPayments
This section provides a reference to the `listAndCountSplitOrderPayments` method. This belongs to the Split Order Payment Module.
This method retrieves a paginated list of split order payments along with the total count of available split order payments satisfying the provided filters.
## Example
To retrieve a list of split order payments with count:
```ts theme={null}
const [splitPayments, count] = await splitOrderPaymentModuleService.listAndCountSplitOrderPayments({
payment_collection_id: "paycol_123",
})
```
By default, only the first `15` records are retrieved. You can control pagination:
```ts theme={null}
const [splitPayments, count] = await splitOrderPaymentModuleService.listAndCountSplitOrderPayments(
{
status: "captured",
},
{
take: 20,
skip: 2,
}
)
```
## Parameters
The filters to apply on the retrieved split order payments.
The IDs to filter the split order payments by.
Filter split order payments by their payment collection IDs.
Filter split order payments by their status.
Filter split order payments by their currency codes.
The configurations determining how the split order payment is retrieved.
An array of strings, each being attribute names of the entity to retrieve in the result.
A number indicating the number of records to skip before retrieving the results.
A number indicating the number of records to return in the result.
An array of strings, each being relation names of the entity to retrieve in the result.
An object used to specify how to sort the returned records.
A boolean indicating whether deleted records should also be retrieved as part of the result.
A context used to share resources, such as transaction manager, between the application and the module.
## Returns
The list of split order payments along with their total count.
***
# softDeleteSplitOrderPayments
This section provides a reference to the `softDeleteSplitOrderPayments` method. This belongs to the Split Order Payment Module.
This method soft deletes split order payments by their IDs.
## Example
```ts theme={null}
await splitOrderPaymentModuleService.softDeleteSplitOrderPayments([
"sp_ord_pay_123",
"sp_ord_pay_321",
])
```
## Parameters
The IDs of the split order payments.
An object that is used to specify an entity's related entities that should be soft-deleted when the main entity is soft-deleted.
A context used to share resources, such as transaction manager, between the application and the module.
## Returns
An object that includes the IDs of related records that were also soft deleted. If there are no related records, the promise resolves to `void`.
***
# restoreSplitOrderPayments
This section provides a reference to the `restoreSplitOrderPayments` method. This belongs to the Split Order Payment Module.
This method restores soft deleted split order payments by their IDs.
## Example
```ts theme={null}
await splitOrderPaymentModuleService.restoreSplitOrderPayments(["sp_ord_pay_123", "sp_ord_pay_321"])
```
## Parameters
The IDs of the split order payments.
Configurations determining which relations to restore along with each of the split order payment.
A context used to share resources, such as transaction manager, between the application and the module.
## Returns
An object that includes the IDs of related records that were restored. If there are no related records restored, the promise resolves to `void`.
# Tax Code Module
Source: https://docs.mercurjs.com/product/modules/b2c-core/taxcode/taxcode-concept
Learn about the Tax Code Module and how to use it in your application
# Tax Code Module
In this section of the documentation, you will find resources to learn more about the Tax Code Module and how to use it in your application.
Mercur has tax code management features available out-of-the-box through the Tax Code Module. A [module](https://docs.medusajs.com/learn/fundamentals/modules) is a standalone package that provides features for a single domain. Each of Mercur's marketplace features are placed in custom modules, such as this Tax Code Module.
Learn more about why modules are isolated in [this documentation](https://docs.medusajs.com/learn/fundamentals/modules/isolation).
## Tax Code Features
* **Tax Code Storage**: Store standardized tax classification codes for products and categories.
* **Stripe Integration**: Fetch and sync tax codes from Stripe's Tax Code API.
* **Category Association**: Link tax codes to product categories for automatic tax classification.
* **Tax Compliance**: Enable proper tax calculation based on product type and jurisdiction.
***
## How to Use the Tax Code Module
The Tax Code Module provides a service method to sync tax codes from Stripe:
```ts theme={null}
import { TAXCODE_MODULE } from "./modules/taxcode"
// In a workflow or API route
const taxCodeService = container.resolve(TAXCODE_MODULE)
// Fetch all available tax codes from Stripe
const stripeTaxCodes = await taxCodeService.getTaxCodes()
// Create tax code records in the database
const taxCodes = await taxCodeService.createTaxCodes(
stripeTaxCodes.map(code => ({
code: code.id,
name: code.name,
description: code.description,
}))
)
```
Learn more about workflows in [this documentation](https://docs.medusajs.com/learn/fundamentals/workflows).
***
# Concepts
In this document, you'll learn about the main concepts related to tax codes in Mercur.
## Tax Code
A tax code is a standardized classification code used for tax calculation and compliance. It is represented by the [TaxCode data model](../data-model/taxcode-module-data-reference#taxcode).
A tax code holds information about:
* A unique code identifier (e.g., `txcd_00000000` for general goods)
* A human-readable name
* A description explaining what products fall under this code
* Created and updated timestamps
Tax codes follow standardized formats like:
* Stripe tax codes
* HS (Harmonized System) codes for customs
* Product tax categories for sales tax
***
## Stripe Tax Code Integration
The Tax Code Module includes integration with Stripe's tax code system through the `getTaxCodes()` method.
### How It Works
1. Module connects to Stripe API using configured API key
2. Fetches tax codes in batches of 100 (Stripe's limit)
3. Automatically paginates through all available tax codes
4. Returns complete array of Stripe tax code objects
```ts theme={null}
// Example Stripe tax codes:
// txcd_00000000 - General - Tangible Goods
// txcd_20010000 - Clothing
// txcd_10000000 - Books
// txcd_99999999 - Electronically supplied services
```
This allows marketplaces to maintain a synchronized catalog of valid tax codes without manual entry.
***
## Category-Level Tax Classification
Tax codes can be associated with product categories through module links:
**ProductCategory → TaxCode** (many-to-one)
This enables:
* Automatic tax classification for products in a category
* Consistent tax handling across similar products
* Simplified tax configuration (set once per category vs per product)
For example:
* "Electronics" category → `txcd_10200000` (Electronic equipment)
* "Clothing" category → `txcd_20010000` (Clothing)
* "Books" category → `txcd_10000000` (Books)
***
## Tax Code vs Tax Rate
It's important to distinguish between tax codes and tax rates:
**Tax Code** (This module):
* Classification code for product type
* Determines which tax rules apply
* Managed in Tax Code Module
* Example: "txcd\_20010000" (Clothing)
**Tax Rate** (Medusa Tax Module):
* Percentage amount to charge
* Varies by jurisdiction
* Managed in Tax Module
* Example: 8.5% sales tax for California
Tax codes help tax systems determine **which** rate to apply, while tax rates determine **how much** tax to charge.
***
## Use Cases
**1. Stripe Tax Integration**
Sync marketplace with Stripe's complete tax code catalog for accurate tax calculation with Stripe Tax.
**2. Product Tax Classification**
Assign appropriate tax codes to product categories, ensuring all products are classified correctly for tax purposes.
**3. International Commerce**
Use HS codes for customs declarations and international shipping requirements.
**4. Tax Compliance**
Maintain proper tax records for audit purposes by classifying all products with standardized codes.
**5. Multi-Jurisdiction Support**
Different jurisdictions may tax product categories differently (e.g., clothing is tax-exempt in some states); tax codes help systems apply the right rules.
# Tax Code Module Data Models
Source: https://docs.mercurjs.com/product/modules/b2c-core/taxcode/taxcode-data-model-reference
Reference documentation for the Tax Code Module data models
## Relations Overview
This module has no relations to other data models.
## Data Models
* [TaxCode](#taxcode)
## TaxCode
This documentation provides a reference to the TaxCode data model. It belongs to the Tax Code Module.
[View source code](https://github.com/mercurjs/mercur/blob/main/packages/modules/b2c-core/src/modules/taxcode/models/taxcode.ts)
| Field | Type | Description |
| ------------- | -------------------------------- | ---------------------------------------------------------- |
| `id` | `PrimaryKeyModifier` | The ID of the tax code. |
| `name` | `TextProperty` | The name of the tax code. Defaults to empty string. |
| `description` | `TextProperty` | The description of the tax code. Defaults to empty string. |
| `code` | `TextProperty` | The unique code of the tax code. |
# Tax Code Module Links
Source: https://docs.mercurjs.com/product/modules/b2c-core/taxcode/taxcode-links
Module links for the Tax Code Module
# Links between Tax Code Module and Other Modules
This document showcases the module links defined between the Tax Code Module and other Commerce Modules.
## Summary
The Tax Code Module has the following links to other modules:
| First Data Model | Second Data Model | Type | Description |
| ---------------- | ----------------- | -------------------- | ------------------------------------------------------------------- |
| ProductCategory | TaxCode | Stored - many-to-one | Associates product categories with tax codes for tax classification |
***
## Product Module
Mercur defines a link between the Product Module's `ProductCategory` data model and the Tax Code Module's `TaxCode` data model. This allows product categories to be associated with specific tax codes for proper tax calculation and compliance.
### Retrieve with Query
To retrieve the tax code of a product category with Query, pass `tax_code.*` in `fields`:
```ts theme={null}
const { data: categories } = await query.graph({
entity: "product_category",
fields: [
"*",
"tax_code.*",
],
})
// categories[0].tax_code
```
```ts theme={null}
import { useQueryGraphStep } from "@medusajs/medusa/core-flows"
// ...
const { data: categories } = useQueryGraphStep({
entity: "product_category",
fields: [
"*",
"tax_code.*",
],
})
// categories[0].tax_code
```
### Manage with Link
To manage the tax code of a product category, use Link:
```ts theme={null}
import { Modules } from "@medusajs/framework/utils"
// ...
await link.create({
[Modules.PRODUCT]: {
product_category_id: "pcat_123",
},
taxcode: {
tax_code_id: "taxc_123",
},
})
```
```ts theme={null}
import { createRemoteLinkStep } from "@medusajs/medusa/core-flows"
// ...
createRemoteLinkStep({
[Modules.PRODUCT]: {
product_category_id: "pcat_123",
},
taxcode: {
tax_code_id: "taxc_123",
},
})
```
# Tax Code Module Service Reference
Source: https://docs.mercurjs.com/product/modules/b2c-core/taxcode/taxcode-services
Reference documentation for the Tax Code Module service methods
# ITaxCodeModuleService Reference
This section of the documentation provides a reference to the `ITaxCodeModuleService` interface's methods. This is the interface developers use to use the functionalities provided by the Tax Code Module.
You should only use the methods in this reference when implementing complex customizations. For common cases, check out available workflows instead.
The main service interface for the Tax Code Module.
## Methods
* [createTaxCodes](#createtaxcodes)
* [updateTaxCodes](#updatetaxcodes)
* [deleteTaxCodes](#deletetaxcodes)
* [retrieveTaxCode](#retrievetaxcode)
* [listTaxCodes](#listtaxcodes)
* [listAndCountTaxCodes](#listandcounttaxcodes)
* [softDeleteTaxCodes](#softdeletetaxcodes)
* [restoreTaxCodes](#restoretaxcodes)
* [getTaxCodes](#gettaxcodes)
***
# createTaxCodes
This section provides a reference to the `createTaxCodes` method. This belongs to the Tax Code Module.
## createTaxCodes(data, sharedContext?): Promise\
This method creates tax codes.
### Example
```ts theme={null}
const taxCodes = await taxCodeModuleService.createTaxCodes([
{
name: "General",
code: "txcd_00000000",
description: "General - Tangible Goods",
},
{
name: "Clothing",
code: "txcd_20010000",
description: "Clothing",
},
])
```
### Parameters
The tax codes to be created.
The name of the tax code.
The unique code of the tax code.
The description of the tax code.
A context used to share resources, such as transaction manager, between the application and the module.
### Returns
The created tax codes.
## createTaxCodes(data, sharedContext?): Promise\
This method creates a tax code.
### Example
```ts theme={null}
const taxCode = await taxCodeModuleService.createTaxCodes({
name: "General",
code: "txcd_00000000",
description: "General - Tangible Goods",
})
```
### Parameters
The tax code to be created.
The name of the tax code.
The unique code of the tax code.
The description of the tax code.
A context used to share resources, such as transaction manager, between the application and the module.
### Returns
The created tax code.
***
# updateTaxCodes
This section provides a reference to the `updateTaxCodes` method. This belongs to the Tax Code Module.
## updateTaxCodes(id, data, sharedContext?): Promise\
This method updates an existing tax code.
### Example
```ts theme={null}
const taxCode = await taxCodeModuleService.updateTaxCodes("taxc_123", {
name: "Updated General",
description: "Updated description",
})
```
### Parameters
The ID of the tax code.
The attributes to update in the tax code.
The name of the tax code.
The unique code of the tax code.
The description of the tax code.
A context used to share resources, such as transaction manager, between the application and the module.
### Returns
The updated tax code.
The ID of the tax code.
The name of the tax code.
The unique code of the tax code.
The description of the tax code.
The created date of the tax code.
The updated date of the tax code.
***
# deleteTaxCodes
This section provides a reference to the `deleteTaxCodes` method. This belongs to the Tax Code Module.
## deleteTaxCodes(ids, sharedContext?): Promise\
This method deletes tax codes by their IDs.
### Example
```ts theme={null}
await taxCodeModuleService.deleteTaxCodes(["taxc_123", "taxc_321"])
```
### Parameters
The IDs of the tax codes.
A context used to share resources, such as transaction manager, between the application and the module.
### Returns
Resolves when the tax codes are deleted successfully.
## deleteTaxCodes(id, sharedContext?): Promise\
This method deletes a tax code by its ID.
### Example
```ts theme={null}
await taxCodeModuleService.deleteTaxCodes("taxc_123")
```
### Parameters
The ID of the tax code.
A context used to share resources, such as transaction manager, between the application and the module.
### Returns
Resolves when the tax code is deleted successfully.
***
# retrieveTaxCode
This section provides a reference to the `retrieveTaxCode` method. This belongs to the Tax Code Module.
This method retrieves a tax code by its ID.
## Example
```ts theme={null}
const taxCode = await taxCodeModuleService.retrieveTaxCode("taxc_123")
```
## Parameters
The ID of the tax code.
The configurations determining how the tax code is retrieved.
An array of strings, each being attribute names of the entity to retrieve in the result.
A number indicating the number of records to skip before retrieving the results.
A number indicating the number of records to return in the result.
An array of strings, each being relation names of the entity to retrieve in the result.
An object used to specify how to sort the returned records.
A boolean indicating whether deleted records should also be retrieved as part of the result.
A context used to share resources, such as transaction manager, between the application and the module.
## Returns
The retrieved tax code.
The ID of the tax code.
The name of the tax code.
The unique code of the tax code.
The description of the tax code.
The created date of the tax code.
The updated date of the tax code.
***
# listTaxCodes
This section provides a reference to the `listTaxCodes` method. This belongs to the Tax Code Module.
This method retrieves a paginated list of tax codes based on optional filters and configuration.
## Example
To retrieve a list of tax codes using their IDs:
```ts theme={null}
const taxCodes = await taxCodeModuleService.listTaxCodes({
id: ["taxc_123", "taxc_321"],
})
```
To retrieve tax codes by code:
```ts theme={null}
const taxCodes = await taxCodeModuleService.listTaxCodes({
code: "txcd_00000000",
})
```
By default, only the first `15` records are retrieved. You can control pagination by specifying the `skip` and `take` properties of the `config` parameter:
```ts theme={null}
const taxCodes = await taxCodeModuleService.listTaxCodes(
{},
{
take: 20,
skip: 2,
}
)
```
## Parameters
The filters to apply on the retrieved tax codes.
The IDs to filter the tax codes by.
Filter tax codes by their names.
Filter tax codes by their codes.
The configurations determining how the tax code is retrieved.
An array of strings, each being attribute names of the entity to retrieve in the result.
A number indicating the number of records to skip before retrieving the results.
A number indicating the number of records to return in the result.
An array of strings, each being relation names of the entity to retrieve in the result.
An object used to specify how to sort the returned records.
A boolean indicating whether deleted records should also be retrieved as part of the result.
A context used to share resources, such as transaction manager, between the application and the module.
## Returns
The list of tax codes.
***
# listAndCountTaxCodes
This section provides a reference to the `listAndCountTaxCodes` method. This belongs to the Tax Code Module.
This method retrieves a paginated list of tax codes along with the total count of available tax codes satisfying the provided filters.
## Example
To retrieve a list of tax codes with count:
```ts theme={null}
const [taxCodes, count] = await taxCodeModuleService.listAndCountTaxCodes({
id: ["taxc_123", "taxc_321"],
})
```
By default, only the first `15` records are retrieved. You can control pagination by specifying the `skip` and `take` properties of the `config` parameter:
```ts theme={null}
const [taxCodes, count] = await taxCodeModuleService.listAndCountTaxCodes(
{},
{
take: 20,
skip: 2,
}
)
```
## Parameters
The filters to apply on the retrieved tax codes.
The IDs to filter the tax codes by.
Filter tax codes by their names.
Filter tax codes by their codes.
The configurations determining how the tax code is retrieved.
An array of strings, each being attribute names of the entity to retrieve in the result.
A number indicating the number of records to skip before retrieving the results.
A number indicating the number of records to return in the result.
An array of strings, each being relation names of the entity to retrieve in the result.
An object used to specify how to sort the returned records.
A boolean indicating whether deleted records should also be retrieved as part of the result.
A context used to share resources, such as transaction manager, between the application and the module.
## Returns
The list of tax codes along with their total count.
***
# softDeleteTaxCodes
This section provides a reference to the `softDeleteTaxCodes` method. This belongs to the Tax Code Module.
This method soft deletes tax codes by their IDs.
## Example
```ts theme={null}
await taxCodeModuleService.softDeleteTaxCodes([
"taxc_123",
"taxc_321",
])
```
## Parameters
The IDs of the tax codes.
An object that is used to specify an entity's related entities that should be soft-deleted when the main entity is soft-deleted.
A context used to share resources, such as transaction manager, between the application and the module.
## Returns
An object that includes the IDs of related records that were also soft deleted. If there are no related records, the promise resolves to `void`.
***
# restoreTaxCodes
This section provides a reference to the `restoreTaxCodes` method. This belongs to the Tax Code Module.
This method restores soft deleted tax codes by their IDs.
## Example
```ts theme={null}
await taxCodeModuleService.restoreTaxCodes(["taxc_123", "taxc_321"])
```
## Parameters
The IDs of the tax codes.
Configurations determining which relations to restore along with each of the tax code.
A context used to share resources, such as transaction manager, between the application and the module.
## Returns
An object that includes the IDs of related records that were restored. If there are no related records restored, the promise resolves to `void`.
***
# getTaxCodes
This section provides a reference to the `getTaxCodes` method. This belongs to the Tax Code Module.
This method fetches all available tax codes from Stripe's Tax Code API. It automatically handles pagination to retrieve all tax codes across multiple API calls.
## Example
```ts theme={null}
const stripeTaxCodes = await taxCodeModuleService.getTaxCodes()
// Example response structure:
// [
// { id: "txcd_00000000", name: "General - Tangible Goods", description: "..." },
// { id: "txcd_20010000", name: "Clothing", description: "..." },
// ...
// ]
```
## Parameters
This method takes no parameters.
## Returns
An array of all available Stripe tax codes.
The Stripe tax code ID.
The name of the tax code.
The description of the tax code.
This method automatically handles Stripe API pagination, fetching up to 100 records per request and continuing until all tax codes are retrieved.
# Wishlist Module
Source: https://docs.mercurjs.com/product/modules/b2c-core/wishlist/wishlist-concept
Learn about the Wishlist Module and how to use it in your application
# Wishlist Module
In this section of the documentation, you will find resources to learn more about the Wishlist Module and how to use it in your application.
Mercur has wishlist features available out-of-the-box through the Wishlist Module. A [module](https://docs.medusajs.com/learn/fundamentals/modules) is a standalone package that provides features for a single domain. Each of Mercur's marketplace features are placed in custom modules, such as this Wishlist Module.
Learn more about why modules are isolated in [this documentation](https://docs.medusajs.com/learn/fundamentals/modules/isolation).
## Wishlist Features
* **Product Wishlists**: Allow customers to save products they're interested in for future purchase consideration.
* **Customer-Specific Wishlists**: Each customer has their own isolated wishlist with saved items.
* **Price Calculation**: Automatically calculate current prices for wishlist products including promotional pricing.
* **Product Availability**: Track product availability and variant information for wishlisted items.
* **Easy Management**: Add and remove products from wishlist with simple workflows.
***
## How to Use the Wishlist Module
In your Medusa application, you build flows around Commerce Modules. A flow is built as a [Workflow](https://docs.medusajs.com/learn/fundamentals/workflows), which is a special function composed of a series of steps that guarantees data consistency and reliable roll-back mechanism.
You can build custom workflows and steps. Mercur provides pre-built workflows for wishlist operations in the `@mercurjs/b2c-core` package.
For example, the `createWishlistEntryWorkflow`:
```ts title="src/workflows/wishlist/create-wishlist.ts" theme={null}
import {
WorkflowResponse,
createWorkflow
} from '@medusajs/framework/workflows-sdk'
import { CreateWishlistDTO } from '@mercurjs/framework'
import { createWishlistEntryStep } from '../steps'
export const createWishlistEntryWorkflow = createWorkflow(
{
name: 'create-wishlist'
},
function (input: CreateWishlistDTO) {
return new WorkflowResponse(createWishlistEntryStep(input))
}
)
```
You can then execute the workflow in your custom API routes:
### API Route
```ts title="src/api/store/wishlist/route.ts" theme={null}
import {
AuthenticatedMedusaRequest,
MedusaResponse,
} from "@medusajs/framework"
import { ContainerRegistrationKeys } from "@medusajs/framework/utils"
import customerWishlist from "../../../links/customer-wishlist"
import { createWishlistEntryWorkflow } from "../../../workflows/wishlist/workflows"
import { calculateWishlistProductsPrice } from "../../../modules/wishlist/utils"
// Create wishlist entry
export const POST = async (
req: AuthenticatedMedusaRequest,
res: MedusaResponse
) => {
const { result } = await createWishlistEntryWorkflow.run({
container: req.scope,
input: {
...req.validatedBody,
customer_id: req.auth_context.actor_id,
},
})
const query = req.scope.resolve(ContainerRegistrationKeys.QUERY)
const {
data: [wishlist],
} = await query.graph({
entity: "wishlist",
fields: req.queryConfig.fields,
filters: {
id: result.id,
},
})
res.status(201).json({ wishlist })
}
// Get customer's wishlist
export const GET = async (
req: AuthenticatedMedusaRequest,
res: MedusaResponse
) => {
const query = req.scope.resolve(ContainerRegistrationKeys.QUERY)
const { data: wishlists, metadata } = await query.graph({
entity: customerWishlist.entryPoint,
fields: [
...req.queryConfig.fields.map((field) => `wishlist.products.${field}`),
"wishlist.products.variants.prices.*",
],
filters: {
customer_id: req.auth_context.actor_id,
},
pagination: req.queryConfig.pagination,
})
// Calculate current prices for wishlist products
const formattedWithPrices = await calculateWishlistProductsPrice(
req.scope,
wishlists
)
res.json({
wishlists: formattedWithPrices,
count: metadata?.count,
offset: metadata?.skip,
limit: metadata?.take,
})
}
```
Learn more about workflows in [this documentation](https://docs.medusajs.com/learn/fundamentals/workflows).
***
# Concepts
In this document, you'll learn about the main concepts related to wishlists in Mercur.
## Wishlist
A wishlist is a collection of products that a customer has saved for future consideration. It is represented by the [Wishlist data model](../data-model/wishlist-module-data-reference#wishlist).
A wishlist entry holds information about:
* A unique ID
* The type of reference (currently only `product`)
* Created and updated timestamps
Each wishlist entry represents a single saved product for a customer.
***
## Customer-Product Relationship
Wishlists create a many-to-many relationship between customers and products:
* **Customer → Wishlist** (one-to-one): Each customer has one wishlist container
* **Wishlist → Product** (one-to-many): The wishlist can contain many saved products
This is implemented through module links that connect:
1. Customer to their Wishlist
2. Wishlist to multiple Products
The system automatically handles the relationship management when customers add or remove products.
***
## Reference Types
The `reference` field indicates what type of entity is being saved to the wishlist:
### product (Currently Supported)
Saves a product reference to the wishlist. This is the standard wishlist functionality for e-commerce.
### Future Extensibility
The reference system is designed to be extensible. Future implementations could add:
* `seller`: Save favorite sellers
* `collection`: Save favorite collections
* `search`: Save search queries
Currently, only `product` references are implemented.
***
## Price Calculation
When retrieving wishlist items, Mercur automatically calculates current prices through the `calculateWishlistProductsPrice` utility:
**What it does:**
* Fetches current prices for wishlist products
* Applies any active promotions or price lists
* Includes variant pricing information
* Respects customer group pricing if applicable
* Returns formatted product objects with calculated prices
This ensures customers always see up-to-date pricing when viewing their wishlist, even if prices have changed since they saved the products.
***
## Delete Cascade
Both wishlist module links have `deleteCascade` enabled:
* When a **customer is deleted**, their wishlist is automatically deleted
* When a **wishlist is deleted**, all wishlist entries are automatically removed
This ensures data consistency and prevents orphaned records when cleaning up customer data.
***
## Authentication Integration
Wishlists are customer-specific and require authentication:
* Routes use `authenticate("customer")` middleware
* Wishlist entries are filtered by `customer_id` from `req.auth_context.actor_id`
* Customers can only see and manage their own wishlist items
This security model ensures wishlist privacy and data isolation between customers.
***
## Use Cases
**1. Save for Later**
Customers browse the marketplace and save interesting products to revisit later without adding them to cart.
**2. Gift Lists**
Customers create wishlists of desired products that they can share for birthdays, holidays, or registries.
**3. Price Tracking**
Customers save expensive items and check back periodically to see if prices have dropped or promotions applied.
**4. Comparison Shopping**
Customers save multiple similar products to compare features, prices, and reviews before making a purchase decision.
**5. Stock Notifications**
(Future enhancement) Notify customers when wishlist items come back in stock or go on sale.
**6. Personalization**
Use wishlist data to personalize product recommendations and marketing communications.
# Wishlist Module Data Models
Source: https://docs.mercurjs.com/product/modules/b2c-core/wishlist/wishlist-data-model-reference
Reference documentation for the Wishlist Module data models
## Relations Overview
| Relationship | Type | Description |
| ----------------------------------- | ------------------- | ------------------------------------ |
| Wishlist → Product (Product Module) | Read-only - has one | A wishlist item references a product |
## Data Models
* [Wishlist](#wishlist)
## Wishlist
This documentation provides a reference to the Wishlist data model. It belongs to the Wishlist Module.
[View source code](https://github.com/mercurjs/mercur/blob/main/packages/modules/b2c-core/src/modules/wishlist/models/wishlist.ts)
| Field | Type | Description |
| ----------- | -------------------------------- | ---------------------------------------------------------------------- |
| `id` | `PrimaryKeyModifier` | The ID of the wishlist. |
| `reference` | `EnumProperty<["product"]>` | The type of the wishlist reference. Currently only supports `product`. |
# Wishlist Module Links
Source: https://docs.mercurjs.com/product/modules/b2c-core/wishlist/wishlist-links
Module links for the Wishlist Module
# Links between Wishlist Module and Other Modules
This document showcases the module links defined between the Wishlist Module and other Commerce Modules.
## Summary
The Wishlist Module has the following links to other modules:
| First Data Model | Second Data Model | Type | Description |
| ---------------- | ----------------- | -------------------- | ----------------------------------------- |
| Customer | Wishlist | Stored - one-to-one | Associates a customer with their wishlist |
| Wishlist | Product | Stored - one-to-many | Associates wishlist items with products |
***
## Customer Module
Mercur defines a link between the Customer Module's `Customer` data model and the Wishlist Module's `Wishlist` data model. This allows each customer to have a wishlist for saving products they're interested in.
### Retrieve with Query
To retrieve the wishlist of a customer with Query, pass `wishlist.*` in `fields`:
```ts theme={null}
const { data: customers } = await query.graph({
entity: "customer",
fields: [
"*",
"wishlist.*",
],
})
// customers[0].wishlist
```
```ts theme={null}
import { useQueryGraphStep } from "@medusajs/medusa/core-flows"
// ...
const { data: customers } = useQueryGraphStep({
entity: "customer",
fields: [
"*",
"wishlist.*",
],
})
// customers[0].wishlist
```
### Manage with Link
To manage the wishlist of a customer, use Link:
```ts theme={null}
import { Modules } from "@medusajs/framework/utils"
// ...
await link.create({
[Modules.CUSTOMER]: {
customer_id: "cus_123",
},
wishlist: {
wishlist_id: "wish_123",
},
})
```
```ts theme={null}
import { createRemoteLinkStep } from "@medusajs/medusa/core-flows"
// ...
createRemoteLinkStep({
[Modules.CUSTOMER]: {
customer_id: "cus_123",
},
wishlist: {
wishlist_id: "wish_123",
},
})
```
***
## Product Module
Mercur defines a link between the Wishlist Module's `Wishlist` data model and the Product Module's `Product` data model. This allows wishlist items to reference specific products that customers want to save for later.
### Retrieve with Query
To retrieve the products in a wishlist with Query, pass `product.*` in `fields`:
```ts theme={null}
const { data: wishlists } = await query.graph({
entity: "wishlist",
fields: [
"*",
"product.*",
],
})
// wishlists[0].product
```
```ts theme={null}
import { useQueryGraphStep } from "@medusajs/medusa/core-flows"
// ...
const { data: wishlists } = useQueryGraphStep({
entity: "wishlist",
fields: [
"*",
"product.*",
],
})
// wishlists[0].product
```
### Manage with Link
To manage the products in a wishlist, use Link:
```ts theme={null}
import { Modules } from "@medusajs/framework/utils"
// ...
await link.create({
wishlist: {
wishlist_id: "wish_123",
},
[Modules.PRODUCT]: {
product_id: "prod_123",
},
})
```
```ts theme={null}
import { createRemoteLinkStep } from "@medusajs/medusa/core-flows"
// ...
createRemoteLinkStep({
wishlist: {
wishlist_id: "wish_123",
},
[Modules.PRODUCT]: {
product_id: "prod_123",
},
})
```
Both links have `deleteCascade` enabled, meaning when a customer is deleted, their wishlist and all wishlist items are automatically deleted.
# Wishlist Module Service Reference
Source: https://docs.mercurjs.com/product/modules/b2c-core/wishlist/wishlist-services
Reference documentation for the Wishlist Module service methods
# IWishlistModuleService Reference
This section of the documentation provides a reference to the `IWishlistModuleService` interface's methods. This is the interface developers use to use the functionalities provided by the Wishlist Module.
You should only use the methods in this reference when implementing complex customizations. For common cases, check out available workflows instead.
The main service interface for the Wishlist Module.
## Methods
* [createWishlists](#createwishlists)
* [updateWishlists](#updatewishlists)
* [deleteWishlists](#deletewishlists)
* [retrieveWishlist](#retrievewishlist)
* [listWishlists](#listwishlists)
* [listAndCountWishlists](#listandcountwishlists)
* [softDeleteWishlists](#softdeletewishlists)
* [restoreWishlists](#restorewishlists)
***
# createWishlists
This section provides a reference to the `createWishlists` method. This belongs to the Wishlist Module.
## createWishlists(data, sharedContext?): Promise\
This method creates wishlist items.
### Example
```ts theme={null}
const wishlists = await wishlistModuleService.createWishlists([
{
reference: "product",
reference_id: "prod_123",
customer_id: "cus_123",
},
])
```
### Parameters
The wishlist items to be created.
The type of the wishlist reference. Currently only supports `product`.
The ID of the referenced entity (e.g., product ID).
The ID of the customer who owns this wishlist item.
A context used to share resources, such as transaction manager, between the application and the module.
### Returns
The created wishlist items.
## createWishlists(data, sharedContext?): Promise\
This method creates a wishlist item.
### Example
```ts theme={null}
const wishlist = await wishlistModuleService.createWishlists({
reference: "product",
reference_id: "prod_123",
customer_id: "cus_123",
})
```
### Parameters
The wishlist item to be created.
The type of the wishlist reference. Currently only supports `product`.
The ID of the referenced entity (e.g., product ID).
The ID of the customer who owns this wishlist item.
A context used to share resources, such as transaction manager, between the application and the module.
### Returns
The created wishlist item.
***
# updateWishlists
This section provides a reference to the `updateWishlists` method. This belongs to the Wishlist Module.
## updateWishlists(id, data, sharedContext?): Promise\
This method updates an existing wishlist item.
### Example
```ts theme={null}
const wishlist = await wishlistModuleService.updateWishlists("wish_123", {
reference_id: "prod_456",
})
```
### Parameters
The ID of the wishlist item.
The attributes to update in the wishlist item.
The type of the wishlist reference.
The ID of the referenced entity.
A context used to share resources, such as transaction manager, between the application and the module.
### Returns
The updated wishlist item.
The ID of the wishlist item.
The type of the wishlist reference.
The created date of the wishlist item.
The updated date of the wishlist item.
***
# deleteWishlists
This section provides a reference to the `deleteWishlists` method. This belongs to the Wishlist Module.
## deleteWishlists(ids, sharedContext?): Promise\
This method deletes wishlist items by their IDs.
### Example
```ts theme={null}
await wishlistModuleService.deleteWishlists(["wish_123", "wish_321"])
```
### Parameters
The IDs of the wishlist items.
A context used to share resources, such as transaction manager, between the application and the module.
### Returns
Resolves when the wishlist items are deleted successfully.
## deleteWishlists(id, sharedContext?): Promise\
This method deletes a wishlist item by its ID.
### Example
```ts theme={null}
await wishlistModuleService.deleteWishlists("wish_123")
```
### Parameters
The ID of the wishlist item.
A context used to share resources, such as transaction manager, between the application and the module.
### Returns
Resolves when the wishlist item is deleted successfully.
***
# retrieveWishlist
This section provides a reference to the `retrieveWishlist` method. This belongs to the Wishlist Module.
This method retrieves a wishlist item by its ID.
## Example
```ts theme={null}
const wishlist = await wishlistModuleService.retrieveWishlist("wish_123")
```
## Parameters
The ID of the wishlist item.
The configurations determining how the wishlist item is retrieved.
An array of strings, each being attribute names of the entity to retrieve in the result.
A number indicating the number of records to skip before retrieving the results.
A number indicating the number of records to return in the result.
An array of strings, each being relation names of the entity to retrieve in the result. Use Query to retrieve linked product data.
An object used to specify how to sort the returned records.
A boolean indicating whether deleted records should also be retrieved as part of the result.
A context used to share resources, such as transaction manager, between the application and the module.
## Returns
The retrieved wishlist item.
The ID of the wishlist item.
The type of the wishlist reference.
The created date of the wishlist item.
The updated date of the wishlist item.
***
# listWishlists
This section provides a reference to the `listWishlists` method. This belongs to the Wishlist Module.
This method retrieves a paginated list of wishlist items based on optional filters and configuration.
## Example
To retrieve a customer's wishlist:
```ts theme={null}
const wishlists = await wishlistModuleService.listWishlists({
customer_id: "cus_123",
})
```
To retrieve wishlist items for specific products:
```ts theme={null}
const wishlists = await wishlistModuleService.listWishlists({
reference_id: ["prod_123", "prod_456"],
})
```
By default, only the first `15` records are retrieved. You can control pagination by specifying the `skip` and `take` properties of the `config` parameter:
```ts theme={null}
const wishlists = await wishlistModuleService.listWishlists(
{
customer_id: "cus_123",
},
{
take: 20,
skip: 2,
}
)
```
## Parameters
The filters to apply on the retrieved wishlist items.
The IDs to filter the wishlist items by.
Filter wishlist items by their customer IDs.
Filter wishlist items by their reference type.
Filter wishlist items by their reference IDs (e.g., product IDs).
The configurations determining how the wishlist item is retrieved.
An array of strings, each being attribute names of the entity to retrieve in the result.
A number indicating the number of records to skip before retrieving the results.
A number indicating the number of records to return in the result.
An array of strings, each being relation names of the entity to retrieve in the result.
An object used to specify how to sort the returned records.
A boolean indicating whether deleted records should also be retrieved as part of the result.
A context used to share resources, such as transaction manager, between the application and the module.
## Returns
The list of wishlist items.
***
# listAndCountWishlists
This section provides a reference to the `listAndCountWishlists` method. This belongs to the Wishlist Module.
This method retrieves a paginated list of wishlist items along with the total count of available wishlist items satisfying the provided filters.
## Example
To retrieve a customer's wishlist with count:
```ts theme={null}
const [wishlists, count] = await wishlistModuleService.listAndCountWishlists({
customer_id: "cus_123",
})
```
By default, only the first `15` records are retrieved. You can control pagination by specifying the `skip` and `take` properties of the `config` parameter:
```ts theme={null}
const [wishlists, count] = await wishlistModuleService.listAndCountWishlists(
{
customer_id: "cus_123",
},
{
take: 20,
skip: 2,
}
)
```
## Parameters
The filters to apply on the retrieved wishlist items.
The IDs to filter the wishlist items by.
Filter wishlist items by their customer IDs.
Filter wishlist items by their reference type.
Filter wishlist items by their reference IDs (e.g., product IDs).
The configurations determining how the wishlist item is retrieved.
An array of strings, each being attribute names of the entity to retrieve in the result.
A number indicating the number of records to skip before retrieving the results.
A number indicating the number of records to return in the result.
An array of strings, each being relation names of the entity to retrieve in the result.
An object used to specify how to sort the returned records.
A boolean indicating whether deleted records should also be retrieved as part of the result.
A context used to share resources, such as transaction manager, between the application and the module.
## Returns
The list of wishlist items along with their total count.
***
# softDeleteWishlists
This section provides a reference to the `softDeleteWishlists` method. This belongs to the Wishlist Module.
This method soft deletes wishlist items by their IDs.
## Example
```ts theme={null}
await wishlistModuleService.softDeleteWishlists([
"wish_123",
"wish_321",
])
```
## Parameters
The IDs of the wishlist items.
An object that is used to specify an entity's related entities that should be soft-deleted when the main entity is soft-deleted.
A context used to share resources, such as transaction manager, between the application and the module.
## Returns
An object that includes the IDs of related records that were also soft deleted. If there are no related records, the promise resolves to `void`.
***
# restoreWishlists
This section provides a reference to the `restoreWishlists` method. This belongs to the Wishlist Module.
This method restores soft deleted wishlist items by their IDs.
## Example
```ts theme={null}
await wishlistModuleService.restoreWishlists(["wish_123", "wish_321"])
```
## Parameters
The IDs of the wishlist items.
Configurations determining which relations to restore along with each of the wishlist item.
A context used to share resources, such as transaction manager, between the application and the module.
## Returns
An object that includes the IDs of related records that were restored. If there are no related records restored, the promise resolves to `void`.
# Commission Module
Source: https://docs.mercurjs.com/product/modules/commission/commission/commission-concept
Learn about the Commission Module and how to use it in your application
# Commission Module
In this section of the documentation, you will find resources to learn more about the Commission Module and how to use it in your application.
Mercur has marketplace commission features available out-of-the-box through the Commission Module. A [module](https://docs.medusajs.com/learn/fundamentals/modules) is a standalone package that provides features for a single domain. Each of Mercur's marketplace features are placed in custom modules, such as this Commission Module.
Learn more about why modules are isolated in [this documentation](https://docs.medusajs.com/learn/fundamentals/modules/isolation).
## Commission Features
* **Flexible Commission Rules**: Create commission rules based on seller, product type, product category, or combinations thereof.
* **Priority-Based Rule Selection**: Automatically select the most specific applicable commission rule using a priority system.
* **Multiple Commission Types**: Support for both percentage-based and flat-rate commissions with min/max limits.
* **Tax-Inclusive Options**: Calculate commissions with or without tax included.
* **Automatic Calculation**: Calculate commission for all line items when orders are placed.
* **Line-Level Tracking**: Store commission amount for each individual line item in an order.
***
## How to Use the Commission Module
In your Medusa application, you build flows around Commerce Modules. A flow is built as a [Workflow](https://docs.medusajs.com/learn/fundamentals/workflows), which is a special function composed of a series of steps that guarantees data consistency and reliable roll-back mechanism.
You can build custom workflows and steps. Mercur provides pre-built workflows for commission operations in the `@mercurjs/commission` package.
For example, the `calculateCommissionWorkflow`:
```ts src/workflows/commission/calculate-commission.ts theme={null}
import { WorkflowResponse, createWorkflow } from '@medusajs/workflows-sdk'
import { calculateCommissionLinesStep } from '../steps/calculate-commission-lines'
import { createCommissionLinesStep } from '../steps/create-commission-lines'
type WorkflowInput = {
order_id: string
seller_id: string
}
export const calculateCommissionWorkflow = createWorkflow(
'calculate-commission-workflow',
function (input: WorkflowInput) {
// Calculate commission for all line items in the order
const lines = calculateCommissionLinesStep(input)
// Create commission line records
return new WorkflowResponse(createCommissionLinesStep(lines))
}
)
```
You can then execute the workflow e.g. in your custom subscribers:
### Subscriber
```ts src/subscribers/commission-order-set-placed.ts theme={null}
import { SubscriberArgs, SubscriberConfig } from "@medusajs/framework"
import { ContainerRegistrationKeys } from "@medusajs/framework/utils"
import { OrderSetWorkflowEvents, SELLER_ORDER_LINK } from "@mercurjs/framework"
import { calculateCommissionWorkflow } from "../workflows/commission/workflows"
export default async function commissionOrderSetPlacedHandler({
event,
container,
}: SubscriberArgs<{ id: string }>) {
const query = container.resolve(ContainerRegistrationKeys.QUERY)
// Get all orders from the order set
const {
data: [set],
} = await query.graph({
entity: "order_set",
fields: ["orders.id"],
filters: {
id: event.data.id,
},
})
const ordersCreated = set.orders.map((o) => o.id)
// Calculate commission for each order
for (const order_id of ordersCreated) {
const {
data: [seller],
} = await query.graph({
entity: SELLER_ORDER_LINK,
fields: ["seller_id"],
filters: {
order_id: order_id,
},
})
if (!seller) {
return
}
await calculateCommissionWorkflow.run({
input: {
order_id: order_id,
seller_id: seller.seller_id,
},
container,
})
}
}
export const config: SubscriberConfig = {
event: OrderSetWorkflowEvents.PLACED,
context: {
subscriberId: "commission-order-set-placed-handler",
},
}
```
Learn more about workflows in [this documentation](https://docs.medusajs.com/learn/fundamentals/workflows).
***
# Concepts
In this document, you'll learn about the main concepts related to commissions in Mercur.
## Commission Rule
A commission rule defines when and how marketplace commissions should be calculated. It is represented by the [CommissionRule data model](../data-model/commission-module-data-reference#commissionrule).
A commission rule holds information about:
* Rule name (for identification)
* Reference type (what the rule applies to)
* Reference ID (which specific entity)
* Active status (whether the rule is currently applied)
* Associated commission rate
Commission rules determine which fees apply to products based on seller, product type, or category.
***
## Rule Reference Types
Commission rules support six reference types with a priority system for selecting the applicable rule:
### Priority Order (Highest to Lowest)
1. **seller+product\_type**: Most specific - applies to products of a specific type sold by a specific seller
2. **seller+product\_category**: Applies to products in a specific category sold by a specific seller
3. **seller**: Applies to all products sold by a specific seller
4. **product\_type**: Applies to all products of a specific type regardless of seller
5. **product\_category**: Applies to all products in a specific category regardless of seller
6. **site**: Default commission applied to all products (lowest priority)
When calculating commission, the system searches from highest to lowest priority and uses the first matching active rule.
### Reference ID Format
* **site**: Empty string `""`
* **seller**: `"sel_123"`
* **product\_type**: `"ptyp_456"`
* **product\_category**: `"pcat_789"`
* **seller+product\_type**: `"sel_123+ptyp_456"`
* **seller+product\_category**: `"sel_123+pcat_789"`
***
## Commission Rate
A commission rate defines how the commission amount is calculated. It is represented by the [CommissionRate data model](../data-model/commission-module-data-reference#commissionrate).
### Commission Types
**Percentage-Based:**
```ts theme={null}
{
type: "percentage",
percentage_rate: 10, // 10% of item price
include_tax: false,
}
```
**Flat-Rate:**
```ts theme={null}
{
type: "flat",
price_set_id: "ps_123", // Fixed amount from price set
include_tax: false,
}
```
### Min/Max Limits
Commission rates can have minimum and maximum limits:
```ts theme={null}
{
type: "percentage",
percentage_rate: 10,
min_price_set_id: "ps_min", // Minimum $5 commission
max_price_set_id: "ps_max", // Maximum $100 commission
include_tax: false,
}
```
The calculated commission is clamped between these boundaries.
***
## Commission Line
A commission line represents the actual calculated commission for a specific order line item. It is represented by the [CommissionLine data model](../data-model/commission-module-data-reference#commissionline).
A commission line holds information about:
* The order line item ID it applies to
* The commission rule that was used
* Currency code
* Calculated commission value
Commission lines are created automatically when orders are placed and used for:
* Financial reporting
* Payout calculations (subtracting commission from seller payout)
* Analytics and insights
***
## Automatic Commission Calculation
When an order set is placed, commission is calculated automatically:
**Process:**
1. `OrderSetWorkflowEvents.PLACED` event is emitted
2. Subscriber retrieves all orders in the order set
3. For each order:
* Find the seller via `SELLER_ORDER_LINK`
* Execute `calculateCommissionWorkflow`
* Calculate commission for each line item
* Create commission line records
This ensures every order has accurate commission tracking for marketplace revenue.
***
## Commission Calculation Algorithm
For each line item in an order:
1. **Build Context**: Extract `seller_id`, `product_type_id`, `product_category_id`
2. **Select Rule**: Call `selectCommissionForProductLine` with context
3. **Apply Rule**: Use the selected rule's rate to calculate commission
4. **Apply Limits**: Clamp result between min/max if specified
5. **Store Line**: Create commission line record with calculated value
The `selectCommissionForProductLine` method queries rules in priority order and returns the first match.
***
## Tax Inclusivity
The `include_tax` property determines whether commission is calculated on the pre-tax or post-tax amount:
**Tax-Exclusive (include\_tax: false)**
```
Item price: $100
Tax (10%): $10
Total: $110
Commission (10%): $100 × 10% = $10
```
**Tax-Inclusive (include\_tax: true)**
```
Item price: $100
Tax (10%): $10
Total: $110
Commission (10%): $110 × 10% = $11
```
This allows marketplaces to choose whether they earn commission on the tax portion.
***
## Use Cases
**1. Seller-Specific Rates** Charge lower commission for premium sellers or those with high sales volume.
**2. Category-Based Pricing** Charge different commissions for different product categories (e.g., 10% for electronics, 15% for luxury goods).
**3. Seller + Category Combination** Create special commission rates for specific seller-category combinations (e.g., Seller A's electronics get 8% instead of the default 10%).
**4. Minimum Commission** Ensure the marketplace earns at least \$5 per sale using min\_price\_set\_id, even for low-value items.
**5. Maximum Commission** Cap commissions at \$100 for high-value items to remain competitive with other marketplaces.
**6. Default Site Commission** Set a baseline 12% commission for all products, then override with specific rules as needed.
# Commission Module Data Models
Source: https://docs.mercurjs.com/product/modules/commission/commission/commission-data-model-reference
Reference documentation for the Commission Module data models
## Relations Overview
| Relationship | Type | Description |
| ---------------------------------------- | ------------------- | ----------------------------------------------- |
| CommissionRule → CommissionRate | One-to-One | A commission rule has one commission rate |
| CommissionLine → CommissionRule | Read-only - has one | A commission line references a commission rule |
| CommissionLine → LineItem (Order Module) | Read-only - has one | A commission line references an order line item |
## Data Models
* [CommissionRule](#commissionrule)
* [CommissionRate](#commissionrate)
* [CommissionLine](#commissionline)
## CommissionRule
This documentation provides a reference to the CommissionRule data model. It belongs to the Commission Module.
[View source code](https://github.com/mercurjs/mercur/blob/main/packages/modules/commission/src/modules/commission/models/commission_rule.ts)
| Field | Type | Description |
| -------------- | -------------------------------- | -------------------------------------------------------------------------------------------------------------------------------------------------- |
| `id` | `PrimaryKeyModifier` | The ID of the commission rule. |
| `name` | `TextProperty` | The name of the commission rule |
| `reference` | `TextProperty` | The type of the commission rule. Can be `site`, `product_type`, `product_category`, `seller+product_category`, `seller+product_type`, or `seller`. |
| `reference_id` | `TextProperty` | The ID of the referenced entity (e.g., seller ID, product type ID). |
| `is_active` | `BooleanProperty` | Whether the commission rule is active. Defaults to `true`. |
| `rate` | `HasOne` | The associated [CommissionRate](#commissionrate). |
## CommissionRate
This documentation provides a reference to the CommissionRate data model. It belongs to the Commission Module.
[View source code](https://github.com/mercurjs/mercur/blob/main/packages/modules/commission/src/modules/commission/models/commission_rate.ts)
| Field | Type | Description |
| ------------------ | -------------------------------- | --------------------------------------------------------------- |
| `id` | `PrimaryKeyModifier` | The ID of the commission rate. |
| `type` | `TextProperty` | The type of the commission rate. Can be `flat` or `percentage`. |
| `percentage_rate` | `NumberProperty` | The percentage rate for percentage-based commissions. |
| `include_tax` | `BooleanProperty` | Whether the commission calculation includes tax. |
| `price_set_id` | `TextProperty` | The ID of the price set used for flat-rate commissions. |
| `max_price_set_id` | `TextProperty` | The ID of the price set defining the maximum commission amount. |
| `min_price_set_id` | `TextProperty` | The ID of the price set defining the minimum commission amount. |
| `rule` | `BelongsTo` | The associated [CommissionRule](#commissionrule). |
## CommissionLine
This documentation provides a reference to the CommissionLine data model. It belongs to the Commission Module.
[View source code](https://github.com/mercurjs/mercur/blob/main/packages/modules/commission/src/modules/commission/models/commission_line.ts)
| Field | Type | Description |
| --------------- | -------------------------------- | -------------------------------------------------------------- |
| `id` | `PrimaryKeyModifier` | The ID of the commission line. |
| `item_line_id` | `TextProperty` | The ID of the order line item that this commission applies to. |
| `rule_id` | `TextProperty` | The ID of the commission rule that was applied. |
| `currency_code` | `TextProperty` | The ISO 3 currency code of the commission. For example, `usd`. |
| `value` | `BigNumberProperty` | The calculated commission amount. |
# Commission Module Service Reference
Source: https://docs.mercurjs.com/product/modules/commission/commission/commission-services
Reference documentation for the Commission Module service methods
# ICommissionModuleService Reference
This section of the documentation provides a reference to the `ICommissionModuleService` interface's methods. This is the interface developers use to use the functionalities provided by the Commission Module.
You should only use the methods in this reference when implementing complex customizations. For common cases, check out available workflows instead.
The main service interface for the Commission Module.
## Methods
### Commission Rule Methods
* [createCommissionRules](#createcommissionrules)
* [updateCommissionRules](#updatecommissionrules)
* [deleteCommissionRules](#deletecommissionrules)
* [retrieveCommissionRule](#retrievecommissionrule)
* [listCommissionRules](#listcommissionrules)
* [listAndCountCommissionRules](#listandcountcommissionrules)
* [softDeleteCommissionRules](#softdeletecommissionrules)
* [restoreCommissionRules](#restorecommissionrules)
### Commission Rate Methods
* [createCommissionRates](#createcommissionrates)
* [updateCommissionRates](#updatecommissionrates)
* [deleteCommissionRates](#deletecommissionrates)
* [retrieveCommissionRate](#retrievecommissionrate)
* [listCommissionRates](#listcommissionrates)
* [listAndCountCommissionRates](#listandcountcommissionrates)
* [softDeleteCommissionRates](#softdeletecommissionrates)
* [restoreCommissionRates](#restorecommissionrates)
### Commission Line Methods
* [createCommissionLines](#createcommissionlines)
* [updateCommissionLines](#updatecommissionlines)
* [deleteCommissionLines](#deletecommissionlines)
* [retrieveCommissionLine](#retrievecommissionline)
* [listCommissionLines](#listcommissionlines)
* [listAndCountCommissionLines](#listandcountcommissionlines)
* [softDeleteCommissionLines](#softdeletecommissionlines)
* [restoreCommissionLines](#restorecommissionlines)
### Custom Methods
* [selectCommissionForProductLine](#selectcommissionforproductline)
***
# selectCommissionForProductLine
This section provides a reference to the `selectCommissionForProductLine` method. This belongs to the Commission Module.
This method selects the applicable commission rule for a given product line item based on the commission rule priority system. It searches through rules in priority order and returns the first matching active rule.
## Priority Order
1. `seller+product_type` (highest priority)
2. `seller+product_category`
3. `seller`
4. `product_type`
5. `product_category`
6. `site` (lowest priority/default)
## Example
```ts theme={null}
const rule = await commissionModuleService.selectCommissionForProductLine({
seller_id: "sel_123",
product_type_id: "ptyp_456",
product_category_id: "pcat_789",
})
```
## Parameters
The calculation context containing product and seller information.
The ID of the seller.
The ID of the product type.
The ID of the product category.
## Returns
The first applicable commission rule found, or `null` if no rule matches.
The ID of the commission rule.
The name of the commission rule.
The type of the commission rule reference.
The ID of the referenced entity.
The associated commission rate.
The ID of the commission rate.
The type of the commission rate.
The percentage rate for percentage-based commissions.
Whether the commission calculation includes tax.
The ID of the price set used for flat-rate commissions.
The ID of the price set defining the maximum commission amount.
The ID of the price set defining the minimum commission amount.
The created date of the commission rate.
The updated date of the commission rate.
The created date of the commission rule.
The updated date of the commission rule.
***
# createCommissionRules
This section provides a reference to the `createCommissionRules` method. This belongs to the Commission Module.
## createCommissionRules(data, sharedContext?): Promise\
This method creates commission rules.
### Example
```ts theme={null}
const rules = await commissionModuleService.createCommissionRules([
{
name: "Default Site Commission",
reference: "site",
reference_id: "",
is_active: true,
rate: {
type: "percentage",
percentage_rate: 10,
include_tax: false,
},
},
])
```
### Parameters
The commission rules to be created.
The name of the commission rule.
The type of the commission rule reference. Can be `site`, `product_type`, `product_category`, `seller+product_category`, `seller+product_type`, or `seller`.
The ID of the referenced entity. Empty string for `site` reference type.
Whether the commission rule is active.
The commission rate configuration.
The type of the commission rate.
The percentage rate for percentage-based commissions.
Whether the commission calculation includes tax.
The price set for flat-rate commissions.
The commission amount.
The ISO 3 currency code.
The minimum commission amount price set.
The maximum commission amount price set.
A context used to share resources, such as transaction manager, between the application and the module.
### Returns
The created commission rules.
## createCommissionRules(data, sharedContext?): Promise\
This method creates a commission rule.
### Example
```ts theme={null}
const rule = await commissionModuleService.createCommissionRules({
name: "Electronics Category Commission",
reference: "product_category",
reference_id: "pcat_electronics",
is_active: true,
rate: {
type: "percentage",
percentage_rate: 15,
include_tax: false,
},
})
```
### Parameters
The commission rule to be created.
The name of the commission rule.
The type of the commission rule reference. Can be `site`, `product_type`, `product_category`, `seller+product_category`, `seller+product_type`, or `seller`.
The ID of the referenced entity. Empty string for `site` reference type.
Whether the commission rule is active.
The commission rate configuration.
The type of the commission rate.
The percentage rate for percentage-based commissions.
Whether the commission calculation includes tax.
The price set for flat-rate commissions.
The commission amount.
The ISO 3 currency code.
The minimum commission amount price set.
The maximum commission amount price set.
A context used to share resources, such as transaction manager, between the application and the module.
### Returns
The created commission rule.
***
# updateCommissionRules
This section provides a reference to the `updateCommissionRules` method. This belongs to the Commission Module.
## updateCommissionRules(id, data, sharedContext?): Promise\
This method updates an existing commission rule.
### Example
```ts theme={null}
const rule = await commissionModuleService.updateCommissionRules("com_rule_123", {
name: "Updated Commission Rule",
is_active: false,
})
```
### Parameters
The ID of the commission rule.
The attributes to update in the commission rule.
The name of the commission rule.
The type of the commission rule reference.
The ID of the referenced entity.
Whether the commission rule is active.
The commission rate configuration to update.
The ID of the commission rate.
The type of the commission rate.
The percentage rate for percentage-based commissions.
Whether the commission calculation includes tax.
The price set for flat-rate commissions.
The minimum commission amount price set.
The maximum commission amount price set.
A context used to share resources, such as transaction manager, between the application and the module.
### Returns
The updated commission rule.
The ID of the commission rule.
The name of the commission rule.
The type of the commission rule reference.
The ID of the referenced entity.
The associated commission rate.
The created date of the commission rule.
The updated date of the commission rule.
***
# deleteCommissionRules
This section provides a reference to the `deleteCommissionRules` method. This belongs to the Commission Module.
## deleteCommissionRules(ids, sharedContext?): Promise\
This method deletes commission rules by their IDs.
### Example
```ts theme={null}
await commissionModuleService.deleteCommissionRules(["com_rule_123", "com_rule_321"])
```
### Parameters
The IDs of the commission rules.
A context used to share resources, such as transaction manager, between the application and the module.
### Returns
Resolves when the commission rules are deleted successfully.
## deleteCommissionRules(id, sharedContext?): Promise\
This method deletes a commission rule by its ID.
### Example
```ts theme={null}
await commissionModuleService.deleteCommissionRules("com_rule_123")
```
### Parameters
The ID of the commission rule.
A context used to share resources, such as transaction manager, between the application and the module.
### Returns
Resolves when the commission rule is deleted successfully.
***
# retrieveCommissionRule
This section provides a reference to the `retrieveCommissionRule` method. This belongs to the Commission Module.
This method retrieves a commission rule by its ID.
## Example
```ts theme={null}
const rule = await commissionModuleService.retrieveCommissionRule("com_rule_123")
```
To retrieve with the rate:
```ts theme={null}
const rule = await commissionModuleService.retrieveCommissionRule(
"com_rule_123",
{
relations: ["rate"],
}
)
```
## Parameters
The ID of the commission rule.
The configurations determining how the commission rule is retrieved.
An array of strings, each being attribute names of the entity to retrieve in the result.
A number indicating the number of records to skip before retrieving the results.
A number indicating the number of records to return in the result.
An array of strings, each being relation names of the entity to retrieve in the result. For example, `["rate"]`.
An object used to specify how to sort the returned records.
A boolean indicating whether deleted records should also be retrieved as part of the result.
A context used to share resources, such as transaction manager, between the application and the module.
## Returns
The retrieved commission rule.
The ID of the commission rule.
The name of the commission rule.
The type of the commission rule reference.
The ID of the referenced entity.
The associated commission rate (if included in relations).
The created date of the commission rule.
The updated date of the commission rule.
***
# listCommissionRules
This section provides a reference to the `listCommissionRules` method. This belongs to the Commission Module.
This method retrieves a paginated list of commission rules based on optional filters and configuration.
## Example
To retrieve active commission rules:
```ts theme={null}
const rules = await commissionModuleService.listCommissionRules({
is_active: true,
})
```
To retrieve rules for a specific seller:
```ts theme={null}
const rules = await commissionModuleService.listCommissionRules({
reference: "seller",
reference_id: "sel_123",
})
```
By default, only the first `15` records are retrieved. You can control pagination:
```ts theme={null}
const rules = await commissionModuleService.listCommissionRules(
{
is_active: true,
},
{
take: 20,
skip: 2,
relations: ["rate"],
}
)
```
## Parameters
The filters to apply on the retrieved commission rules.
The IDs to filter the commission rules by.
Filter commission rules by their names.
Filter commission rules by their reference types.
Filter commission rules by their reference IDs.
Filter by whether commission rules are active.
The configurations determining how the commission rule is retrieved.
An array of strings, each being attribute names of the entity to retrieve in the result.
A number indicating the number of records to skip before retrieving the results.
A number indicating the number of records to return in the result.
An array of strings, each being relation names of the entity to retrieve in the result. For example, `["rate"]`.
An object used to specify how to sort the returned records.
A boolean indicating whether deleted records should also be retrieved as part of the result.
A context used to share resources, such as transaction manager, between the application and the module.
## Returns
The list of commission rules.
***
# listAndCountCommissionRules
This section provides a reference to the `listAndCountCommissionRules` method. This belongs to the Commission Module.
This method retrieves a paginated list of commission rules along with the total count of available commission rules satisfying the provided filters.
## Example
```ts theme={null}
const [rules, count] = await commissionModuleService.listAndCountCommissionRules({
is_active: true,
})
```
## Parameters
The filters to apply on the retrieved commission rules.
The IDs to filter the commission rules by.
Filter commission rules by their names.
Filter commission rules by their reference types.
Filter commission rules by their reference IDs.
Filter by whether commission rules are active.
The configurations determining how the commission rule is retrieved.
An array of strings, each being attribute names of the entity to retrieve in the result.
A number indicating the number of records to skip before retrieving the results.
A number indicating the number of records to return in the result.
An array of strings, each being relation names of the entity to retrieve in the result.
An object used to specify how to sort the returned records.
A boolean indicating whether deleted records should also be retrieved as part of the result.
A context used to share resources, such as transaction manager, between the application and the module.
## Returns
The list of commission rules along with their total count.
***
# softDeleteCommissionRules
This section provides a reference to the `softDeleteCommissionRules` method. This belongs to the Commission Module.
This method soft deletes commission rules by their IDs.
## Example
```ts theme={null}
await commissionModuleService.softDeleteCommissionRules([
"com_rule_123",
"com_rule_321",
])
```
## Parameters
The IDs of the commission rules.
An object that is used to specify an entity's related entities that should be soft-deleted when the main entity is soft-deleted.
A context used to share resources, such as transaction manager, between the application and the module.
## Returns
An object that includes the IDs of related records that were also soft deleted. If there are no related records, the promise resolves to `void`.
***
# restoreCommissionRules
This section provides a reference to the `restoreCommissionRules` method. This belongs to the Commission Module.
This method restores soft deleted commission rules by their IDs.
## Example
```ts theme={null}
await commissionModuleService.restoreCommissionRules(["com_rule_123", "com_rule_321"])
```
## Parameters
The IDs of the commission rules.
Configurations determining which relations to restore along with each of the commission rule.
A context used to share resources, such as transaction manager, between the application and the module.
## Returns
An object that includes the IDs of related records that were restored. If there are no related records restored, the promise resolves to `void`.
***
# createCommissionRates
This section provides a reference to the `createCommissionRates` method. This belongs to the Commission Module.
## createCommissionRates(data, sharedContext?): Promise\
This method creates commission rates.
### Example
```ts theme={null}
const rates = await commissionModuleService.createCommissionRates([
{
type: "percentage",
percentage_rate: 10,
include_tax: false,
},
])
```
### Parameters
The commission rates to be created.
The type of the commission rate.
The percentage rate for percentage-based commissions.
Whether the commission calculation includes tax.
The price set for flat-rate commissions.
The commission amount.
The ISO 3 currency code.
The minimum commission amount price set.
The maximum commission amount price set.
A context used to share resources, such as transaction manager, between the application and the module.
### Returns
The created commission rates.
***
# updateCommissionRates
This section provides a reference to the `updateCommissionRates` method. This belongs to the Commission Module.
## updateCommissionRates(id, data, sharedContext?): Promise\
This method updates an existing commission rate.
### Example
```ts theme={null}
const rate = await commissionModuleService.updateCommissionRates("com_rate_123", {
percentage_rate: 15,
})
```
### Parameters
The ID of the commission rate.
The attributes to update in the commission rate.
The type of the commission rate.
The percentage rate for percentage-based commissions.
Whether the commission calculation includes tax.
The price set for flat-rate commissions.
The minimum commission amount price set.
The maximum commission amount price set.
A context used to share resources, such as transaction manager, between the application and the module.
### Returns
The updated commission rate.
The ID of the commission rate.
The type of the commission rate.
The percentage rate for percentage-based commissions.
Whether the commission calculation includes tax.
The ID of the price set used for flat-rate commissions.
The ID of the price set defining the maximum commission amount.
The ID of the price set defining the minimum commission amount.
The created date of the commission rate.
The updated date of the commission rate.
***
# deleteCommissionRates
This section provides a reference to the `deleteCommissionRates` method. This belongs to the Commission Module.
## deleteCommissionRates(ids, sharedContext?): Promise\
This method deletes commission rates by their IDs.
### Example
```ts theme={null}
await commissionModuleService.deleteCommissionRates(["com_rate_123", "com_rate_321"])
```
### Parameters
The IDs of the commission rates.
A context used to share resources, such as transaction manager, between the application and the module.
### Returns
Resolves when the commission rates are deleted successfully.
***
# retrieveCommissionRate
This section provides a reference to the `retrieveCommissionRate` method. This belongs to the Commission Module.
This method retrieves a commission rate by its ID.
## Example
```ts theme={null}
const rate = await commissionModuleService.retrieveCommissionRate("com_rate_123")
```
## Parameters
The ID of the commission rate.
The configurations determining how the commission rate is retrieved.
An array of strings, each being attribute names of the entity to retrieve in the result.
An array of strings, each being relation names of the entity to retrieve in the result.
An object used to specify how to sort the returned records.
A boolean indicating whether deleted records should also be retrieved as part of the result.
A context used to share resources, such as transaction manager, between the application and the module.
## Returns
The retrieved commission rate.
The ID of the commission rate.
The type of the commission rate.
The percentage rate for percentage-based commissions.
Whether the commission calculation includes tax.
The ID of the price set used for flat-rate commissions.
The ID of the price set defining the maximum commission amount.
The ID of the price set defining the minimum commission amount.
The created date of the commission rate.
The updated date of the commission rate.
***
# listCommissionRates
This section provides a reference to the `listCommissionRates` method. This belongs to the Commission Module.
This method retrieves a paginated list of commission rates based on optional filters and configuration.
## Example
```ts theme={null}
const rates = await commissionModuleService.listCommissionRates({
type: "percentage",
})
```
## Parameters
The filters to apply on the retrieved commission rates.
The IDs to filter the commission rates by.
Filter commission rates by their types.
Filter by whether commission rates include tax in calculation.
The configurations determining how the commission rate is retrieved.
An array of strings, each being attribute names of the entity to retrieve in the result.
A number indicating the number of records to skip before retrieving the results.
A number indicating the number of records to return in the result.
An array of strings, each being relation names of the entity to retrieve in the result.
An object used to specify how to sort the returned records.
A boolean indicating whether deleted records should also be retrieved as part of the result.
A context used to share resources, such as transaction manager, between the application and the module.
## Returns
The list of commission rates.
***
# listAndCountCommissionRates
This section provides a reference to the `listAndCountCommissionRates` method. This belongs to the Commission Module.
This method retrieves a paginated list of commission rates along with the total count of available commission rates satisfying the provided filters.
## Example
```ts theme={null}
const [rates, count] = await commissionModuleService.listAndCountCommissionRates({
type: "percentage",
})
```
## Parameters
The filters to apply on the retrieved commission rates.
The IDs to filter the commission rates by.
Filter commission rates by their types.
Filter by whether commission rates include tax in calculation.
The configurations determining how the commission rate is retrieved.
An array of strings, each being attribute names of the entity to retrieve in the result.
A number indicating the number of records to skip before retrieving the results.
A number indicating the number of records to return in the result.
An array of strings, each being relation names of the entity to retrieve in the result.
An object used to specify how to sort the returned records.
A boolean indicating whether deleted records should also be retrieved as part of the result.
A context used to share resources, such as transaction manager, between the application and the module.
## Returns
The list of commission rates along with their total count.
***
# softDeleteCommissionRates
This section provides a reference to the `softDeleteCommissionRates` method. This belongs to the Commission Module.
This method soft deletes commission rates by their IDs.
## Example
```ts theme={null}
await commissionModuleService.softDeleteCommissionRates([
"com_rate_123",
"com_rate_321",
])
```
## Parameters
The IDs of the commission rates.
An object that is used to specify an entity's related entities that should be soft-deleted when the main entity is soft-deleted.
A context used to share resources, such as transaction manager, between the application and the module.
## Returns
An object that includes the IDs of related records that were also soft deleted. If there are no related records, the promise resolves to `void`.
***
# restoreCommissionRates
This section provides a reference to the `restoreCommissionRates` method. This belongs to the Commission Module.
This method restores soft deleted commission rates by their IDs.
## Example
```ts theme={null}
await commissionModuleService.restoreCommissionRates(["com_rate_123", "com_rate_321"])
```
## Parameters
The IDs of the commission rates.
Configurations determining which relations to restore along with each of the commission rate.
A context used to share resources, such as transaction manager, between the application and the module.
## Returns
An object that includes the IDs of related records that were restored. If there are no related records restored, the promise resolves to `void`.
***
# createCommissionLines
This section provides a reference to the `createCommissionLines` method. This belongs to the Commission Module.
## createCommissionLines(data, sharedContext?): Promise\
This method creates commission lines.
### Example
```ts theme={null}
const lines = await commissionModuleService.createCommissionLines([
{
item_line_id: "ordli_123",
rule_id: "com_rule_123",
currency_code: "usd",
value: 500,
},
])
```
### Parameters
The commission lines to be created.
The ID of the order line item that this commission applies to.
The ID of the commission rule that was applied.
The ISO 3 currency code of the commission.
The calculated commission amount.
A context used to share resources, such as transaction manager, between the application and the module.
### Returns
The created commission lines.
***
# updateCommissionLines
This section provides a reference to the `updateCommissionLines` method. This belongs to the Commission Module.
## updateCommissionLines(id, data, sharedContext?): Promise\
This method updates an existing commission line.
### Example
```ts theme={null}
const line = await commissionModuleService.updateCommissionLines("com_line_123", {
value: 600,
})
```
### Parameters
The ID of the commission line.
The attributes to update in the commission line.
The ID of the order line item that this commission applies to.
The ID of the commission rule that was applied.
The ISO 3 currency code of the commission.
The calculated commission amount.
A context used to share resources, such as transaction manager, between the application and the module.
### Returns
The updated commission line.
The ID of the commission line.
The ID of the order line item that this commission applies to.
The ID of the commission rule that was applied.
The ISO 3 currency code of the commission.
The calculated commission amount.
The created date of the commission line.
The updated date of the commission line.
***
# deleteCommissionLines
This section provides a reference to the `deleteCommissionLines` method. This belongs to the Commission Module.
## deleteCommissionLines(ids, sharedContext?): Promise\
This method deletes commission lines by their IDs.
### Example
```ts theme={null}
await commissionModuleService.deleteCommissionLines(["com_line_123", "com_line_321"])
```
### Parameters
The IDs of the commission lines.
A context used to share resources, such as transaction manager, between the application and the module.
### Returns
Resolves when the commission lines are deleted successfully.
***
# retrieveCommissionLine
This section provides a reference to the `retrieveCommissionLine` method. This belongs to the Commission Module.
This method retrieves a commission line by its ID.
## Example
```ts theme={null}
const line = await commissionModuleService.retrieveCommissionLine("com_line_123")
```
## Parameters
The ID of the commission line.
The configurations determining how the commission line is retrieved.
An array of strings, each being attribute names of the entity to retrieve in the result.
An array of strings, each being relation names of the entity to retrieve in the result.
An object used to specify how to sort the returned records.
A boolean indicating whether deleted records should also be retrieved as part of the result.
A context used to share resources, such as transaction manager, between the application and the module.
## Returns
The retrieved commission line.
The ID of the commission line.
The ID of the order line item that this commission applies to.
The ID of the commission rule that was applied.
The ISO 3 currency code of the commission.
The calculated commission amount.
The created date of the commission line.
The updated date of the commission line.
***
# listCommissionLines
This section provides a reference to the `listCommissionLines` method. This belongs to the Commission Module.
This method retrieves a paginated list of commission lines based on optional filters and configuration.
## Example
To retrieve commission lines for a specific order line item:
```ts theme={null}
const lines = await commissionModuleService.listCommissionLines({
item_line_id: "ordli_123",
})
```
To retrieve commission lines by rule:
```ts theme={null}
const lines = await commissionModuleService.listCommissionLines({
rule_id: "com_rule_123",
})
```
## Parameters
The filters to apply on the retrieved commission lines.
The IDs to filter the commission lines by.
Filter commission lines by their order line item IDs.
Filter commission lines by their commission rule IDs.
Filter commission lines by their currency codes.
The configurations determining how the commission line is retrieved.
An array of strings, each being attribute names of the entity to retrieve in the result.
A number indicating the number of records to skip before retrieving the results.
A number indicating the number of records to return in the result.
An array of strings, each being relation names of the entity to retrieve in the result.
An object used to specify how to sort the returned records.
A boolean indicating whether deleted records should also be retrieved as part of the result.
A context used to share resources, such as transaction manager, between the application and the module.
## Returns
The list of commission lines.
***
# listAndCountCommissionLines
This section provides a reference to the `listAndCountCommissionLines` method. This belongs to the Commission Module.
This method retrieves a paginated list of commission lines along with the total count of available commission lines satisfying the provided filters.
## Example
```ts theme={null}
const [lines, count] = await commissionModuleService.listAndCountCommissionLines({
item_line_id: "ordli_123",
})
```
## Parameters
The filters to apply on the retrieved commission lines.
The IDs to filter the commission lines by.
Filter commission lines by their order line item IDs.
Filter commission lines by their commission rule IDs.
Filter commission lines by their currency codes.
The configurations determining how the commission line is retrieved.
An array of strings, each being attribute names of the entity to retrieve in the result.
A number indicating the number of records to skip before retrieving the results.
A number indicating the number of records to return in the result.
An array of strings, each being relation names of the entity to retrieve in the result.
An object used to specify how to sort the returned records.
A boolean indicating whether deleted records should also be retrieved as part of the result.
A context used to share resources, such as transaction manager, between the application and the module.
## Returns
The list of commission lines along with their total count.
***
# softDeleteCommissionLines
This section provides a reference to the `softDeleteCommissionLines` method. This belongs to the Commission Module.
This method soft deletes commission lines by their IDs.
## Example
```ts theme={null}
await commissionModuleService.softDeleteCommissionLines([
"com_line_123",
"com_line_321",
])
```
## Parameters
The IDs of the commission lines.
An object that is used to specify an entity's related entities that should be soft-deleted when the main entity is soft-deleted.
A context used to share resources, such as transaction manager, between the application and the module.
## Returns
An object that includes the IDs of related records that were also soft deleted. If there are no related records, the promise resolves to `void`.
***
# restoreCommissionLines
This section provides a reference to the `restoreCommissionLines` method. This belongs to the Commission Module.
This method restores soft deleted commission lines by their IDs.
## Example
```ts theme={null}
await commissionModuleService.restoreCommissionLines(["com_line_123", "com_line_321"])
```
## Parameters
The IDs of the commission lines.
Configurations determining which relations to restore along with each of the commission line.
A context used to share resources, such as transaction manager, between the application and the module.
## Returns
An object that includes the IDs of related records that were restored. If there are no related records restored, the promise resolves to `void`.
# Order Return Request Module
Source: https://docs.mercurjs.com/product/modules/requests/order-return-request/order-return-request
Learn about the Order Return Request Module and how to use it in your application
# Order Return Request Module
In this section of the documentation, you will find resources to learn more about the Order Return Request Module and how to use it in your application.
Mercur has order return management features available out-of-the-box through the Order Return Request Module. A [module](https://docs.medusajs.com/learn/fundamentals/modules) is a standalone package that provides features for a single domain. Each of Mercur's marketplace features are placed in custom modules, such as this Order Return Request Module.
Learn more about why modules are isolated in [this documentation](https://docs.medusajs.com/learn/fundamentals/modules/isolation).
## Order Return Request Features
* **Customer Return Requests**: Allow customers to request returns for purchased items with reasons and notes.
* **Multi-Tier Review System**: Support both vendor review and admin escalation for dispute resolution.
* **Line Item Tracking**: Track which specific items and quantities are being returned.
* **Status Workflow**: Manage return requests through multiple statuses (pending, refunded, withdrawn, escalated, canceled).
* **Reviewer Notes**: Store notes from both vendors and admins explaining their decisions.
* **Shipping Integration**: Associate return requests with shipping options for return logistics.
***
## How to Use the Order Return Request Module
In your Medusa application, you build flows around Commerce Modules. A flow is built as a [Workflow](https://docs.medusajs.com/learn/fundamentals/workflows), which is a special function composed of a series of steps that guarantees data consistency and reliable roll-back mechanism.
You can build custom workflows and steps. Mercur provides pre-built workflows for return request operations in the `@mercurjs/requests` package.
For example, the `createOrderReturnRequestWorkflow`:
```ts title="src/workflows/order-return-request/create-return-request.ts" theme={null}
import { Modules } from "@medusajs/framework/utils"
import {
WorkflowResponse,
createHook,
createWorkflow,
transform,
} from "@medusajs/framework/workflows-sdk"
import { createRemoteLinkStep } from "@medusajs/medusa/core-flows"
import { CreateOrderReturnRequestDTO } from "@mercurjs/framework"
import { ORDER_RETURN_MODULE } from "../../../modules/order-return-request"
import { SELLER_MODULE } from "@mercurjs/framework"
import {
createOrderReturnRequestStep,
validateOrderReturnRequestStep,
} from "../steps"
export const createOrderReturnRequestWorkflow = createWorkflow(
"create-order-return-request",
function (input: { data: CreateOrderReturnRequestDTO; seller_id: string }) {
// Validate the return request data
validateOrderReturnRequestStep(input.data)
// Create the return request
const request = createOrderReturnRequestStep(input.data)
const requestId = transform({ request }, ({ request }) => request.id)
// Create module links
createRemoteLinkStep([
{
[SELLER_MODULE]: {
seller_id: input.seller_id,
},
[ORDER_RETURN_MODULE]: {
order_return_request_id: requestId,
},
},
{
[ORDER_RETURN_MODULE]: {
order_return_request_id: requestId,
},
[Modules.ORDER]: {
order_id: input.data.order_id,
},
},
])
// Emit workflow hook
const orderReturnRequestCreatedHook = createHook(
"orderReturnRequestCreated",
{
requestId: request.id,
}
)
return new WorkflowResponse(request, {
hooks: [orderReturnRequestCreatedHook],
})
}
)
```
You can then execute the workflow in your custom API routes:
### API Route
```ts title="src/api/store/return-request/route.ts" theme={null}
import { AuthenticatedMedusaRequest, MedusaResponse } from '@medusajs/framework'
import { ContainerRegistrationKeys } from '@medusajs/framework/utils'
import { createOrderReturnRequestWorkflow } from "../../../workflows/order-return-request/workflows"
import sellerOrder from '../../../links/seller-order'
export const POST = async (
req: AuthenticatedMedusaRequest,
res: MedusaResponse
) => {
const query = req.scope.resolve(ContainerRegistrationKeys.QUERY)
// Get seller_id from the order
const {
data: [resource],
} = await query.graph({
entity: sellerOrder.entryPoint,
fields: ["seller_id"],
filters: {
order_id: req.validatedBody.order_id,
},
})
// Execute the createOrderReturnRequestWorkflow
const { result: order_return_request } =
await createOrderReturnRequestWorkflow.run({
container: req.scope,
input: {
data: { ...req.validatedBody, customer_id: req.auth_context.actor_id },
seller_id: resource.seller_id,
},
})
res.json({ order_return_request })
}
```
Learn more about workflows in [this documentation](https://docs.medusajs.com/learn/fundamentals/workflows).
***
# Concepts
In this document, you'll learn about the main concepts related to order return requests in Mercur.
## Order Return Request
An order return request represents a customer's request to return items from an order. It is represented by the [OrderReturnRequest data model](../data-model/order-return-request-module-data-reference#orderreturnrequest).
An order return request holds information about:
* The customer who submitted the request
* Customer's note explaining the return reason
* Shipping option for return logistics
* Vendor reviewer information (ID, note, review date)
* Admin reviewer information (ID, note, review date)
* Current status in the review workflow
* Associated line items being returned
This enables a structured return process with accountability and tracking at each stage.
***
## Return Request Status Workflow
Return requests follow a multi-tier approval workflow with five possible statuses:
### pending
**Initial state** when customer creates the return request.
* Awaiting vendor review
* Customer has submitted their reason
* No action taken yet
### refunded
**Approved by vendor** - the return is accepted.
* Vendor agrees with the return reason
* Return and refund process proceeds
* Customer receives refund
* Items are returned to seller
### withdrawn
**Rejected by vendor** - the return is denied.
* Vendor determines return doesn't meet criteria
* Vendor provides explanation in `vendor_reviewer_note`
* No refund issued
* Customer keeps the items
### escalated
**Disputed by vendor** - vendor disagrees with return reason.
* Vendor believes return is unfair or against policy
* Request is escalated to marketplace admin for final decision
* Admin reviews both customer and vendor perspectives
* Admin makes final decision (refunded or canceled)
### canceled
**Rejected by admin** - admin sides with vendor on escalated request.
* Admin reviewed escalated request
* Admin determined vendor was correct to deny
* Admin provides explanation in `admin_reviewer_note`
* No refund issued
***
## Return Request Line Item
A return request line item specifies which products and quantities are being returned. It is represented by the [OrderReturnRequestLineItem data model](../data-model/order-return-request-module-data-reference#orderreturnrequestlineitem).
Each line item includes:
* Original order line item ID
* Quantity to be returned (can be partial)
* Return reason ID (optional)
This granular tracking allows customers to return specific items or quantities from an order, not just the entire order.
***
## Multi-Tier Review System
The return request system implements a two-tier review process:
### Tier 1: Vendor Review
**Reviewer**: Seller member\
**Actions**: Refunded, Withdrawn, Escalated\
**Fields**: `vendor_reviewer_id`, `vendor_reviewer_note`, `vendor_review_date`
Vendors handle the first level of review, deciding whether to:
* Accept the return (refunded)
* Deny the return (withdrawn)
* Dispute the return (escalated)
### Tier 2: Admin Review (Escalations Only)
**Reviewer**: Marketplace admin\
**Actions**: Refunded, Canceled\
**Fields**: `admin_reviewer_id`, `admin_reviewer_note`, `admin_review_date`
Admins only review escalated requests, providing final arbitration when vendors and customers disagree.
This system balances seller autonomy with marketplace oversight.
***
## Return Request Validation
The `validateOrderReturnRequestStep` ensures return requests meet requirements:
* Order exists and belongs to the customer
* Line items exist in the order
* Quantities don't exceed ordered amounts
* Order is in a returnable state
* Return window hasn't expired (if configured)
This prevents fraudulent or invalid return requests.
***
## Workflow Integration
Return requests integrate with other marketplace workflows:
**On Creation:**
* Links created to Seller and Order
* Workflow hook emitted for extensibility
* Notifications can be triggered
**On Status Change:**
* Return and refund workflows triggered (if refunded)
* Inventory updated (if items returned to stock)
* Payout adjustments made (if already paid out)
***
## Use Cases
**1. Standard Return**
Customer receives damaged item, creates return request, vendor approves, refund processed.
**2. Vendor Denial**
Customer requests return after 30-day window, vendor denies with explanation, customer keeps item.
**3. Escalation to Admin**
Customer claims item is counterfeit, vendor disputes, admin reviews and makes final decision.
**4. Partial Return**
Customer orders 3 items but only wants to return 1; line item tracking handles partial returns.
**5. Return Reason Tracking**
Marketplace tracks return reasons (damaged, wrong item, not as described) for quality insights.
**6. Multi-Vendor Returns**
Customer bought from 3 sellers, creates separate return requests for each seller's items.
# Order Return Request Module Data Models
Source: https://docs.mercurjs.com/product/modules/requests/order-return-request/order-return-request-data-model-reference
Reference documentation for the Order Return Request Module data models
## Relations Overview
| Relationship | Type | Description |
| -------------------------------------------------------- | ------------------- | -------------------------------------------------------- |
| OrderReturnRequest → OrderReturnRequestLineItem | One-to-Many | A return request has many line items |
| OrderReturnRequest → Customer (Customer Module) | Read-only - has one | A return request belongs to a customer |
| OrderReturnRequest → ShippingOption (Fulfillment Module) | Read-only - has one | A return request references a shipping option |
| OrderReturnRequestLineItem → LineItem (Order Module) | Read-only - has one | A return request line item references an order line item |
## Data Models
* [OrderReturnRequest](#orderreturnrequest)
* [OrderReturnRequestLineItem](#orderreturnrequestlineitem)
## OrderReturnRequest
This documentation provides a reference to the OrderReturnRequest data model. It belongs to the Order Return Request Module.
[View source code](https://github.com/mercurjs/mercur/blob/main/packages/modules/requests/src/modules/order-return-request/models/return-request.ts)
| Field | Type | Description |
| ---------------------- | ----------------------------------------------------------------------------- | --------------------------------------------------------------------------------- |
| `id` | `PrimaryKeyModifier` | The ID of the order return request. |
| `customer_id` | `TextProperty` | The ID of the customer who created the return request. |
| `customer_note` | `TextProperty` | The customer's note explaining the reason for the return. |
| `shipping_option_id` | `TextProperty` | The ID of the shipping option for returning the items. |
| `vendor_reviewer_id` | `TextProperty` | The ID of the vendor member who reviewed the request. |
| `vendor_reviewer_note` | `TextProperty` | The vendor's note regarding the return request. |
| `vendor_review_date` | `DateTimeProperty` | The date when the vendor reviewed the request. |
| `admin_reviewer_id` | `TextProperty` | The ID of the admin user who reviewed the escalated request. |
| `admin_reviewer_note` | `TextProperty` | The admin's note regarding the return request. |
| `admin_review_date` | `DateTimeProperty` | The date when the admin reviewed the request. |
| `status` | `EnumProperty<["pending", "refunded", "withdrawn", "escalated", "canceled"]>` | The status of the return request. Defaults to `pending`. |
| `line_items` | `HasMany` | The associated [OrderReturnRequestLineItem](#orderreturnrequestlineitem) records. |
## OrderReturnRequestLineItem
This documentation provides a reference to the OrderReturnRequestLineItem data model. It belongs to the Order Return Request Module.
[View source code](https://github.com/mercurjs/mercur/blob/main/packages/modules/requests/src/modules/order-return-request/models/return-request-line-item.ts)
| Field | Type | Description |
| ---------------- | -------------------------------- | --------------------------------------------------------- |
| `id` | `PrimaryKeyModifier` | The ID of the order return request line item. |
| `line_item_id` | `TextProperty` | The ID of the original order line item being returned. |
| `quantity` | `NumberProperty` | The quantity of the item to be returned. |
| `reason_id` | `TextProperty` | The ID of the return reason. |
| `return_request` | `BelongsTo` | The associated [OrderReturnRequest](#orderreturnrequest). |
# Order Return Request Module Links
Source: https://docs.mercurjs.com/product/modules/requests/order-return-request/order-return-request-links
Module links for the Order Return Request Module
# Links between Order Return Request Module and Other Modules
This document showcases the module links defined between the Order Return Request Module and other Commerce Modules.
## Summary
The Order Return Request Module has the following links to other modules:
| First Data Model | Second Data Model | Type | Description |
| ------------------ | ------------------ | -------------------- | -------------------------------------------------- |
| OrderReturnRequest | Order | Stored - many-to-one | Associates return requests with the original order |
| Seller | OrderReturnRequest | Stored - one-to-many | Associates a seller with their return requests |
***
## Order Module
Mercur defines a link between the Order Return Request Module's `OrderReturnRequest` data model and the Order Module's `Order` data model. This allows return requests to be associated with the original order being returned.
### Retrieve with Query
To retrieve the order of a return request with Query, pass `order.*` in `fields`:
```ts theme={null}
const { data: returnRequests } = await query.graph({
entity: "order_return_request",
fields: [
"*",
"order.*",
],
})
// returnRequests[0].order
```
```ts theme={null}
import { useQueryGraphStep } from "@medusajs/medusa/core-flows"
// ...
const { data: returnRequests } = useQueryGraphStep({
entity: "order_return_request",
fields: [
"*",
"order.*",
],
})
// returnRequests[0].order
```
### Manage with Link
To manage the order association of a return request, use Link:
```ts theme={null}
import { Modules } from "@medusajs/framework/utils"
// ...
await link.create({
order_return_request: {
order_return_request_id: "oretreq_123",
},
[Modules.ORDER]: {
order_id: "ord_123",
},
})
```
```ts theme={null}
import { createRemoteLinkStep } from "@medusajs/medusa/core-flows"
// ...
createRemoteLinkStep({
order_return_request: {
order_return_request_id: "oretreq_123",
},
[Modules.ORDER]: {
order_id: "ord_123",
},
})
```
***
## Seller Module
Mercur defines a link between the Seller Module's `Seller` data model and the Order Return Request Module's `OrderReturnRequest` data model. This allows tracking which return requests belong to each seller for vendor review and processing.
### Retrieve with Query
To retrieve the return requests of a seller with Query, pass `order_return_request.*` in `fields`:
```ts theme={null}
const { data: sellers } = await query.graph({
entity: "seller",
fields: [
"*",
"order_return_request.*",
],
})
// sellers[0].order_return_request
```
```ts theme={null}
import { useQueryGraphStep } from "@medusajs/medusa/core-flows"
// ...
const { data: sellers } = useQueryGraphStep({
entity: "seller",
fields: [
"*",
"order_return_request.*",
],
})
// sellers[0].order_return_request
```
### Manage with Link
To manage the return requests of a seller, use Link:
```ts theme={null}
// ...
await link.create({
seller: {
seller_id: "sel_123",
},
order_return_request: {
order_return_request_id: "oretreq_123",
},
})
```
```ts theme={null}
import { createRemoteLinkStep } from "@medusajs/medusa/core-flows"
// ...
createRemoteLinkStep({
seller: {
seller_id: "sel_123",
},
order_return_request: {
order_return_request_id: "oretreq_123",
},
})
```
# Order Return Request Module Service Reference
Source: https://docs.mercurjs.com/product/modules/requests/order-return-request/order-return-request-services
Reference documentation for the Order Return Request Module service methods
# IOrderReturnRequestModuleService Reference
This section of the documentation provides a reference to the `IOrderReturnRequestModuleService` interface's methods. This is the interface developers use to use the functionalities provided by the Order Return Request Module.
You should only use the methods in this reference when implementing complex customizations. For common cases, check out available workflows instead.
The main service interface for the Order Return Request Module.
## Methods
### Order Return Request Methods
* [createOrderReturnRequests](#createorderreturnrequests)
* [updateOrderReturnRequests](#updateorderreturnrequests)
* [deleteOrderReturnRequests](#deleteorderreturnrequests)
* [retrieveOrderReturnRequest](#retrieveorderreturnrequest)
* [listOrderReturnRequests](#listorderreturnrequests)
* [listAndCountOrderReturnRequests](#listandcountorderreturnrequests)
* [softDeleteOrderReturnRequests](#softdeleteorderreturnrequests)
* [restoreOrderReturnRequests](#restoreorderreturnrequests)
### Order Return Request Line Item Methods
* [createOrderReturnRequestLineItems](#createorderreturnrequestlineitems)
* [updateOrderReturnRequestLineItems](#updateorderreturnrequestlineitems)
* [deleteOrderReturnRequestLineItems](#deleteorderreturnrequestlineitems)
* [retrieveOrderReturnRequestLineItem](#retrieveorderreturnrequestlineitem)
* [listOrderReturnRequestLineItems](#listorderreturnrequestlineitems)
* [listAndCountOrderReturnRequestLineItems](#listandcountorderreturnrequestlineitems)
* [softDeleteOrderReturnRequestLineItems](#softdeleteorderreturnrequestlineitems)
* [restoreOrderReturnRequestLineItems](#restoreorderreturnrequestlineitems)
***
# createOrderReturnRequests
This section provides a reference to the `createOrderReturnRequests` method. This belongs to the Order Return Request Module.
## createOrderReturnRequests(data, sharedContext?): Promise\
This method creates order return requests.
### Example
```ts theme={null}
const returnRequests = await orderReturnRequestModuleService.createOrderReturnRequests([
{
order_id: "ord_123",
customer_id: "cus_123",
customer_note: "Product arrived damaged",
shipping_option_id: "so_123",
line_items: [
{ line_item_id: "ordli_123", quantity: 1, reason_id: "reason_123" },
],
},
])
```
### Parameters
The order return requests to be created.
The ID of the order this return request is for.
The ID of the customer who created the return request.
The customer's note explaining the reason for the return.
The ID of the shipping option for returning the items.
The line items to be returned.
The ID of the original order line item being returned.
The quantity of the item to be returned.
The ID of the return reason.
A context used to share resources, such as transaction manager, between the application and the module.
### Returns
The created order return requests.
## createOrderReturnRequests(data, sharedContext?): Promise\
This method creates an order return request.
### Example
```ts theme={null}
const returnRequest = await orderReturnRequestModuleService.createOrderReturnRequests({
order_id: "ord_123",
customer_id: "cus_123",
customer_note: "Product arrived damaged",
shipping_option_id: "so_123",
line_items: [
{ line_item_id: "ordli_123", quantity: 1, reason_id: "reason_123" },
],
})
```
### Parameters
The order return request to be created.
The ID of the order this return request is for.
The ID of the customer who created the return request.
The customer's note explaining the reason for the return.
The ID of the shipping option for returning the items.
The line items to be returned.
The ID of the original order line item being returned.
The quantity of the item to be returned.
The ID of the return reason.
A context used to share resources, such as transaction manager, between the application and the module.
### Returns
The created order return request.
***
# updateOrderReturnRequests
This section provides a reference to the `updateOrderReturnRequests` method. This belongs to the Order Return Request Module.
## updateOrderReturnRequests(id, data, sharedContext?): Promise\
This method updates an existing order return request.
### Example
Vendor reviewing a return request:
```ts theme={null}
const returnRequest = await orderReturnRequestModuleService.updateOrderReturnRequests("oretreq_123", {
vendor_reviewer_id: "mem_123",
vendor_reviewer_note: "Approved for return",
vendor_review_date: new Date(),
status: "refunded",
})
```
Admin reviewing an escalated return request:
```ts theme={null}
const returnRequest = await orderReturnRequestModuleService.updateOrderReturnRequests("oretreq_123", {
admin_reviewer_id: "user_123",
admin_reviewer_note: "Customer is right, approve the return",
admin_review_date: new Date(),
status: "refunded",
})
```
### Parameters
The ID of the order return request.
The attributes to update in the order return request.
The customer's note explaining the reason for the return.
The ID of the shipping option for returning the items.
The ID of the vendor member who reviewed the request.
The vendor's note regarding the return request.
The date when the vendor reviewed the request.
The ID of the admin user who reviewed the escalated request.
The admin's note regarding the return request.
The date when the admin reviewed the request.
The status of the return request.
A context used to share resources, such as transaction manager, between the application and the module.
### Returns
The updated order return request.
The ID of the order return request.
The ID of the customer who created the return request.
The customer's note explaining the reason for the return.
The ID of the shipping option for returning the items.
The ID of the vendor member who reviewed the request.
The vendor's note regarding the return request.
The date when the vendor reviewed the request.
The ID of the admin user who reviewed the escalated request.
The admin's note regarding the return request.
The date when the admin reviewed the request.
The status of the return request.
The associated line items (if included in relations).
The created date of the order return request.
The updated date of the order return request.
***
# deleteOrderReturnRequests
This section provides a reference to the `deleteOrderReturnRequests` method. This belongs to the Order Return Request Module.
## deleteOrderReturnRequests(ids, sharedContext?): Promise\
This method deletes order return requests by their IDs.
### Example
```ts theme={null}
await orderReturnRequestModuleService.deleteOrderReturnRequests(["oretreq_123", "oretreq_321"])
```
### Parameters
The IDs of the order return requests.
A context used to share resources, such as transaction manager, between the application and the module.
### Returns
Resolves when the order return requests are deleted successfully.
## deleteOrderReturnRequests(id, sharedContext?): Promise\
This method deletes an order return request by its ID.
### Example
```ts theme={null}
await orderReturnRequestModuleService.deleteOrderReturnRequests("oretreq_123")
```
### Parameters
The ID of the order return request.
A context used to share resources, such as transaction manager, between the application and the module.
### Returns
Resolves when the order return request is deleted successfully.
***
# retrieveOrderReturnRequest
This section provides a reference to the `retrieveOrderReturnRequest` method. This belongs to the Order Return Request Module.
This method retrieves an order return request by its ID.
## Example
```ts theme={null}
const returnRequest = await orderReturnRequestModuleService.retrieveOrderReturnRequest("oretreq_123")
```
To retrieve with line items:
```ts theme={null}
const returnRequest = await orderReturnRequestModuleService.retrieveOrderReturnRequest(
"oretreq_123",
{
relations: ["line_items"],
}
)
```
## Parameters
The ID of the order return request.
The configurations determining how the order return request is retrieved.
An array of strings, each being attribute names of the entity to retrieve in the result.
A number indicating the number of records to skip before retrieving the results.
A number indicating the number of records to return in the result.
An array of strings, each being relation names of the entity to retrieve in the result. For example, `["line_items"]`.
An object used to specify how to sort the returned records.
A boolean indicating whether deleted records should also be retrieved as part of the result.
A context used to share resources, such as transaction manager, between the application and the module.
## Returns
The retrieved order return request.
The ID of the order return request.
The ID of the customer who created the return request.
The customer's note explaining the reason for the return.
The ID of the shipping option for returning the items.
The ID of the vendor member who reviewed the request.
The vendor's note regarding the return request.
The date when the vendor reviewed the request.
The ID of the admin user who reviewed the escalated request.
The admin's note regarding the return request.
The date when the admin reviewed the request.
The status of the return request.
The associated line items (if included in relations).
The created date of the order return request.
The updated date of the order return request.
***
# listOrderReturnRequests
This section provides a reference to the `listOrderReturnRequests` method. This belongs to the Order Return Request Module.
This method retrieves a paginated list of order return requests based on optional filters and configuration.
## Example
To retrieve pending return requests:
```ts theme={null}
const returnRequests = await orderReturnRequestModuleService.listOrderReturnRequests({
status: "pending",
})
```
To retrieve return requests for a specific customer:
```ts theme={null}
const returnRequests = await orderReturnRequestModuleService.listOrderReturnRequests({
customer_id: "cus_123",
})
```
By default, only the first `15` records are retrieved. You can control pagination:
```ts theme={null}
const returnRequests = await orderReturnRequestModuleService.listOrderReturnRequests(
{
status: "pending",
},
{
take: 20,
skip: 2,
relations: ["line_items"],
}
)
```
## Parameters
The filters to apply on the retrieved order return requests.
The IDs to filter the order return requests by.
Filter order return requests by their customer IDs.
Filter order return requests by their status.
Filter order return requests by their vendor reviewer IDs.
Filter order return requests by their admin reviewer IDs.
The configurations determining how the order return request is retrieved.
An array of strings, each being attribute names of the entity to retrieve in the result.
A number indicating the number of records to skip before retrieving the results.
A number indicating the number of records to return in the result.
An array of strings, each being relation names of the entity to retrieve in the result. For example, `["line_items"]`.
An object used to specify how to sort the returned records.
A boolean indicating whether deleted records should also be retrieved as part of the result.
A context used to share resources, such as transaction manager, between the application and the module.
## Returns
The list of order return requests.
***
# listAndCountOrderReturnRequests
This section provides a reference to the `listAndCountOrderReturnRequests` method. This belongs to the Order Return Request Module.
This method retrieves a paginated list of order return requests along with the total count of available order return requests satisfying the provided filters.
## Example
```ts theme={null}
const [returnRequests, count] = await orderReturnRequestModuleService.listAndCountOrderReturnRequests({
status: "pending",
})
```
## Parameters
The filters to apply on the retrieved order return requests.
The IDs to filter the order return requests by.
Filter order return requests by their customer IDs.
Filter order return requests by their status.
Filter order return requests by their vendor reviewer IDs.
Filter order return requests by their admin reviewer IDs.
The configurations determining how the order return request is retrieved.
An array of strings, each being attribute names of the entity to retrieve in the result.
A number indicating the number of records to skip before retrieving the results.
A number indicating the number of records to return in the result.
An array of strings, each being relation names of the entity to retrieve in the result.
An object used to specify how to sort the returned records.
A boolean indicating whether deleted records should also be retrieved as part of the result.
A context used to share resources, such as transaction manager, between the application and the module.
## Returns
The list of order return requests along with their total count.
***
# softDeleteOrderReturnRequests
This section provides a reference to the `softDeleteOrderReturnRequests` method. This belongs to the Order Return Request Module.
This method soft deletes order return requests by their IDs.
## Example
```ts theme={null}
await orderReturnRequestModuleService.softDeleteOrderReturnRequests([
"oretreq_123",
"oretreq_321",
])
```
## Parameters
The IDs of the order return requests.
An object that is used to specify an entity's related entities that should be soft-deleted when the main entity is soft-deleted.
A context used to share resources, such as transaction manager, between the application and the module.
## Returns
An object that includes the IDs of related records that were also soft deleted. If there are no related records, the promise resolves to `void`.
***
# restoreOrderReturnRequests
This section provides a reference to the `restoreOrderReturnRequests` method. This belongs to the Order Return Request Module.
This method restores soft deleted order return requests by their IDs.
## Example
```ts theme={null}
await orderReturnRequestModuleService.restoreOrderReturnRequests(["oretreq_123", "oretreq_321"])
```
## Parameters
The IDs of the order return requests.
Configurations determining which relations to restore along with each of the order return request.
A context used to share resources, such as transaction manager, between the application and the module.
## Returns
An object that includes the IDs of related records that were restored. If there are no related records restored, the promise resolves to `void`.
***
# createOrderReturnRequestLineItems
This section provides a reference to the `createOrderReturnRequestLineItems` method. This belongs to the Order Return Request Module.
## createOrderReturnRequestLineItems(data, sharedContext?): Promise\
This method creates order return request line items.
### Example
```ts theme={null}
const lineItems = await orderReturnRequestModuleService.createOrderReturnRequestLineItems([
{
return_request_id: "oretreq_123",
line_item_id: "ordli_123",
quantity: 2,
reason_id: "reason_123",
},
])
```
### Parameters
The order return request line items to be created.
The ID of the return request this line item belongs to.
The ID of the original order line item being returned.
The quantity of the item to be returned.
The ID of the return reason.
A context used to share resources, such as transaction manager, between the application and the module.
### Returns
The created order return request line items.
***
# updateOrderReturnRequestLineItems
This section provides a reference to the `updateOrderReturnRequestLineItems` method. This belongs to the Order Return Request Module.
## updateOrderReturnRequestLineItems(id, data, sharedContext?): Promise\
This method updates an existing order return request line item.
### Example
```ts theme={null}
const lineItem = await orderReturnRequestModuleService.updateOrderReturnRequestLineItems("oretreqli_123", {
quantity: 1,
})
```
### Parameters
The ID of the order return request line item.
The attributes to update in the order return request line item.
The ID of the original order line item being returned.
The quantity of the item to be returned.
The ID of the return reason.
A context used to share resources, such as transaction manager, between the application and the module.
### Returns
The updated order return request line item.
The ID of the order return request line item.
The ID of the original order line item being returned.
The quantity of the item to be returned.
The ID of the return reason.
The created date of the line item.
The updated date of the line item.
***
# deleteOrderReturnRequestLineItems
This section provides a reference to the `deleteOrderReturnRequestLineItems` method. This belongs to the Order Return Request Module.
## deleteOrderReturnRequestLineItems(ids, sharedContext?): Promise\
This method deletes order return request line items by their IDs.
### Example
```ts theme={null}
await orderReturnRequestModuleService.deleteOrderReturnRequestLineItems(["oretreqli_123", "oretreqli_321"])
```
### Parameters
The IDs of the order return request line items.
A context used to share resources, such as transaction manager, between the application and the module.
### Returns
Resolves when the order return request line items are deleted successfully.
***
# retrieveOrderReturnRequestLineItem
This section provides a reference to the `retrieveOrderReturnRequestLineItem` method. This belongs to the Order Return Request Module.
This method retrieves an order return request line item by its ID.
## Example
```ts theme={null}
const lineItem = await orderReturnRequestModuleService.retrieveOrderReturnRequestLineItem("oretreqli_123")
```
To retrieve with the return request:
```ts theme={null}
const lineItem = await orderReturnRequestModuleService.retrieveOrderReturnRequestLineItem(
"oretreqli_123",
{
relations: ["return_request"],
}
)
```
## Parameters
The ID of the order return request line item.
The configurations determining how the order return request line item is retrieved.
An array of strings, each being attribute names of the entity to retrieve in the result.
An array of strings, each being relation names of the entity to retrieve in the result. For example, `["return_request"]`.
An object used to specify how to sort the returned records.
A boolean indicating whether deleted records should also be retrieved as part of the result.
A context used to share resources, such as transaction manager, between the application and the module.
## Returns
The retrieved order return request line item.
The ID of the order return request line item.
The ID of the original order line item being returned.
The quantity of the item to be returned.
The ID of the return reason.
The created date of the line item.
The updated date of the line item.
The associated return request (if included in relations).
***
# listOrderReturnRequestLineItems
This section provides a reference to the `listOrderReturnRequestLineItems` method. This belongs to the Order Return Request Module.
This method retrieves a paginated list of order return request line items based on optional filters and configuration.
## Example
To retrieve line items for a specific return request:
```ts theme={null}
const lineItems = await orderReturnRequestModuleService.listOrderReturnRequestLineItems({
return_request_id: "oretreq_123",
})
```
To retrieve line items for specific order line items:
```ts theme={null}
const lineItems = await orderReturnRequestModuleService.listOrderReturnRequestLineItems({
line_item_id: ["ordli_123", "ordli_456"],
})
```
## Parameters
The filters to apply on the retrieved order return request line items.
The IDs to filter the order return request line items by.
Filter line items by their return request IDs.
Filter line items by their order line item IDs.
Filter line items by their return reason IDs.
The configurations determining how the order return request line item is retrieved.
An array of strings, each being attribute names of the entity to retrieve in the result.
A number indicating the number of records to skip before retrieving the results.
A number indicating the number of records to return in the result.
An array of strings, each being relation names of the entity to retrieve in the result.
An object used to specify how to sort the returned records.
A boolean indicating whether deleted records should also be retrieved as part of the result.
A context used to share resources, such as transaction manager, between the application and the module.
## Returns
The list of order return request line items.
***
# listAndCountOrderReturnRequestLineItems
This section provides a reference to the `listAndCountOrderReturnRequestLineItems` method. This belongs to the Order Return Request Module.
This method retrieves a paginated list of order return request line items along with the total count of available order return request line items satisfying the provided filters.
## Example
```ts theme={null}
const [lineItems, count] = await orderReturnRequestModuleService.listAndCountOrderReturnRequestLineItems({
return_request_id: "oretreq_123",
})
```
## Parameters
The filters to apply on the retrieved order return request line items.
The IDs to filter the order return request line items by.
Filter line items by their return request IDs.
Filter line items by their order line item IDs.
Filter line items by their return reason IDs.
The configurations determining how the order return request line item is retrieved.
An array of strings, each being attribute names of the entity to retrieve in the result.
A number indicating the number of records to skip before retrieving the results.
A number indicating the number of records to return in the result.
An array of strings, each being relation names of the entity to retrieve in the result.
An object used to specify how to sort the returned records.
A boolean indicating whether deleted records should also be retrieved as part of the result.
A context used to share resources, such as transaction manager, between the application and the module.
## Returns
The list of order return request line items along with their total count.
***
# softDeleteOrderReturnRequestLineItems
This section provides a reference to the `softDeleteOrderReturnRequestLineItems` method. This belongs to the Order Return Request Module.
This method soft deletes order return request line items by their IDs.
## Example
```ts theme={null}
await orderReturnRequestModuleService.softDeleteOrderReturnRequestLineItems([
"oretreqli_123",
"oretreqli_321",
])
```
## Parameters
The IDs of the order return request line items.
An object that is used to specify an entity's related entities that should be soft-deleted when the main entity is soft-deleted.
A context used to share resources, such as transaction manager, between the application and the module.
## Returns
An object that includes the IDs of related records that were also soft deleted. If there are no related records, the promise resolves to `void`.
***
# restoreOrderReturnRequestLineItems
This section provides a reference to the `restoreOrderReturnRequestLineItems` method. This belongs to the Order Return Request Module.
This method restores soft deleted order return request line items by their IDs.
## Example
```ts theme={null}
await orderReturnRequestModuleService.restoreOrderReturnRequestLineItems(["oretreqli_123", "oretreqli_321"])
```
## Parameters
The IDs of the order return request line items.
Configurations determining which relations to restore along with each of the order return request line item.
A context used to share resources, such as transaction manager, between the application and the module.
## Returns
An object that includes the IDs of related records that were restored. If there are no related records restored, the promise resolves to `void`.
# Request Module Data Models
Source: https://docs.mercurjs.com/product/modules/requests/requests/request-data-model-reference
Reference documentation for the Request Module data models
## Relations Overview
| Relationship | Type | Description |
| -------------------------------- | ------------------- | ----------------------------------------- |
| Request → Member (Seller Module) | Read-only - has one | A request is submitted by a seller member |
| Request → User (User Module) | Read-only - has one | A request is reviewed by an admin user |
## Data Models
* [Request](#request)
## Request
This documentation provides a reference to the Request data model. It belongs to the Request Module.
[View source code](https://github.com/mercurjs/mercur/blob/main/packages/modules/requests/src/modules/requests/models/request.ts)
| Field | Type | Description |
| --------------- | ------------------------------------------------------------ | --------------------------------------------------------------------------------------------------------------------------------------- |
| `id` | `PrimaryKeyModifier` | The ID of the request. |
| `type` | `TextProperty` | The type of the request. Can be `product`, `product_collection`, `product_type`, `product_category`, `product_tag`, or `review_remove`. |
| `data` | `JSONProperty` | The request payload containing the proposed entity data. |
| `submitter_id` | `TextProperty` | The ID of the seller member who submitted the request. |
| `reviewer_id` | `TextProperty` | The ID of the admin user who reviewed the request. |
| `reviewer_note` | `TextProperty` | The admin's note explaining their decision. |
| `status` | `EnumProperty<["draft", "pending", "accepted", "rejected"]>` | The status of the request. Defaults to `pending`. |
# Request Module
Source: https://docs.mercurjs.com/product/modules/requests/requests/requests-concept
Learn about the Request Module and how to use it in your application
# Request Module
In this section of the documentation, you will find resources to learn more about the Request Module and how to use it in your application.
Mercur has seller request and approval features available out-of-the-box through the Request Module. A [module](https://docs.medusajs.com/learn/fundamentals/modules) is a standalone package that provides features for a single domain. Each of Mercur's marketplace features are placed in custom modules, such as this Request Module.
Learn more about why modules are isolated in [this documentation](https://docs.medusajs.com/learn/fundamentals/modules/isolation).
## Request Features
* **Seller Proposals**: Allow sellers to propose new marketplace resources (products, categories, collections, types, tags).
* **Admin Approval Workflow**: Require admin review and approval before seller-proposed resources go live.
* **Request Types**: Support multiple request types for different marketplace entities.
* **Review Notes**: Store admin explanations for approval or rejection decisions.
* **Status Tracking**: Track requests through draft, pending, accepted, and rejected statuses.
* **Automatic Resource Creation**: Automatically create the proposed resource when a request is accepted.
***
## How to Use the Request Module
In your Medusa application, you build flows around Commerce Modules. A flow is built as a [Workflow](https://docs.medusajs.com/learn/fundamentals/workflows), which is a special function composed of a series of steps that guarantees data consistency and reliable roll-back mechanism.
You can build custom workflows and steps. Mercur provides pre-built workflows for request operations in the `@mercurjs/requests` package.
For example, the `acceptProductRequestWorkflow`:
```ts title="src/workflows/requests/accept-product-request.ts" theme={null}
import { WorkflowResponse, createWorkflow } from "@medusajs/workflows-sdk"
import { AcceptRequestDTO, updateProductStatusStep } from "@mercurjs/framework"
import { updateRequestWorkflow } from "./update-request"
import { ProductStatus } from "@medusajs/framework/utils"
export const acceptProductRequestWorkflow = createWorkflow(
"accept-product-request",
function (input: AcceptRequestDTO) {
// Update the product status to published
const product = updateProductStatusStep({
id: input.data.product_id,
status: ProductStatus.PUBLISHED,
})
// Update the request status to accepted
updateRequestWorkflow.runAsStep({ input })
return new WorkflowResponse(product)
}
)
```
You can then execute the workflow in your custom API routes, scheduled jobs, or subscribers:
### API Route
```ts title="src/api/admin/requests/route.ts" theme={null}
import { MedusaRequest, MedusaResponse } from '@medusajs/framework'
import { ContainerRegistrationKeys } from '@medusajs/framework/utils'
export async function GET(
req: MedusaRequest,
res: MedusaResponse
): Promise {
const query = req.scope.resolve(ContainerRegistrationKeys.QUERY)
const { data: requests, metadata } = await query.graph({
entity: 'request',
fields: req.queryConfig.fields,
filters: {
...req.filterableFields,
status: req.filterableFields.status || { $ne: 'draft' }
},
pagination: req.queryConfig.pagination
})
res.json({
requests,
count: metadata?.count,
offset: metadata?.skip,
limit: metadata?.take
})
}
```
### Subscriber
```ts title="src/subscribers/product-request-to-create.ts" theme={null}
import { SubscriberArgs, SubscriberConfig } from "@medusajs/framework"
import {
CreateRequestDTO,
ProductRequestUpdatedEvent,
} from "@mercurjs/framework"
import { createProductRequestWorkflow } from "../workflows"
export default async function productRequestToCreateHandler({
event,
container,
}: SubscriberArgs<{
data: CreateRequestDTO
seller_id: string
}>) {
const input = event.data
await createProductRequestWorkflow.run({
container,
input,
})
}
export const config: SubscriberConfig = {
event: ProductRequestUpdatedEvent.TO_CREATE,
context: {
subscriberId: "product-request-to-create",
},
}
```
Learn more about workflows in [this documentation](https://docs.medusajs.com/learn/fundamentals/workflows).
***
# Concepts
In this document, you'll learn about the main concepts related to requests in Mercur.
## Request
A request represents a seller's proposal to create a new marketplace resource that requires admin approval. It is represented by the [Request data model](../data-model/request-module-data-reference#request).
A request holds information about:
* Request type (what kind of resource is being proposed)
* Request data (the payload containing the proposed resource details)
* Submitter ID (the seller member who created the request)
* Reviewer ID (the admin who reviewed the request)
* Reviewer note (admin's explanation of their decision)
* Status (current state in the approval workflow)
This enables controlled marketplace growth where admins can review and approve seller contributions.
***
## Request Types
The Request Module supports multiple request types for different marketplace entities:
### product
Seller proposes a new product to be added to the marketplace catalog.
**Data payload includes:**
* Product title, description, handle
* Product type, collection, category
* Variants, options, pricing
* Images and metadata
### product\_category
Seller proposes a new product category.
**Data payload includes:**
* Category name, description
* Parent category ID (for hierarchy)
* Handle for URL
### product\_collection
Seller proposes a new product collection.
**Data payload includes:**
* Collection title, handle
* Description and metadata
### product\_type
Seller proposes a new product type classification.
**Data payload includes:**
* Type value (e.g., "Electronics", "Apparel")
### product\_tag
Seller proposes a new product tag.
**Data payload includes:**
* Tag value (e.g., "Eco-Friendly", "Sale")
### review\_remove
Seller requests removal of an unfair or policy-violating review.
**Data payload includes:**
* Review ID to be removed
* Reason for removal request
### product\_update
Seller proposes updates to an existing product that requires approval.
**Data payload includes:**
* Product ID
* Fields to be updated
* New values
***
## Request Status Workflow
Requests follow a four-state workflow:
### draft
**Initial state** for requests being prepared.
* Not yet submitted for review
* Can be edited or deleted
* Not visible to admins
### pending
**Submitted for review**.
* Awaiting admin decision
* Visible in admin request queue
* Cannot be edited by seller
### accepted
**Approved by admin**.
* Resource is automatically created from request data
* Request marked as accepted
* Seller notified of approval
* Resource goes live in marketplace
### rejected
**Denied by admin**.
* Resource is not created
* Admin provides explanation in `reviewer_note`
* Seller notified of rejection
* Request archived
***
## Automatic Resource Creation
When a request is accepted, the appropriate workflow automatically creates the resource:
**Product Request → Product**
```ts theme={null}
acceptProductRequestWorkflow
→ updateProductStatusStep (set to PUBLISHED)
→ updateRequestWorkflow (mark as accepted)
```
**Category Request → ProductCategory**
```ts theme={null}
acceptProductCategoryRequestWorkflow
→ createProductCategoriesStep
→ updateRequestWorkflow
```
**Collection Request → ProductCollection**
```ts theme={null}
acceptProductCollectionRequestWorkflow
→ createCollectionsStep
→ updateRequestWorkflow
```
This ensures consistency between the request approval and resource creation.
***
## Event-Driven Architecture
The Request Module uses an event-driven pattern for resource creation:
1. **Request Created**: Seller creates request with status "pending"
2. **Admin Reviews**: Admin accepts the request
3. **Event Emitted**: `ProductRequestUpdatedEvent.TO_CREATE` emitted
4. **Subscriber Triggered**: `product-request-to-create` subscriber executes
5. **Workflow Runs**: `createProductRequestWorkflow` creates the resource
6. **Request Updated**: Request status updated to "accepted"
This decouples request approval from resource creation, allowing for flexible workflows and error handling.
***
## Configuration Integration
The Request Module integrates with the Configuration Module to control availability:
```ts theme={null}
const isEnabled = await checkConfigurationRule(
req.scope,
"product_request_enabled"
)
if (!isEnabled) {
return res.status(403).json({
message: "Product request functionality is disabled"
})
}
```
Marketplace admins can enable or disable the request system globally through configuration rules.
***
## Notification Integration
The Request Module triggers notifications for key events:
**For Admins:**
* New request created → Admin notification in feed
**For Sellers:**
* Request accepted → Success notification with resource details
* Request rejected → Rejection notification with admin's reason
This keeps both parties informed throughout the approval process.
***
## Use Cases
**1. Curated Marketplace**
Sellers propose new products; admins review for quality, accuracy, and policy compliance before approval.
**2. Category Expansion**
Sellers request new product categories when existing ones don't fit their products; admins approve to grow the catalog.
**3. Tag Management**
Sellers propose new tags for better product organization; admins approve to maintain tag consistency.
**4. Review Moderation**
Sellers request removal of unfair reviews; admins review both sides and make final decision.
**5. Product Updates**
In strict marketplaces, even product edits require approval to maintain quality standards.
**6. Seller Onboarding**
New seller registration goes through request approval before account activation.
# Request Module Links
Source: https://docs.mercurjs.com/product/modules/requests/requests/requests-links
Module links for the Request Module
# Links between Request Module and Other Modules
This document showcases the module links defined between the Request Module and other Commerce Modules.
## Summary
The Request Module has the following links to other modules:
| First Data Model | Second Data Model | Type | Description |
| ---------------- | ----------------- | -------------------- | --------------------------------------------------------------------------- |
| Seller | Request | Stored - one-to-many | Associates a seller with their submitted requests for marketplace resources |
***
## Seller Module
Mercur defines a link between the Seller Module's `Seller` data model and the Request Module's `Request` data model. This allows sellers to submit requests for creating new marketplace resources (products, categories, collections, etc.) that require admin approval.
### Retrieve with Query
To retrieve the requests of a seller with Query, pass `request.*` in `fields`:
```ts theme={null}
const { data: sellers } = await query.graph({
entity: "seller",
fields: [
"*",
"request.*",
],
})
// sellers[0].request
```
```ts theme={null}
import { useQueryGraphStep } from "@medusajs/medusa/core-flows"
// ...
const { data: sellers } = useQueryGraphStep({
entity: "seller",
fields: [
"*",
"request.*",
],
})
// sellers[0].request
```
### Manage with Link
To manage the requests of a seller, use Link:
```ts theme={null}
// ...
await link.create({
seller: {
seller_id: "sel_123",
},
request: {
request_id: "req_123",
},
})
```
```ts theme={null}
import { createRemoteLinkStep } from "@medusajs/medusa/core-flows"
// ...
createRemoteLinkStep({
seller: {
seller_id: "sel_123",
},
request: {
request_id: "req_123",
},
})
```
# Request Module Service Reference
Source: https://docs.mercurjs.com/product/modules/requests/requests/requests-services
Reference documentation for the Request Module service methods
# IRequestModuleService Reference
This section of the documentation provides a reference to the `IRequestModuleService` interface's methods. This is the interface developers use to use the functionalities provided by the Request Module.
You should only use the methods in this reference when implementing complex customizations. For common cases, check out available workflows instead.
The main service interface for the Request Module.
## Methods
* [createRequests](#createrequests)
* [updateRequests](#updaterequests)
* [deleteRequests](#deleterequests)
* [retrieveRequest](#retrieverequest)
* [listRequests](#listrequests)
* [listAndCountRequests](#listandcountrequests)
* [softDeleteRequests](#softdeleterequests)
* [restoreRequests](#restorerequests)
***
# createRequests
This section provides a reference to the `createRequests` method. This belongs to the Request Module.
## createRequests(data, sharedContext?): Promise\
This method creates requests.
### Example
```ts theme={null}
const requests = await requestModuleService.createRequests([
{
type: "product",
submitter_id: "mem_123",
data: {
title: "New Product",
description: "Product description",
},
status: "pending",
},
{
type: "product_category",
submitter_id: "mem_123",
data: {
name: "Electronics",
parent_category_id: null,
},
},
])
```
### Parameters
The requests to be created.
The type of the request. Can be `product`, `product_collection`, `product_type`, `product_category`, `product_tag`, or `review_remove`.
The ID of the seller member who submitted the request.
The request payload containing the proposed entity data.
The status of the request.
The ID of the admin user who reviewed the request.
The admin's note explaining their decision.
A context used to share resources, such as transaction manager, between the application and the module.
### Returns
The created requests.
## createRequests(data, sharedContext?): Promise\
This method creates a request.
### Example
```ts theme={null}
const request = await requestModuleService.createRequests({
type: "product",
submitter_id: "mem_123",
data: {
title: "New Product",
description: "Product description",
},
status: "pending",
})
```
### Parameters
The request to be created.
The type of the request. Can be `product`, `product_collection`, `product_type`, `product_category`, `product_tag`, or `review_remove`.
The ID of the seller member who submitted the request.
The request payload containing the proposed entity data.
The status of the request.
The ID of the admin user who reviewed the request.
The admin's note explaining their decision.
A context used to share resources, such as transaction manager, between the application and the module.
### Returns
The created request.
***
# updateRequests
This section provides a reference to the `updateRequests` method. This belongs to the Request Module.
## updateRequests(id, data, sharedContext?): Promise\
This method updates an existing request.
### Example
Accepting a request:
```ts theme={null}
const request = await requestModuleService.updateRequests("req_123", {
reviewer_id: "user_123",
reviewer_note: "Looks good, approved",
status: "accepted",
})
```
Rejecting a request:
```ts theme={null}
const request = await requestModuleService.updateRequests("req_123", {
reviewer_id: "user_123",
reviewer_note: "Duplicate product",
status: "rejected",
})
```
### Parameters
The ID of the request.
The attributes to update in the request.
The ID of the admin user who reviewed the request.
The admin's note explaining their decision.
The status of the request.
A context used to share resources, such as transaction manager, between the application and the module.
### Returns
The updated request.
The ID of the request.
The type of the request.
The request payload containing the proposed entity data.
The ID of the seller member who submitted the request.
The ID of the admin user who reviewed the request.
The admin's note explaining their decision.
The status of the request.
The created date of the request.
The updated date of the request.
***
# deleteRequests
This section provides a reference to the `deleteRequests` method. This belongs to the Request Module.
## deleteRequests(ids, sharedContext?): Promise\
This method deletes requests by their IDs.
### Example
```ts theme={null}
await requestModuleService.deleteRequests(["req_123", "req_321"])
```
### Parameters
The IDs of the requests.
A context used to share resources, such as transaction manager, between the application and the module.
### Returns
Resolves when the requests are deleted successfully.
## deleteRequests(id, sharedContext?): Promise\
This method deletes a request by its ID.
### Example
```ts theme={null}
await requestModuleService.deleteRequests("req_123")
```
### Parameters
The ID of the request.
A context used to share resources, such as transaction manager, between the application and the module.
### Returns
Resolves when the request is deleted successfully.
***
# retrieveRequest
This section provides a reference to the `retrieveRequest` method. This belongs to the Request Module.
This method retrieves a request by its ID.
## Example
```ts theme={null}
const request = await requestModuleService.retrieveRequest("req_123")
```
## Parameters
The ID of the request.
The configurations determining how the request is retrieved.
An array of strings, each being attribute names of the entity to retrieve in the result.
A number indicating the number of records to skip before retrieving the results.
A number indicating the number of records to return in the result.
An array of strings, each being relation names of the entity to retrieve in the result. Use Query to retrieve linked submitter or reviewer data.
An object used to specify how to sort the returned records.
A boolean indicating whether deleted records should also be retrieved as part of the result.
A context used to share resources, such as transaction manager, between the application and the module.
## Returns
The retrieved request.
The ID of the request.
The type of the request.
The request payload containing the proposed entity data.
The ID of the seller member who submitted the request.
The ID of the admin user who reviewed the request.
The admin's note explaining their decision.
The status of the request.
The created date of the request.
The updated date of the request.
***
# listRequests
This section provides a reference to the `listRequests` method. This belongs to the Request Module.
This method retrieves a paginated list of requests based on optional filters and configuration.
## Example
To retrieve pending requests:
```ts theme={null}
const requests = await requestModuleService.listRequests({
status: "pending",
})
```
To retrieve requests by type:
```ts theme={null}
const requests = await requestModuleService.listRequests({
type: "product",
})
```
To retrieve requests from a specific seller:
```ts theme={null}
const requests = await requestModuleService.listRequests({
submitter_id: "mem_123",
})
```
By default, only the first `15` records are retrieved. You can control pagination:
```ts theme={null}
const requests = await requestModuleService.listRequests(
{
status: "pending",
},
{
take: 20,
skip: 2,
}
)
```
## Parameters
The filters to apply on the retrieved requests.
The IDs to filter the requests by.
Filter requests by their types.
Filter requests by their submitter IDs.
Filter requests by their reviewer IDs.
Filter requests by their status.
The configurations determining how the request is retrieved.
An array of strings, each being attribute names of the entity to retrieve in the result.
A number indicating the number of records to skip before retrieving the results.
A number indicating the number of records to return in the result.
An array of strings, each being relation names of the entity to retrieve in the result.
An object used to specify how to sort the returned records.
A boolean indicating whether deleted records should also be retrieved as part of the result.
A context used to share resources, such as transaction manager, between the application and the module.
## Returns
The list of requests.
***
# listAndCountRequests
This section provides a reference to the `listAndCountRequests` method. This belongs to the Request Module.
This method retrieves a paginated list of requests along with the total count of available requests satisfying the provided filters.
## Example
To retrieve pending requests with count:
```ts theme={null}
const [requests, count] = await requestModuleService.listAndCountRequests({
status: "pending",
})
```
By default, only the first `15` records are retrieved. You can control pagination:
```ts theme={null}
const [requests, count] = await requestModuleService.listAndCountRequests(
{
type: "product",
status: "pending",
},
{
take: 20,
skip: 2,
}
)
```
## Parameters
The filters to apply on the retrieved requests.
The IDs to filter the requests by.
Filter requests by their types.
Filter requests by their submitter IDs.
Filter requests by their reviewer IDs.
Filter requests by their status.
The configurations determining how the request is retrieved.
An array of strings, each being attribute names of the entity to retrieve in the result.
A number indicating the number of records to skip before retrieving the results.
A number indicating the number of records to return in the result.
An array of strings, each being relation names of the entity to retrieve in the result.
An object used to specify how to sort the returned records.
A boolean indicating whether deleted records should also be retrieved as part of the result.
A context used to share resources, such as transaction manager, between the application and the module.
## Returns
The list of requests along with their total count.
***
# softDeleteRequests
This section provides a reference to the `softDeleteRequests` method. This belongs to the Request Module.
This method soft deletes requests by their IDs.
## Example
```ts theme={null}
await requestModuleService.softDeleteRequests([
"req_123",
"req_321",
])
```
## Parameters
The IDs of the requests.
An object that is used to specify an entity's related entities that should be soft-deleted when the main entity is soft-deleted.
A context used to share resources, such as transaction manager, between the application and the module.
## Returns
An object that includes the IDs of related records that were also soft deleted. If there are no related records, the promise resolves to `void`.
***
# restoreRequests
This section provides a reference to the `restoreRequests` method. This belongs to the Request Module.
This method restores soft deleted requests by their IDs.
## Example
```ts theme={null}
await requestModuleService.restoreRequests(["req_123", "req_321"])
```
## Parameters
The IDs of the requests.
Configurations determining which relations to restore along with each of the request.
A context used to share resources, such as transaction manager, between the application and the module.
## Returns
An object that includes the IDs of related records that were restored. If there are no related records restored, the promise resolves to `void`.
# Review Module Data Models
Source: https://docs.mercurjs.com/product/modules/reviews/reviews/review-data-model-reference
Reference documentation for the Review Module data models
## Relations Overview
| Relationship | Type | Description |
| ----------------------------------- | ------------------- | --------------------------------- |
| Review → Product (Product Module) | Read-only - has one | A review can reference a product |
| Review → Seller (Seller Module) | Read-only - has one | A review can reference a seller |
| Review → Customer (Customer Module) | Read-only - has one | A review is created by a customer |
## Data Models
* [Review](#review)
## Review
This documentation provides a reference to the Review data model. It belongs to the Review Module.
[View source code](https://github.com/mercurjs/mercur/blob/main/packages/modules/reviews/src/modules/reviews/models/review.ts)
| Field | Type | Description |
| --------------- | ------------------------------------- | ---------------------------------------------------------------- |
| `id` | `PrimaryKeyModifier` | The ID of the review. |
| `reference` | `EnumProperty<["product", "seller"]>` | The type of entity being reviewed. Can be `product` or `seller`. |
| `rating` | `NumberProperty` | The rating value of the review (1-5). |
| `customer_note` | `TextProperty` | The customer's written review comment. |
| `seller_note` | `TextProperty` | The seller's response to the review. |
# Review Module Links
Source: https://docs.mercurjs.com/product/modules/reviews/reviews/review-links
Module links for the Review Module
# Links between Review Module and Other Modules
This document showcases the module links defined between the Review Module and other Commerce Modules.
## Summary
The Review Module has the following links to other modules:
| First Data Model | Second Data Model | Type | Description |
| ---------------- | ----------------- | -------------------- | -------------------------------------------------- |
| Customer | Review | Stored - one-to-many | Associates a customer with their submitted reviews |
| Order | Review | Stored - one-to-many | Associates an order with its reviews |
| Product | Review | Stored - one-to-many | Associates a product with its reviews |
| Seller | Review | Stored - one-to-many | Associates a seller with reviews about them |
***
## Customer Module
Mercur defines a link between the Customer Module's `Customer` data model and the Review Module's `Review` data model. This allows tracking all reviews submitted by a specific customer.
### Retrieve with Query
To retrieve the reviews of a customer with Query, pass `review.*` in `fields`:
```ts theme={null}
const { data: customers } = await query.graph({
entity: "customer",
fields: [
"*",
"review.*",
],
})
// customers[0].review
```
```ts theme={null}
import { useQueryGraphStep } from "@medusajs/medusa/core-flows"
// ...
const { data: customers } = useQueryGraphStep({
entity: "customer",
fields: [
"*",
"review.*",
],
})
// customers[0].review
```
### Manage with Link
To manage the reviews of a customer, use Link:
```ts theme={null}
import { Modules } from "@medusajs/framework/utils"
// ...
await link.create({
[Modules.CUSTOMER]: {
customer_id: "cus_123",
},
review: {
review_id: "rev_123",
},
})
```
```ts theme={null}
import { createRemoteLinkStep } from "@medusajs/medusa/core-flows"
// ...
createRemoteLinkStep({
[Modules.CUSTOMER]: {
customer_id: "cus_123",
},
review: {
review_id: "rev_123",
},
})
```
***
## Order Module
Mercur defines a link between the Order Module's `Order` data model and the Review Module's `Review` data model. This ensures customers can only review products or sellers from orders they've actually purchased.
### Retrieve with Query
To retrieve the reviews of an order with Query, pass `review.*` in `fields`:
```ts theme={null}
const { data: orders } = await query.graph({
entity: "order",
fields: [
"*",
"review.*",
],
})
// orders[0].review
```
```ts theme={null}
import { useQueryGraphStep } from "@medusajs/medusa/core-flows"
// ...
const { data: orders } = useQueryGraphStep({
entity: "order",
fields: [
"*",
"review.*",
],
})
// orders[0].review
```
### Manage with Link
To manage the reviews of an order, use Link:
```ts theme={null}
import { Modules } from "@medusajs/framework/utils"
// ...
await link.create({
[Modules.ORDER]: {
order_id: "ord_123",
},
review: {
review_id: "rev_123",
},
})
```
```ts theme={null}
import { createRemoteLinkStep } from "@medusajs/medusa/core-flows"
// ...
createRemoteLinkStep({
[Modules.ORDER]: {
order_id: "ord_123",
},
review: {
review_id: "rev_123",
},
})
```
***
## Product Module
Mercur defines a link between the Product Module's `Product` data model and the Review Module's `Review` data model. This allows products to have multiple customer reviews for ratings and feedback.
### Retrieve with Query
To retrieve the reviews of a product with Query, pass `review.*` in `fields`:
```ts theme={null}
const { data: products } = await query.graph({
entity: "product",
fields: [
"*",
"review.*",
],
})
// products[0].review
```
```ts theme={null}
import { useQueryGraphStep } from "@medusajs/medusa/core-flows"
// ...
const { data: products } = useQueryGraphStep({
entity: "product",
fields: [
"*",
"review.*",
],
})
// products[0].review
```
### Manage with Link
To manage the reviews of a product, use Link:
```ts theme={null}
import { Modules } from "@medusajs/framework/utils"
// ...
await link.create({
[Modules.PRODUCT]: {
product_id: "prod_123",
},
review: {
review_id: "rev_123",
},
})
```
```ts theme={null}
import { createRemoteLinkStep } from "@medusajs/medusa/core-flows"
// ...
createRemoteLinkStep({
[Modules.PRODUCT]: {
product_id: "prod_123",
},
review: {
review_id: "rev_123",
},
})
```
***
## Seller Module
Mercur defines a link between the Seller Module's `Seller` data model and the Review Module's `Review` data model. This allows sellers to receive customer reviews about their service and performance.
### Retrieve with Query
To retrieve the reviews of a seller with Query, pass `review.*` in `fields`:
```ts theme={null}
const { data: sellers } = await query.graph({
entity: "seller",
fields: [
"*",
"review.*",
],
})
// sellers[0].review
```
```ts theme={null}
import { useQueryGraphStep } from "@medusajs/medusa/core-flows"
// ...
const { data: sellers } = useQueryGraphStep({
entity: "seller",
fields: [
"*",
"review.*",
],
})
// sellers[0].review
```
### Manage with Link
To manage the reviews of a seller, use Link:
```ts theme={null}
// ...
await link.create({
seller: {
seller_id: "sel_123",
},
review: {
review_id: "rev_123",
},
})
```
```ts theme={null}
import { createRemoteLinkStep } from "@medusajs/medusa/core-flows"
// ...
createRemoteLinkStep({
seller: {
seller_id: "sel_123",
},
review: {
review_id: "rev_123",
},
})
```
# Review Module Service Reference
Source: https://docs.mercurjs.com/product/modules/reviews/reviews/review-service
Reference documentation for the Review Module service methods
# IReviewModuleService Reference
This section of the documentation provides a reference to the `IReviewModuleService` interface's methods. This is the interface developers use to use the functionalities provided by the Review Module.
You should only use the methods in this reference when implementing complex customizations. For common cases, check out available workflows instead.
The main service interface for the Review Module.
## Methods
* [createReviews](#createreviews)
* [updateReviews](#updatereviews)
* [deleteReviews](#deletereviews)
* [retrieveReview](#retrievereview)
* [listReviews](#listreviews)
* [listAndCountReviews](#listandcountreviews)
* [softDeleteReviews](#softdeletereviews)
* [restoreReviews](#restorereviews)
***
# createReviews
This section provides a reference to the `createReviews` method. This belongs to the Review Module.
## createReviews(data, sharedContext?): Promise\
This method creates reviews.
### Example
Creating product reviews:
```ts theme={null}
const reviews = await reviewModuleService.createReviews([
{
order_id: "ord_123",
reference: "product",
reference_id: "prod_123",
rating: 5,
customer_note: "Excellent product!",
customer_id: "cus_123",
},
])
```
Creating seller reviews:
```ts theme={null}
const reviews = await reviewModuleService.createReviews([
{
order_id: "ord_123",
reference: "seller",
reference_id: "sel_123",
rating: 4,
customer_note: "Good service",
customer_id: "cus_123",
},
])
```
### Parameters
The reviews to be created.
The ID of the order this review is associated with.
The type of entity being reviewed.
The ID of the entity being reviewed (product ID or seller ID).
The rating value (1-5).
The customer's written review comment.
The ID of the customer who created the review.
A context used to share resources, such as transaction manager, between the application and the module.
### Returns
The created reviews.
## createReviews(data, sharedContext?): Promise\
This method creates a review.
### Example
```ts theme={null}
const review = await reviewModuleService.createReviews({
order_id: "ord_123",
reference: "product",
reference_id: "prod_123",
rating: 5,
customer_note: "Excellent product!",
customer_id: "cus_123",
})
```
### Parameters
The review to be created.
The ID of the order this review is associated with.
The type of entity being reviewed.
The ID of the entity being reviewed (product ID or seller ID).
The rating value (1-5).
The customer's written review comment.
The ID of the customer who created the review.
A context used to share resources, such as transaction manager, between the application and the module.
### Returns
The created review.
***
# updateReviews
This section provides a reference to the `updateReviews` method. This belongs to the Review Module.
## updateReviews(id, data, sharedContext?): Promise\
This method updates an existing review.
### Example
Customer updating their review:
```ts theme={null}
const review = await reviewModuleService.updateReviews("rev_123", {
rating: 4,
customer_note: "Updated my review",
})
```
Seller responding to a review:
```ts theme={null}
const review = await reviewModuleService.updateReviews("rev_123", {
seller_note: "Thank you for your feedback!",
})
```
### Parameters
The ID of the review.
The attributes to update in the review.
The rating value (1-5).
The customer's written review comment.
The seller's response to the review.
A context used to share resources, such as transaction manager, between the application and the module.
### Returns
The updated review.
The ID of the review.
The type of entity being reviewed.
The rating value (1-5).
The customer's written review comment.
The ID of the customer who created the review.
The seller's response to the review.
The created date of the review.
The updated date of the review.
***
# deleteReviews
This section provides a reference to the `deleteReviews` method. This belongs to the Review Module.
## deleteReviews(ids, sharedContext?): Promise\
This method deletes reviews by their IDs.
### Example
```ts theme={null}
await reviewModuleService.deleteReviews(["rev_123", "rev_321"])
```
### Parameters
The IDs of the reviews.
A context used to share resources, such as transaction manager, between the application and the module.
### Returns
Resolves when the reviews are deleted successfully.
## deleteReviews(id, sharedContext?): Promise\
This method deletes a review by its ID.
### Example
```ts theme={null}
await reviewModuleService.deleteReviews("rev_123")
```
### Parameters
The ID of the review.
A context used to share resources, such as transaction manager, between the application and the module.
### Returns
Resolves when the review is deleted successfully.
***
# retrieveReview
This section provides a reference to the `retrieveReview` method. This belongs to the Review Module.
This method retrieves a review by its ID.
## Example
```ts theme={null}
const review = await reviewModuleService.retrieveReview("rev_123")
```
## Parameters
The ID of the review.
The configurations determining how the review is retrieved.
An array of strings, each being attribute names of the entity to retrieve in the result.
A number indicating the number of records to skip before retrieving the results.
A number indicating the number of records to return in the result.
An array of strings, each being relation names of the entity to retrieve in the result. Use Query to retrieve linked customer, product, or seller data.
An object used to specify how to sort the returned records.
A boolean indicating whether deleted records should also be retrieved as part of the result.
A context used to share resources, such as transaction manager, between the application and the module.
## Returns
The retrieved review.
The ID of the review.
The type of entity being reviewed.
The rating value (1-5).
The customer's written review comment.
The ID of the customer who created the review.
The seller's response to the review.
The created date of the review.
The updated date of the review.
***
# listReviews
This section provides a reference to the `listReviews` method. This belongs to the Review Module.
This method retrieves a paginated list of reviews based on optional filters and configuration.
## Example
To retrieve product reviews:
```ts theme={null}
const reviews = await reviewModuleService.listReviews({
reference: "product",
reference_id: "prod_123",
})
```
To retrieve seller reviews:
```ts theme={null}
const reviews = await reviewModuleService.listReviews({
reference: "seller",
reference_id: "sel_123",
})
```
To retrieve a customer's reviews:
```ts theme={null}
const reviews = await reviewModuleService.listReviews({
customer_id: "cus_123",
})
```
By default, only the first `15` records are retrieved. You can control pagination:
```ts theme={null}
const reviews = await reviewModuleService.listReviews(
{
reference: "product",
reference_id: "prod_123",
},
{
take: 20,
skip: 2,
}
)
```
## Parameters
The filters to apply on the retrieved reviews.
The IDs to filter the reviews by.
Filter reviews by their reference type (`product` or `seller`).
Filter reviews by the ID of the entity being reviewed.
Filter reviews by their customer IDs.
Filter reviews by their rating values.
The configurations determining how the review is retrieved.
An array of strings, each being attribute names of the entity to retrieve in the result.
A number indicating the number of records to skip before retrieving the results.
A number indicating the number of records to return in the result.
An array of strings, each being relation names of the entity to retrieve in the result.
An object used to specify how to sort the returned records.
A boolean indicating whether deleted records should also be retrieved as part of the result.
A context used to share resources, such as transaction manager, between the application and the module.
## Returns
The list of reviews.
***
# listAndCountReviews
This section provides a reference to the `listAndCountReviews` method. This belongs to the Review Module.
This method retrieves a paginated list of reviews along with the total count of available reviews satisfying the provided filters.
## Example
To retrieve product reviews with count:
```ts theme={null}
const [reviews, count] = await reviewModuleService.listAndCountReviews({
reference: "product",
reference_id: "prod_123",
})
```
To retrieve 5-star reviews:
```ts theme={null}
const [reviews, count] = await reviewModuleService.listAndCountReviews({
rating: 5,
})
```
By default, only the first `15` records are retrieved. You can control pagination:
```ts theme={null}
const [reviews, count] = await reviewModuleService.listAndCountReviews(
{
customer_id: "cus_123",
},
{
take: 20,
skip: 2,
}
)
```
## Parameters
The filters to apply on the retrieved reviews.
The IDs to filter the reviews by.
Filter reviews by their reference type (`product` or `seller`).
Filter reviews by the ID of the entity being reviewed.
Filter reviews by their customer IDs.
Filter reviews by their rating values.
The configurations determining how the review is retrieved.
An array of strings, each being attribute names of the entity to retrieve in the result.
A number indicating the number of records to skip before retrieving the results.
A number indicating the number of records to return in the result.
An array of strings, each being relation names of the entity to retrieve in the result.
An object used to specify how to sort the returned records.
A boolean indicating whether deleted records should also be retrieved as part of the result.
A context used to share resources, such as transaction manager, between the application and the module.
## Returns
The list of reviews along with their total count.
***
# softDeleteReviews
This section provides a reference to the `softDeleteReviews` method. This belongs to the Review Module.
This method soft deletes reviews by their IDs.
## Example
```ts theme={null}
await reviewModuleService.softDeleteReviews([
"rev_123",
"rev_321",
])
```
## Parameters
The IDs of the reviews.
An object that is used to specify an entity's related entities that should be soft-deleted when the main entity is soft-deleted.
A context used to share resources, such as transaction manager, between the application and the module.
## Returns
An object that includes the IDs of related records that were also soft deleted. If there are no related records, the promise resolves to `void`.
***
# restoreReviews
This section provides a reference to the `restoreReviews` method. This belongs to the Review Module.
This method restores soft deleted reviews by their IDs.
## Example
```ts theme={null}
await reviewModuleService.restoreReviews(["rev_123", "rev_321"])
```
## Parameters
The IDs of the reviews.
Configurations determining which relations to restore along with each of the review.
A context used to share resources, such as transaction manager, between the application and the module.
## Returns
An object that includes the IDs of related records that were restored. If there are no related records restored, the promise resolves to `void`.
# Review Module
Source: https://docs.mercurjs.com/product/modules/reviews/reviews/reviews-concept
Learn about the Review Module and how to use it in your application
# Review Module
In this section of the documentation, you will find resources to learn more about the Review Module and how to use it in your application.
Mercur has product and seller review features available out-of-the-box through the Review Module. A [module](https://docs.medusajs.com/learn/fundamentals/modules) is a standalone package that provides features for a single domain. Each of Mercur's marketplace features are placed in custom modules, such as this Review Module.
Learn more about why modules are isolated in [this documentation](https://docs.medusajs.com/learn/fundamentals/modules/isolation).
## Review Features
* **Dual Review Types**: Support reviews for both products and sellers using a single unified system.
* **Rating System**: 1-5 star rating system for quantitative feedback.
* **Customer Notes**: Allow customers to write detailed review comments.
* **Seller Responses**: Enable sellers to respond to reviews about their products or service.
* **Order Verification**: Link reviews to orders to ensure only verified purchasers can review.
* **Review Removal Requests**: Allow sellers to request removal of unfair reviews through the request system.
***
## How to Use the Review Module
In your Medusa application, you build flows around Commerce Modules. A flow is built as a [Workflow](https://docs.medusajs.com/learn/fundamentals/workflows), which is a special function composed of a series of steps that guarantees data consistency and reliable roll-back mechanism.
You can build custom workflows and steps. Mercur provides pre-built workflows for review operations in the `@mercurjs/reviews` package.
For example, the `createReviewWorkflow`:
```ts title="src/workflows/review/create-review.ts" theme={null}
import { Modules } from "@medusajs/framework/utils"
import {
WorkflowResponse,
createHook,
createWorkflow,
transform,
} from "@medusajs/framework/workflows-sdk"
import {
createRemoteLinkStep,
emitEventStep,
} from "@medusajs/medusa/core-flows"
import { AlgoliaEvents, CreateReviewDTO } from "@mercurjs/framework"
import { REVIEW_MODULE } from "../../../modules/reviews"
import { createReviewStep, validateReviewStep } from "../steps"
const SELLER_MODULE = "seller"
export const createReviewWorkflow = createWorkflow(
{
name: "create-review",
},
function (input: CreateReviewDTO) {
// Validate review data
validateReviewStep(input)
// Create the review
const review = createReviewStep(input)
// Create appropriate module link based on reference type
const link = transform({ input, review }, ({ input, review }) => {
return input.reference === "product"
? [
{
[Modules.PRODUCT]: {
product_id: input.reference_id,
},
[REVIEW_MODULE]: {
review_id: review.id,
},
},
]
: [
{
[SELLER_MODULE]: {
seller_id: input.reference_id,
},
[REVIEW_MODULE]: {
review_id: review.id,
},
},
]
})
createRemoteLinkStep(link)
// Emit event for search engine reindexing
emitEventStep({
eventName: AlgoliaEvents.REVIEW_CHANGED,
data: { review },
})
// Emit workflow hook
const reviewCreatedHook = createHook("reviewCreated", {
review_id: review.id,
})
return new WorkflowResponse(review, {
hooks: [reviewCreatedHook],
})
}
)
```
You can then execute the workflow in your custom API routes:
### API Route
```ts title="src/api/store/reviews/route.ts" theme={null}
import {
AuthenticatedMedusaRequest,
MedusaResponse,
} from "@medusajs/framework"
import { ContainerRegistrationKeys } from "@medusajs/framework/utils"
import { createReviewWorkflow } from "../../../workflows/review/workflows"
export const POST = async (
req: AuthenticatedMedusaRequest,
res: MedusaResponse
) => {
// Execute the createReviewWorkflow
const { result } = await createReviewWorkflow.run({
container: req.scope,
input: {
...req.validatedBody,
customer_id: req.auth_context.actor_id,
},
})
const query = req.scope.resolve(ContainerRegistrationKeys.QUERY)
const {
data: [review],
} = await query.graph({
entity: "review",
fields: req.queryConfig.fields,
filters: {
id: result.id,
},
})
res.status(201).json({ review })
}
```
Learn more about workflows in [this documentation](https://docs.medusajs.com/learn/fundamentals/workflows).
***
# Concepts
In this document, you'll learn about the main concepts related to reviews in Mercur.
## Review
A review represents customer feedback about a product or seller. It is represented by the [Review data model](../data-model/review-module-data-reference#review).
A review holds information about:
* Reference type (product or seller)
* Rating value (1-5)
* Customer note (written review comment)
* Customer ID (who wrote the review)
* Seller note (seller's response to the review)
* Created and updated timestamps
This enables a two-way feedback system where customers can share experiences and sellers can engage with feedback.
***
## Dual Reference System
The Review Module uses a single data model to handle two types of reviews:
### Product Reviews
**Reference**: `product`\
**Reference ID**: Product ID\
**Purpose**: Rate and review specific products
Customers can review:
* Product quality
* Accuracy of description
* Value for money
* Overall satisfaction
Product reviews help other customers make informed purchase decisions and provide sellers with product feedback.
### Seller Reviews
**Reference**: `seller`\
**Reference ID**: Seller ID\
**Purpose**: Rate and review seller service
Customers can review:
* Shipping speed
* Communication quality
* Packaging quality
* Overall seller experience
Seller reviews build marketplace trust and help customers choose reliable vendors.
***
## Rating System
Reviews use a 1-5 star rating system:
* **5 stars**: Excellent
* **4 stars**: Good
* **3 stars**: Average
* **2 stars**: Below Average
* **1 star**: Poor
The `rating` field stores the numeric value (1-5). Marketplaces can calculate:
* Average ratings per product/seller
* Rating distributions (e.g., "80% 5-star reviews")
* Trending ratings over time
***
## Customer Notes
The `customer_note` field allows customers to write detailed review comments (up to 300 characters in typical implementations).
This provides qualitative feedback beyond the numeric rating:
* Specific product details
* Use case descriptions
* Pros and cons
* Recommendations
Customer notes are displayed publicly to help other shoppers.
***
## Seller Responses
The `seller_note` field allows sellers to respond to reviews:
**Use Cases:**
* Thank customers for positive reviews
* Address concerns in negative reviews
* Provide additional product information
* Offer solutions to problems
Seller responses demonstrate:
* Customer service quality
* Responsiveness
* Professionalism
* Commitment to customer satisfaction
This two-way communication builds trust and shows sellers actively engage with feedback.
***
## Order Verification
Reviews are linked to orders through module links, ensuring:
* Only verified purchasers can review
* Customers can only review products/sellers they've bought from
* One review per customer per product/seller per order
* Review authenticity is guaranteed
This prevents fake reviews and maintains marketplace integrity.
***
## Review Removal System
Sellers can request review removal through the Request Module when they believe a review:
* Violates marketplace policies
* Contains inappropriate content
* Is fraudulent or fake
* Is unfair or inaccurate
**Process:**
1. Seller creates `review_remove` request with review ID and reason
2. Admin reviews the request and both the original review
3. If approved: `RemoveReviewRequestUpdatedEvent.REMOVED` is emitted
4. Subscriber triggers `deleteReviewWorkflow`
5. Review is deleted from the system
This provides a dispute resolution mechanism while maintaining review integrity.
***
## Search Engine Integration
When reviews are created or updated, the workflow emits `AlgoliaEvents.REVIEW_CHANGED`:
```ts theme={null}
emitEventStep({
eventName: AlgoliaEvents.REVIEW_CHANGED,
data: { review },
})
```
This triggers:
* Product reindexing with updated average rating
* Seller profile reindexing with updated rating
* Search results updated with current ratings
Keeping search indexes synchronized ensures customers always see accurate ratings.
***
## Use Cases
**1. Product Feedback**
Customer purchases a product, receives it, and leaves a 5-star review praising quality.
**2. Seller Service Review**
Customer reviews seller's fast shipping and excellent communication with 4 stars.
**3. Seller Response**
Seller receives 3-star review, responds professionally addressing the customer's concern and offering a solution.
**4. Review Removal**
Seller receives unfair 1-star review from competitor, requests removal, admin investigates and approves removal.
**5. Average Rating Display**
Marketplace calculates and displays average rating (4.7/5 from 234 reviews) on product pages.
**6. Verified Purchase Badge**
Reviews linked to orders display "Verified Purchase" badge, increasing trust.
# Core commerce modules
Source: https://docs.mercurjs.com/product/core-commerce-modules
Learn how Mercur builds on Medusa’s core commerce modules
# Core commerce modules
Mercur is built on top of **Medusa’s core commerce modules**.\
These modules provide the foundational commerce primitives used in every Mercur marketplace: products, pricing, carts, orders, customers, payments, fulfillment, inventory, and more.
Mercur does **not replace** these modules.\
Instead, it creates additional marketplace domain logic - such as sellers, commissions, order splitting, payouts, requests, reviews, and vendor-level operations.
Below is an overview of every Medusa core module, along with a short description and a reference link to the official Medusa documentation where you can learn more about each module.
***
Handles API key management and authentication for programmatic access.
Provides authentication flows, hashing utilities, and identity management.
Manages carts, line items, promotions, and total calculations. Used by Mercur for multi-vendor cart orchestration.
Defines currencies and formatting rules.
Stores customer profiles, addresses, and preferences.
Handles fulfillment providers and shipping. Mercur extends it with vendor-level fulfillment flows.
Controls stock levels, reservations, and inventory adjustments.
Manages orders, statuses, and returns. Mercur extends it with multi-seller order splitting logic.
Integrates payment providers and transaction flows. Used by Mercur for multi-vendor payments and payouts.
Defines pricing structures, price lists, and contextual price calculations.
Defines products, variants, options, and collections. Mercur adds seller ownership, moderation, and request flows.
Handles discounts, promotion rules, and coupon codes.
Manages regions, currencies, and tax settings for contextual pricing.
Supports product availability across multiple sales channels.
Defines physical or virtual locations where inventory is stored.
Stores global configuration and metadata for the storefront.
Manages tax rules and region-based tax calculations.
Handles internal user accounts. Mercur extends this with vendor roles and permissions.
***
By keeping all Medusa modules intact and fully accessible, Mercur ensures developers retain complete control over both the **commerce layer** and the **marketplace domain layer**.
***
# Core Infrastructure Modules
Source: https://docs.mercurjs.com/product/core-infrastructure-modules
Learn how Mercur uses Medusa’s core infrastructure modules for events, files, notifications, caching, workflows, and more.
Mercur builds on top of **Medusa’s core infrastructure modules** to provide a scalable, event-driven, and extendable foundation for marketplace logic.
These modules provide the architectural capabilities that power Mercur’s internals:
* Event emission and subscribers
* Workflows and distributed transaction orchestration
* File storage (local or cloud)
* Notification pipelines (email, SMS, internal channels)
* Caching and performance
* Distributed locking
* Analytics
Mercur uses these modules exactly as Medusa designed them and layers marketplace-specific behaviors on top.
Below is a list of all Medusa core infrastructure modules.
***
Tracks system and user events (such as cart updates or order placements) and forwards them to analytics providers.
Provides high-performance caching for frequently accessed data. Supports Redis, Memcached, and custom providers.
Implements the publish/subscribe system used to emit events and run subscribers. Supports Local and Redis providers.
Handles file upload, retrieval, and storage. Used for assets such as product images. Supports Local and S3 providers.
Provides distributed locking to prevent race conditions during concurrent operations. Supports Redis and PostgreSQL providers.
Sends notifications through channels like email or SMS. Supports SendGrid, Resend, Slack, and Local providers.
Tracks and manages the execution of workflows and steps with strong consistency guarantees. Supports In-Memory and Redis engines.
***
# How Mercur Uses These Modules
Mercur relies on Medusa’s infrastructure layer to power marketplace-specific concerns:
* Event Module → seller actions, approval flows, requests, commissions
* Workflow Engine → multi-step processes like onboarding, payouts, order splitting
* File Module → seller product images, documents, attachments
* Caching Module → all cart-related operations
* Locking Module → concurrency protection for order splitting and inventory updates
* Notification Module → seller/admin notifications
* Analytics Module → seller performance and buyer activity tracking
By building on Medusa’s infrastructure modules, Mercur ensures performance, and full compatibility with the broader Medusa ecosystem - while letting you extend or swap providers as needed for your marketplace architecture.
***
# Framework
Source: https://docs.mercurjs.com/product/framework
Learn how Mercur builds on Medusa’s Framework to stay fully extensible and customizable.
# Framework
Mercur is built on top of the **Medusa Framework**, not just Medusa’s commerce modules.\
This is important because the Framework provides the low-level building blocks developers use to customize, extend, and orchestrate complex commerce applications.
Mercur was designed to **preserve 100% of Medusa’s extensibility** meaning every concept from Medusa’s Framework remains available:
* You can add modules
* Extend data models
* Build custom workflows
* Hook into events
* Define API routes
* Run scheduled jobs
* Link data across modules
* Package extensions into plugins
This ensures that Mercur remains open, transparent, and easy for teams to build on without losing the power of Medusa.
Below are the core Medusa Framework concepts Mercur is built on.
***
# Framework components
A globally accessible dependency container that stores all registered modules, services, workflows, and tools. Used across API routes, workflows, subscribers, jobs, and scripts.
Encapsulated domain units with their own data models, services, and logic. Mercur adds marketplace modules on top of Medusa’s module system.
Mechanism for linking data models across isolated modules while preserving module boundaries. Supports linking Mercur marketplace models to Medusa core models.
Database tables defined inside modules using Medusa’s Data Modeling Language (DML). Used throughout Mercur’s marketplace-specific modules.
File-based REST endpoints used to expose module and workflow logic to clients. Mercur uses this to define Storefront, Admin, and Vendor Panel APIs.
Durable, step-based, rollback-safe units of business logic. Mercur relies heavily on workflows for commissions, order splitting, payouts, onboarding, and more.
Event-driven architecture for reacting to operations (e.g., order.placed). Mercur uses subscribers for notifications, indexing, moderation, and vendor operations.
Cron-based or interval-based recurring jobs. Useful for background tasks such as syncing, cleanup, or analytics aggregation in Mercur.
Bundled, reusable packages containing modules, routes, workflows, jobs, links, subscribers, and more. Mercur itself is delivered as modular packages compatible with this system.
***
# Why this matters
Mercur extends Medusa and it does not constrain it.
Because Mercur keeps Medusa’s entire Framework intact:
* You can build custom modules the same way you would in Medusa.
* You can extend core marketplace logic using module links.
* You can add your own workflows into Mercur’s flows.
* You can hook into Mercur’s events with subscribers.
* You can introduce new API routes or extend existing ones.
* You can package your own marketplace extensions into plugins.
This means Mercur acts as a **native layer on top of Medusa**, not a closed system.
Everything Medusa can do, Mercur also can do.
And everything Mercur adds you can extend or replace same as Medusa core logic.
This makes Mercur suitable for custom marketplace architectures where long-term ownership and deep extensibility are required.
***
# Attribute Module
Source: https://docs.mercurjs.com/product/modules/b2c-core/attribute/attribute-concept
Learn about the Attribute Module and how to use it in your application
# Attribute Module
In this section of the documentation, you will find resources to learn more about the Attribute Module and how to use it in your application.
Mercur has product attribute related features available out-of-the-box through the Attribute Module. A [module](https://docs.medusajs.com/learn/fundamentals/modules) is a standalone package that provides features for a single domain. Each of Mercur's marketplace features are placed in custom modules, such as this Attribute Module.
Learn more about why modules are isolated in [this documentation](https://docs.medusajs.com/learn/fundamentals/modules/isolation).
## Attribute Features
* **Attribute Management**: Create and manage custom product attributes (e.g., Material, Size, Color, Condition) that can be applied to products.
* **Flexible Attribute Values**: Store actual values assigned to products and manage predefined possible values for dropdown/select attributes.
* **Category-Specific Attributes**: Associate attributes with product categories to define which attributes are applicable for products in each category.
* **Multiple UI Components**: Support for different attribute input types including select, multivalue, unit, toggle, textarea, and color picker.
* **Product Organization**: Link products to attribute values for enhanced filtering and search capabilities.
***
## How to Use the Attribute Module
In your Medusa application, you build flows around Commerce Modules. A flow is built as a [Workflow](https://docs.medusajs.com/learn/fundamentals/workflows), which is a special function composed of a series of steps that guarantees data consistency and reliable roll-back mechanism.
You can build custom workflows and steps. Mercur provides pre-built workflows for common attribute operations in the `@mercurjs/b2c-core` package.
For example, the `createAttributesWorkflow`:
```ts title="src/workflows/attribute/create-attributes.ts" theme={null}
import { LinkDefinition } from "@medusajs/framework/types"
import { Modules } from "@medusajs/framework/utils"
import {
WorkflowData,
WorkflowResponse,
createWorkflow,
transform,
when,
} from "@medusajs/framework/workflows-sdk"
import { createRemoteLinkStep } from "@medusajs/medusa/core-flows"
import { CreateAttributeDTO } from "@mercurjs/framework"
import { createAttributesStep } from "../steps/create-attributes"
export const createAttributesWorkflow = createWorkflow(
"create-attributes",
(input: WorkflowData<{ attributes: CreateAttributeDTO[] }>) => {
const attributesWithoutExternalRelations = transform(
input,
({ attributes }) => {
return attributes.map((attribute) => {
delete attribute.product_category_ids
return attribute
})
}
)
const createdAttributes = createAttributesStep(
attributesWithoutExternalRelations
)
const productCategoryLinks: LinkDefinition[] = transform(
{ input, createdAttributes },
({ input, createdAttributes }) => {
return createdAttributes
.map((attribute, idx) => {
const inputAttribute = input.attributes[idx]
return (
inputAttribute.product_category_ids?.map((productCategoryId) => ({
[Modules.PRODUCT]: {
product_category_id: productCategoryId,
},
attribute: {
attribute_id: attribute.id,
},
})) || []
)
})
.flat()
}
)
when({ productCategoryLinks }, ({ productCategoryLinks }) => {
return productCategoryLinks.length > 0
}).then(() => {
createRemoteLinkStep(productCategoryLinks)
})
return new WorkflowResponse(createdAttributes)
}
)
```
You can then execute the workflow in your custom API routes:
### API Route
```ts title="src/api/admin/attributes/route.ts" theme={null}
import { MedusaRequest, MedusaResponse } from '@medusajs/framework'
import { ContainerRegistrationKeys } from '@medusajs/framework/utils'
import { createAttributesWorkflow } from '../../../workflows/attribute/workflows'
export const POST = async (
req: MedusaRequest,
res: MedusaResponse
) => {
const query = req.scope.resolve(ContainerRegistrationKeys.QUERY)
// Execute the createAttributesWorkflow
const { result } = await createAttributesWorkflow(req.scope).run({
input: { attributes: [req.validatedBody] }
})
const {
data: [attribute]
} = await query.graph({
entity: 'attribute',
filters: {
id: result[0].id
},
...req.queryConfig
})
res.status(201).json({ attribute })
}
```
Learn more about workflows in [this documentation](https://docs.medusajs.com/learn/fundamentals/workflows).
***
# Concepts
In this document, you'll learn about the main concepts related to attributes in Mercur.
## Attribute
An attribute is a custom property that can be applied to products to provide additional product information and enable better filtering. It is represented by the [Attribute data model](../data-model/attribute-module-data-reference#attribute).
An attribute holds information about:
* The name and description of the attribute (e.g., "Material", "Size")
* A unique handle for programmatic access
* Whether it's required or filterable
* The UI component type for rendering (select, multivalue, unit, toggle, textarea, color\_picker)
* Predefined possible values
* Actual values assigned to products
Attributes can be associated with product categories to define which attributes are applicable for products in that category. For example, an "Electronics" category might have "Battery Life" and "Screen Size" attributes, while a "Clothing" category might have "Material" and "Size" attributes.
***
## Attribute Value
An attribute value, represented by the [AttributeValue](../data-model/attribute-module-data-reference#attributevalue) data model, is the actual value assigned to a specific product for a given attribute.
For example, if you have a "Material" attribute, one product might have an attribute value of "Cotton" while another has "Silk". These are the actual values stored per product, not the predefined list.
A product can have multiple attribute values, one for each attribute that applies to it.
***
## Attribute Possible Value
An attribute possible value, represented by the [AttributePossibleValue](../data-model/attribute-module-data-reference#attributepossiblevalue) data model, defines the predefined list of allowed values for an attribute.
This is particularly useful for attributes rendered as dropdowns or select inputs, where you want to provide a curated list of options to choose from.
For example, for a "Material" attribute, you might define possible values of:
* Cotton (rank: 1)
* Polyester (rank: 2)
* Silk (rank: 3)
The `rank` property determines the display order of these options in the UI.
***
## UI Component Types
Each attribute can specify a UI component type that determines how it should be rendered in the admin panel or storefront:
* **select**: Standard dropdown with single selection from predefined possible values
* **multivalue**: Multiple selection from predefined possible values
* **unit**: Numeric value with a unit of measurement (e.g., "10 kg", "15 cm")
* **toggle**: Boolean on/off switch
* **text\_area**: Multi-line text input for longer descriptions
* **color\_picker**: Color selection interface for color attributes
This flexibility allows marketplace administrators to create appropriate input experiences for different types of product information.
***
## Filterable Attributes
The `is_filterable` property on an attribute determines whether it should be used in product filtering and faceted search.
When enabled, the attribute values can be used to:
* Filter products in the storefront (e.g., "Show only Cotton products")
* Create faceted navigation (e.g., "Material: Cotton (23 products)")
* Power search engine filters (e.g., Algolia facets)
This is essential for creating rich product discovery experiences in the marketplace.
***
## Required Attributes
The `is_required` property on an attribute determines whether sellers must provide a value for this attribute when creating or editing products.
This is useful for enforcing data quality in the marketplace. For example, you might make "Condition" a required attribute for a second-hand marketplace to ensure all products have this information.
***
## Use Cases
**1. Enhanced Product Filtering**
Create rich filtering experiences by defining attributes like Size, Color, Material, and Condition.
**2. Category-Specific Properties**
Define different attributes for different product categories (e.g., "Battery Life" for electronics, "Fabric Type" for clothing).
**3. Dynamic Product Forms**
Use the `ui_component` property to automatically generate appropriate input fields in seller dashboards.
**4. Search Engine Integration**
Filterable attributes can be synced to search engines like Algolia for powerful faceted search.
**5. Data Quality Enforcement**
Use required attributes to ensure sellers provide essential product information.
# Attribute Module Links
Source: https://docs.mercurjs.com/product/modules/b2c-core/attribute/attribute-links
Module links for the Attribute Module
# Links between Attribute Module and Other Modules
This document showcases the module links defined between the Attribute Module and other Commerce Modules.
## Summary
The Attribute Module has the following links to other modules:
| First Data Model | Second Data Model | Type | Description |
| ---------------- | ----------------- | --------------------- | -------------------------------------------------------------- |
| Product | AttributeValue | Stored - many-to-many | Associates products with their attribute values |
| ProductCategory | Attribute | Stored - many-to-many | Associates product categories with their applicable attributes |
***
## Product Module
Mercur defines a link between the Product Module's `Product` data model and the Attribute Module's `AttributeValue` data model. This allows products to have multiple attribute values assigned to them (e.g., Material: "Cotton", Color: "Blue").
### Retrieve with Query
To retrieve the attribute values of a product with Query, pass `attribute_value_link.attribute_value.*` in `fields`:
```ts theme={null}
const { data: products } = await query.graph({
entity: "product",
fields: [
"*",
"attribute_value_link.attribute_value.*",
"attribute_value_link.attribute_value.attribute.*",
],
})
// products[0].attribute_value_link[0].attribute_value
// products[0].attribute_value_link[0].attribute_value.attribute
```
```ts theme={null}
import { useQueryGraphStep } from "@medusajs/medusa/core-flows"
// ...
const { data: products } = useQueryGraphStep({
entity: "product",
fields: [
"*",
"attribute_value_link.attribute_value.*",
"attribute_value_link.attribute_value.attribute.*",
],
})
// products[0].attribute_value_link[0].attribute_value
```
### Manage with Link
To manage the attribute values of a product, use Link:
```ts theme={null}
import { Modules } from "@medusajs/framework/utils"
// ...
await link.create({
[Modules.PRODUCT]: {
product_id: "prod_123",
},
attribute: {
attribute_value_id: "attr_val_123",
},
})
```
```ts theme={null}
import { createRemoteLinkStep } from "@medusajs/medusa/core-flows"
// ...
createRemoteLinkStep({
[Modules.PRODUCT]: {
product_id: "prod_123",
},
attribute: {
attribute_value_id: "attr_val_123",
},
})
```
***
## Product Module - Categories
Mercur defines a link between the Product Module's `ProductCategory` data model and the Attribute Module's `Attribute` data model. This allows product categories to define which attributes are applicable for products in that category (e.g., "Electronics" category might have "Battery Life" and "Screen Size" attributes).
### Retrieve with Query
To retrieve the attributes of a product category with Query, pass `attribute_link.attribute.*` in `fields`:
```ts theme={null}
const { data: categories } = await query.graph({
entity: "product_category",
fields: [
"*",
"attribute_link.attribute.*",
],
})
// categories[0].attribute_link[0].attribute
```
```ts theme={null}
import { useQueryGraphStep } from "@medusajs/medusa/core-flows"
// ...
const { data: categories } = useQueryGraphStep({
entity: "product_category",
fields: [
"*",
"attribute_link.attribute.*",
],
})
// categories[0].attribute_link[0].attribute
```
### Manage with Link
To manage the attributes of a product category, use Link:
```ts theme={null}
import { Modules } from "@medusajs/framework/utils"
// ...
await link.create({
[Modules.PRODUCT]: {
product_category_id: "pcat_123",
},
attribute: {
attribute_id: "attr_123",
},
})
```
```ts theme={null}
import { createRemoteLinkStep } from "@medusajs/medusa/core-flows"
// ...
createRemoteLinkStep({
[Modules.PRODUCT]: {
product_category_id: "pcat_123",
},
attribute: {
attribute_id: "attr_123",
},
})
```
# Attribute Module Data Models
Source: https://docs.mercurjs.com/product/modules/b2c-core/attribute/attributes-data-models-ref
Reference documentation for the Attribute Module data models
## Relations Overview
| Relationship | Type | Description |
| ---------------------------------- | ----------- | ------------------------------------- |
| Attribute → AttributeValue | One-to-Many | An attribute has many values |
| Attribute → AttributePossibleValue | One-to-Many | An attribute has many possible values |
## Data Models
* [Attribute](#attribute)
* [AttributeValue](#attributevalue)
* [AttributePossibleValue](#attributepossiblevalue)
## Attribute
This documentation provides a reference to the Attribute data model. It belongs to the Attribute Module.
[View source code](https://github.com/mercurjs/mercur/blob/main/packages/modules/b2c-core/src/modules/attribute/models/attribute.ts)
| Field | Type | Description |
| ----------------- | --------------------------------------------------------------------------------------- | ------------------------------------------------------------------------- |
| `id` | `PrimaryKeyModifier` | The ID of the attribute. |
| `name` | `TextProperty` | The name of the attribute |
| `description` | `TextProperty` | The description of the attribute |
| `is_required` | `BooleanProperty` | Whether the attribute is required. Defaults to `false`. |
| `is_filterable` | `BooleanProperty` | Whether the attribute is filterable. Defaults to `true`. |
| `handle` | `TextProperty` | The unique handle of the attribute |
| `ui_component` | `EnumProperty<["select", "multivalue", "unit", "toggle", "text_area", "color_picker"]>` | The UI component type for rendering the attribute. Defaults to `select`. |
| `metadata` | `JSONProperty` | Holds custom data in key-value pairs. |
| `values` | `HasMany` | The associated [AttributeValue](#attributevalue) records. |
| `possible_values` | `HasMany` | The associated [AttributePossibleValue](#attributepossiblevalue) records. |
## AttributeValue
This documentation provides a reference to the AttributeValue data model. It belongs to the Attribute Module.
[View source code](https://github.com/mercurjs/mercur/blob/main/packages/modules/b2c-core/src/modules/attribute/models/attribute-value.ts)
| Field | Type | Description |
| ----------- | -------------------------------- | --------------------------------------- |
| `id` | `PrimaryKeyModifier` | The ID of the attribute value. |
| `value` | `TextProperty` | The value of the attribute value |
| `rank` | `NumberProperty` | The rank of the attribute value |
| `metadata` | `JSONProperty` | Holds custom data in key-value pairs. |
| `attribute` | `BelongsTo` | The associated [Attribute](#attribute). |
## AttributePossibleValue
This documentation provides a reference to the AttributePossibleValue data model. It belongs to the Attribute Module.
[View source code](https://github.com/mercurjs/mercur/blob/main/packages/modules/b2c-core/src/modules/attribute/models/attribute-possible-value.ts)
| Field | Type | Description |
| ----------- | -------------------------------- | ----------------------------------------- |
| `id` | `PrimaryKeyModifier` | The ID of the attribute possible value. |
| `value` | `TextProperty` | The value of the attribute possible value |
| `rank` | `NumberProperty` | The rank of the attribute possible value |
| `metadata` | `JSONProperty` | Holds custom data in key-value pairs. |
| `attribute` | `BelongsTo` | The associated [Attribute](#attribute). |
# Attribute Module Service Reference
Source: https://docs.mercurjs.com/product/modules/b2c-core/attribute/attributes-services
Reference documentation for the Attribute Module service methods
# IAttributeModuleService Reference
This section of the documentation provides a reference to the `IAttributeModuleService` interface's methods. This is the interface developers use to use the functionalities provided by the Attribute Module.
You should only use the methods in this reference when implementing complex customizations. For common cases, check out available workflows instead.
The main service interface for the Attribute Module.
## Methods
* [createAttributes](#createattributes)
* [updateAttributes](#updateattributes)
* [deleteAttributes](#deleteattributes)
* [retrieveAttribute](#retrieveattribute)
* [listAttributes](#listattributes)
* [listAndCountAttributes](#listandcountattributes)
* [softDeleteAttributes](#softdeleteattributes)
* [restoreAttributes](#restoreattributes)
* [createAttributeValues](#createattributevalues)
* [updateAttributeValues](#updateattributevalues)
* [deleteAttributeValues](#deleteattributevalues)
* [retrieveAttributeValue](#retrieveattributevalue)
* [listAttributeValues](#listattributevalues)
* [listAndCountAttributeValues](#listandcountattributevalues)
* [softDeleteAttributeValues](#softdeleteattributevalues)
* [restoreAttributeValues](#restoreattributevalues)
* [createAttributePossibleValues](#createattributepossiblevalues)
* [updateAttributePossibleValues](#updateattributepossiblevalues)
* [deleteAttributePossibleValues](#deleteattributepossiblevalues)
* [retrieveAttributePossibleValue](#retrieveattributepossiblevalue)
* [listAttributePossibleValues](#listattributepossiblevalues)
* [listAndCountAttributePossibleValues](#listandcountattributepossiblevalues)
* [softDeleteAttributePossibleValues](#softdeleteattributepossiblevalues)
* [restoreAttributePossibleValues](#restoreattributepossiblevalues)
* [updateAttributeWithUpsertOrReplacePossibleValues](#updateattributewithupsertorreplacepossiblevalues)
***
# createAttributes
This section provides a reference to the `createAttributes` method. This belongs to the Attribute Module.
## createAttributes(data, sharedContext?): Promise\
This method creates attributes.
### Example
```ts theme={null}
const attributes = await attributeModuleService.createAttributes([
{
name: "Material",
handle: "material",
ui_component: "select",
is_filterable: true,
is_required: false,
possible_values: [
{ value: "Cotton", rank: 1 },
{ value: "Polyester", rank: 2 },
],
},
])
```
### Parameters
The attributes to be created.
The name of the attribute.
The description of the attribute.
The unique handle of the attribute.
Whether the attribute is filterable.
Whether the attribute is required.
The UI component type for rendering the attribute.
Holds custom data in key-value pairs.
The predefined possible values for the attribute.
The value of the attribute possible value.
The rank of the attribute possible value.
Holds custom data in key-value pairs.
The IDs of product categories to associate with this attribute.
A context used to share resources, such as transaction manager, between the application and the module.
### Returns
The created attributes.
## createAttributes(data, sharedContext?): Promise\
This method creates an attribute.
### Example
```ts theme={null}
const attribute = await attributeModuleService.createAttributes({
name: "Size",
handle: "size",
ui_component: "select",
is_filterable: true,
})
```
### Parameters
The attribute to be created.
The name of the attribute.
The description of the attribute.
The unique handle of the attribute.
Whether the attribute is filterable.
Whether the attribute is required.
The UI component type for rendering the attribute.
Holds custom data in key-value pairs.
The predefined possible values for the attribute.
The value of the attribute possible value.
The rank of the attribute possible value.
Holds custom data in key-value pairs.
The IDs of product categories to associate with this attribute.
A context used to share resources, such as transaction manager, between the application and the module.
### Returns
The created attribute.
***
# updateAttributeWithUpsertOrReplacePossibleValues
This section provides a reference to the `updateAttributeWithUpsertOrReplacePossibleValues` method. This belongs to the Attribute Module.
## updateAttributeWithUpsertOrReplacePossibleValues(input, sharedContext?): Promise\
This method updates an attribute and upserts or replaces its possible values in a single operation. If `id` is not provided for `possible_values` entries, it will lookup the database by `attributePossibleValue.value` to update or create accordingly.
### Example
```ts theme={null}
await attributeModuleService.updateAttributeWithUpsertOrReplacePossibleValues({
id: "attr_123",
name: "Updated Material",
possible_values: [
{ id: "attr_pos_val_1", value: "Cotton", rank: 1 },
{ value: "Silk", rank: 3 }, // Will be created
],
})
```
### Parameters
The attribute(s) to update with possible values to upsert.
The ID of the attribute to update.
The name of the attribute.
The description of the attribute.
The unique handle of the attribute.
Whether the attribute is filterable.
Whether the attribute is required.
Holds custom data in key-value pairs.
The possible values to upsert.
The ID of the existing possible value (for updates).
The value of the attribute possible value.
The rank of the attribute possible value.
Holds custom data in key-value pairs.
The ID of the attribute this value belongs to.
The product categories to associate with this attribute.
A context used to share resources, such as transaction manager, between the application and the module.
### Returns
Resolves when the attribute and its possible values are updated successfully.
***
# listAttributes
This section provides a reference to the `listAttributes` method. This belongs to the Attribute Module.
This method retrieves a paginated list of attributes based on optional filters and configuration.
## Example
To retrieve a list of attributes using their IDs:
```ts theme={null}
const attributes = await attributeModuleService.listAttributes({
id: ["attr_123", "attr_321"],
})
```
To retrieve filterable attributes:
```ts theme={null}
const attributes = await attributeModuleService.listAttributes({
is_filterable: true,
})
```
By default, only the first `15` records are retrieved. You can control pagination by specifying the `skip` and `take` properties of the `config` parameter:
```ts theme={null}
const attributes = await attributeModuleService.listAttributes(
{
id: ["attr_123", "attr_321"],
},
{
take: 20,
skip: 2,
}
)
```
## Parameters
The filters to apply on the retrieved attributes.
The IDs to filter the attributes by.
Filter attributes by their names.
Filter attributes by their handles.
Filter by whether attributes are filterable.
Filter by whether attributes are required.
Filter attributes by their UI component type.
The configurations determining how the attribute is retrieved. Its properties, such as `select` or `relations`, accept the attributes or relations associated with an attribute.
An array of strings, each being attribute names of the entity to retrieve in the result.
A number indicating the number of records to skip before retrieving the results.
A number indicating the number of records to return in the result.
An array of strings, each being relation names of the entity to retrieve in the result. For example, `["possible_values", "values"]`.
An object used to specify how to sort the returned records. Its keys are the names of attributes of the entity, and a key's value can either be `ASC` to sort retrieved records in an ascending order, or `DESC` to sort retrieved records in a descending order.
A boolean indicating whether deleted records should also be retrieved as part of the result.
A context used to share resources, such as transaction manager, between the application and the module.
## Returns
The list of attributes.
***
# retrieveAttribute
This section provides a reference to the `retrieveAttribute` method. This belongs to the Attribute Module.
This method retrieves an attribute by its ID.
## Example
```ts theme={null}
const attribute = await attributeModuleService.retrieveAttribute("attr_123")
```
To retrieve relationships:
```ts theme={null}
const attribute = await attributeModuleService.retrieveAttribute(
"attr_123",
{
relations: ["possible_values", "values"],
}
)
```
## Parameters
The ID of the attribute.
The configurations determining how the attribute is retrieved. Its properties, such as `select` or `relations`, accept the attributes or relations associated with an attribute.
An array of strings, each being attribute names of the entity to retrieve in the result.
A number indicating the number of records to skip before retrieving the results.
A number indicating the number of records to return in the result.
An array of strings, each being relation names of the entity to retrieve in the result. For example, `["possible_values", "values"]`.
An object used to specify how to sort the returned records.
A boolean indicating whether deleted records should also be retrieved as part of the result.
A context used to share resources, such as transaction manager, between the application and the module.
## Returns
The retrieved attribute.
The ID of the attribute.
The name of the attribute.
The description of the attribute.
The unique handle of the attribute.
Whether the attribute is filterable.
Whether the attribute is required.
The UI component type for rendering the attribute.
Holds custom data in key-value pairs.
The created date of the attribute.
The updated date of the attribute.
The associated possible values (if included in relations).
The ID of the attribute possible value.
The value of the attribute possible value.
The rank of the attribute possible value.
Holds custom data in key-value pairs.
The created date of the possible value.
The associated attribute values (if included in relations).
The ID of the attribute value.
The value of the attribute value.
The rank of the attribute value.
Holds custom data in key-value pairs.
***
# updateAttributes
This section provides a reference to the `updateAttributes` method. This belongs to the Attribute Module.
## updateAttributes(id, data, sharedContext?): Promise\
This method updates an existing attribute.
### Example
```ts theme={null}
const attribute = await attributeModuleService.updateAttributes("attr_123", {
name: "Updated Material",
is_filterable: false,
})
```
### Parameters
The ID of the attribute.
The attributes to update in the attribute.
The name of the attribute.
The description of the attribute.
The unique handle of the attribute.
Whether the attribute is filterable.
Whether the attribute is required.
Holds custom data in key-value pairs.
A context used to share resources, such as transaction manager, between the application and the module.
### Returns
The updated attribute.
The ID of the attribute.
The name of the attribute.
The description of the attribute.
The unique handle of the attribute.
Whether the attribute is filterable.
Whether the attribute is required.
The UI component type for rendering the attribute.
Holds custom data in key-value pairs.
The created date of the attribute.
The updated date of the attribute.
***
# deleteAttributes
This section provides a reference to the `deleteAttributes` method. This belongs to the Attribute Module.
## deleteAttributes(ids, sharedContext?): Promise\
This method deletes attributes by their IDs.
### Example
```ts theme={null}
await attributeModuleService.deleteAttributes(["attr_123", "attr_321"])
```
### Parameters
The IDs of the attributes.
A context used to share resources, such as transaction manager, between the application and the module.
### Returns
Resolves when the attributes are deleted successfully.
## deleteAttributes(id, sharedContext?): Promise\
This method deletes an attribute by its ID.
### Example
```ts theme={null}
await attributeModuleService.deleteAttributes("attr_123")
```
### Parameters
The ID of the attribute.
A context used to share resources, such as transaction manager, between the application and the module.
### Returns
Resolves when the attribute is deleted successfully.
***
# listAndCountAttributes
This section provides a reference to the `listAndCountAttributes` method. This belongs to the Attribute Module.
This method retrieves a paginated list of attributes along with the total count of available attributes satisfying the provided filters.
## Example
To retrieve a list of attributes using their IDs:
```ts theme={null}
const [attributes, count] = await attributeModuleService.listAndCountAttributes({
id: ["attr_123", "attr_321"],
})
```
By default, only the first `15` records are retrieved. You can control pagination by specifying the `skip` and `take` properties of the `config` parameter:
```ts theme={null}
const [attributes, count] = await attributeModuleService.listAndCountAttributes(
{
id: ["attr_123", "attr_321"],
},
{
take: 20,
skip: 2,
}
)
```
## Parameters
The filters to apply on the retrieved attributes.
The IDs to filter the attributes by.
Filter attributes by their names.
Filter attributes by their handles.
Filter by whether attributes are filterable.
Filter by whether attributes are required.
Filter attributes by their UI component type.
The configurations determining how the attribute is retrieved.
An array of strings, each being attribute names of the entity to retrieve in the result.
A number indicating the number of records to skip before retrieving the results.
A number indicating the number of records to return in the result.
An array of strings, each being relation names of the entity to retrieve in the result.
An object used to specify how to sort the returned records.
A boolean indicating whether deleted records should also be retrieved as part of the result.
A context used to share resources, such as transaction manager, between the application and the module.
## Returns
The list of attributes along with their total count.
***
# softDeleteAttributes
This section provides a reference to the `softDeleteAttributes` method. This belongs to the Attribute Module.
This method soft deletes attributes by their IDs.
## Example
```ts theme={null}
await attributeModuleService.softDeleteAttributes([
"attr_123",
"attr_321",
])
```
## Parameters
The IDs of the attributes.
An object that is used to specify an entity's related entities that should be soft-deleted when the main entity is soft-deleted.
A context used to share resources, such as transaction manager, between the application and the module.
## Returns
An object that includes the IDs of related records that were also soft deleted. If there are no related records, the promise resolves to `void`.
***
# restoreAttributes
This section provides a reference to the `restoreAttributes` method. This belongs to the Attribute Module.
This method restores soft deleted attributes by their IDs.
## Example
```ts theme={null}
await attributeModuleService.restoreAttributes(["attr_123", "attr_321"])
```
## Parameters
The IDs of the attributes.
Configurations determining which relations to restore along with each of the attribute.
A context used to share resources, such as transaction manager, between the application and the module.
## Returns
An object that includes the IDs of related records that were restored. If there are no related records restored, the promise resolves to `void`.
***
# createAttributeValues
This section provides a reference to the `createAttributeValues` method. This belongs to the Attribute Module.
This method creates attribute values.
## Example
```ts theme={null}
const attributeValues = await attributeModuleService.createAttributeValues([
{
attribute_id: "attr_123",
value: "Large",
rank: 1,
},
])
```
## Parameters
The attribute values to be created.
The value of the attribute value.
The rank of the attribute value.
The ID of the attribute this value belongs to.
Holds custom data in key-value pairs.
A context used to share resources, such as transaction manager, between the application and the module.
## Returns
The created attribute values.
***
# updateAttributeValues
This section provides a reference to the `updateAttributeValues` method. This belongs to the Attribute Module.
This method updates existing attribute values.
## Example
```ts theme={null}
const attributeValues = await attributeModuleService.updateAttributeValues([
{
id: "attr_val_123",
value: "Extra Large",
rank: 4,
},
])
```
## Parameters
The attribute values to update.
The ID of the attribute value.
The value of the attribute value.
The rank of the attribute value.
Holds custom data in key-value pairs.
A context used to share resources, such as transaction manager, between the application and the module.
## Returns
The updated attribute values.
***
# deleteAttributeValues
This section provides a reference to the `deleteAttributeValues` method. This belongs to the Attribute Module.
This method deletes attribute values by their IDs.
## Example
```ts theme={null}
await attributeModuleService.deleteAttributeValues(["attr_val_123", "attr_val_321"])
```
## Parameters
The IDs of the attribute values.
A context used to share resources, such as transaction manager, between the application and the module.
## Returns
Resolves when the attribute values are deleted successfully.
***
# listAttributeValues
This section provides a reference to the `listAttributeValues` method. This belongs to the Attribute Module.
This method retrieves a paginated list of attribute values based on optional filters and configuration.
## Example
```ts theme={null}
const attributeValues = await attributeModuleService.listAttributeValues({
attribute_id: "attr_123",
})
```
## Parameters
The filters to apply on the retrieved attribute values.
The IDs to filter the attribute values by.
Filter attribute values by their attribute IDs.
Filter attribute values by their values.
The configurations determining how the attribute value is retrieved.
An array of strings, each being attribute names of the entity to retrieve in the result.
A number indicating the number of records to skip before retrieving the results.
A number indicating the number of records to return in the result.
An array of strings, each being relation names of the entity to retrieve in the result.
An object used to specify how to sort the returned records.
A context used to share resources, such as transaction manager, between the application and the module.
## Returns
The list of attribute values.
***
# retrieveAttributeValue
This section provides a reference to the `retrieveAttributeValue` method. This belongs to the Attribute Module.
This method retrieves an attribute value by its ID.
## Example
```ts theme={null}
const attributeValue = await attributeModuleService.retrieveAttributeValue("attr_val_123")
```
## Parameters
The ID of the attribute value.
The configurations determining how the attribute value is retrieved.
An array of strings, each being attribute names of the entity to retrieve in the result.
An array of strings, each being relation names of the entity to retrieve in the result.
An object used to specify how to sort the returned records.
A context used to share resources, such as transaction manager, between the application and the module.
## Returns
The retrieved attribute value.
The ID of the attribute value.
The value of the attribute value.
The rank of the attribute value.
Holds custom data in key-value pairs.
***
# listAndCountAttributeValues
This section provides a reference to the `listAndCountAttributeValues` method. This belongs to the Attribute Module.
This method retrieves a paginated list of attribute values along with the total count of available attribute values satisfying the provided filters.
## Example
```ts theme={null}
const [attributeValues, count] = await attributeModuleService.listAndCountAttributeValues({
attribute_id: "attr_123",
})
```
## Parameters
The filters to apply on the retrieved attribute values.
The IDs to filter the attribute values by.
Filter attribute values by their attribute IDs.
Filter attribute values by their values.
The configurations determining how the attribute value is retrieved.
An array of strings, each being attribute names of the entity to retrieve in the result.
A number indicating the number of records to skip before retrieving the results.
A number indicating the number of records to return in the result.
An array of strings, each being relation names of the entity to retrieve in the result.
An object used to specify how to sort the returned records.
A context used to share resources, such as transaction manager, between the application and the module.
## Returns
The list of attribute values along with their total count.
***
# softDeleteAttributeValues
This section provides a reference to the `softDeleteAttributeValues` method. This belongs to the Attribute Module.
This method soft deletes attribute values by their IDs.
## Example
```ts theme={null}
await attributeModuleService.softDeleteAttributeValues([
"attr_val_123",
"attr_val_321",
])
```
## Parameters
The IDs of the attribute values.
A context used to share resources, such as transaction manager, between the application and the module.
## Returns
An object that includes the IDs of related records that were also soft deleted. If there are no related records, the promise resolves to `void`.
***
# restoreAttributeValues
This section provides a reference to the `restoreAttributeValues` method. This belongs to the Attribute Module.
This method restores soft deleted attribute values by their IDs.
## Example
```ts theme={null}
await attributeModuleService.restoreAttributeValues(["attr_val_123", "attr_val_321"])
```
## Parameters
The IDs of the attribute values.
A context used to share resources, such as transaction manager, between the application and the module.
## Returns
An object that includes the IDs of related records that were restored. If there are no related records restored, the promise resolves to `void`.
***
# createAttributePossibleValues
This section provides a reference to the `createAttributePossibleValues` method. This belongs to the Attribute Module.
This method creates attribute possible values.
## Example
```ts theme={null}
const possibleValues = await attributeModuleService.createAttributePossibleValues([
{
attribute_id: "attr_123",
value: "Small",
rank: 1,
},
])
```
## Parameters
The attribute possible values to be created.
The ID of the attribute this possible value belongs to.
The value of the attribute possible value.
The rank of the attribute possible value.
Holds custom data in key-value pairs.
A context used to share resources, such as transaction manager, between the application and the module.
## Returns
The created attribute possible values.
***
# updateAttributePossibleValues
This section provides a reference to the `updateAttributePossibleValues` method. This belongs to the Attribute Module.
This method updates existing attribute possible values.
## Example
```ts theme={null}
const possibleValues = await attributeModuleService.updateAttributePossibleValues([
{
id: "attr_pos_val_123",
value: "Extra Small",
rank: 0,
},
])
```
## Parameters
The attribute possible values to update.
The ID of the attribute possible value.
The value of the attribute possible value.
The rank of the attribute possible value.
Holds custom data in key-value pairs.
A context used to share resources, such as transaction manager, between the application and the module.
## Returns
The updated attribute possible values.
***
# deleteAttributePossibleValues
This section provides a reference to the `deleteAttributePossibleValues` method. This belongs to the Attribute Module.
This method deletes attribute possible values by their IDs.
## Example
```ts theme={null}
await attributeModuleService.deleteAttributePossibleValues([
"attr_pos_val_123",
"attr_pos_val_321",
])
```
## Parameters
The IDs of the attribute possible values.
A context used to share resources, such as transaction manager, between the application and the module.
## Returns
Resolves when the attribute possible values are deleted successfully.
***
# listAttributePossibleValues
This section provides a reference to the `listAttributePossibleValues` method. This belongs to the Attribute Module.
This method retrieves a paginated list of attribute possible values based on optional filters and configuration.
## Example
```ts theme={null}
const possibleValues = await attributeModuleService.listAttributePossibleValues({
attribute_id: "attr_123",
})
```
## Parameters
The filters to apply on the retrieved attribute possible values.
The IDs to filter the attribute possible values by.
Filter attribute possible values by their attribute IDs.
Filter attribute possible values by their values.
The configurations determining how the attribute possible value is retrieved.
An array of strings, each being attribute names of the entity to retrieve in the result.
A number indicating the number of records to skip before retrieving the results.
A number indicating the number of records to return in the result.
An array of strings, each being relation names of the entity to retrieve in the result.
An object used to specify how to sort the returned records.
A context used to share resources, such as transaction manager, between the application and the module.
## Returns
The list of attribute possible values.
***
# retrieveAttributePossibleValue
This section provides a reference to the `retrieveAttributePossibleValue` method. This belongs to the Attribute Module.
This method retrieves an attribute possible value by its ID.
## Example
```ts theme={null}
const possibleValue = await attributeModuleService.retrieveAttributePossibleValue(
"attr_pos_val_123"
)
```
## Parameters
The ID of the attribute possible value.
The configurations determining how the attribute possible value is retrieved.
An array of strings, each being attribute names of the entity to retrieve in the result.
An array of strings, each being relation names of the entity to retrieve in the result.
An object used to specify how to sort the returned records.
A context used to share resources, such as transaction manager, between the application and the module.
## Returns
The retrieved attribute possible value.
The ID of the attribute possible value.
The value of the attribute possible value.
The rank of the attribute possible value.
Holds custom data in key-value pairs.
The created date of the possible value.
***
# listAndCountAttributePossibleValues
This section provides a reference to the `listAndCountAttributePossibleValues` method. This belongs to the Attribute Module.
This method retrieves a paginated list of attribute possible values along with the total count of available attribute possible values satisfying the provided filters.
## Example
```ts theme={null}
const [possibleValues, count] = await attributeModuleService.listAndCountAttributePossibleValues({
attribute_id: "attr_123",
})
```
## Parameters
The filters to apply on the retrieved attribute possible values.
The IDs to filter the attribute possible values by.
Filter attribute possible values by their attribute IDs.
Filter attribute possible values by their values.
The configurations determining how the attribute possible value is retrieved.
An array of strings, each being attribute names of the entity to retrieve in the result.
A number indicating the number of records to skip before retrieving the results.
A number indicating the number of records to return in the result.
An array of strings, each being relation names of the entity to retrieve in the result.
An object used to specify how to sort the returned records.
A context used to share resources, such as transaction manager, between the application and the module.
## Returns
The list of attribute possible values along with their total count.
***
# softDeleteAttributePossibleValues
This section provides a reference to the `softDeleteAttributePossibleValues` method. This belongs to the Attribute Module.
This method soft deletes attribute possible values by their IDs.
## Example
```ts theme={null}
await attributeModuleService.softDeleteAttributePossibleValues([
"attr_pos_val_123",
"attr_pos_val_321",
])
```
## Parameters
The IDs of the attribute possible values.
A context used to share resources, such as transaction manager, between the application and the module.
## Returns
An object that includes the IDs of related records that were also soft deleted. If there are no related records, the promise resolves to `void`.
***
# restoreAttributePossibleValues
This section provides a reference to the `restoreAttributePossibleValues` method. This belongs to the Attribute Module.
This method restores soft deleted attribute possible values by their IDs.
## Example
```ts theme={null}
await attributeModuleService.restoreAttributePossibleValues([
"attr_pos_val_123",
"attr_pos_val_321",
])
```
## Parameters
The IDs of the attribute possible values.
A context used to share resources, such as transaction manager, between the application and the module.
## Returns
An object that includes the IDs of related records that were restored. If there are no related records restored, the promise resolves to `void`.
# Configuration Module
Source: https://docs.mercurjs.com/product/modules/b2c-core/configuration/configuration-concept
Learn about the Configuration Module and how to use it in your application
# Configuration Module
In this section of the documentation, you will find resources to learn more about the Configuration Module and how to use it in your application.
Mercur has marketplace configuration features available out-of-the-box through the Configuration Module. A [module](https://docs.medusajs.com/learn/fundamentals/modules) is a standalone package that provides features for a single domain. Each of Mercur's marketplace features are placed in custom modules, such as this Configuration Module.
Learn more about why modules are isolated in [this documentation](https://docs.medusajs.com/learn/fundamentals/modules/isolation).
## Configuration Features
* **Marketplace Settings Management**: Create and manage marketplace-wide configuration rules that control platform behavior.
* **Dynamic Rule Checking**: Programmatically check whether specific features are enabled at runtime.
* **Default Values**: Fall back to predefined default values when rules aren't explicitly configured in the database.
* **Feature Toggles**: Enable or disable key marketplace features such as product approval requirements and import capabilities.
***
## How to Use the Configuration Module
In your Medusa application, you build flows around Commerce Modules. A flow is built as a [Workflow](https://docs.medusajs.com/learn/fundamentals/workflows), which is a special function composed of a series of steps that guarantees data consistency and reliable roll-back mechanism.
You can build custom workflows and steps. Mercur provides pre-built workflows for common configuration operations in the `@mercurjs/b2c-core` package.
For example, the `createConfigurationRuleWorkflow`:
```ts title="src/workflows/configuration/create-configuration-rule.ts" theme={null}
import { WorkflowResponse, createWorkflow } from '@medusajs/workflows-sdk'
import { CreateConfigurationRuleDTO } from '@mercurjs/framework'
import { createConfigurationRuleStep } from '../steps'
export const createConfigurationRuleWorkflow = createWorkflow(
'create-configuration-rule',
function (input: CreateConfigurationRuleDTO) {
return new WorkflowResponse(createConfigurationRuleStep(input))
}
)
```
You can then execute the workflow in your custom API routes:
### API Route
```ts title="src/api/admin/configuration/route.ts" theme={null}
import { MedusaRequest, MedusaResponse } from "@medusajs/framework"
import { createConfigurationRuleWorkflow } from '../../../workflows/configuration/workflows'
export const POST = async (
req: MedusaRequest,
res: MedusaResponse
) => {
// Execute the createConfigurationRuleWorkflow
const { result: configuration_rule } =
await createConfigurationRuleWorkflow.run({
container: req.scope,
input: req.validatedBody
})
res.status(201).json({ configuration_rule })
}
```
Learn more about workflows in [this documentation](https://docs.medusajs.com/learn/fundamentals/workflows).
***
# Concepts
In this document, you'll learn about the main concepts related to marketplace configuration in Mercur.
## Configuration Rule
A configuration rule is a marketplace-wide setting that controls the behavior of specific platform features. It is represented by the [ConfigurationRule data model](../data-model/configuration-module-data-reference#configurationrule).
A configuration rule holds information about:
* The type of rule being configured
* Whether the rule is currently enabled
* Created and updated timestamps
Each rule type controls a specific aspect of the marketplace's functionality and can be toggled on or off by marketplace administrators.
***
## Rule Types
Mercur supports four configuration rule types that control key marketplace behaviors:
### global\_product\_catalog
Controls whether the marketplace uses a global product catalog where all sellers share the same product definitions.
* **Default**: `false`
* **When enabled**: Products are shared across sellers (managed centrally)
* **When disabled**: Each seller manages their own unique products
### require\_product\_approval
Controls whether products added by sellers require administrator approval before becoming available to customers.
* **Default**: `false`
* **When enabled**: New products remain in "draft" status until admin approves
* **When disabled**: Seller products go live immediately
### product\_request\_enabled
Controls whether sellers can submit requests to create new marketplace-wide products, categories, collections, and other resources.
* **Default**: `true`
* **When enabled**: Sellers can submit proposals for new marketplace resources
* **When disabled**: Request submission functionality is unavailable to sellers
### product\_import\_enabled
Controls whether sellers can import products in bulk using CSV files.
* **Default**: `true`
* **When enabled**: Sellers have access to bulk product import functionality
* **When disabled**: Sellers must create products one by one through the UI
***
## Default Values
The Configuration Module implements a fallback system to ensure the marketplace can function even when rules aren't explicitly stored in the database.
Each rule type has a predefined default value:
```ts theme={null}
const ConfigurationRuleDefaults = new Map([
['global_product_catalog', false],
['product_request_enabled', true],
['require_product_approval', false],
['product_import_enabled', true],
])
```
When checking if a rule is enabled, the system:
1. First attempts to retrieve the rule from the database
2. If not found, returns the default value
3. If an error occurs, falls back to the default value
This ensures the marketplace remains functional during initial setup or if configuration rules are accidentally deleted.
***
## Dynamic Rule Checking
The `isRuleEnabled` method allows programmatic checking of configuration rules at runtime:
```ts theme={null}
const isApprovalRequired = await configurationModuleService.isRuleEnabled(
"require_product_approval"
)
if (isApprovalRequired) {
// Set product status to draft
productData.status = "draft"
} else {
// Publish product immediately
productData.status = "published"
}
```
This pattern is used throughout Mercur to conditionally enable or disable features based on marketplace configuration.
***
## Configuration in Middleware
Mercur provides a `checkConfigurationRule` utility function for use in API route middlewares:
```ts theme={null}
import { checkConfigurationRule } from "@mercurjs/framework"
// In a middleware
const isEnabled = await checkConfigurationRule(
req.scope,
"product_request_enabled"
)
if (!isEnabled) {
return res.status(403).json({
message: "Product request functionality is disabled"
})
}
```
This allows routes to be conditionally enabled or disabled based on marketplace settings, providing flexibility in how the platform is operated.
***
## Use Cases
**1. Curated Marketplace**
Enable `require_product_approval` to manually review all products before they go live, ensuring quality control.
**2. Open Marketplace**
Disable `require_product_approval` to allow sellers to list products immediately, reducing administrative overhead.
**3. Centralized Catalog**
Enable `global_product_catalog` for marketplaces where products are managed centrally and sellers only manage inventory.
**4. Seller-Driven Growth**
Enable `product_request_enabled` to allow sellers to propose new product categories and types, growing the catalog organically.
**5. Controlled Product Import**
Disable `product_import_enabled` during initial marketplace launch to ensure data quality, then enable it once processes are established.
# Configuration Module Data Models
Source: https://docs.mercurjs.com/product/modules/b2c-core/configuration/configuration-data-models-ref
Reference documentation for the Configuration Module data models
## Relations Overview
This module has no relations to other data models.
## Data Models
* [ConfigurationRule](#configurationrule)
## ConfigurationRule
This documentation provides a reference to the ConfigurationRule data model. It belongs to the Configuration Module.
[View source code](https://github.com/mercurjs/mercur/blob/main/packages/modules/b2c-core/src/modules/configuration/models/configuration-rule.ts)
| Field | Type | Description |
| ------------ | --------------------------------------------------------------------------------------------------------------------------- | --------------------------------------------------------- |
| `id` | `PrimaryKeyModifier` | The ID of the configuration rule. |
| `rule_type` | `EnumProperty<["global_product_catalog", "require_product_approval", "product_request_enabled", "product_import_enabled"]>` | The type of the configuration rule. This field is unique. |
| `is_enabled` | `BooleanProperty` | Whether the configuration rule is enabled. |
# Configuration Module Service Reference
Source: https://docs.mercurjs.com/product/modules/b2c-core/configuration/configuration-services
Reference documentation for the Configuration Module service methods
# IConfigurationModuleService Reference
This section of the documentation provides a reference to the `IConfigurationModuleService` interface's methods. This is the interface developers use to use the functionalities provided by the Configuration Module.
You should only use the methods in this reference when implementing complex customizations. For common cases, check out available workflows instead.
The main service interface for the Configuration Module.
## Methods
* [createConfigurationRules](#createconfigurationrules)
* [updateConfigurationRules](#updateconfigurationrules)
* [deleteConfigurationRules](#deleteconfigurationrules)
* [retrieveConfigurationRule](#retrieveconfigurationrule)
* [listConfigurationRules](#listconfigurationrules)
* [listAndCountConfigurationRules](#listandcountconfigurationrules)
* [softDeleteConfigurationRules](#softdeleteconfigurationrules)
* [restoreConfigurationRules](#restoreconfigurationrules)
* [isRuleEnabled](#isruleenabled)
***
# createConfigurationRules
This section provides a reference to the `createConfigurationRules` method. This belongs to the Configuration Module.
## createConfigurationRules(data, sharedContext?): Promise\
This method creates configuration rules.
### Example
```ts theme={null}
const rules = await configurationModuleService.createConfigurationRules([
{
rule_type: "require_product_approval",
is_enabled: true,
},
{
rule_type: "product_import_enabled",
is_enabled: false,
},
])
```
### Parameters
The configuration rules to be created.
The type of the configuration rule.
Whether the configuration rule is enabled.
A context used to share resources, such as transaction manager, between the application and the module.
### Returns
The created configuration rules.
## createConfigurationRules(data, sharedContext?): Promise\
This method creates a configuration rule.
### Example
```ts theme={null}
const rule = await configurationModuleService.createConfigurationRules({
rule_type: "require_product_approval",
is_enabled: true,
})
```
### Parameters
The configuration rule to be created.
The type of the configuration rule.
Whether the configuration rule is enabled.
A context used to share resources, such as transaction manager, between the application and the module.
### Returns
The created configuration rule.
***
# updateConfigurationRules
This section provides a reference to the `updateConfigurationRules` method. This belongs to the Configuration Module.
## updateConfigurationRules(id, data, sharedContext?): Promise\
This method updates an existing configuration rule.
### Example
```ts theme={null}
const rule = await configurationModuleService.updateConfigurationRules("conf_123", {
is_enabled: false,
})
```
### Parameters
The ID of the configuration rule.
The attributes to update in the configuration rule.
Whether the configuration rule is enabled.
A context used to share resources, such as transaction manager, between the application and the module.
### Returns
The updated configuration rule.
The ID of the configuration rule.
The type of the configuration rule.
Whether the configuration rule is enabled.
The created date of the configuration rule.
The updated date of the configuration rule.
***
# deleteConfigurationRules
This section provides a reference to the `deleteConfigurationRules` method. This belongs to the Configuration Module.
## deleteConfigurationRules(ids, sharedContext?): Promise\
This method deletes configuration rules by their IDs.
### Example
```ts theme={null}
await configurationModuleService.deleteConfigurationRules(["conf_123", "conf_321"])
```
### Parameters
The IDs of the configuration rules.
A context used to share resources, such as transaction manager, between the application and the module.
### Returns
Resolves when the configuration rules are deleted successfully.
## deleteConfigurationRules(id, sharedContext?): Promise\
This method deletes a configuration rule by its ID.
### Example
```ts theme={null}
await configurationModuleService.deleteConfigurationRules("conf_123")
```
### Parameters
The ID of the configuration rule.
A context used to share resources, such as transaction manager, between the application and the module.
### Returns
Resolves when the configuration rule is deleted successfully.
***
# retrieveConfigurationRule
This section provides a reference to the `retrieveConfigurationRule` method. This belongs to the Configuration Module.
This method retrieves a configuration rule by its ID.
## Example
```ts theme={null}
const rule = await configurationModuleService.retrieveConfigurationRule("conf_123")
```
## Parameters
The ID of the configuration rule.
The configurations determining how the configuration rule is retrieved.
An array of strings, each being attribute names of the entity to retrieve in the result.
A number indicating the number of records to skip before retrieving the results.
A number indicating the number of records to return in the result.
An array of strings, each being relation names of the entity to retrieve in the result.
An object used to specify how to sort the returned records.
A boolean indicating whether deleted records should also be retrieved as part of the result.
A context used to share resources, such as transaction manager, between the application and the module.
## Returns
The retrieved configuration rule.
The ID of the configuration rule.
The type of the configuration rule.
Whether the configuration rule is enabled.
The created date of the configuration rule.
The updated date of the configuration rule.
***
# listConfigurationRules
This section provides a reference to the `listConfigurationRules` method. This belongs to the Configuration Module.
This method retrieves a paginated list of configuration rules based on optional filters and configuration.
## Example
To retrieve a list of configuration rules using their IDs:
```ts theme={null}
const rules = await configurationModuleService.listConfigurationRules({
id: ["conf_123", "conf_321"],
})
```
To retrieve enabled rules:
```ts theme={null}
const rules = await configurationModuleService.listConfigurationRules({
is_enabled: true,
})
```
By default, only the first `15` records are retrieved. You can control pagination by specifying the `skip` and `take` properties of the `config` parameter:
```ts theme={null}
const rules = await configurationModuleService.listConfigurationRules(
{
rule_type: "require_product_approval",
},
{
take: 20,
skip: 2,
}
)
```
## Parameters
The filters to apply on the retrieved configuration rules.
The IDs to filter the configuration rules by.
Filter configuration rules by their rule types.
Filter by whether configuration rules are enabled.
The configurations determining how the configuration rule is retrieved.
An array of strings, each being attribute names of the entity to retrieve in the result.
A number indicating the number of records to skip before retrieving the results.
A number indicating the number of records to return in the result.
An array of strings, each being relation names of the entity to retrieve in the result.
An object used to specify how to sort the returned records.
A boolean indicating whether deleted records should also be retrieved as part of the result.
A context used to share resources, such as transaction manager, between the application and the module.
## Returns
The list of configuration rules.
***
# listAndCountConfigurationRules
This section provides a reference to the `listAndCountConfigurationRules` method. This belongs to the Configuration Module.
This method retrieves a paginated list of configuration rules along with the total count of available configuration rules satisfying the provided filters.
## Example
To retrieve a list of configuration rules using their IDs:
```ts theme={null}
const [rules, count] = await configurationModuleService.listAndCountConfigurationRules({
id: ["conf_123", "conf_321"],
})
```
By default, only the first `15` records are retrieved. You can control pagination by specifying the `skip` and `take` properties of the `config` parameter:
```ts theme={null}
const [rules, count] = await configurationModuleService.listAndCountConfigurationRules(
{
is_enabled: true,
},
{
take: 20,
skip: 2,
}
)
```
## Parameters
The filters to apply on the retrieved configuration rules.
The IDs to filter the configuration rules by.
Filter configuration rules by their rule types.
Filter by whether configuration rules are enabled.
The configurations determining how the configuration rule is retrieved.
An array of strings, each being attribute names of the entity to retrieve in the result.
A number indicating the number of records to skip before retrieving the results.
A number indicating the number of records to return in the result.
An array of strings, each being relation names of the entity to retrieve in the result.
An object used to specify how to sort the returned records.
A boolean indicating whether deleted records should also be retrieved as part of the result.
A context used to share resources, such as transaction manager, between the application and the module.
## Returns
The list of configuration rules along with their total count.
***
# softDeleteConfigurationRules
This section provides a reference to the `softDeleteConfigurationRules` method. This belongs to the Configuration Module.
This method soft deletes configuration rules by their IDs.
## Example
```ts theme={null}
await configurationModuleService.softDeleteConfigurationRules([
"conf_123",
"conf_321",
])
```
## Parameters
The IDs of the configuration rules.
An object that is used to specify an entity's related entities that should be soft-deleted when the main entity is soft-deleted.
A context used to share resources, such as transaction manager, between the application and the module.
## Returns
An object that includes the IDs of related records that were also soft deleted. If there are no related records, the promise resolves to `void`.
***
# restoreConfigurationRules
This section provides a reference to the `restoreConfigurationRules` method. This belongs to the Configuration Module.
This method restores soft deleted configuration rules by their IDs.
## Example
```ts theme={null}
await configurationModuleService.restoreConfigurationRules(["conf_123", "conf_321"])
```
## Parameters
The IDs of the configuration rules.
Configurations determining which relations to restore along with each of the configuration rule.
A context used to share resources, such as transaction manager, between the application and the module.
## Returns
An object that includes the IDs of related records that were restored. If there are no related records restored, the promise resolves to `void`.
***
# isRuleEnabled
This section provides a reference to the `isRuleEnabled` method. This belongs to the Configuration Module.
This method checks whether a specific configuration rule is enabled. If the rule doesn't exist in the database, it returns the default value for that rule type.
## Example
```ts theme={null}
const isEnabled = await configurationModuleService.isRuleEnabled("require_product_approval")
```
## Parameters
The type of the configuration rule to check. Can be `global_product_catalog`, `require_product_approval`, `product_request_enabled`, or `product_import_enabled`.
## Returns
A boolean indicating whether the configuration rule is enabled.
# Marketplace Module
Source: https://docs.mercurjs.com/product/modules/b2c-core/marketplace/marketplace-concept
Learn about the Marketplace Module and how to use it in your application
# Marketplace Module
In this section of the documentation, you will find resources to learn more about the Marketplace Module and how to use it in your application.
Mercur has order set management features available out-of-the-box through the Marketplace Module. A [module](https://docs.medusajs.com/learn/fundamentals/modules) is a standalone package that provides features for a single domain. Each of Mercur's marketplace features are placed in custom modules, such as this Marketplace Module.
Learn more about why modules are isolated in [this documentation](https://docs.medusajs.com/learn/fundamentals/modules/isolation).
## Marketplace Features
* **Order Set Management**: Group multiple vendor orders from a single customer checkout into an order set for unified tracking.
* **Multi-Vendor Order Tracking**: Associate multiple orders with a single cart and payment collection when customers purchase from multiple sellers.
* **Order Aggregation**: Calculate aggregated totals, status, and fulfillment information across all orders in a set.
* **Unified Customer View**: Provide customers with a single view of their multi-vendor orders while maintaining individual order records per seller.
***
## How to Use the Marketplace Module
In your Medusa application, you build flows around Commerce Modules. A flow is built as a [Workflow](https://docs.medusajs.com/learn/fundamentals/workflows), which is a special function composed of a series of steps that guarantees data consistency and reliable roll-back mechanism.
You can build custom workflows and steps. Mercur provides pre-built workflows for marketplace operations in the `@mercurjs/b2c-core` package.
For example, the `getFormattedOrderSetListWorkflow`:
```ts title="src/workflows/order-set/get-formatted-order-set-list.ts" theme={null}
import { deduplicate } from '@medusajs/framework/utils'
import {
WorkflowResponse,
createWorkflow,
transform
} from '@medusajs/framework/workflows-sdk'
import { useQueryGraphStep } from '@medusajs/medusa/core-flows'
import { formatOrderSets } from '../utils'
export const getFormattedOrderSetListWorkflow = createWorkflow(
'get-formatted-order-set-list',
function (input: {
fields?: string[]
filters?: Record
pagination?: {
skip: number
take?: number
order?: Record
}
}) {
const fields = transform(input, ({ fields }) => {
return deduplicate([
...(fields ?? []),
'id',
'display_id',
'customer.*',
'cart.*',
'payment_collection.*',
'orders.id',
'orders.status',
'orders.payment_status',
'orders.fulfillment_status',
'orders.total',
'orders.subtotal',
'orders.tax_total',
'orders.items.*',
'orders.fulfillments.*'
])
})
const { data, metadata } = useQueryGraphStep({
entity: 'order_set',
fields,
filters: input.filters,
pagination: input.pagination
})
const formattedOrderSets = transform(data, formatOrderSets)
return new WorkflowResponse({ data: formattedOrderSets, metadata })
}
)
```
You can then execute the workflow in your custom API routes, scheduled jobs, or subscribers:
### API Route
```ts title="src/api/admin/order-sets/route.ts" theme={null}
import { MedusaRequest, MedusaResponse } from '@medusajs/framework'
import { ContainerRegistrationKeys } from '@medusajs/framework/utils'
import { getFormattedOrderSetListWorkflow } from '../../../workflows/order-set/workflows'
export const GET = async (req: MedusaRequest, res: MedusaResponse) => {
const { filterableFields, queryConfig } = req
if (filterableFields['order_id']) {
const query = req.scope.resolve(ContainerRegistrationKeys.QUERY)
const {
data: [order_set]
} = await query.graph({
entity: 'order_set_order',
fields: ['order_set_id'],
filters: {
order_id: req.filterableFields['order_id']
}
})
delete filterableFields['order_id']
filterableFields['id'] = order_set.order_set_id
}
const {
result: { data, metadata }
} = await getFormattedOrderSetListWorkflow(req.scope).run({
input: {
fields: queryConfig.fields,
filters: filterableFields,
pagination: queryConfig.pagination
}
})
res.json({
order_sets: data,
count: metadata!.count,
offset: metadata!.skip,
limit: metadata!.take
})
}
```
### Subscriber
```ts title="src/subscribers/notification-admin-new-order-set.ts" theme={null}
import { ContainerRegistrationKeys, Modules } from '@medusajs/framework/utils'
import { SubscriberArgs, SubscriberConfig } from '@medusajs/medusa'
import { OrderSetWorkflowEvents } from '@mercurjs/framework'
export default async function newOrderSetAdminNotifyHandler({
event,
container
}: SubscriberArgs<{ id: string }>) {
const notificationService = container.resolve(Modules.NOTIFICATION)
const query = container.resolve(ContainerRegistrationKeys.QUERY)
const { id: orderSetId } = event.data
const {
data: [order_set]
} = await query.graph({
entity: 'order_set',
fields: ['orders.id'],
filters: {
id: orderSetId
}
})
if (!order_set || order_set.orders.length < 2) {
return
}
await notificationService.createNotifications({
to: '',
channel: 'feed',
template: 'admin-ui',
content: {
subject: `New Order Set Placed`
},
data: {
title: `New order set placed`,
description: 'Someone has placed a new order from multiple sellers 🔔',
redirect: '/admin/orders'
}
})
}
export const config: SubscriberConfig = {
event: OrderSetWorkflowEvents.PLACED,
context: {
subscriberId: 'new-order-set-admin-notify-handler'
}
}
```
Learn more about workflows in [this documentation](https://docs.medusajs.com/learn/fundamentals/workflows).
***
# Concepts
In this document, you'll learn about the main concepts related to order sets in Mercur.
## Order Set
An order set is a grouping of multiple orders created from a single cart in a multi-vendor marketplace. It is represented by the [OrderSet data model](../data-model/marketplace-module-data-reference#orderset).
When a customer checks out a cart containing products from multiple sellers, Mercur:
1. Creates one `OrderSet` to represent the entire purchase
2. Creates individual `Order` records for each seller
3. Links all orders to the order set
An order set holds information about:
* The cart that was used for the purchase
* The customer who made the purchase
* The sales channel where the purchase was made
* The payment collection containing payment details
* All individual seller orders created from the cart
This architecture allows the marketplace to maintain both a unified customer view (the order set) and individual seller order management.
***
## Why Order Sets?
In a traditional single-vendor e-commerce platform, one cart results in one order. In a multi-vendor marketplace, this creates complexity:
**Without Order Sets:**
* Customer sees multiple separate orders (confusing UX)
* No unified tracking for a single purchase session
* Difficult to aggregate totals and status
* Payment tracking becomes fragmented
**With Order Sets:**
* Customer sees one unified order set (better UX)
* Single reference point for the entire purchase
* Easy aggregation of totals across vendors
* Simplified payment and fulfillment tracking
***
## Order Set Properties
### Display ID
The `display_id` is an auto-incrementing number that provides a user-friendly reference for the order set (e.g., #1001, #1002). This is what customers see instead of the UUID.
### Linked Entities
An order set maintains read-only links to:
* **Customer**: The customer who placed the order
* **Cart**: The cart that was converted to orders
* **SalesChannel**: The channel where the purchase was made
* **PaymentCollection**: The payment information for the entire order set
***
## Formatted Order Sets
Mercur provides a `formatOrderSets` utility that aggregates information from individual orders to present unified order set data:
**Aggregated Properties:**
* **status**: Overall order set status (derived from individual order statuses)
* **payment\_status**: Overall payment status (from payment collection)
* **fulfillment\_status**: Overall fulfillment status (across all orders)
* **total**: Sum of all order totals
* **subtotal**: Sum of all order subtotals
* **tax\_total**: Sum of all tax amounts
* **shipping\_total**: Sum of all shipping amounts
This allows displaying a single "order" to customers while maintaining separate orders for each seller behind the scenes.
***
## Use Cases
**1. Multi-Vendor Checkout**
Customer adds products from 3 different sellers to cart and checks out once, creating 1 order set with 3 individual orders.
**2. Customer Order History**
Display unified order history to customers, showing order sets rather than confusing them with multiple orders per purchase.
**3. Admin Order Management**
Administrators can view all orders from a single checkout session grouped together for support and analytics.
**4. Payment Reconciliation**
Track that a single payment collection was split across multiple vendor orders through the order set.
**5. Fulfillment Tracking**
Monitor overall fulfillment progress across all sellers involved in a single customer purchase.
# Marketplace Module Data Models
Source: https://docs.mercurjs.com/product/modules/b2c-core/marketplace/marketplace-data-model-reference
Reference documentation for the Marketplace Module data models
## Relations Overview
| Relationship | Type | Description |
| ---------------------------------------------- | ------------------- | ----------------------------------------------- |
| OrderSet → Cart (Cart Module) | Read-only - has one | An order set is created from a cart |
| OrderSet → Customer (Customer Module) | Read-only - has one | An order set belongs to a customer |
| OrderSet → SalesChannel (Sales Channel Module) | Read-only - has one | An order set is associated with a sales channel |
| OrderSet → PaymentCollection (Payment Module) | Read-only - has one | An order set has a payment collection |
## Data Models
* [OrderSet](#orderset)
## OrderSet
This documentation provides a reference to the OrderSet data model. It belongs to the Marketplace Module.
[View source code](https://github.com/mercurjs/mercur/blob/main/packages/modules/b2c-core/src/modules/marketplace/models/order-set.ts)
| Field | Type | Description |
| ----------------------- | -------------------------------- | ------------------------------------------------------- |
| `id` | `PrimaryKeyModifier` | The ID of the order set. |
| `display_id` | `NumberProperty` | The display ID of the order set |
| `sales_channel_id` | `TextProperty` | The ID of the order set's sales channel. |
| `cart_id` | `TextProperty` | The ID of the cart that the order set was created from. |
| `customer_id` | `TextProperty` | The ID of the order set's customer. |
| `payment_collection_id` | `TextProperty` | The ID of the order set's payment collection. |
# Marketplace Module Links
Source: https://docs.mercurjs.com/product/modules/b2c-core/marketplace/marketplace-links
Module links for the Marketplace Module
# Links between Marketplace Module and Other Modules
This document showcases the module links defined between the Marketplace Module and other Commerce Modules.
## Summary
The Marketplace Module has the following links to other modules:
Read-only links are used to query data across modules, but the relations aren't stored in a pivot table in the database.
| First Data Model | Second Data Model | Type | Description |
| ---------------- | ----------------- | -------------------- | -------------------------------------------------------- |
| OrderSet | Order | Stored - one-to-many | Associates an order set with its multiple vendor orders |
| OrderSet | Customer | Read-only - has one | Retrieves the customer who owns the order set |
| OrderSet | Cart | Read-only - has one | Retrieves the cart that was used to create the order set |
| OrderSet | SalesChannel | Read-only - has one | Retrieves the sales channel of the order set |
| OrderSet | PaymentCollection | Read-only - has one | Retrieves the payment collection for the order set |
***
## Order Module
Mercur defines a link between the Marketplace Module's `OrderSet` data model and the Order Module's `Order` data model. This allows an order set to be associated with multiple orders (one per seller in a multi-vendor cart).
### Retrieve with Query
To retrieve the orders of an order set with Query, pass `order.*` in `fields`:
```ts theme={null}
const { data: orderSets } = await query.graph({
entity: "order_set",
fields: [
"*",
"order.*",
],
})
// orderSets[0].order
```
```ts theme={null}
import { useQueryGraphStep } from "@medusajs/medusa/core-flows"
// ...
const { data: orderSets } = useQueryGraphStep({
entity: "order_set",
fields: [
"*",
"order.*",
],
})
// orderSets[0].order
```
### Manage with Link
To manage the orders of an order set, use Link:
```ts theme={null}
import { Modules } from "@medusajs/framework/utils"
// ...
await link.create({
marketplace: {
order_set_id: "ordset_123",
},
[Modules.ORDER]: {
order_id: "ord_123",
},
})
```
```ts theme={null}
import { createRemoteLinkStep } from "@medusajs/medusa/core-flows"
// ...
createRemoteLinkStep({
marketplace: {
order_set_id: "ordset_123",
},
[Modules.ORDER]: {
order_id: "ord_123",
},
})
```
***
## Customer Module
Mercur defines a read-only link between the Marketplace Module's `OrderSet` data model and the Customer Module's `Customer` data model. Because the link is read-only from the `OrderSet`'s side, you can only retrieve the customer of an order set, and not the other way around.
### Retrieve with Query
To retrieve the customer of an order set with Query, pass `customer.*` in `fields`:
```ts theme={null}
const { data: orderSets } = await query.graph({
entity: "order_set",
fields: [
"*",
"customer.*",
],
})
// orderSets[0].customer
```
```ts theme={null}
import { useQueryGraphStep } from "@medusajs/medusa/core-flows"
// ...
const { data: orderSets } = useQueryGraphStep({
entity: "order_set",
fields: [
"*",
"customer.*",
],
})
// orderSets[0].customer
```
***
## Cart Module
Mercur defines a read-only link between the Marketplace Module's `OrderSet` data model and the Cart Module's `Cart` data model. Because the link is read-only from the `OrderSet`'s side, you can only retrieve the cart of an order set, and not the other way around.
The cart of an order set is determined by the `cart_id` property of the `OrderSet` data model.
### Retrieve with Query
To retrieve the cart of an order set with Query, pass `cart.*` in `fields`:
```ts theme={null}
const { data: orderSets } = await query.graph({
entity: "order_set",
fields: [
"*",
"cart.*",
],
})
// orderSets[0].cart
```
```ts theme={null}
import { useQueryGraphStep } from "@medusajs/medusa/core-flows"
// ...
const { data: orderSets } = useQueryGraphStep({
entity: "order_set",
fields: [
"*",
"cart.*",
],
})
// orderSets[0].cart
```
***
## Sales Channel Module
Mercur defines a read-only link between the Marketplace Module's `OrderSet` data model and the Sales Channel Module's `SalesChannel` data model. Because the link is read-only from the `OrderSet`'s side, you can only retrieve the sales channel of an order set, and not the other way around.
The sales channel of an order set is determined by the `sales_channel_id` property of the `OrderSet` data model.
### Retrieve with Query
To retrieve the sales channel of an order set with Query, pass `sales_channel.*` in `fields`:
```ts theme={null}
const { data: orderSets } = await query.graph({
entity: "order_set",
fields: [
"*",
"sales_channel.*",
],
})
// orderSets[0].sales_channel
```
```ts theme={null}
import { useQueryGraphStep } from "@medusajs/medusa/core-flows"
// ...
const { data: orderSets } = useQueryGraphStep({
entity: "order_set",
fields: [
"*",
"sales_channel.*",
],
})
// orderSets[0].sales_channel
```
***
## Payment Module
Mercur defines a read-only link between the Marketplace Module's `OrderSet` data model and the Payment Module's `PaymentCollection` data model. Because the link is read-only from the `OrderSet`'s side, you can only retrieve the payment collection of an order set, and not the other way around.
The payment collection of an order set is determined by the `payment_collection_id` property of the `OrderSet` data model.
### Retrieve with Query
To retrieve the payment collection of an order set with Query, pass `payment_collection.*` in `fields`:
```ts theme={null}
const { data: orderSets } = await query.graph({
entity: "order_set",
fields: [
"*",
"payment_collection.*",
],
})
// orderSets[0].payment_collection
```
```ts theme={null}
import { useQueryGraphStep } from "@medusajs/medusa/core-flows"
// ...
const { data: orderSets } = useQueryGraphStep({
entity: "order_set",
fields: [
"*",
"payment_collection.*",
],
})
// orderSets[0].payment_collection
```
# Marketplace Module Service Reference
Source: https://docs.mercurjs.com/product/modules/b2c-core/marketplace/marketplace-service
Reference documentation for the Marketplace Module service methods
# IMarketplaceModuleService Reference
This section of the documentation provides a reference to the `IMarketplaceModuleService` interface's methods. This is the interface developers use to use the functionalities provided by the Marketplace Module.
You should only use the methods in this reference when implementing complex customizations. For common cases, check out available workflows instead.
The main service interface for the Marketplace Module.
## Methods
* [createOrderSets](#createordersets)
* [updateOrderSets](#updateordersets)
* [deleteOrderSets](#deleteordersets)
* [retrieveOrderSet](#retrieveorderset)
* [listOrderSets](#listordersets)
* [listAndCountOrderSets](#listandcountordersets)
* [softDeleteOrderSets](#softdeleteordersets)
* [restoreOrderSets](#restoreordersets)
***
# createOrderSets
This section provides a reference to the `createOrderSets` method. This belongs to the Marketplace Module.
## createOrderSets(data, sharedContext?): Promise\
This method creates order sets.
### Example
```ts theme={null}
const orderSets = await marketplaceModuleService.createOrderSets([
{
cart_id: "cart_123",
customer_id: "cus_123",
sales_channel_id: "sc_123",
payment_collection_id: "paycol_123",
},
])
```
### Parameters
The order sets to be created.
The ID of the cart that the order set was created from.
The ID of the customer who owns the order set.
The ID of the sales channel the order set belongs to.
The ID of the payment collection associated with the order set.
A context used to share resources, such as transaction manager, between the application and the module.
### Returns
The created order sets.
## createOrderSets(data, sharedContext?): Promise\
This method creates an order set.
### Example
```ts theme={null}
const orderSet = await marketplaceModuleService.createOrderSets({
cart_id: "cart_123",
customer_id: "cus_123",
sales_channel_id: "sc_123",
payment_collection_id: "paycol_123",
})
```
### Parameters
The order set to be created.
The ID of the cart that the order set was created from.
The ID of the customer who owns the order set.
The ID of the sales channel the order set belongs to.
The ID of the payment collection associated with the order set.
A context used to share resources, such as transaction manager, between the application and the module.
### Returns
The created order set.
***
# updateOrderSets
This section provides a reference to the `updateOrderSets` method. This belongs to the Marketplace Module.
## updateOrderSets(id, data, sharedContext?): Promise\
This method updates an existing order set.
### Example
```ts theme={null}
const orderSet = await marketplaceModuleService.updateOrderSets("ordset_123", {
payment_collection_id: "paycol_456",
})
```
### Parameters
The ID of the order set.
The attributes to update in the order set.
The ID of the cart that the order set was created from.
The ID of the customer who owns the order set.
The ID of the sales channel the order set belongs to.
The ID of the payment collection associated with the order set.
A context used to share resources, such as transaction manager, between the application and the module.
### Returns
The updated order set.
The ID of the order set.
The display ID of the order set.
The ID of the cart that the order set was created from.
The ID of the customer who owns the order set.
The ID of the sales channel the order set belongs to.
The ID of the payment collection associated with the order set.
The created date of the order set.
The updated date of the order set.
***
# deleteOrderSets
This section provides a reference to the `deleteOrderSets` method. This belongs to the Marketplace Module.
## deleteOrderSets(ids, sharedContext?): Promise\
This method deletes order sets by their IDs.
### Example
```ts theme={null}
await marketplaceModuleService.deleteOrderSets(["ordset_123", "ordset_321"])
```
### Parameters
The IDs of the order sets.
A context used to share resources, such as transaction manager, between the application and the module.
### Returns
Resolves when the order sets are deleted successfully.
## deleteOrderSets(id, sharedContext?): Promise\
This method deletes an order set by its ID.
### Example
```ts theme={null}
await marketplaceModuleService.deleteOrderSets("ordset_123")
```
### Parameters
The ID of the order set.
A context used to share resources, such as transaction manager, between the application and the module.
### Returns
Resolves when the order set is deleted successfully.
***
# retrieveOrderSet
This section provides a reference to the `retrieveOrderSet` method. This belongs to the Marketplace Module.
This method retrieves an order set by its ID.
## Example
```ts theme={null}
const orderSet = await marketplaceModuleService.retrieveOrderSet("ordset_123")
```
To retrieve relationships:
```ts theme={null}
const orderSet = await marketplaceModuleService.retrieveOrderSet(
"ordset_123",
{
relations: ["customer", "cart", "sales_channel"],
}
)
```
## Parameters
The ID of the order set.
The configurations determining how the order set is retrieved. Its properties, such as `select` or `relations`, accept the attributes or relations associated with an order set.
An array of strings, each being attribute names of the entity to retrieve in the result.
A number indicating the number of records to skip before retrieving the results.
A number indicating the number of records to return in the result.
An array of strings, each being relation names of the entity to retrieve in the result. Use Query to retrieve linked data models from other modules.
An object used to specify how to sort the returned records.
A boolean indicating whether deleted records should also be retrieved as part of the result.
A context used to share resources, such as transaction manager, between the application and the module.
## Returns
The retrieved order set.
The ID of the order set.
The display ID of the order set.
The ID of the cart that the order set was created from.
The ID of the customer who owns the order set.
The ID of the sales channel the order set belongs to.
The ID of the payment collection associated with the order set.
The created date of the order set.
The updated date of the order set.
The associated customer (if included in relations).
The associated cart (if included in relations).
The associated sales channel (if included in relations).
The associated payment collection (if included in relations).
***
# listOrderSets
This section provides a reference to the `listOrderSets` method. This belongs to the Marketplace Module.
This method retrieves a paginated list of order sets based on optional filters and configuration.
## Example
To retrieve a list of order sets using their IDs:
```ts theme={null}
const orderSets = await marketplaceModuleService.listOrderSets({
id: ["ordset_123", "ordset_321"],
})
```
To retrieve order sets for a specific customer:
```ts theme={null}
const orderSets = await marketplaceModuleService.listOrderSets({
customer_id: "cus_123",
})
```
By default, only the first `15` records are retrieved. You can control pagination by specifying the `skip` and `take` properties of the `config` parameter:
```ts theme={null}
const orderSets = await marketplaceModuleService.listOrderSets(
{
customer_id: "cus_123",
},
{
take: 20,
skip: 2,
}
)
```
## Parameters
The filters to apply on the retrieved order sets.
The IDs to filter the order sets by.
Filter order sets by their cart IDs.
Filter order sets by their customer IDs.
Filter order sets by their sales channel IDs.
Filter order sets by their payment collection IDs.
Filter order sets by their display IDs.
The configurations determining how the order set is retrieved. Its properties, such as `select` or `relations`, accept the attributes or relations associated with an order set.
An array of strings, each being attribute names of the entity to retrieve in the result.
A number indicating the number of records to skip before retrieving the results.
A number indicating the number of records to return in the result.
An array of strings, each being relation names of the entity to retrieve in the result.
An object used to specify how to sort the returned records. Its keys are the names of attributes of the entity, and a key's value can either be `ASC` to sort retrieved records in an ascending order, or `DESC` to sort retrieved records in a descending order.
A boolean indicating whether deleted records should also be retrieved as part of the result.
A context used to share resources, such as transaction manager, between the application and the module.
## Returns
The list of order sets.
***
# listAndCountOrderSets
This section provides a reference to the `listAndCountOrderSets` method. This belongs to the Marketplace Module.
This method retrieves a paginated list of order sets along with the total count of available order sets satisfying the provided filters.
## Example
To retrieve a list of order sets using their IDs:
```ts theme={null}
const [orderSets, count] = await marketplaceModuleService.listAndCountOrderSets({
id: ["ordset_123", "ordset_321"],
})
```
By default, only the first `15` records are retrieved. You can control pagination by specifying the `skip` and `take` properties of the `config` parameter:
```ts theme={null}
const [orderSets, count] = await marketplaceModuleService.listAndCountOrderSets(
{
customer_id: "cus_123",
},
{
take: 20,
skip: 2,
}
)
```
## Parameters
The filters to apply on the retrieved order sets.
The IDs to filter the order sets by.
Filter order sets by their cart IDs.
Filter order sets by their customer IDs.
Filter order sets by their sales channel IDs.
Filter order sets by their payment collection IDs.
Filter order sets by their display IDs.
The configurations determining how the order set is retrieved.
An array of strings, each being attribute names of the entity to retrieve in the result.
A number indicating the number of records to skip before retrieving the results.
A number indicating the number of records to return in the result.
An array of strings, each being relation names of the entity to retrieve in the result.
An object used to specify how to sort the returned records.
A boolean indicating whether deleted records should also be retrieved as part of the result.
A context used to share resources, such as transaction manager, between the application and the module.
## Returns
The list of order sets along with their total count.
***
# softDeleteOrderSets
This section provides a reference to the `softDeleteOrderSets` method. This belongs to the Marketplace Module.
This method soft deletes order sets by their IDs.
## Example
```ts theme={null}
await marketplaceModuleService.softDeleteOrderSets([
"ordset_123",
"ordset_321",
])
```
## Parameters
The IDs of the order sets.
An object that is used to specify an entity's related entities that should be soft-deleted when the main entity is soft-deleted.
A context used to share resources, such as transaction manager, between the application and the module.
## Returns
An object that includes the IDs of related records that were also soft deleted. If there are no related records, the promise resolves to `void`.
***
# restoreOrderSets
This section provides a reference to the `restoreOrderSets` method. This belongs to the Marketplace Module.
This method restores soft deleted order sets by their IDs.
## Example
```ts theme={null}
await marketplaceModuleService.restoreOrderSets(["ordset_123", "ordset_321"])
```
## Parameters
The IDs of the order sets.
Configurations determining which relations to restore along with each of the order set.
A context used to share resources, such as transaction manager, between the application and the module.
## Returns
An object that includes the IDs of related records that were restored. If there are no related records restored, the promise resolves to `void`.
# Payout Module
Source: https://docs.mercurjs.com/product/modules/b2c-core/payout/payout-concept
Learn about the Payout Module and how to use it in your application
# Payout Module
In this section of the documentation, you will find resources to learn more about the Payout Module and how to use it in your application.
Mercur has seller payout features available out-of-the-box through the Payout Module. A [module](https://docs.medusajs.com/learn/fundamentals/modules) is a standalone package that provides features for a single domain. Each of Mercur's marketplace features are placed in custom modules, such as this Payout Module.
Learn more about why modules are isolated in [this documentation](https://docs.medusajs.com/learn/fundamentals/modules/isolation).
## Payout Features
* **Payout Account Management**: Create and manage seller payout accounts integrated with payment providers like Stripe Connect.
* **Seller Onboarding**: Handle the onboarding process for sellers to connect their bank accounts and receive payments.
* **Automated Payouts**: Process payouts to sellers automatically based on completed orders.
* **Payout Reversals**: Handle refunds and chargebacks by creating payout reversals.
* **Webhook Integration**: Process asynchronous events from payment providers to update account status.
***
## How to Use the Payout Module
In your Medusa application, you build flows around Commerce Modules. A flow is built as a [Workflow](https://docs.medusajs.com/learn/fundamentals/workflows), which is a special function composed of a series of steps that guarantees data consistency and reliable roll-back mechanism.
You can build custom workflows and steps. Mercur provides pre-built workflows for payout operations in the `@mercurjs/b2c-core` package.
For example, the `processPayoutWebhookActionWorkflow`:
```ts src/workflows/payout/process-payout-webhook-action.ts theme={null}
import { when } from '@medusajs/framework/workflows-sdk'
import { createWorkflow } from '@medusajs/workflows-sdk'
import {
PayoutAccountStatus,
PayoutWebhookAction,
PayoutWebhookActionAndDataResponse
} from '@mercurjs/framework'
import { updatePayoutAccountStep } from '../steps'
type ProcessPayoutWebhookActionInput = {
action: PayoutWebhookActionAndDataResponse['action']
data: PayoutWebhookActionAndDataResponse['data']
}
export const processPayoutWebhookActionWorkflow = createWorkflow(
'process-payout-action',
function (input: ProcessPayoutWebhookActionInput) {
// Conditional workflow execution based on webhook action
when(
{ action: input.action },
({ action }) => action === PayoutWebhookAction.ACCOUNT_AUTHORIZED
).then(() => {
updatePayoutAccountStep({
id: input.data.account_id,
status: PayoutAccountStatus.ACTIVE
})
})
}
)
```
You can then execute the workflow in your subscribers:
### Subscriber
```ts src/subscribers/payout-webhook.ts theme={null}
import { SubscriberArgs, SubscriberConfig } from "@medusajs/framework"
import {
PayoutWebhookActionPayload,
PayoutWebhookEvents,
} from "@mercurjs/framework"
import { PAYOUT_MODULE } from "../modules/payout"
import { PayoutModuleService } from "../modules/payout"
import { processPayoutWebhookActionWorkflow } from "../workflows/payout/workflows"
export default async function payoutWebhookHandler({
event,
container,
}: SubscriberArgs) {
const payoutService: PayoutModuleService = container.resolve(PAYOUT_MODULE)
const input = event.data
// Handle Buffer serialization
if (input.rawData?.type === "Buffer") {
input.rawData = Buffer.from(input.rawData.data)
}
// Validate webhook and determine action
const actionAndData = await payoutService.getWebhookActionAndData(input)
if (!actionAndData) {
return
}
// Process the webhook action
await processPayoutWebhookActionWorkflow(container).run({
input: {
action: actionAndData.action,
data: actionAndData.data,
},
})
}
export const config: SubscriberConfig = {
event: PayoutWebhookEvents.ACCOUNT_WEBHOOK_RECEIVED,
context: {
subscriberId: "payout-account-webhook-handler",
},
}
```
***
# Concepts
In this document, you'll learn about the main concepts related to payouts in Mercur.
## Payout Account
A payout account represents a seller's connection to a payment provider for receiving funds from the marketplace. It is represented by the [PayoutAccount data model](../data-model/payout-module-data-reference#payoutaccount).
A payout account holds information about:
* The seller's reference ID in the external provider's system (e.g., Stripe Connect account ID)
* Account status (pending, active, disabled)
* Provider-specific account data
* Associated onboarding record
* History of payouts
Each seller must create and complete verification for a payout account before they can receive payments from orders.
***
## Payout Account Status
A payout account can be in one of three states:
### pending
The account is created but not yet fully verified. The seller needs to complete the onboarding process by providing business information, bank account details, and identity verification.
### active
The account is fully verified and authorized to receive payouts. The seller has completed all required steps in the onboarding flow.
### disabled
The account has been deactivated, either by the seller, the marketplace administrator, or the payment provider. No payouts can be sent to disabled accounts.
***
## Onboarding
The onboarding process guides sellers through connecting their payout account with the payment provider. It is represented by the [Onboarding data model](../data-model/payout-module-data-reference#onboarding).
### Onboarding Flow
1. **Create Payout Account**: Seller initiates account creation through the vendor panel
2. **Initialize Onboarding**: System generates an onboarding URL from the payment provider (e.g., Stripe Connect onboarding link)
3. **Complete Verification**: Seller completes identity and business verification on the provider's platform
4. **Webhook Callback**: Provider sends webhook to notify account authorization
5. **Account Activation**: System updates account status to `active` via webhook handler
The onboarding record stores:
* Provider-specific data (e.g., onboarding URL, session ID)
* Context data (e.g., redirect URLs)
***
## Payout
A payout represents a money transfer from the marketplace to a seller. It is represented by the [Payout data model](../data-model/payout-module-data-reference#payout).
Payouts are created automatically by the marketplace system (not manually by sellers) when:
* An order is completed
* The seller's payout account is active
* The commission has been calculated
A payout includes:
* The amount being transferred
* Currency code
* Provider transfer data (e.g., Stripe transfer ID)
* Associated payout account
***
## Payout Reversal
A payout reversal represents a refund or chargeback of a previous payout. It is represented by the [PayoutReversal data model](../data-model/payout-module-data-reference#payoutreversal).
Reversals are created when:
* A customer receives a refund for their order
* A chargeback occurs
* An order is canceled after payout
The reversal amount is deducted from the seller's future payouts or handled through the payment provider's dispute resolution process.
***
## Webhook Processing
Mercur uses webhooks from payment providers to handle asynchronous payout events:
### Webhook Actions
* **account\_authorized**: Seller completed onboarding, account is now active
* **account\_deauthorized**: Seller disconnected their account
* **account\_requires\_action**: Additional verification required
The `payout-webhook` subscriber listens for webhook events, validates the signature, determines the action, and executes the appropriate workflow to update account status.
***
## Automated Payout Schedule
The `daily-payouts` scheduled job runs every day at midnight to process pending payouts:
**Process:**
1. Query database for orders without associated payouts
2. Batch orders in groups of 100 for performance
3. Emit payout events with staggered delays to avoid overwhelming the payment provider
4. Each event triggers payout creation workflow
5. Failed events are retried up to 3 times
This ensures sellers receive payments automatically without manual intervention.
***
## Use Cases
**1. Seller Onboarding** New sellers create payout accounts and complete Stripe Connect onboarding to receive marketplace payments.
**2. Automated Seller Payments** Daily job processes all completed orders and transfers funds to sellers automatically, minus marketplace commission.
**3. Refund Handling** When customers receive refunds, payout reversals are created to deduct amounts from seller accounts.
**4. Account Verification** Webhook integration keeps payout account status synchronized with Stripe's verification process.
**5. Multi-Currency Support** Payouts support multiple currencies, allowing international marketplaces to pay sellers in their local currency.
# Payout Module Data Models
Source: https://docs.mercurjs.com/product/modules/b2c-core/payout/payout-data-model-reference
Reference documentation for the Payout Module data models
## Relations Overview
| Relationship | Type | Description |
| -------------------------- | ----------- | ------------------------------------------ |
| PayoutAccount → Onboarding | One-to-One | A payout account has one onboarding record |
| PayoutAccount → Payout | One-to-Many | A payout account has many payouts |
| Payout → PayoutReversal | One-to-Many | A payout can have many reversals |
## Data Models
* [PayoutAccount](#payoutaccount)
* [Onboarding](#onboarding)
* [Payout](#payout)
* [PayoutReversal](#payoutreversal)
## PayoutAccount
This documentation provides a reference to the PayoutAccount data model. It belongs to the Payout Module.
[View source code](https://github.com/mercurjs/mercur/blob/main/packages/modules/b2c-core/src/modules/payout/models/payout-account.ts)
| Field | Type | Description |
| -------------- | ------------------------------------------------- | ------------------------------------------------------------------------------------------------- |
| `id` | `PrimaryKeyModifier` | The ID of the payout account. |
| `status` | `EnumProperty<["pending", "active", "disabled"]>` | The status of the payout account. Defaults to `pending`. |
| `reference_id` | `TextProperty` | The ID of the payout account in the external provider's system (e.g., Stripe Connect account ID). |
| `data` | `JSONProperty` | The data returned by the payout provider when the account is created. |
| `context` | `JSONProperty` | Additional context data for the payout account. |
| `onboarding` | `HasOne` | The associated [Onboarding](#onboarding) record. |
| `payouts` | `HasMany` | The associated [Payout](#payout) records. |
## Onboarding
This documentation provides a reference to the Onboarding data model. It belongs to the Payout Module.
[View source code](https://github.com/mercurjs/mercur/blob/main/packages/modules/b2c-core/src/modules/payout/models/onboarding.ts)
| Field | Type | Description |
| ---------------- | -------------------------------- | ---------------------------------------------------- |
| `id` | `PrimaryKeyModifier` | The ID of the onboarding. |
| `data` | `JSONProperty` | The onboarding data returned by the payout provider. |
| `context` | `JSONProperty` | Additional context data for the onboarding process. |
| `payout_account` | `BelongsTo` | The associated [PayoutAccount](#payoutaccount). |
## Payout
This documentation provides a reference to the Payout data model. It belongs to the Payout Module.
[View source code](https://github.com/mercurjs/mercur/blob/main/packages/modules/b2c-core/src/modules/payout/models/payout.ts)
| Field | Type | Description |
| ---------------- | -------------------------------- | ------------------------------------------------------------------------------ |
| `id` | `PrimaryKeyModifier` | The ID of the payout. |
| `currency_code` | `TextProperty` | The ISO 3 currency code of the payout. For example, `usd`. |
| `amount` | `BigNumberProperty` | The amount of the payout |
| `data` | `JSONProperty` | The payout data returned by the payout provider (e.g., Stripe payout details). |
| `payout_account` | `BelongsTo` | The associated [PayoutAccount](#payoutaccount). |
| `reversals` | `HasMany` | The associated [PayoutReversal](#payoutreversal) records. |
## PayoutReversal
This documentation provides a reference to the PayoutReversal data model. It belongs to the Payout Module.
[View source code](https://github.com/mercurjs/mercur/blob/main/packages/modules/b2c-core/src/modules/payout/models/payout-reversal.ts)
| Field | Type | Description |
| --------------- | -------------------------------- | ------------------------------------------------------------------- |
| `id` | `PrimaryKeyModifier` | The ID of the payout reversal. |
| `currency_code` | `TextProperty` | The ISO 3 currency code of the payout reversal. For example, `usd`. |
| `amount` | `BigNumberProperty` | The amount of the payout reversal |
| `data` | `JSONProperty` | The reversal data returned by the payout provider. |
| `payout` | `BelongsTo` | The associated [Payout](#payout). |
# Payout Module Links
Source: https://docs.mercurjs.com/product/modules/b2c-core/payout/payout-links
Module links for the Payout Module
# Links between Payout Module and Other Modules
This document showcases the module links defined between the Payout Module and other Commerce Modules.
## Summary
The Payout Module has the following links to other modules:
| First Data Model | Second Data Model | Type | Description |
| ---------------- | ----------------- | -------------------- | -------------------------------------------------------- |
| Order | Payout | Stored - one-to-many | Associates an order with its payout transfers to sellers |
| Seller | PayoutAccount | Stored - one-to-one | Associates a seller with their payout account |
***
## Order Module
Mercur defines a link between the Order Module's `Order` data model and the Payout Module's `Payout` data model. This allows tracking which payouts were created for a specific order.
### Retrieve with Query
To retrieve the payouts of an order with Query, pass `payout.*` in `fields`:
```ts theme={null}
const { data: orders } = await query.graph({
entity: "order",
fields: [
"*",
"payout.*",
],
})
// orders[0].payout
```
```ts theme={null}
import { useQueryGraphStep } from "@medusajs/medusa/core-flows"
// ...
const { data: orders } = useQueryGraphStep({
entity: "order",
fields: [
"*",
"payout.*",
],
})
// orders[0].payout
```
### Manage with Link
To manage the payouts of an order, use Link:
```ts theme={null}
import { Modules } from "@medusajs/framework/utils"
// ...
await link.create({
[Modules.ORDER]: {
order_id: "ord_123",
},
payout: {
payout_id: "pout_123",
},
})
```
```ts theme={null}
import { createRemoteLinkStep } from "@medusajs/medusa/core-flows"
// ...
createRemoteLinkStep({
[Modules.ORDER]: {
order_id: "ord_123",
},
payout: {
payout_id: "pout_123",
},
})
```
***
## Seller Module
Mercur defines a link between the Seller Module's `Seller` data model and the Payout Module's `PayoutAccount` data model. This allows each seller to have a payout account for receiving payments from the marketplace.
### Retrieve with Query
To retrieve the payout account of a seller with Query, pass `payout_account.*` in `fields`:
```ts theme={null}
const { data: sellers } = await query.graph({
entity: "seller",
fields: [
"*",
"payout_account.*",
],
})
// sellers[0].payout_account
```
```ts theme={null}
import { useQueryGraphStep } from "@medusajs/medusa/core-flows"
// ...
const { data: sellers } = useQueryGraphStep({
entity: "seller",
fields: [
"*",
"payout_account.*",
],
})
// sellers[0].payout_account
```
### Manage with Link
To manage the payout account of a seller, use Link:
```ts theme={null}
// ...
await link.create({
seller: {
seller_id: "sel_123",
},
payout: {
payout_account_id: "pacc_123",
},
})
```
```ts theme={null}
import { createRemoteLinkStep } from "@medusajs/medusa/core-flows"
// ...
createRemoteLinkStep({
seller: {
seller_id: "sel_123",
},
payout: {
payout_account_id: "pacc_123",
},
})
```
# Payout Module Service Reference
Source: https://docs.mercurjs.com/product/modules/b2c-core/payout/payout-services
Reference documentation for the Payout Module service methods
# IPayoutModuleService Reference
This section of the documentation provides a reference to the `IPayoutModuleService` interface's methods. This is the interface developers use to use the functionalities provided by the Payout Module.
You should only use the methods in this reference when implementing complex customizations. For common cases, check out available workflows instead.
The main service interface for the Payout Module.
## Methods
### PayoutAccount Methods
* [createPayoutAccount](#createpayoutaccount)
* [updatePayoutAccounts](#updatepayoutaccounts)
* [deletePayoutAccounts](#deletepayoutaccounts)
* [retrievePayoutAccount](#retrievepayoutaccount)
* [listPayoutAccounts](#listpayoutaccounts)
* [listAndCountPayoutAccounts](#listandcountpayoutaccounts)
* [softDeletePayoutAccounts](#softdeletepayoutaccounts)
* [restorePayoutAccounts](#restorepayoutaccounts)
* [syncStripeAccount](#syncstripeaccount)
### Onboarding Methods
* [initializeOnboarding](#initializeonboarding)
* [updateOnboardings](#updateonboardings)
* [deleteOnboardings](#deleteonboardings)
* [retrieveOnboarding](#retrieveonboarding)
* [listOnboardings](#listonboardings)
* [listAndCountOnboardings](#listandcountonboardings)
* [softDeleteOnboardings](#softdeleteonboardings)
* [restoreOnboardings](#restoreonboardings)
### Payout Methods
* [createPayout](#createpayout)
* [createPayouts](#createpayouts)
* [updatePayouts](#updatepayouts)
* [deletePayouts](#deletepayouts)
* [retrievePayout](#retrievepayout)
* [listPayouts](#listpayouts)
* [listAndCountPayouts](#listandcountpayouts)
* [softDeletePayouts](#softdeletepayouts)
* [restorePayouts](#restorepayouts)
### Payout Reversal Methods
* [createPayoutReversal](#createpayoutreversal)
* [createPayoutReversals](#createpayoutreversals)
* [updatePayoutReversals](#updatepayoutreversals)
* [deletePayoutReversals](#deletepayoutreversals)
* [retrievePayoutReversal](#retrievepayoutreversal)
* [listPayoutReversals](#listpayoutreversals)
* [listAndCountPayoutReversals](#listandcountpayoutreversals)
* [softDeletePayoutReversals](#softdeletepayoutreversals)
* [restorePayoutReversals](#restorepayoutreversals)
### Webhook Methods
* [getWebhookActionAndData](#getwebhookactionanddata)
***
# createPayoutAccount
This section provides a reference to the `createPayoutAccount` method. This belongs to the Payout Module.
This method creates a payout account by initializing it with the payout provider (e.g., Stripe Connect).
## Example
```ts theme={null}
const payoutAccount = await payoutModuleService.createPayoutAccount({
context: {
seller_id: "sel_123",
country: "US",
business_type: "company",
},
})
```
## Parameters
The payout account to be created.
Context data passed to the payout provider (e.g., seller information, business details for Stripe Connect account creation).
A context used to share resources, such as transaction manager, between the application and the module.
## Returns
The created payout account.
The ID of the payout account.
The ID of the payout account in the external provider's system (e.g., Stripe Connect account ID).
The data returned by the payout provider when the account is created.
The status of the payout account.
The created date of the payout account.
The updated date of the payout account.
***
# syncStripeAccount
This section provides a reference to the `syncStripeAccount` method. This belongs to the Payout Module.
This method syncs a payout account with the Stripe Connect account status. It fetches the latest account details from Stripe and updates the local payout account status based on whether the account is fully verified and authorized.
## Example
```ts theme={null}
const payoutAccount = await payoutModuleService.syncStripeAccount("pacc_123")
```
## Parameters
The ID of the payout account to sync.
A context used to share resources, such as transaction manager, between the application and the module.
## Returns
The synced payout account with updated status.
The ID of the payout account.
The ID of the payout account in Stripe.
The complete Stripe account data.
The updated status of the payout account. Set to `active` if the Stripe account is fully verified and authorized.
The created date of the payout account.
The updated date of the payout account.
***
# initializeOnboarding
This section provides a reference to the `initializeOnboarding` method. This belongs to the Payout Module.
This method initializes or updates the onboarding process for a payout account with the payout provider. If an onboarding record already exists, it updates it; otherwise, it creates a new one.
## Example
```ts theme={null}
const onboarding = await payoutModuleService.initializeOnboarding({
payout_account_id: "pacc_123",
context: {
refresh_url: "https://example.com/onboarding",
return_url: "https://example.com/dashboard",
},
})
```
## Parameters
The onboarding data.
The ID of the payout account to initialize onboarding for.
Context data passed to the payout provider (e.g., redirect URLs for Stripe Connect onboarding flow).
A context used to share resources, such as transaction manager, between the application and the module.
## Returns
The initialized or updated onboarding record.
The ID of the onboarding.
The onboarding data returned by the payout provider (e.g., Stripe onboarding URL).
Additional context data for the onboarding process.
The created date of the onboarding.
The updated date of the onboarding.
***
# createPayout
This section provides a reference to the `createPayout` method. This belongs to the Payout Module.
This method creates a payout by processing a money transfer through the payout provider (e.g., Stripe Transfer).
## Example
```ts theme={null}
const payout = await payoutModuleService.createPayout({
amount: 10000,
currency_code: "usd",
account_id: "pacc_123",
transaction_id: "txn_123",
source_transaction: "ch_456",
})
```
## Parameters
The payout to be created.
The amount to transfer to the seller.
The ISO 3 currency code. For example, `usd`.
The ID of the payout account to transfer funds to.
The ID of the transaction related to this payout.
The ID of the source transaction (e.g., Stripe charge ID).
A context used to share resources, such as transaction manager, between the application and the module.
## Returns
The created payout.
The ID of the payout.
The amount of the payout.
The ISO 3 currency code of the payout.
The payout data returned by the payout provider (e.g., Stripe transfer details).
The created date of the payout.
The updated date of the payout.
***
# createPayoutReversal
This section provides a reference to the `createPayoutReversal` method. This belongs to the Payout Module.
This method creates a payout reversal by reversing a previous payout through the payout provider.
## Example
```ts theme={null}
const reversal = await payoutModuleService.createPayoutReversal({
payout_id: "pout_123",
amount: 5000,
currency_code: "usd",
})
```
## Parameters
The payout reversal to be created.
The ID of the payout to reverse.
The amount to reverse.
The ISO 3 currency code. For example, `usd`.
A context used to share resources, such as transaction manager, between the application and the module.
## Returns
The created payout reversal.
The ID of the payout reversal.
The amount of the reversal.
The ISO 3 currency code of the reversal.
The reversal data returned by the payout provider.
The created date of the payout reversal.
The updated date of the payout reversal.
***
# getWebhookActionAndData
This section provides a reference to the `getWebhookActionAndData` method. This belongs to the Payout Module.
This method processes webhook events from the payout provider and returns the action type and associated data.
## Example
```ts theme={null}
const result = await payoutModuleService.getWebhookActionAndData({
data: webhookEvent,
rawData: req.rawBody,
headers: req.headers,
})
```
## Parameters
The webhook payload data.
The parsed webhook event data.
The raw webhook body (needed for signature verification).
The webhook request headers (contains signature).
## Returns
The webhook action and associated data.
The action type determined from the webhook event.
The data associated with the webhook action.
The ID of the payout account affected by this webhook.
***
# updatePayoutAccounts
This section provides a reference to the `updatePayoutAccounts` method. This belongs to the Payout Module.
## updatePayoutAccounts(id, data, sharedContext?): Promise\
This method updates an existing payout account.
### Example
```ts theme={null}
const payoutAccount = await payoutModuleService.updatePayoutAccounts("pacc_123", {
status: "active",
})
```
### Parameters
The ID of the payout account.
The attributes to update in the payout account.
The ID of the payout account in the external provider's system.
The data returned by the payout provider.
The status of the payout account.
Additional context data for the payout account.
A context used to share resources, such as transaction manager, between the application and the module.
### Returns
The updated payout account.
The ID of the payout account.
The ID of the payout account in the external provider's system.
The data returned by the payout provider.
The status of the payout account.
The created date of the payout account.
The updated date of the payout account.
***
# deletePayoutAccounts
This section provides a reference to the `deletePayoutAccounts` method. This belongs to the Payout Module.
## deletePayoutAccounts(ids, sharedContext?): Promise\
This method deletes payout accounts by their IDs.
### Example
```ts theme={null}
await payoutModuleService.deletePayoutAccounts(["pacc_123", "pacc_321"])
```
### Parameters
The IDs of the payout accounts.
A context used to share resources, such as transaction manager, between the application and the module.
### Returns
Resolves when the payout accounts are deleted successfully.
## deletePayoutAccounts(id, sharedContext?): Promise\
This method deletes a payout account by its ID.
### Example
```ts theme={null}
await payoutModuleService.deletePayoutAccounts("pacc_123")
```
### Parameters
The ID of the payout account.
A context used to share resources, such as transaction manager, between the application and the module.
### Returns
Resolves when the payout account is deleted successfully.
***
# retrievePayoutAccount
This section provides a reference to the `retrievePayoutAccount` method. This belongs to the Payout Module.
This method retrieves a payout account by its ID.
## Example
```ts theme={null}
const payoutAccount = await payoutModuleService.retrievePayoutAccount("pacc_123")
```
To retrieve relationships:
```ts theme={null}
const payoutAccount = await payoutModuleService.retrievePayoutAccount(
"pacc_123",
{
relations: ["onboarding", "payouts"],
}
)
```
## Parameters
The ID of the payout account.
The configurations determining how the payout account is retrieved.
An array of strings, each being attribute names of the entity to retrieve in the result.
A number indicating the number of records to skip before retrieving the results.
A number indicating the number of records to return in the result.
An array of strings, each being relation names of the entity to retrieve in the result. For example, `["onboarding", "payouts"]`.
An object used to specify how to sort the returned records.
A boolean indicating whether deleted records should also be retrieved as part of the result.
A context used to share resources, such as transaction manager, between the application and the module.
## Returns
The retrieved payout account.
The ID of the payout account.
The ID of the payout account in the external provider's system.
The data returned by the payout provider.
The status of the payout account.
The created date of the payout account.
The updated date of the payout account.
***
# listPayoutAccounts
This section provides a reference to the `listPayoutAccounts` method. This belongs to the Payout Module.
This method retrieves a paginated list of payout accounts based on optional filters and configuration.
## Example
```ts theme={null}
const payoutAccounts = await payoutModuleService.listPayoutAccounts({
status: "active",
})
```
By default, only the first `15` records are retrieved. You can control pagination:
```ts theme={null}
const payoutAccounts = await payoutModuleService.listPayoutAccounts(
{
status: "active",
},
{
take: 20,
skip: 2,
}
)
```
## Parameters
The filters to apply on the retrieved payout accounts.
The IDs to filter the payout accounts by.
Filter payout accounts by their provider reference IDs.
Filter payout accounts by their status.
The configurations determining how the payout account is retrieved.
An array of strings, each being attribute names of the entity to retrieve in the result.
A number indicating the number of records to skip before retrieving the results.
A number indicating the number of records to return in the result.
An array of strings, each being relation names of the entity to retrieve in the result.
An object used to specify how to sort the returned records.
A boolean indicating whether deleted records should also be retrieved as part of the result.
A context used to share resources, such as transaction manager, between the application and the module.
## Returns
The list of payout accounts.
***
# listAndCountPayoutAccounts
This section provides a reference to the `listAndCountPayoutAccounts` method. This belongs to the Payout Module.
This method retrieves a paginated list of payout accounts along with the total count of available payout accounts satisfying the provided filters.
## Example
```ts theme={null}
const [payoutAccounts, count] = await payoutModuleService.listAndCountPayoutAccounts({
status: "active",
})
```
## Parameters
The filters to apply on the retrieved payout accounts.
The IDs to filter the payout accounts by.
Filter payout accounts by their provider reference IDs.
Filter payout accounts by their status.
The configurations determining how the payout account is retrieved.
An array of strings, each being attribute names of the entity to retrieve in the result.
A number indicating the number of records to skip before retrieving the results.
A number indicating the number of records to return in the result.
An array of strings, each being relation names of the entity to retrieve in the result.
An object used to specify how to sort the returned records.
A boolean indicating whether deleted records should also be retrieved as part of the result.
A context used to share resources, such as transaction manager, between the application and the module.
## Returns
The list of payout accounts along with their total count.
***
# softDeletePayoutAccounts
This section provides a reference to the `softDeletePayoutAccounts` method. This belongs to the Payout Module.
This method soft deletes payout accounts by their IDs.
## Example
```ts theme={null}
await payoutModuleService.softDeletePayoutAccounts([
"pacc_123",
"pacc_321",
])
```
## Parameters
The IDs of the payout accounts.
An object that is used to specify an entity's related entities that should be soft-deleted when the main entity is soft-deleted.
A context used to share resources, such as transaction manager, between the application and the module.
## Returns
An object that includes the IDs of related records that were also soft deleted. If there are no related records, the promise resolves to `void`.
***
# restorePayoutAccounts
This section provides a reference to the `restorePayoutAccounts` method. This belongs to the Payout Module.
This method restores soft deleted payout accounts by their IDs.
## Example
```ts theme={null}
await payoutModuleService.restorePayoutAccounts(["pacc_123", "pacc_321"])
```
## Parameters
The IDs of the payout accounts.
Configurations determining which relations to restore along with each of the payout account.
A context used to share resources, such as transaction manager, between the application and the module.
## Returns
An object that includes the IDs of related records that were restored. If there are no related records restored, the promise resolves to `void`.
***
# updateOnboardings
This section provides a reference to the `updateOnboardings` method. This belongs to the Payout Module.
## updateOnboardings(id, data, sharedContext?): Promise\
This method updates an existing onboarding record.
### Example
```ts theme={null}
const onboarding = await payoutModuleService.updateOnboardings("onb_123", {
data: { url: "https://connect.stripe.com/setup/..." },
})
```
### Parameters
The ID of the onboarding.
The attributes to update in the onboarding.
The onboarding data returned by the payout provider.
Additional context data for the onboarding process.
A context used to share resources, such as transaction manager, between the application and the module.
### Returns
The updated onboarding.
***
# deleteOnboardings
This section provides a reference to the `deleteOnboardings` method. This belongs to the Payout Module.
## deleteOnboardings(ids, sharedContext?): Promise\
This method deletes onboardings by their IDs.
### Example
```ts theme={null}
await payoutModuleService.deleteOnboardings(["onb_123", "onb_321"])
```
### Parameters
The IDs of the onboardings.
A context used to share resources, such as transaction manager, between the application and the module.
### Returns
Resolves when the onboardings are deleted successfully.
## deleteOnboardings(id, sharedContext?): Promise\
This method deletes an onboarding by its ID.
### Example
```ts theme={null}
await payoutModuleService.deleteOnboardings("onb_123")
```
### Parameters
The ID of the onboarding.
A context used to share resources, such as transaction manager, between the application and the module.
### Returns
Resolves when the onboarding is deleted successfully.
***
# retrieveOnboarding
This section provides a reference to the `retrieveOnboarding` method. This belongs to the Payout Module.
This method retrieves an onboarding by its ID.
## Example
```ts theme={null}
const onboarding = await payoutModuleService.retrieveOnboarding("onb_123")
```
## Parameters
The ID of the onboarding.
The configurations determining how the onboarding is retrieved.
An array of strings, each being attribute names of the entity to retrieve in the result.
An array of strings, each being relation names of the entity to retrieve in the result.
An object used to specify how to sort the returned records.
A boolean indicating whether deleted records should also be retrieved as part of the result.
A context used to share resources, such as transaction manager, between the application and the module.
## Returns
The retrieved onboarding.
The ID of the onboarding.
The onboarding data returned by the payout provider.
Additional context data for the onboarding process.
The created date of the onboarding.
The updated date of the onboarding.
***
# listOnboardings
This section provides a reference to the `listOnboardings` method. This belongs to the Payout Module.
This method retrieves a paginated list of onboardings based on optional filters and configuration.
## Example
```ts theme={null}
const onboardings = await payoutModuleService.listOnboardings({
payout_account_id: "pacc_123",
})
```
## Parameters
The filters to apply on the retrieved onboardings.
The IDs to filter the onboardings by.
Filter onboardings by their payout account IDs.
The configurations determining how the onboarding is retrieved.
An array of strings, each being attribute names of the entity to retrieve in the result.
A number indicating the number of records to skip before retrieving the results.
A number indicating the number of records to return in the result.
An array of strings, each being relation names of the entity to retrieve in the result.
An object used to specify how to sort the returned records.
A boolean indicating whether deleted records should also be retrieved as part of the result.
A context used to share resources, such as transaction manager, between the application and the module.
## Returns
The list of onboardings.
***
# listAndCountOnboardings
This section provides a reference to the `listAndCountOnboardings` method. This belongs to the Payout Module.
This method retrieves a paginated list of onboardings along with the total count of available onboardings satisfying the provided filters.
## Example
```ts theme={null}
const [onboardings, count] = await payoutModuleService.listAndCountOnboardings({
payout_account_id: "pacc_123",
})
```
## Parameters
The filters to apply on the retrieved onboardings.
The IDs to filter the onboardings by.
Filter onboardings by their payout account IDs.
The configurations determining how the onboarding is retrieved.
An array of strings, each being attribute names of the entity to retrieve in the result.
A number indicating the number of records to skip before retrieving the results.
A number indicating the number of records to return in the result.
An array of strings, each being relation names of the entity to retrieve in the result.
An object used to specify how to sort the returned records.
A boolean indicating whether deleted records should also be retrieved as part of the result.
A context used to share resources, such as transaction manager, between the application and the module.
## Returns
The list of onboardings along with their total count.
***
# softDeleteOnboardings
This section provides a reference to the `softDeleteOnboardings` method. This belongs to the Payout Module.
This method soft deletes onboardings by their IDs.
## Example
```ts theme={null}
await payoutModuleService.softDeleteOnboardings([
"onb_123",
"onb_321",
])
```
## Parameters
The IDs of the onboardings.
An object that is used to specify an entity's related entities that should be soft-deleted when the main entity is soft-deleted.
A context used to share resources, such as transaction manager, between the application and the module.
## Returns
An object that includes the IDs of related records that were also soft deleted. If there are no related records, the promise resolves to `void`.
***
# restoreOnboardings
This section provides a reference to the `restoreOnboardings` method. This belongs to the Payout Module.
This method restores soft deleted onboardings by their IDs.
## Example
```ts theme={null}
await payoutModuleService.restoreOnboardings(["onb_123", "onb_321"])
```
## Parameters
The IDs of the onboardings.
Configurations determining which relations to restore along with each of the onboarding.
A context used to share resources, such as transaction manager, between the application and the module.
## Returns
An object that includes the IDs of related records that were restored. If there are no related records restored, the promise resolves to `void`.
***
# createPayouts
This section provides a reference to the `createPayouts` method. This belongs to the Payout Module.
## createPayouts(data, sharedContext?): Promise\
This method creates payouts.
### Example
```ts theme={null}
const payouts = await payoutModuleService.createPayouts([
{
amount: 10000,
currency_code: "usd",
payout_account_id: "pacc_123",
data: { transfer_id: "tr_123" },
},
])
```
### Parameters
The payouts to be created.
The amount of the payout.
The ISO 3 currency code. For example, `usd`.
The ID of the payout account.
The payout data from the provider.
A context used to share resources, such as transaction manager, between the application and the module.
### Returns
The created payouts.
***
# updatePayouts
This section provides a reference to the `updatePayouts` method. This belongs to the Payout Module.
## updatePayouts(id, data, sharedContext?): Promise\
This method updates an existing payout.
### Example
```ts theme={null}
const payout = await payoutModuleService.updatePayouts("pout_123", {
data: { status: "paid" },
})
```
### Parameters
The ID of the payout.
The attributes to update in the payout.
The amount of the payout.
The ISO 3 currency code.
The payout data from the provider.
A context used to share resources, such as transaction manager, between the application and the module.
### Returns
The updated payout.
***
# deletePayouts
This section provides a reference to the `deletePayouts` method. This belongs to the Payout Module.
## deletePayouts(ids, sharedContext?): Promise\
This method deletes payouts by their IDs.
### Example
```ts theme={null}
await payoutModuleService.deletePayouts(["pout_123", "pout_321"])
```
### Parameters
The IDs of the payouts.
A context used to share resources, such as transaction manager, between the application and the module.
### Returns
Resolves when the payouts are deleted successfully.
## deletePayouts(id, sharedContext?): Promise\
This method deletes a payout by its ID.
### Example
```ts theme={null}
await payoutModuleService.deletePayouts("pout_123")
```
### Parameters
The ID of the payout.
A context used to share resources, such as transaction manager, between the application and the module.
### Returns
Resolves when the payout is deleted successfully.
***
# retrievePayout
This section provides a reference to the `retrievePayout` method. This belongs to the Payout Module.
This method retrieves a payout by its ID.
## Example
```ts theme={null}
const payout = await payoutModuleService.retrievePayout("pout_123")
```
To retrieve relationships:
```ts theme={null}
const payout = await payoutModuleService.retrievePayout(
"pout_123",
{
relations: ["payout_account", "reversals"],
}
)
```
## Parameters
The ID of the payout.
The configurations determining how the payout is retrieved.
An array of strings, each being attribute names of the entity to retrieve in the result.
An array of strings, each being relation names of the entity to retrieve in the result. For example, `["payout_account", "reversals"]`.
An object used to specify how to sort the returned records.
A boolean indicating whether deleted records should also be retrieved as part of the result.
A context used to share resources, such as transaction manager, between the application and the module.
## Returns
The retrieved payout.
The ID of the payout.
The amount of the payout.
The ISO 3 currency code of the payout.
The payout data returned by the payout provider.
The created date of the payout.
The updated date of the payout.
***
# listPayouts
This section provides a reference to the `listPayouts` method. This belongs to the Payout Module.
This method retrieves a paginated list of payouts based on optional filters and configuration.
## Example
```ts theme={null}
const payouts = await payoutModuleService.listPayouts({
payout_account_id: "pacc_123",
})
```
## Parameters
The filters to apply on the retrieved payouts.
The IDs to filter the payouts by.
Filter payouts by their payout account IDs.
Filter payouts by their currency codes.
The configurations determining how the payout is retrieved.
An array of strings, each being attribute names of the entity to retrieve in the result.
A number indicating the number of records to skip before retrieving the results.
A number indicating the number of records to return in the result.
An array of strings, each being relation names of the entity to retrieve in the result.
An object used to specify how to sort the returned records.
A boolean indicating whether deleted records should also be retrieved as part of the result.
A context used to share resources, such as transaction manager, between the application and the module.
## Returns
The list of payouts.
***
# listAndCountPayouts
This section provides a reference to the `listAndCountPayouts` method. This belongs to the Payout Module.
This method retrieves a paginated list of payouts along with the total count of available payouts satisfying the provided filters.
## Example
```ts theme={null}
const [payouts, count] = await payoutModuleService.listAndCountPayouts({
payout_account_id: "pacc_123",
})
```
## Parameters
The filters to apply on the retrieved payouts.
The IDs to filter the payouts by.
Filter payouts by their payout account IDs.
Filter payouts by their currency codes.
The configurations determining how the payout is retrieved.
An array of strings, each being attribute names of the entity to retrieve in the result.
A number indicating the number of records to skip before retrieving the results.
A number indicating the number of records to return in the result.
An array of strings, each being relation names of the entity to retrieve in the result.
An object used to specify how to sort the returned records.
A boolean indicating whether deleted records should also be retrieved as part of the result.
A context used to share resources, such as transaction manager, between the application and the module.
## Returns
The list of payouts along with their total count.
***
# softDeletePayouts
This section provides a reference to the `softDeletePayouts` method. This belongs to the Payout Module.
This method soft deletes payouts by their IDs.
## Example
```ts theme={null}
await payoutModuleService.softDeletePayouts([
"pout_123",
"pout_321",
])
```
## Parameters
The IDs of the payouts.
An object that is used to specify an entity's related entities that should be soft-deleted when the main entity is soft-deleted.
A context used to share resources, such as transaction manager, between the application and the module.
## Returns
An object that includes the IDs of related records that were also soft deleted. If there are no related records, the promise resolves to `void`.
***
# restorePayouts
This section provides a reference to the `restorePayouts` method. This belongs to the Payout Module.
This method restores soft deleted payouts by their IDs.
## Example
```ts theme={null}
await payoutModuleService.restorePayouts(["pout_123", "pout_321"])
```
## Parameters
The IDs of the payouts.
Configurations determining which relations to restore along with each of the payout.
A context used to share resources, such as transaction manager, between the application and the module.
## Returns
An object that includes the IDs of related records that were restored. If there are no related records restored, the promise resolves to `void`.
***
# createPayoutReversals
This section provides a reference to the `createPayoutReversals` method. This belongs to the Payout Module.
## createPayoutReversals(data, sharedContext?): Promise\
This method creates payout reversals.
### Example
```ts theme={null}
const reversals = await payoutModuleService.createPayoutReversals([
{
amount: 5000,
currency_code: "usd",
payout_id: "pout_123",
data: { reversal_id: "trr_123" },
},
])
```
### Parameters
The payout reversals to be created.
The amount to reverse.
The ISO 3 currency code. For example, `usd`.
The ID of the payout being reversed.
The reversal data from the provider.
A context used to share resources, such as transaction manager, between the application and the module.
### Returns
The created payout reversals.
***
# updatePayoutReversals
This section provides a reference to the `updatePayoutReversals` method. This belongs to the Payout Module.
## updatePayoutReversals(id, data, sharedContext?): Promise\
This method updates an existing payout reversal.
### Example
```ts theme={null}
const reversal = await payoutModuleService.updatePayoutReversals("prev_123", {
data: { status: "succeeded" },
})
```
### Parameters
The ID of the payout reversal.
The attributes to update in the payout reversal.
The amount of the reversal.
The ISO 3 currency code.
The reversal data from the provider.
A context used to share resources, such as transaction manager, between the application and the module.
### Returns
The updated payout reversal.
***
# deletePayoutReversals
This section provides a reference to the `deletePayoutReversals` method. This belongs to the Payout Module.
## deletePayoutReversals(ids, sharedContext?): Promise\
This method deletes payout reversals by their IDs.
### Example
```ts theme={null}
await payoutModuleService.deletePayoutReversals(["prev_123", "prev_321"])
```
### Parameters
The IDs of the payout reversals.
A context used to share resources, such as transaction manager, between the application and the module.
### Returns
Resolves when the payout reversals are deleted successfully.
## deletePayoutReversals(id, sharedContext?): Promise\
This method deletes a payout reversal by its ID.
### Example
```ts theme={null}
await payoutModuleService.deletePayoutReversals("prev_123")
```
### Parameters
The ID of the payout reversal.
A context used to share resources, such as transaction manager, between the application and the module.
### Returns
Resolves when the payout reversal is deleted successfully.
***
# retrievePayoutReversal
This section provides a reference to the `retrievePayoutReversal` method. This belongs to the Payout Module.
This method retrieves a payout reversal by its ID.
## Example
```ts theme={null}
const reversal = await payoutModuleService.retrievePayoutReversal("prev_123")
```
## Parameters
The ID of the payout reversal.
The configurations determining how the payout reversal is retrieved.
An array of strings, each being attribute names of the entity to retrieve in the result.
An array of strings, each being relation names of the entity to retrieve in the result.
An object used to specify how to sort the returned records.
A boolean indicating whether deleted records should also be retrieved as part of the result.
A context used to share resources, such as transaction manager, between the application and the module.
## Returns
The retrieved payout reversal.
The ID of the payout reversal.
The amount of the reversal.
The ISO 3 currency code of the reversal.
The reversal data returned by the payout provider.
The created date of the payout reversal.
The updated date of the payout reversal.
***
# listPayoutReversals
This section provides a reference to the `listPayoutReversals` method. This belongs to the Payout Module.
This method retrieves a paginated list of payout reversals based on optional filters and configuration.
## Example
```ts theme={null}
const reversals = await payoutModuleService.listPayoutReversals({
payout_id: "pout_123",
})
```
## Parameters
The filters to apply on the retrieved payout reversals.
The IDs to filter the payout reversals by.
Filter payout reversals by their payout IDs.
Filter payout reversals by their currency codes.
The configurations determining how the payout reversal is retrieved.
An array of strings, each being attribute names of the entity to retrieve in the result.
A number indicating the number of records to skip before retrieving the results.
A number indicating the number of records to return in the result.
An array of strings, each being relation names of the entity to retrieve in the result.
An object used to specify how to sort the returned records.
A boolean indicating whether deleted records should also be retrieved as part of the result.
A context used to share resources, such as transaction manager, between the application and the module.
## Returns
The list of payout reversals.
***
# listAndCountPayoutReversals
This section provides a reference to the `listAndCountPayoutReversals` method. This belongs to the Payout Module.
This method retrieves a paginated list of payout reversals along with the total count of available payout reversals satisfying the provided filters.
## Example
```ts theme={null}
const [reversals, count] = await payoutModuleService.listAndCountPayoutReversals({
payout_id: "pout_123",
})
```
## Parameters
The filters to apply on the retrieved payout reversals.
The IDs to filter the payout reversals by.
Filter payout reversals by their payout IDs.
Filter payout reversals by their currency codes.
The configurations determining how the payout reversal is retrieved.
An array of strings, each being attribute names of the entity to retrieve in the result.
A number indicating the number of records to skip before retrieving the results.
A number indicating the number of records to return in the result.
An array of strings, each being relation names of the entity to retrieve in the result.
An object used to specify how to sort the returned records.
A boolean indicating whether deleted records should also be retrieved as part of the result.
A context used to share resources, such as transaction manager, between the application and the module.
## Returns
The list of payout reversals along with their total count.
***
# softDeletePayoutReversals
This section provides a reference to the `softDeletePayoutReversals` method. This belongs to the Payout Module.
This method soft deletes payout reversals by their IDs.
## Example
```ts theme={null}
await payoutModuleService.softDeletePayoutReversals([
"prev_123",
"prev_321",
])
```
## Parameters
The IDs of the payout reversals.
An object that is used to specify an entity's related entities that should be soft-deleted when the main entity is soft-deleted.
A context used to share resources, such as transaction manager, between the application and the module.
## Returns
An object that includes the IDs of related records that were also soft deleted. If there are no related records, the promise resolves to `void`.
***
# restorePayoutReversals
This section provides a reference to the `restorePayoutReversals` method. This belongs to the Payout Module.
This method restores soft deleted payout reversals by their IDs.
## Example
```ts theme={null}
await payoutModuleService.restorePayoutReversals(["prev_123", "prev_321"])
```
## Parameters
The IDs of the payout reversals.
Configurations determining which relations to restore along with each of the payout reversal.
A context used to share resources, such as transaction manager, between the application and the module.
## Returns
An object that includes the IDs of related records that were restored. If there are no related records restored, the promise resolves to `void`.
# Secondary Categories Module Data Models
Source: https://docs.mercurjs.com/product/modules/b2c-core/secondary-categories/sec-cat-data-model-reference
Reference documentation for the Secondary Categories Module data models
## Relations Overview
| Relationship | Type | Description |
| ---------------------------------------------------- | ------------------- | -------------------------------------------------- |
| SecondaryCategory → ProductCategory (Product Module) | Read-only - has one | A secondary category references a product category |
## Data Models
* [SecondaryCategory](#secondarycategory)
## SecondaryCategory
This documentation provides a reference to the SecondaryCategory data model. It belongs to the Secondary Categories Module.
[View source code](https://github.com/mercurjs/mercur/blob/main/packages/modules/b2c-core/src/modules/secondary_categories/models/secondary_category.ts)
| Field | Type | Description |
| ------------- | -------------------------------- | ----------------------------------------------------------------------- |
| `id` | `PrimaryKeyModifier` | The ID of the secondary category. |
| `category_id` | `TextProperty` | The ID of the product category that this secondary category references. |
# Secondary Category Module
Source: https://docs.mercurjs.com/product/modules/b2c-core/secondary-categories/secondary-categories-concept
Learn about the Secondary Category Module and how to use it in your application
# Secondary Category Module
In this section of the documentation, you will find resources to learn more about the Secondary Category Module and how to use it in your application.
Mercur has secondary product categorization features available out-of-the-box through the Secondary Category Module. A [module](https://docs.medusajs.com/learn/fundamentals/modules) is a standalone package that provides features for a single domain. Each of Mercur's marketplace features are placed in custom modules, such as this Secondary Category Module.
Learn more about why modules are isolated in [this documentation](https://docs.medusajs.com/learn/fundamentals/modules/isolation).
## Secondary Category Features
* **Flexible Product Categorization**: Allow products to belong to multiple categories beyond their primary category.
* **Category-Based Navigation**: Enable products to appear in multiple category browsing contexts.
* **Dynamic Category Assignment**: Add or remove secondary categories when creating or updating products.
* **Cross-Category Discovery**: Help customers discover products through multiple categorization paths.
***
## How to Use the Secondary Category Module
In your Medusa application, you build flows around Commerce Modules. A flow is built as a [Workflow](https://docs.medusajs.com/learn/fundamentals/workflows), which is a special function composed of a series of steps that guarantees data consistency and reliable roll-back mechanism.
Secondary categories are managed through workflow hooks on Medusa's core `updateProductsWorkflow`. Mercur extends this workflow to handle secondary category assignments:
```ts title="src/workflows/hooks/product-updated.ts" theme={null}
import { ContainerRegistrationKeys, Modules } from "@medusajs/framework/utils"
import { updateProductsWorkflow } from "@medusajs/medusa/core-flows"
import { Link } from "@medusajs/framework/modules-sdk"
import { SECONDARY_CATEGORY_MODULE } from "../../modules/secondary_categories"
import SecondaryCategoryModuleService from "../../modules/secondary_categories/service"
import secondaryCategoryProduct from "../../links/secondary-category-product"
export const updateProductSubcategories = async (
products,
additional_data,
container
) => {
const link: Link = container.resolve(ContainerRegistrationKeys.LINK)
const secondaryCategoryService: SecondaryCategoryModuleService =
container.resolve(SECONDARY_CATEGORY_MODULE)
const query = container.resolve(ContainerRegistrationKeys.QUERY)
const entries = additional_data?.secondary_categories ?? []
if (!entries.length || !products?.length) return
await Promise.all(
products.map(async (product) => {
const match = entries.find(e => e.product_id === product.id)
if (!match) return
const toAddIds = [...new Set(match.add ?? match.secondary_categories_ids ?? [])]
const toRemoveIds = [...new Set(match.remove ?? [])]
// Remove secondary categories
if (toRemoveIds.length) {
await Promise.all(
toRemoveIds.map(async (secId) => {
const secondaryCategories =
await secondaryCategoryService.listSecondaryCategories({
category_id: secId
})
const { data: [secondaryCategoryLink] } = await query.graph({
entity: secondaryCategoryProduct.entryPoint,
fields: ['secondary_category_id'],
filters: {
secondary_category_id: secondaryCategories.map(sc => sc.id),
product_id: product.id
}
})
await link.dismiss({
[Modules.PRODUCT]: { product_id: product.id },
[SECONDARY_CATEGORY_MODULE]: {
secondary_category_id: secondaryCategoryLink.secondary_category_id
}
})
})
)
}
// Add secondary categories
if (toAddIds.length) {
await Promise.all(
toAddIds.map((secId) =>
link.create({
[Modules.PRODUCT]: { product_id: product.id },
[SECONDARY_CATEGORY_MODULE]: { secondary_category_id: secId },
})
)
)
}
})
)
}
// Hook into Medusa's updateProductsWorkflow
updateProductsWorkflow.hooks.productsUpdated(
async ({ products, additional_data }, { container }) => {
await updateProductSubcategories(
products,
additional_data,
container
)
}
)
```
You can then use this in product update operations through Medusa's core workflow:
### Workflow Usage
```ts theme={null}
import { updateProductsWorkflow } from "@medusajs/medusa/core-flows"
// When updating products, pass secondary categories in additional_data
const { result } = await updateProductsWorkflow(container).run({
input: {
selector: { id: "prod_123" },
update: {
title: "Updated Product",
},
additional_data: {
secondary_categories: [
{
product_id: "prod_123",
add: ["pcat_summer", "pcat_sale"],
remove: ["pcat_winter"],
},
],
},
},
})
```
Learn more about workflows in [this documentation](https://docs.medusajs.com/learn/fundamentals/workflows).
***
# Concepts
In this document, you'll learn about the main concepts related to secondary categories in Mercur.
## Secondary Category
A secondary category is a reference to a Medusa product category that allows products to be organized under multiple categories simultaneously. It is represented by the [SecondaryCategory data model](../data-model/secondary-categories-module-data-reference#secondarycategory).
A secondary category holds:
* A unique ID
* A reference to a product category via `category_id`
Unlike primary categories (managed directly in the Product Module), secondary categories enable many-to-many relationships between products and categories.
***
## Primary vs Secondary Categories
### Primary Category
In Medusa's Product Module, each product can belong to multiple categories through the built-in many-to-many relationship. These are considered the product's **primary categories**.
### Secondary Category
Mercur's Secondary Category Module provides an **additional layer** of categorization:
* Products can be tagged with secondary categories
* Useful for cross-cutting concerns (e.g., "Sale Items", "Seasonal", "Featured")
* Separate from the primary category hierarchy
* Can be managed independently without affecting product category structure
***
## Why Secondary Categories?
**Use Case Example:**
A dress might have:
* **Primary Category**: Women's Clothing → Dresses
* **Secondary Categories**:
* Summer Collection
* Sale Items
* New Arrivals
* Wedding Guest Outfits
This allows the product to appear in multiple navigation contexts without disrupting the main category tree structure.
***
## Dynamic Assignment
Secondary categories can be dynamically assigned when creating or updating products through the `additional_data` parameter:
```ts theme={null}
{
additional_data: {
secondary_categories: [
{
product_id: "prod_123",
add: ["pcat_summer", "pcat_sale"], // Add these
remove: ["pcat_winter"], // Remove this
secondary_categories_ids: ["pcat_new"] // Alternative to 'add'
},
],
},
}
```
The system automatically:
1. Creates or retrieves secondary category records for the specified category IDs
2. Creates module links between products and secondary categories
3. Removes links for categories in the `remove` array
***
## Workflow Hook Integration
Secondary categories are managed through a workflow hook on Medusa's `updateProductsWorkflow`:
```ts theme={null}
updateProductsWorkflow.hooks.productsUpdated(
async ({ products, additional_data }, { container }) => {
await updateProductSubcategories(
products,
additional_data,
container
)
}
)
```
This ensures secondary categories are updated atomically with product updates, maintaining data consistency through Medusa's workflow system.
***
## Querying Products with Secondary Categories
When retrieving products, you can include secondary categories in the query fields:
```ts theme={null}
const { data: products } = await query.graph({
entity: "product",
fields: [
"*",
"*secondary_categories",
],
})
// products[0].secondary_categories
```
This is commonly included in product list and detail queries to display all categorization contexts.
***
## Use Cases
**1. Seasonal Collections**
Tag products with "Spring Collection", "Summer Sale", etc., without moving them from their primary categories.
**2. Special Promotions**
Group products under "Black Friday Deals" or "Clearance" without affecting their permanent category structure.
**3. Lifestyle Categories**
Create cross-category groupings like "Eco-Friendly", "Luxury", "Budget-Friendly" that span multiple product types.
**4. Featured Products**
Mark products as "Staff Picks", "Bestsellers", or "New Arrivals" for homepage and landing page display.
**5. Event-Based Grouping**
Organize products for specific events like "Wedding Collection", "Back to School", "Holiday Gifts" that cut across traditional categories.
# Secondary Category Module Links
Source: https://docs.mercurjs.com/product/modules/b2c-core/secondary-categories/secondary-category-links
Module links for the Secondary Category Module
# Links between Secondary Category Module and Other Modules
This document showcases the module links defined between the Secondary Category Module and other Commerce Modules.
## Summary
The Secondary Category Module has the following links to other modules:
| First Data Model | Second Data Model | Type | Description |
| ---------------- | ----------------- | --------------------- | ------------------------------------------------------------------------- |
| Product | SecondaryCategory | Stored - many-to-many | Associates products with secondary categories for additional organization |
***
## Product Module
Mercur defines a link between the Product Module's `Product` data model and the Secondary Category Module's `SecondaryCategory` data model. This allows products to be organized under secondary categories in addition to their primary category, enabling more flexible product categorization and navigation.
### Retrieve with Query
To retrieve the secondary categories of a product with Query, pass `secondary_category.*` in `fields`:
```ts theme={null}
const { data: products } = await query.graph({
entity: "product",
fields: [
"*",
"secondary_category.*",
],
})
// products[0].secondary_category
```
```ts theme={null}
import { useQueryGraphStep } from "@medusajs/medusa/core-flows"
// ...
const { data: products } = useQueryGraphStep({
entity: "product",
fields: [
"*",
"secondary_category.*",
],
})
// products[0].secondary_category
```
### Manage with Link
To manage the secondary categories of a product, use Link:
```ts theme={null}
import { Modules } from "@medusajs/framework/utils"
// ...
await link.create({
[Modules.PRODUCT]: {
product_id: "prod_123",
},
secondary_category: {
secondary_category_id: "sec_cat_123",
},
})
```
```ts theme={null}
import { createRemoteLinkStep } from "@medusajs/medusa/core-flows"
// ...
createRemoteLinkStep({
[Modules.PRODUCT]: {
product_id: "prod_123",
},
secondary_category: {
secondary_category_id: "sec_cat_123",
},
})
```
# Secondary Category Module Service Reference
Source: https://docs.mercurjs.com/product/modules/b2c-core/secondary-categories/secondary-category-services
Reference documentation for the Secondary Category Module service methods
# ISecondaryCategoryModuleService Reference
This section of the documentation provides a reference to the `ISecondaryCategoryModuleService` interface's methods. This is the interface developers use to use the functionalities provided by the Secondary Category Module.
You should only use the methods in this reference when implementing complex customizations. For common cases, check out available workflows instead.
The main service interface for the Secondary Category Module.
## Methods
* [createSecondaryCategories](#createsecondarycategories)
* [updateSecondaryCategories](#updatesecondarycategories)
* [deleteSecondaryCategories](#deletesecondarycategories)
* [retrieveSecondaryCategory](#retrievesecondarycategory)
* [listSecondaryCategories](#listsecondarycategories)
* [listAndCountSecondaryCategories](#listandcountsecondarycategories)
* [softDeleteSecondaryCategories](#softdeletesecondarycategories)
* [restoreSecondaryCategories](#restoresecondarycategories)
***
# createSecondaryCategories
This section provides a reference to the `createSecondaryCategories` method. This belongs to the Secondary Category Module.
## createSecondaryCategories(data, sharedContext?): Promise\
This method creates secondary categories.
### Example
```ts theme={null}
const secondaryCategories = await secondaryCategoryModuleService.createSecondaryCategories([
{
category_id: "pcat_123",
},
{
category_id: "pcat_456",
},
])
```
### Parameters
The secondary categories to be created.
The ID of the product category that this secondary category references.
A context used to share resources, such as transaction manager, between the application and the module.
### Returns
The created secondary categories.
## createSecondaryCategories(data, sharedContext?): Promise\
This method creates a secondary category.
### Example
```ts theme={null}
const secondaryCategory = await secondaryCategoryModuleService.createSecondaryCategories({
category_id: "pcat_123",
})
```
### Parameters
The secondary category to be created.
The ID of the product category that this secondary category references.
A context used to share resources, such as transaction manager, between the application and the module.
### Returns
The created secondary category.
***
# updateSecondaryCategories
This section provides a reference to the `updateSecondaryCategories` method. This belongs to the Secondary Category Module.
## updateSecondaryCategories(id, data, sharedContext?): Promise\
This method updates an existing secondary category.
### Example
```ts theme={null}
const secondaryCategory = await secondaryCategoryModuleService.updateSecondaryCategories("sec_cat_123", {
category_id: "pcat_789",
})
```
### Parameters
The ID of the secondary category.
The attributes to update in the secondary category.
The ID of the product category that this secondary category references.
A context used to share resources, such as transaction manager, between the application and the module.
### Returns
The updated secondary category.
The ID of the secondary category.
The ID of the product category that this secondary category references.
The created date of the secondary category.
The updated date of the secondary category.
***
# deleteSecondaryCategories
This section provides a reference to the `deleteSecondaryCategories` method. This belongs to the Secondary Category Module.
## deleteSecondaryCategories(ids, sharedContext?): Promise\
This method deletes secondary categories by their IDs.
### Example
```ts theme={null}
await secondaryCategoryModuleService.deleteSecondaryCategories(["sec_cat_123", "sec_cat_321"])
```
### Parameters
The IDs of the secondary categories.
A context used to share resources, such as transaction manager, between the application and the module.
### Returns
Resolves when the secondary categories are deleted successfully.
## deleteSecondaryCategories(id, sharedContext?): Promise\
This method deletes a secondary category by its ID.
### Example
```ts theme={null}
await secondaryCategoryModuleService.deleteSecondaryCategories("sec_cat_123")
```
### Parameters
The ID of the secondary category.
A context used to share resources, such as transaction manager, between the application and the module.
### Returns
Resolves when the secondary category is deleted successfully.
***
# retrieveSecondaryCategory
This section provides a reference to the `retrieveSecondaryCategory` method. This belongs to the Secondary Category Module.
This method retrieves a secondary category by its ID.
## Example
```ts theme={null}
const secondaryCategory = await secondaryCategoryModuleService.retrieveSecondaryCategory("sec_cat_123")
```
## Parameters
The ID of the secondary category.
The configurations determining how the secondary category is retrieved.
An array of strings, each being attribute names of the entity to retrieve in the result.
A number indicating the number of records to skip before retrieving the results.
A number indicating the number of records to return in the result.
An array of strings, each being relation names of the entity to retrieve in the result.
An object used to specify how to sort the returned records.
A boolean indicating whether deleted records should also be retrieved as part of the result.
A context used to share resources, such as transaction manager, between the application and the module.
## Returns
The retrieved secondary category.
The ID of the secondary category.
The ID of the product category that this secondary category references.
The created date of the secondary category.
The updated date of the secondary category.
The deleted date of the secondary category.
***
# listSecondaryCategories
This section provides a reference to the `listSecondaryCategories` method. This belongs to the Secondary Category Module.
This method retrieves a paginated list of secondary categories based on optional filters and configuration.
## Example
To retrieve a list of secondary categories using their IDs:
```ts theme={null}
const secondaryCategories = await secondaryCategoryModuleService.listSecondaryCategories({
id: ["sec_cat_123", "sec_cat_321"],
})
```
To retrieve secondary categories for a specific product category:
```ts theme={null}
const secondaryCategories = await secondaryCategoryModuleService.listSecondaryCategories({
category_id: "pcat_123",
})
```
By default, only the first `15` records are retrieved. You can control pagination by specifying the `skip` and `take` properties of the `config` parameter:
```ts theme={null}
const secondaryCategories = await secondaryCategoryModuleService.listSecondaryCategories(
{
category_id: "pcat_123",
},
{
take: 20,
skip: 2,
}
)
```
## Parameters
The filters to apply on the retrieved secondary categories.
The IDs to filter the secondary categories by.
Filter secondary categories by their product category IDs.
The configurations determining how the secondary category is retrieved.
An array of strings, each being attribute names of the entity to retrieve in the result.
A number indicating the number of records to skip before retrieving the results.
A number indicating the number of records to return in the result.
An array of strings, each being relation names of the entity to retrieve in the result.
An object used to specify how to sort the returned records.
A boolean indicating whether deleted records should also be retrieved as part of the result.
A context used to share resources, such as transaction manager, between the application and the module.
## Returns
The list of secondary categories.
***
# listAndCountSecondaryCategories
This section provides a reference to the `listAndCountSecondaryCategories` method. This belongs to the Secondary Category Module.
This method retrieves a paginated list of secondary categories along with the total count of available secondary categories satisfying the provided filters.
## Example
To retrieve a list of secondary categories using their IDs:
```ts theme={null}
const [secondaryCategories, count] = await secondaryCategoryModuleService.listAndCountSecondaryCategories({
id: ["sec_cat_123", "sec_cat_321"],
})
```
By default, only the first `15` records are retrieved. You can control pagination by specifying the `skip` and `take` properties of the `config` parameter:
```ts theme={null}
const [secondaryCategories, count] = await secondaryCategoryModuleService.listAndCountSecondaryCategories(
{
category_id: "pcat_123",
},
{
take: 20,
skip: 2,
}
)
```
## Parameters
The filters to apply on the retrieved secondary categories.
The IDs to filter the secondary categories by.
Filter secondary categories by their product category IDs.
The configurations determining how the secondary category is retrieved.
An array of strings, each being attribute names of the entity to retrieve in the result.
A number indicating the number of records to skip before retrieving the results.
A number indicating the number of records to return in the result.
An array of strings, each being relation names of the entity to retrieve in the result.
An object used to specify how to sort the returned records.
A boolean indicating whether deleted records should also be retrieved as part of the result.
A context used to share resources, such as transaction manager, between the application and the module.
## Returns
The list of secondary categories along with their total count.
***
# softDeleteSecondaryCategories
This section provides a reference to the `softDeleteSecondaryCategories` method. This belongs to the Secondary Category Module.
This method soft deletes secondary categories by their IDs.
## Example
```ts theme={null}
await secondaryCategoryModuleService.softDeleteSecondaryCategories([
"sec_cat_123",
"sec_cat_321",
])
```
## Parameters
The IDs of the secondary categories.
An object that is used to specify an entity's related entities that should be soft-deleted when the main entity is soft-deleted.
A context used to share resources, such as transaction manager, between the application and the module.
## Returns
An object that includes the IDs of related records that were also soft deleted. If there are no related records, the promise resolves to `void`.
***
# restoreSecondaryCategories
This section provides a reference to the `restoreSecondaryCategories` method. This belongs to the Secondary Category Module.
This method restores soft deleted secondary categories by their IDs.
## Example
```ts theme={null}
await secondaryCategoryModuleService.restoreSecondaryCategories(["sec_cat_123", "sec_cat_321"])
```
## Parameters
The IDs of the secondary categories.
Configurations determining which relations to restore along with each of the secondary category.
A context used to share resources, such as transaction manager, between the application and the module.
## Returns
An object that includes the IDs of related records that were restored. If there are no related records restored, the promise resolves to `void`.
# Seller Module
Source: https://docs.mercurjs.com/product/modules/b2c-core/seller/seller-concept
Learn about the Seller Module and how to use it in your application
# Seller Module
In this section of the documentation, you will find resources to learn more about the Seller Module and how to use it in your application.
Mercur has multi-vendor management features available out-of-the-box through the Seller Module. A [module](https://docs.medusajs.com/learn/fundamentals/modules) is a standalone package that provides features for a single domain. Each of Mercur's marketplace features are placed in custom modules, such as this Seller Module.
Learn more about why modules are isolated in [this documentation](https://docs.medusajs.com/learn/fundamentals/modules/isolation).
## Seller Features
* **Seller Management**: Create and manage seller accounts with business information and store status.
* **Team Member Management**: Handle multiple team members per seller with role-based access (owner, admin, member).
* **Member Invitations**: Send JWT-based invitations to team members with expiration and validation.
* **Seller Onboarding**: Track seller onboarding progress through multiple setup steps.
* **Store Status Control**: Manage seller store status (ACTIVE, INACTIVE, SUSPENDED) to control marketplace access.
* **Resource Isolation**: Each seller has isolated access to their own products, orders, inventory, and shipping configurations.
***
## How to Use the Seller Module
In your Medusa application, you build flows around Commerce Modules. A flow is built as a [Workflow](https://docs.medusajs.com/learn/fundamentals/workflows), which is a special function composed of a series of steps that guarantees data consistency and reliable roll-back mechanism.
You can build custom workflows and steps. Mercur provides pre-built workflows for seller operations in the `@mercurjs/b2c-core` package.
For example, the `createSellerWorkflow`:
```ts title="src/workflows/seller/create-seller.ts" theme={null}
import { transform } from "@medusajs/framework/workflows-sdk"
import { setAuthAppMetadataStep } from "@medusajs/medusa/core-flows"
import {
WorkflowResponse,
createHook,
createWorkflow,
} from "@medusajs/workflows-sdk"
import { CreateMemberDTO, CreateSellerDTO } from "@mercurjs/framework"
import {
createMemberStep,
createSellerOnboardingStep,
createSellerStep,
createSellerShippingProfileStep,
} from "../steps"
type CreateSellerWorkflowInput = {
seller: CreateSellerDTO
member: Omit
auth_identity_id: string
}
export const createSellerWorkflow = createWorkflow(
"create-seller",
function (input: CreateSellerWorkflowInput) {
// Create the seller
const seller = createSellerStep(input.seller)
// Create the first member (owner) with seller_id
const memberInput = transform(
{ seller, member: input.member },
({ member, seller }) => ({
...member,
seller_id: seller.id,
})
)
const member = createMemberStep(memberInput)
// Initialize onboarding tracker
createSellerOnboardingStep(seller)
// Link auth identity to seller member
setAuthAppMetadataStep({
authIdentityId: input.auth_identity_id,
actorType: "seller",
value: member.id,
})
// Create default shipping profile
createSellerShippingProfileStep(seller)
// Emit workflow hook for extensibility
const sellerCreatedHook = createHook("sellerCreated", {
sellerId: seller.id,
})
return new WorkflowResponse(seller, { hooks: [sellerCreatedHook] })
}
)
```
You can then execute the workflow in your custom API routes, scheduled jobs, or subscribers:
### Subscriber
```ts title="src/subscribers/seller-creation-request-accepted.ts" theme={null}
import { SubscriberArgs, SubscriberConfig } from "@medusajs/framework"
import {
RequestDTO,
SellerAccountRequestUpdatedEvent,
} from "@mercurjs/framework"
import { createSellerWorkflow } from "../workflows"
import { ContainerRegistrationKeys } from "@medusajs/framework/utils"
export default async function sellerCreationRequestAcceptedHandler({
event,
container,
}: SubscriberArgs) {
const logger = container.resolve(ContainerRegistrationKeys.LOGGER)
const request = event.data
// Execute the createSellerWorkflow when admin accepts seller registration
const { result: seller } = await createSellerWorkflow.run({
container,
input: {
member: request.data.member as any,
seller: request.data.seller as any,
auth_identity_id: request.data.auth_identity_id as string,
},
})
logger.info(
`Seller creation request accepted: ${request.id}, seller: ${seller.id}`
)
}
export const config: SubscriberConfig = {
event: SellerAccountRequestUpdatedEvent.ACCEPTED,
context: {
subscriberId: "seller-creation-request-accepted-handler",
},
}
```
Learn more about workflows in [this documentation](https://docs.medusajs.com/learn/fundamentals/workflows).
***
# Concepts
In this document, you'll learn about the main concepts related to sellers in Mercur.
## Seller
A seller is a vendor entity in the marketplace that can manage products, orders, and customers. It is represented by the [Seller data model](../data-model/seller-module-data-reference#seller).
A seller holds information about:
* Business details (name, description, contact information)
* Business address and tax identification
* Store status (ACTIVE, INACTIVE, SUSPENDED)
* A unique handle for storefront URLs
* Team members who can manage the seller's resources
* Onboarding progress
Each seller operates independently in the marketplace, with their own isolated resources including products, orders, inventory, shipping options, promotions, and customer groups.
***
## Store Status
A seller's store can be in one of three states:
### ACTIVE
The seller is fully operational and can:
* List and sell products
* Receive and fulfill orders
* Manage all marketplace resources
* Access the vendor panel
This is the default status for approved sellers.
### INACTIVE
The seller account exists but is not currently operational. This status might be used for:
* Sellers who haven't completed onboarding
* Temporarily closed stores
* Sellers taking a break from the marketplace
Inactive sellers cannot list products or process new orders.
### SUSPENDED
The seller has been suspended by marketplace administrators, typically due to:
* Policy violations
* Customer complaints
* Payment issues
Suspended sellers can only access order and fulfillment management to handle existing commitments, but cannot create new listings or receive new orders.
***
## Member
A member represents a user who can manage a seller's marketplace operations. It is represented by the [Member data model](../data-model/seller-module-data-reference#member).
### Member Roles
Members can have one of three roles:
**owner**: Full administrative control
* Manage seller business information
* Invite and remove team members
* Access financial and payout settings
* Delete the seller account
**admin**: Operational management
* Manage products, inventory, and orders
* Configure shipping and promotions
* View reports and analytics
* Cannot modify business settings or team members
**member**: Limited access
* View and fulfill orders
* Update inventory
* Cannot modify products or settings
This role-based system allows sellers to delegate responsibilities while maintaining control over sensitive operations.
***
## Member Invite
A member invite represents a pending invitation to join a seller's team. It is represented by the [MemberInvite data model](../data-model/seller-module-data-reference#memberinvite).
### Invitation Flow
1. **Existing member creates invite**: Owner or admin generates invitation with email and role
2. **JWT token generated**: System creates signed JWT token with 7-day expiration
3. **Email sent**: Invitation email with unique link sent to invitee
4. **Recipient accepts**: User clicks link and completes registration
5. **Token validation**: System verifies token is valid and not expired
6. **Member created**: New member account created and linked to seller
7. **Invite marked accepted**: Invite record updated to prevent reuse
The JWT token includes the invite ID and is signed with the application's JWT secret, ensuring secure invite handling.
***
## Seller Onboarding
Seller onboarding tracks the setup progress of new sellers through required steps. It is represented by the [SellerOnboarding data model](../data-model/seller-module-data-reference#selleronboarding).
### Onboarding Steps
**1. store\_information** (boolean)
* Business name, description, contact details
* Business address and tax ID
* Store branding (logo, photos)
**2. stripe\_connection** (boolean)
* Payout account creation
* Stripe Connect onboarding
* Bank account verification
**3. locations\_shipping** (boolean)
* Stock location setup
* Shipping zones and options
* Fulfillment configuration
**4. products** (boolean)
* First product creation
* Inventory setup
* Pricing configuration
The `isOnboardingCompleted` method checks if all four steps are complete, determining if the seller can start selling.
***
## Resource Isolation
The Seller Module implements multi-tenancy through module links, giving each seller their own isolated resources:
**Commerce Resources:**
* Products and inventory
* Orders and returns
* Customer groups
* Promotions and campaigns
* Price lists
**Fulfillment Resources:**
* Stock locations
* Fulfillment sets
* Service zones
* Shipping options
* Shipping profiles
This isolation ensures:
* Data security (sellers only see their own data)
* Independent operations (one seller's actions don't affect others)
* Scalability (resources scale per seller)
***
## Authentication Integration
The Seller Module integrates with Medusa's Auth Module to enable member authentication:
* Members are a custom actor type (`seller`)
* Auth identities store `member_id` in `app_metadata`
* Routes are protected with `authenticate("seller")` middleware
* Member ID is used to resolve seller ownership
This allows the same authentication system to handle customers, admin users, and seller members with different permissions.
***
## Use Cases
**1. Vendor Registration**
New vendors register, complete onboarding, and start selling on the marketplace.
**2. Team Collaboration**
Sellers invite team members with different roles to collaborate on store management.
**3. Store Suspension**
Marketplace admin suspends a seller for policy violations while allowing them to fulfill existing orders.
**4. Multi-Store Management**
A business creates multiple seller accounts for different brands or product lines.
**5. Status-Based Product Visibility**
When a seller is suspended, their products are automatically hidden from search results (via the status change subscriber).
# Seller Module Data Models
Source: https://docs.mercurjs.com/product/modules/b2c-core/seller/seller-data-model-reference
Reference documentation for the Seller Module data models
## Relations Overview
| Relationship | Type | Description |
| ------------------------- | ----------- | -------------------------------------------- |
| Seller → Member | One-to-Many | A seller has many team members |
| Seller → MemberInvite | One-to-Many | A seller has many pending member invitations |
| Seller → SellerOnboarding | One-to-One | A seller has one onboarding record |
## Data Models
* [Seller](#seller)
* [Member](#member)
* [MemberInvite](#memberinvite)
* [SellerOnboarding](#selleronboarding)
## Seller
This documentation provides a reference to the Seller data model. It belongs to the Seller Module.
[View source code](https://github.com/mercurjs/mercur/blob/main/packages/modules/b2c-core/src/modules/seller/models/seller.ts)
| Field | Type | Description |
| -------------- | --------------------------------------------------- | ------------------------------------------------------------ |
| `id` | `PrimaryKeyModifier` | The ID of the seller. |
| `store_status` | `EnumProperty<["ACTIVE", "INACTIVE", "SUSPENDED"]>` | The status of the seller's store. Defaults to `ACTIVE`. |
| `name` | `TextProperty` | The name of the seller |
| `handle` | `TextProperty` | The unique handle of the seller |
| `description` | `TextProperty` | The description of the seller |
| `photo` | `TextProperty` | The photo URL of the seller |
| `email` | `TextProperty` | The email of the seller |
| `phone` | `TextProperty` | The phone of the seller |
| `address_line` | `TextProperty` | The address line of the seller |
| `city` | `TextProperty` | The city of the seller |
| `state` | `TextProperty` | The state of the seller |
| `postal_code` | `TextProperty` | The postal code of the seller |
| `country_code` | `TextProperty` | The country code of the seller |
| `tax_id` | `TextProperty` | The tax ID of the seller |
| `members` | `HasMany` | The associated [Member](#member) records. |
| `invites` | `HasMany` | The associated [MemberInvite](#memberinvite) records. |
| `onboarding` | `HasOne` | The associated [SellerOnboarding](#selleronboarding) record. |
## Member
This documentation provides a reference to the Member data model. It belongs to the Seller Module.
[View source code](https://github.com/mercurjs/mercur/blob/main/packages/modules/b2c-core/src/modules/seller/models/member.ts)
| Field | Type | Description |
| -------- | -------------------------------------------- | ----------------------------------------------------------------- |
| `id` | `PrimaryKeyModifier` | The ID of the member. |
| `role` | `EnumProperty<["owner", "admin", "member"]>` | The role of the member in the seller's team. Defaults to `owner`. |
| `name` | `TextProperty` | The name of the member |
| `email` | `TextProperty` | The email of the member |
| `bio` | `TextProperty` | The bio of the member |
| `phone` | `TextProperty` | The phone of the member |
| `photo` | `TextProperty` | The photo URL of the member |
| `seller` | `BelongsTo` | The associated [Seller](#seller). |
## MemberInvite
This documentation provides a reference to the MemberInvite data model. It belongs to the Seller Module.
[View source code](https://github.com/mercurjs/mercur/blob/main/packages/modules/b2c-core/src/modules/seller/models/invite.ts)
| Field | Type | Description |
| ------------ | -------------------------------------------- | ------------------------------------------------------------------ |
| `id` | `PrimaryKeyModifier` | The ID of the member invite. |
| `email` | `TextProperty` | The email of the invited member. |
| `role` | `EnumProperty<["owner", "admin", "member"]>` | The role that will be assigned to the member. Defaults to `owner`. |
| `token` | `TextProperty` | The invitation token. |
| `expires_at` | `DateTimeProperty` | The date and time when the invitation expires. |
| `accepted` | `BooleanProperty` | Whether the invitation has been accepted. Defaults to `false`. |
| `seller` | `BelongsTo` | The associated [Seller](#seller). |
## SellerOnboarding
This documentation provides a reference to the SellerOnboarding data model. It belongs to the Seller Module.
[View source code](https://github.com/mercurjs/mercur/blob/main/packages/modules/b2c-core/src/modules/seller/models/onboarding.ts)
| Field | Type | Description |
| -------------------- | -------------------------------- | -------------------------------------------------------------------------------- |
| `id` | `PrimaryKeyModifier` | The ID of the seller onboarding. |
| `store_information` | `BooleanProperty` | Whether the store information step is completed. Defaults to `false`. |
| `stripe_connection` | `BooleanProperty` | Whether the Stripe connection step is completed. Defaults to `false`. |
| `locations_shipping` | `BooleanProperty` | Whether the locations and shipping setup step is completed. Defaults to `false`. |
| `products` | `BooleanProperty` | Whether the products setup step is completed. Defaults to `false`. |
| `seller` | `BelongsTo` | The associated [Seller](#seller). |
# Seller Module Links
Source: https://docs.mercurjs.com/product/modules/b2c-core/seller/seller-links
Module links for the Seller Module
# Links between Seller Module and Other Modules
This document showcases the module links defined between the Seller Module and other Commerce Modules.
## Summary
The Seller Module has the following links to other modules:
| First Data Model | Second Data Model | Type | Description |
| ---------------- | ----------------- | -------------------- | ------------------------------------------------ |
| Seller | Product | Stored - one-to-many | Associates a seller with their products |
| Seller | Order | Stored - one-to-many | Associates a seller with their orders |
| Seller | Return | Stored - one-to-many | Associates a seller with order returns |
| Seller | PayoutAccount | Stored - one-to-one | Associates a seller with their payout account |
| Seller | StockLocation | Stored - one-to-many | Associates a seller with their stock locations |
| Seller | FulfillmentSet | Stored - one-to-many | Associates a seller with their fulfillment sets |
| Seller | ServiceZone | Stored - one-to-many | Associates a seller with their service zones |
| Seller | ShippingOption | Stored - one-to-many | Associates a seller with their shipping options |
| Seller | ShippingProfile | Stored - one-to-many | Associates a seller with their shipping profiles |
| Seller | InventoryItem | Stored - one-to-many | Associates a seller with their inventory items |
| Seller | CustomerGroup | Stored - one-to-many | Associates a seller with their customer groups |
| Seller | PriceList | Stored - one-to-many | Associates a seller with their price lists |
| Seller | Promotion | Stored - one-to-many | Associates a seller with their promotions |
| Seller | Campaign | Stored - one-to-many | Associates a seller with their campaigns |
***
## Product Module
Mercur defines a link between the Seller Module's `Seller` data model and the Product Module's `Product` data model. This allows each seller to have their own products in the marketplace.
### Retrieve with Query
To retrieve the products of a seller with Query, pass `product.*` in `fields`:
```ts theme={null}
const { data: sellers } = await query.graph({
entity: "seller",
fields: [
"*",
"product.*",
],
})
// sellers[0].product
```
```ts theme={null}
import { useQueryGraphStep } from "@medusajs/medusa/core-flows"
// ...
const { data: sellers } = useQueryGraphStep({
entity: "seller",
fields: [
"*",
"product.*",
],
})
// sellers[0].product
```
### Manage with Link
To manage the products of a seller, use Link:
```ts theme={null}
import { Modules } from "@medusajs/framework/utils"
// ...
await link.create({
seller: {
seller_id: "sel_123",
},
[Modules.PRODUCT]: {
product_id: "prod_123",
},
})
```
```ts theme={null}
import { createRemoteLinkStep } from "@medusajs/medusa/core-flows"
// ...
createRemoteLinkStep({
seller: {
seller_id: "sel_123",
},
[Modules.PRODUCT]: {
product_id: "prod_123",
},
})
```
***
## Order Module
Mercur defines a link between the Seller Module's `Seller` data model and the Order Module's `Order` data model. This allows tracking which orders belong to each seller in the marketplace.
### Retrieve with Query
To retrieve the orders of a seller with Query, pass `order.*` in `fields`:
```ts theme={null}
const { data: sellers } = await query.graph({
entity: "seller",
fields: [
"*",
"order.*",
],
})
// sellers[0].order
```
```ts theme={null}
import { useQueryGraphStep } from "@medusajs/medusa/core-flows"
// ...
const { data: sellers } = useQueryGraphStep({
entity: "seller",
fields: [
"*",
"order.*",
],
})
// sellers[0].order
```
### Manage with Link
To manage the orders of a seller, use Link:
```ts theme={null}
import { Modules } from "@medusajs/framework/utils"
// ...
await link.create({
seller: {
seller_id: "sel_123",
},
[Modules.ORDER]: {
order_id: "ord_123",
},
})
```
```ts theme={null}
import { createRemoteLinkStep } from "@medusajs/medusa/core-flows"
// ...
createRemoteLinkStep({
seller: {
seller_id: "sel_123",
},
[Modules.ORDER]: {
order_id: "ord_123",
},
})
```
***
## Order Module - Returns
Mercur defines a link between the Seller Module's `Seller` data model and the Order Module's `Return` data model. This allows tracking which returns belong to each seller.
### Retrieve with Query
To retrieve the returns of a seller with Query, pass `return.*` in `fields`:
```ts theme={null}
const { data: sellers } = await query.graph({
entity: "seller",
fields: [
"*",
"return.*",
],
})
// sellers[0].return
```
```ts theme={null}
import { useQueryGraphStep } from "@medusajs/medusa/core-flows"
// ...
const { data: sellers } = useQueryGraphStep({
entity: "seller",
fields: [
"*",
"return.*",
],
})
// sellers[0].return
```
### Manage with Link
To manage the returns of a seller, use Link:
```ts theme={null}
import { Modules } from "@medusajs/framework/utils"
// ...
await link.create({
seller: {
seller_id: "sel_123",
},
[Modules.ORDER]: {
return_id: "ret_123",
},
})
```
```ts theme={null}
import { createRemoteLinkStep } from "@medusajs/medusa/core-flows"
// ...
createRemoteLinkStep({
seller: {
seller_id: "sel_123",
},
[Modules.ORDER]: {
return_id: "ret_123",
},
})
```
***
## Payout Module
Mercur defines a link between the Seller Module's `Seller` data model and the Payout Module's `PayoutAccount` data model. This allows each seller to have a payout account for receiving payments from the marketplace.
### Retrieve with Query
To retrieve the payout account of a seller with Query, pass `payout_account.*` in `fields`:
```ts theme={null}
const { data: sellers } = await query.graph({
entity: "seller",
fields: [
"*",
"payout_account.*",
],
})
// sellers[0].payout_account
```
```ts theme={null}
import { useQueryGraphStep } from "@medusajs/medusa/core-flows"
// ...
const { data: sellers } = useQueryGraphStep({
entity: "seller",
fields: [
"*",
"payout_account.*",
],
})
// sellers[0].payout_account
```
### Manage with Link
To manage the payout account of a seller, use Link:
```ts theme={null}
// ...
await link.create({
seller: {
seller_id: "sel_123",
},
payout: {
payout_account_id: "pacc_123",
},
})
```
```ts theme={null}
import { createRemoteLinkStep } from "@medusajs/medusa/core-flows"
// ...
createRemoteLinkStep({
seller: {
seller_id: "sel_123",
},
payout: {
payout_account_id: "pacc_123",
},
})
```
***
## Stock Location Module
Mercur defines a link between the Seller Module's `Seller` data model and the Stock Location Module's `StockLocation` data model. This allows each seller to have their own stock locations (warehouses).
### Retrieve with Query
To retrieve the stock locations of a seller with Query, pass `stock_location.*` in `fields`:
```ts theme={null}
const { data: sellers } = await query.graph({
entity: "seller",
fields: [
"*",
"stock_location.*",
],
})
// sellers[0].stock_location
```
```ts theme={null}
import { useQueryGraphStep } from "@medusajs/medusa/core-flows"
// ...
const { data: sellers } = useQueryGraphStep({
entity: "seller",
fields: [
"*",
"stock_location.*",
],
})
// sellers[0].stock_location
```
### Manage with Link
To manage the stock locations of a seller, use Link:
```ts theme={null}
import { Modules } from "@medusajs/framework/utils"
// ...
await link.create({
seller: {
seller_id: "sel_123",
},
[Modules.STOCK_LOCATION]: {
stock_location_id: "sloc_123",
},
})
```
```ts theme={null}
import { createRemoteLinkStep } from "@medusajs/medusa/core-flows"
// ...
createRemoteLinkStep({
seller: {
seller_id: "sel_123",
},
[Modules.STOCK_LOCATION]: {
stock_location_id: "sloc_123",
},
})
```
***
## Fulfillment Module
Mercur defines multiple links between the Seller Module and the Fulfillment Module to enable sellers to manage their own fulfillment configurations.
### FulfillmentSet
A link between `Seller` and `FulfillmentSet` allows sellers to have their own fulfillment sets.
#### Retrieve with Query
```ts theme={null}
const { data: sellers } = await query.graph({
entity: "seller",
fields: [
"*",
"fulfillment_set.*",
],
})
// sellers[0].fulfillment_set
```
```ts theme={null}
import { useQueryGraphStep } from "@medusajs/medusa/core-flows"
// ...
const { data: sellers } = useQueryGraphStep({
entity: "seller",
fields: [
"*",
"fulfillment_set.*",
],
})
// sellers[0].fulfillment_set
```
#### Manage with Link
```ts theme={null}
import { Modules } from "@medusajs/framework/utils"
// ...
await link.create({
seller: {
seller_id: "sel_123",
},
[Modules.FULFILLMENT]: {
fulfillment_set_id: "fset_123",
},
})
```
```ts theme={null}
import { createRemoteLinkStep } from "@medusajs/medusa/core-flows"
// ...
createRemoteLinkStep({
seller: {
seller_id: "sel_123",
},
[Modules.FULFILLMENT]: {
fulfillment_set_id: "fset_123",
},
})
```
### ServiceZone
A link between `Seller` and `ServiceZone` allows sellers to define their own service zones.
#### Retrieve with Query
```ts theme={null}
const { data: sellers } = await query.graph({
entity: "seller",
fields: [
"*",
"service_zone.*",
],
})
// sellers[0].service_zone
```
```ts theme={null}
import { useQueryGraphStep } from "@medusajs/medusa/core-flows"
// ...
const { data: sellers } = useQueryGraphStep({
entity: "seller",
fields: [
"*",
"service_zone.*",
],
})
// sellers[0].service_zone
```
#### Manage with Link
```ts theme={null}
import { Modules } from "@medusajs/framework/utils"
// ...
await link.create({
seller: {
seller_id: "sel_123",
},
[Modules.FULFILLMENT]: {
service_zone_id: "serzo_123",
},
})
```
```ts theme={null}
import { createRemoteLinkStep } from "@medusajs/medusa/core-flows"
// ...
createRemoteLinkStep({
seller: {
seller_id: "sel_123",
},
[Modules.FULFILLMENT]: {
service_zone_id: "serzo_123",
},
})
```
### ShippingOption
A link between `Seller` and `ShippingOption` allows sellers to configure their own shipping options.
#### Retrieve with Query
```ts theme={null}
const { data: sellers } = await query.graph({
entity: "seller",
fields: [
"*",
"shipping_option.*",
],
})
// sellers[0].shipping_option
```
```ts theme={null}
import { useQueryGraphStep } from "@medusajs/medusa/core-flows"
// ...
const { data: sellers } = useQueryGraphStep({
entity: "seller",
fields: [
"*",
"shipping_option.*",
],
})
// sellers[0].shipping_option
```
#### Manage with Link
```ts theme={null}
import { Modules } from "@medusajs/framework/utils"
// ...
await link.create({
seller: {
seller_id: "sel_123",
},
[Modules.FULFILLMENT]: {
shipping_option_id: "so_123",
},
})
```
```ts theme={null}
import { createRemoteLinkStep } from "@medusajs/medusa/core-flows"
// ...
createRemoteLinkStep({
seller: {
seller_id: "sel_123",
},
[Modules.FULFILLMENT]: {
shipping_option_id: "so_123",
},
})
```
### ShippingProfile
A link between `Seller` and `ShippingProfile` allows sellers to manage their own shipping profiles.
#### Retrieve with Query
```ts theme={null}
const { data: sellers } = await query.graph({
entity: "seller",
fields: [
"*",
"shipping_profile.*",
],
})
// sellers[0].shipping_profile
```
```ts theme={null}
import { useQueryGraphStep } from "@medusajs/medusa/core-flows"
// ...
const { data: sellers } = useQueryGraphStep({
entity: "seller",
fields: [
"*",
"shipping_profile.*",
],
})
// sellers[0].shipping_profile
```
#### Manage with Link
```ts theme={null}
import { Modules } from "@medusajs/framework/utils"
// ...
await link.create({
seller: {
seller_id: "sel_123",
},
[Modules.FULFILLMENT]: {
shipping_profile_id: "sp_123",
},
})
```
```ts theme={null}
import { createRemoteLinkStep } from "@medusajs/medusa/core-flows"
// ...
createRemoteLinkStep({
seller: {
seller_id: "sel_123",
},
[Modules.FULFILLMENT]: {
shipping_profile_id: "sp_123",
},
})
```
***
## Inventory Module
Mercur defines a link between the Seller Module's `Seller` data model and the Inventory Module's `InventoryItem` data model. This allows each seller to manage their own inventory items.
### Retrieve with Query
To retrieve the inventory items of a seller with Query, pass `inventory_item.*` in `fields`:
```ts theme={null}
const { data: sellers } = await query.graph({
entity: "seller",
fields: [
"*",
"inventory_item.*",
],
})
// sellers[0].inventory_item
```
```ts theme={null}
import { useQueryGraphStep } from "@medusajs/medusa/core-flows"
// ...
const { data: sellers } = useQueryGraphStep({
entity: "seller",
fields: [
"*",
"inventory_item.*",
],
})
// sellers[0].inventory_item
```
### Manage with Link
To manage the inventory items of a seller, use Link:
```ts theme={null}
import { Modules } from "@medusajs/framework/utils"
// ...
await link.create({
seller: {
seller_id: "sel_123",
},
[Modules.INVENTORY]: {
inventory_item_id: "iitem_123",
},
})
```
```ts theme={null}
import { createRemoteLinkStep } from "@medusajs/medusa/core-flows"
// ...
createRemoteLinkStep({
seller: {
seller_id: "sel_123",
},
[Modules.INVENTORY]: {
inventory_item_id: "iitem_123",
},
})
```
***
## Customer Module
Mercur defines a link between the Seller Module's `Seller` data model and the Customer Module's `CustomerGroup` data model. This allows sellers to create and manage their own customer groups for targeted marketing.
### Retrieve with Query
To retrieve the customer groups of a seller with Query, pass `customer_group.*` in `fields`:
```ts theme={null}
const { data: sellers } = await query.graph({
entity: "seller",
fields: [
"*",
"customer_group.*",
],
})
// sellers[0].customer_group
```
```ts theme={null}
import { useQueryGraphStep } from "@medusajs/medusa/core-flows"
// ...
const { data: sellers } = useQueryGraphStep({
entity: "seller",
fields: [
"*",
"customer_group.*",
],
})
// sellers[0].customer_group
```
### Manage with Link
To manage the customer groups of a seller, use Link:
```ts theme={null}
import { Modules } from "@medusajs/framework/utils"
// ...
await link.create({
seller: {
seller_id: "sel_123",
},
[Modules.CUSTOMER]: {
customer_group_id: "cgrp_123",
},
})
```
```ts theme={null}
import { createRemoteLinkStep } from "@medusajs/medusa/core-flows"
// ...
createRemoteLinkStep({
seller: {
seller_id: "sel_123",
},
[Modules.CUSTOMER]: {
customer_group_id: "cgrp_123",
},
})
```
***
## Pricing Module
Mercur defines a link between the Seller Module's `Seller` data model and the Pricing Module's `PriceList` data model. This allows sellers to create and manage their own price lists.
### Retrieve with Query
To retrieve the price lists of a seller with Query, pass `price_list.*` in `fields`:
```ts theme={null}
const { data: sellers } = await query.graph({
entity: "seller",
fields: [
"*",
"price_list.*",
],
})
// sellers[0].price_list
```
```ts theme={null}
import { useQueryGraphStep } from "@medusajs/medusa/core-flows"
// ...
const { data: sellers } = useQueryGraphStep({
entity: "seller",
fields: [
"*",
"price_list.*",
],
})
// sellers[0].price_list
```
### Manage with Link
To manage the price lists of a seller, use Link:
```ts theme={null}
import { Modules } from "@medusajs/framework/utils"
// ...
await link.create({
seller: {
seller_id: "sel_123",
},
[Modules.PRICING]: {
price_list_id: "pl_123",
},
})
```
```ts theme={null}
import { createRemoteLinkStep } from "@medusajs/medusa/core-flows"
// ...
createRemoteLinkStep({
seller: {
seller_id: "sel_123",
},
[Modules.PRICING]: {
price_list_id: "pl_123",
},
})
```
***
## Promotion Module
Mercur defines links between the Seller Module and the Promotion Module to enable sellers to manage their own promotions and campaigns.
### Promotion
A link between `Seller` and `Promotion` allows sellers to create their own promotions.
#### Retrieve with Query
```ts theme={null}
const { data: sellers } = await query.graph({
entity: "seller",
fields: [
"*",
"promotion.*",
],
})
// sellers[0].promotion
```
```ts theme={null}
import { useQueryGraphStep } from "@medusajs/medusa/core-flows"
// ...
const { data: sellers } = useQueryGraphStep({
entity: "seller",
fields: [
"*",
"promotion.*",
],
})
// sellers[0].promotion
```
#### Manage with Link
```ts theme={null}
import { Modules } from "@medusajs/framework/utils"
// ...
await link.create({
seller: {
seller_id: "sel_123",
},
[Modules.PROMOTION]: {
promotion_id: "promo_123",
},
})
```
```ts theme={null}
import { createRemoteLinkStep } from "@medusajs/medusa/core-flows"
// ...
createRemoteLinkStep({
seller: {
seller_id: "sel_123",
},
[Modules.PROMOTION]: {
promotion_id: "promo_123",
},
})
```
### Campaign
A link between `Seller` and `Campaign` allows sellers to organize promotions into campaigns.
#### Retrieve with Query
```ts theme={null}
const { data: sellers } = await query.graph({
entity: "seller",
fields: [
"*",
"campaign.*",
],
})
// sellers[0].campaign
```
```ts theme={null}
import { useQueryGraphStep } from "@medusajs/medusa/core-flows"
// ...
const { data: sellers } = useQueryGraphStep({
entity: "seller",
fields: [
"*",
"campaign.*",
],
})
// sellers[0].campaign
```
#### Manage with Link
```ts theme={null}
import { Modules } from "@medusajs/framework/utils"
// ...
await link.create({
seller: {
seller_id: "sel_123",
},
[Modules.PROMOTION]: {
campaign_id: "camp_123",
},
})
```
```ts theme={null}
import { createRemoteLinkStep } from "@medusajs/medusa/core-flows"
// ...
createRemoteLinkStep({
seller: {
seller_id: "sel_123",
},
[Modules.PROMOTION]: {
campaign_id: "camp_123",
},
})
```
# Seller Module Options
Source: https://docs.mercurjs.com/product/modules/b2c-core/seller/seller-module-options
Configuration options for the Seller Module
# Seller Module Options
In this document, you'll learn about the options of the Seller Module.
## validInviteDuration
The `validInviteDuration` option configures how long member invitation tokens remain valid before expiring.
**Type**: `number`\
**Default**: `604800000` (7 days in milliseconds)\
**Unit**: Milliseconds
When a seller invites a team member, a JWT token is generated with an expiration time. This option controls that duration.
For example, to set invitations to expire after 3 days:
```ts title="medusa-config.ts" theme={null}
module.exports = defineConfig({
// ...
modules: [
{
resolve: "@mercurjs/b2c-core",
options: {
seller: {
validInviteDuration: 259200000, // 3 days in milliseconds
},
},
},
],
})
```
### Calculation
To convert days to milliseconds:
```
days × 24 hours × 60 minutes × 60 seconds × 1000 milliseconds
```
**Common Values:**
* 1 day: `86400000`
* 3 days: `259200000`
* 7 days: `604800000` (default)
* 14 days: `1209600000`
* 30 days: `2592000000`
### Use Cases
**Shorter Duration (1-3 days)**
* High-security marketplaces
* Urgent team additions
* Reduces risk of token compromise
**Longer Duration (14-30 days)**
* Casual onboarding processes
* International teams across time zones
* Reduces need to resend invitations
# Seller Module Service Reference
Source: https://docs.mercurjs.com/product/modules/b2c-core/seller/seller-services
Reference documentation for the Seller Module service methods
# ISellerModuleService Reference
This section of the documentation provides a reference to the `ISellerModuleService` interface's methods. This is the interface developers use to use the functionalities provided by the Seller Module.
You should only use the methods in this reference when implementing complex customizations. For common cases, check out available workflows instead.
The main service interface for the Seller Module.
## Methods
### Seller Methods
* [createSellers](#createsellers)
* [updateSellers](#updatesellers)
* [deleteSellers](#deletesellers)
* [retrieveSeller](#retrieveseller)
* [listSellers](#listsellers)
* [listAndCountSellers](#listandcountsellers)
* [softDeleteSellers](#softdeletesellers)
* [restoreSellers](#restoresellers)
### Member Methods
* [createMembers](#createmembers)
* [updateMembers](#updatemembers)
* [deleteMembers](#deletemembers)
* [retrieveMember](#retrievemember)
* [listMembers](#listmembers)
* [listAndCountMembers](#listandcountmembers)
* [softDeleteMembers](#softdeletemembers)
* [restoreMembers](#restoremembers)
### Member Invite Methods
* [createMemberInvites](#creatememberinvites)
* [updateMemberInvites](#updatememberinvites)
* [deleteMemberInvites](#deletememberinvites)
* [retrieveMemberInvite](#retrievememberinvite)
* [listMemberInvites](#listmemberinvites)
* [listAndCountMemberInvites](#listandcountmemberinvites)
* [softDeleteMemberInvites](#softdeletememberinvites)
* [restoreMemberInvites](#restorememberinvites)
* [validateInviteToken](#validateinvitetoken)
### Seller Onboarding Methods
* [createSellerOnboardings](#createselleronboardings)
* [updateSellerOnboardings](#updateselleronboardings)
* [deleteSellerOnboardings](#deleteselleronboardings)
* [retrieveSellerOnboarding](#retrieveselleronboarding)
* [listSellerOnboardings](#listselleronboardings)
* [listAndCountSellerOnboardings](#listandcountselleronboardings)
* [softDeleteSellerOnboardings](#softdeleteselleronboardings)
* [restoreSellerOnboardings](#restoreselleronboardings)
* [isOnboardingCompleted](#isonboardingcompleted)
***
# createSellers
This section provides a reference to the `createSellers` method. This belongs to the Seller Module.
## createSellers(data, sharedContext?): Promise\
This method creates sellers.
### Example
```ts theme={null}
const sellers = await sellerModuleService.createSellers([
{
name: "Acme Store",
handle: "acme-store",
email: "contact@acme.com",
description: "Quality products for everyone",
},
])
```
### Parameters
The sellers to be created.
The name of the seller.
The unique handle of the seller.
The email of the seller.
The phone of the seller.
The description of the seller.
The photo URL of the seller.
The address line of the seller.
The city of the seller.
The state of the seller.
The postal code of the seller.
The country code of the seller.
The tax ID of the seller.
The status of the seller's store.
A context used to share resources, such as transaction manager, between the application and the module.
### Returns
The created sellers.
## createSellers(data, sharedContext?): Promise\
This method creates a seller.
### Example
```ts theme={null}
const seller = await sellerModuleService.createSellers({
name: "Acme Store",
handle: "acme-store",
})
```
### Parameters
The seller to be created.
The name of the seller.
The unique handle of the seller.
The email of the seller.
The phone of the seller.
The description of the seller.
The photo URL of the seller.
The address line of the seller.
The city of the seller.
The state of the seller.
The postal code of the seller.
The country code of the seller.
The tax ID of the seller.
The status of the seller's store.
A context used to share resources, such as transaction manager, between the application and the module.
### Returns
The created seller.
***
# updateSellers
This section provides a reference to the `updateSellers` method. This belongs to the Seller Module.
## updateSellers(id, data, sharedContext?): Promise\
This method updates an existing seller.
### Example
```ts theme={null}
const seller = await sellerModuleService.updateSellers("sel_123", {
name: "Updated Store Name",
description: "New description",
store_status: "ACTIVE",
})
```
### Parameters
The ID of the seller.
The attributes to update in the seller.
The name of the seller.
The email of the seller.
The phone of the seller.
The description of the seller.
The address line of the seller.
The city of the seller.
The state of the seller.
The postal code of the seller.
The country code of the seller.
The tax ID of the seller.
The unique handle of the seller.
The photo URL of the seller.
The status of the seller's store.
A context used to share resources, such as transaction manager, between the application and the module.
### Returns
The updated seller.
The ID of the seller.
The name of the seller.
The unique handle of the seller.
The email of the seller.
The phone of the seller.
The description of the seller.
The photo URL of the seller.
The address line of the seller.
The city of the seller.
The state of the seller.
The postal code of the seller.
The country code of the seller.
The tax ID of the seller.
The status of the seller's store.
The created date of the seller.
The updated date of the seller.
***
# deleteSellers
This section provides a reference to the `deleteSellers` method. This belongs to the Seller Module.
## deleteSellers(ids, sharedContext?): Promise\
This method deletes sellers by their IDs.
### Example
```ts theme={null}
await sellerModuleService.deleteSellers(["sel_123", "sel_321"])
```
### Parameters
The IDs of the sellers.
A context used to share resources, such as transaction manager, between the application and the module.
### Returns
Resolves when the sellers are deleted successfully.
## deleteSellers(id, sharedContext?): Promise\
This method deletes a seller by its ID.
### Example
```ts theme={null}
await sellerModuleService.deleteSellers("sel_123")
```
### Parameters
The ID of the seller.
A context used to share resources, such as transaction manager, between the application and the module.
### Returns
Resolves when the seller is deleted successfully.
***
# retrieveSeller
This section provides a reference to the `retrieveSeller` method. This belongs to the Seller Module.
This method retrieves a seller by its ID.
## Example
```ts theme={null}
const seller = await sellerModuleService.retrieveSeller("sel_123")
```
To retrieve relationships:
```ts theme={null}
const seller = await sellerModuleService.retrieveSeller(
"sel_123",
{
relations: ["members", "onboarding", "invites"],
}
)
```
## Parameters
The ID of the seller.
The configurations determining how the seller is retrieved. Its properties, such as `select` or `relations`, accept the attributes or relations associated with a seller.
An array of strings, each being attribute names of the entity to retrieve in the result.
A number indicating the number of records to skip before retrieving the results.
A number indicating the number of records to return in the result.
An array of strings, each being relation names of the entity to retrieve in the result. For example, `["members", "onboarding", "invites"]`.
An object used to specify how to sort the returned records.
A boolean indicating whether deleted records should also be retrieved as part of the result.
A context used to share resources, such as transaction manager, between the application and the module.
## Returns
The retrieved seller.
The ID of the seller.
The name of the seller.
The unique handle of the seller.
The email of the seller.
The phone of the seller.
The description of the seller.
The photo URL of the seller.
The address line of the seller.
The city of the seller.
The state of the seller.
The postal code of the seller.
The country code of the seller.
The tax ID of the seller.
The status of the seller's store.
The created date of the seller.
The updated date of the seller.
The associated members (if included in relations).
The associated onboarding record (if included in relations).
The associated member invites (if included in relations).
***
# listSellers
This section provides a reference to the `listSellers` method. This belongs to the Seller Module.
This method retrieves a paginated list of sellers based on optional filters and configuration.
## Example
To retrieve a list of sellers using their IDs:
```ts theme={null}
const sellers = await sellerModuleService.listSellers({
id: ["sel_123", "sel_321"],
})
```
To retrieve active sellers:
```ts theme={null}
const sellers = await sellerModuleService.listSellers({
store_status: "ACTIVE",
})
```
By default, only the first `15` records are retrieved. You can control pagination:
```ts theme={null}
const sellers = await sellerModuleService.listSellers(
{
store_status: "ACTIVE",
},
{
take: 20,
skip: 2,
}
)
```
## Parameters
The filters to apply on the retrieved sellers.
The IDs to filter the sellers by.
Filter sellers by their names.
Filter sellers by their handles.
Filter sellers by their email addresses.
Filter sellers by their store status.
The configurations determining how the seller is retrieved.
An array of strings, each being attribute names of the entity to retrieve in the result.
A number indicating the number of records to skip before retrieving the results.
A number indicating the number of records to return in the result.
An array of strings, each being relation names of the entity to retrieve in the result.
An object used to specify how to sort the returned records.
A boolean indicating whether deleted records should also be retrieved as part of the result.
A context used to share resources, such as transaction manager, between the application and the module.
## Returns
The list of sellers.
***
# listAndCountSellers
This section provides a reference to the `listAndCountSellers` method. This belongs to the Seller Module.
This method retrieves a paginated list of sellers along with the total count of available sellers satisfying the provided filters.
## Example
```ts theme={null}
const [sellers, count] = await sellerModuleService.listAndCountSellers({
store_status: "ACTIVE",
})
```
## Parameters
The filters to apply on the retrieved sellers.
The IDs to filter the sellers by.
Filter sellers by their names.
Filter sellers by their handles.
Filter sellers by their email addresses.
Filter sellers by their store status.
The configurations determining how the seller is retrieved.
An array of strings, each being attribute names of the entity to retrieve in the result.
A number indicating the number of records to skip before retrieving the results.
A number indicating the number of records to return in the result.
An array of strings, each being relation names of the entity to retrieve in the result.
An object used to specify how to sort the returned records.
A boolean indicating whether deleted records should also be retrieved as part of the result.
A context used to share resources, such as transaction manager, between the application and the module.
## Returns
The list of sellers along with their total count.
***
# softDeleteSellers
This section provides a reference to the `softDeleteSellers` method. This belongs to the Seller Module.
This method soft deletes sellers by their IDs.
## Example
```ts theme={null}
await sellerModuleService.softDeleteSellers([
"sel_123",
"sel_321",
])
```
## Parameters
The IDs of the sellers.
An object that is used to specify an entity's related entities that should be soft-deleted when the main entity is soft-deleted.
A context used to share resources, such as transaction manager, between the application and the module.
## Returns
An object that includes the IDs of related records that were also soft deleted. If there are no related records, the promise resolves to `void`.
***
# restoreSellers
This section provides a reference to the `restoreSellers` method. This belongs to the Seller Module.
This method restores soft deleted sellers by their IDs.
## Example
```ts theme={null}
await sellerModuleService.restoreSellers(["sel_123", "sel_321"])
```
## Parameters
The IDs of the sellers.
Configurations determining which relations to restore along with each of the seller.
A context used to share resources, such as transaction manager, between the application and the module.
## Returns
An object that includes the IDs of related records that were restored. If there are no related records restored, the promise resolves to `void`.
***
# createMembers
This section provides a reference to the `createMembers` method. This belongs to the Seller Module.
## createMembers(data, sharedContext?): Promise\
This method creates members.
### Example
```ts theme={null}
const members = await sellerModuleService.createMembers([
{
seller_id: "sel_123",
name: "John Doe",
email: "john@example.com",
role: "admin",
},
])
```
### Parameters
The members to be created.
The ID of the seller this member belongs to.
The name of the member.
The email of the member.
The role of the member in the seller's team.
The bio of the member.
The photo URL of the member.
The phone of the member.
A context used to share resources, such as transaction manager, between the application and the module.
### Returns
The created members.
## createMembers(data, sharedContext?): Promise\
This method creates a member.
### Example
```ts theme={null}
const member = await sellerModuleService.createMembers({
seller_id: "sel_123",
name: "John Doe",
email: "john@example.com",
role: "admin",
})
```
### Parameters
The member to be created.
The ID of the seller this member belongs to.
The name of the member.
The email of the member.
The role of the member in the seller's team.
The bio of the member.
The photo URL of the member.
The phone of the member.
A context used to share resources, such as transaction manager, between the application and the module.
### Returns
The created member.
***
# updateMembers
This section provides a reference to the `updateMembers` method. This belongs to the Seller Module.
## updateMembers(id, data, sharedContext?): Promise\
This method updates an existing member.
### Example
```ts theme={null}
const member = await sellerModuleService.updateMembers("mem_123", {
name: "Jane Doe",
role: "owner",
})
```
### Parameters
The ID of the member.
The attributes to update in the member.
The name of the member.
The email of the member.
The role of the member in the seller's team.
The bio of the member.
The photo URL of the member.
The phone of the member.
A context used to share resources, such as transaction manager, between the application and the module.
### Returns
The updated member.
The ID of the member.
The name of the member.
The email of the member.
The role of the member.
The bio of the member.
The photo URL of the member.
The phone of the member.
The created date of the member.
The updated date of the member.
***
# deleteMembers
This section provides a reference to the `deleteMembers` method. This belongs to the Seller Module.
## deleteMembers(ids, sharedContext?): Promise\
This method deletes members by their IDs.
### Example
```ts theme={null}
await sellerModuleService.deleteMembers(["mem_123", "mem_321"])
```
### Parameters
The IDs of the members.
A context used to share resources, such as transaction manager, between the application and the module.
### Returns
Resolves when the members are deleted successfully.
## deleteMembers(id, sharedContext?): Promise\
This method deletes a member by its ID.
### Example
```ts theme={null}
await sellerModuleService.deleteMembers("mem_123")
```
### Parameters
The ID of the member.
A context used to share resources, such as transaction manager, between the application and the module.
### Returns
Resolves when the member is deleted successfully.
***
# retrieveMember
This section provides a reference to the `retrieveMember` method. This belongs to the Seller Module.
This method retrieves a member by its ID.
## Example
```ts theme={null}
const member = await sellerModuleService.retrieveMember("mem_123")
```
To retrieve the seller relationship:
```ts theme={null}
const member = await sellerModuleService.retrieveMember(
"mem_123",
{
relations: ["seller"],
}
)
```
## Parameters
The ID of the member.
The configurations determining how the member is retrieved.
An array of strings, each being attribute names of the entity to retrieve in the result.
An array of strings, each being relation names of the entity to retrieve in the result. For example, `["seller"]`.
An object used to specify how to sort the returned records.
A boolean indicating whether deleted records should also be retrieved as part of the result.
A context used to share resources, such as transaction manager, between the application and the module.
## Returns
The retrieved member.
The ID of the member.
The name of the member.
The email of the member.
The role of the member.
The bio of the member.
The photo URL of the member.
The phone of the member.
The created date of the member.
The updated date of the member.
The associated seller (if included in relations).
***
# listMembers
This section provides a reference to the `listMembers` method. This belongs to the Seller Module.
This method retrieves a paginated list of members based on optional filters and configuration.
## Example
```ts theme={null}
const members = await sellerModuleService.listMembers({
seller_id: "sel_123",
})
```
To filter by role:
```ts theme={null}
const members = await sellerModuleService.listMembers({
seller_id: "sel_123",
role: "admin",
})
```
## Parameters
The filters to apply on the retrieved members.
The IDs to filter the members by.
Filter members by their seller IDs.
Filter members by their email addresses.
Filter members by their roles.
The configurations determining how the member is retrieved.
An array of strings, each being attribute names of the entity to retrieve in the result.
A number indicating the number of records to skip before retrieving the results.
A number indicating the number of records to return in the result.
An array of strings, each being relation names of the entity to retrieve in the result.
An object used to specify how to sort the returned records.
A boolean indicating whether deleted records should also be retrieved as part of the result.
A context used to share resources, such as transaction manager, between the application and the module.
## Returns
The list of members.
***
# listAndCountMembers
This section provides a reference to the `listAndCountMembers` method. This belongs to the Seller Module.
This method retrieves a paginated list of members along with the total count of available members satisfying the provided filters.
## Example
```ts theme={null}
const [members, count] = await sellerModuleService.listAndCountMembers({
seller_id: "sel_123",
})
```
## Parameters
The filters to apply on the retrieved members.
The IDs to filter the members by.
Filter members by their seller IDs.
Filter members by their email addresses.
Filter members by their roles.
The configurations determining how the member is retrieved.
An array of strings, each being attribute names of the entity to retrieve in the result.
A number indicating the number of records to skip before retrieving the results.
A number indicating the number of records to return in the result.
An array of strings, each being relation names of the entity to retrieve in the result.
An object used to specify how to sort the returned records.
A boolean indicating whether deleted records should also be retrieved as part of the result.
A context used to share resources, such as transaction manager, between the application and the module.
## Returns
The list of members along with their total count.
***
# softDeleteMembers
This section provides a reference to the `softDeleteMembers` method. This belongs to the Seller Module.
This method soft deletes members by their IDs.
## Example
```ts theme={null}
await sellerModuleService.softDeleteMembers([
"mem_123",
"mem_321",
])
```
## Parameters
The IDs of the members.
An object that is used to specify an entity's related entities that should be soft-deleted when the main entity is soft-deleted.
A context used to share resources, such as transaction manager, between the application and the module.
## Returns
An object that includes the IDs of related records that were also soft deleted. If there are no related records, the promise resolves to `void`.
***
# restoreMembers
This section provides a reference to the `restoreMembers` method. This belongs to the Seller Module.
This method restores soft deleted members by their IDs.
## Example
```ts theme={null}
await sellerModuleService.restoreMembers(["mem_123", "mem_321"])
```
## Parameters
The IDs of the members.
Configurations determining which relations to restore along with each of the member.
A context used to share resources, such as transaction manager, between the application and the module.
## Returns
An object that includes the IDs of related records that were restored. If there are no related records restored, the promise resolves to `void`.
***
# createMemberInvites
This section provides a reference to the `createMemberInvites` method. This belongs to the Seller Module.
This method creates member invites with automatically generated JWT tokens.
## createMemberInvites(data, sharedContext?): Promise\
### Example
```ts theme={null}
const invites = await sellerModuleService.createMemberInvites([
{
seller_id: "sel_123",
email: "newmember@example.com",
role: "member",
},
])
```
### Parameters
The member invites to be created.
The ID of the seller this invite belongs to.
The email of the invited member.
The role that will be assigned to the member.
A context used to share resources, such as transaction manager, between the application and the module.
### Returns
The created member invites with generated tokens.
The ID of the member invite.
The email of the invited member.
The role that will be assigned to the member.
The JWT invitation token.
The date and time when the invitation expires.
Whether the invitation has been accepted.
The created date of the invite.
The updated date of the invite.
***
# validateInviteToken
This section provides a reference to the `validateInviteToken` method. This belongs to the Seller Module.
This method validates a member invitation JWT token and returns the associated invite if valid.
## Example
```ts theme={null}
const invite = await sellerModuleService.validateInviteToken("eyJhbGciOiJIUzI1NiIsInR5cCI6IkpXVCJ9...")
```
## Parameters
The JWT invitation token to validate.
## Returns
The validated member invite.
The ID of the member invite.
The email of the invited member.
The role that will be assigned to the member.
The JWT invitation token.
The date and time when the invitation expires.
Whether the invitation has been accepted.
The created date of the invite.
The updated date of the invite.
This method throws an error if the invite has already been accepted or has expired.
***
# updateMemberInvites
This section provides a reference to the `updateMemberInvites` method. This belongs to the Seller Module.
## updateMemberInvites(id, data, sharedContext?): Promise\
This method updates an existing member invite.
### Example
```ts theme={null}
const invite = await sellerModuleService.updateMemberInvites("meminv_123", {
accepted: true,
})
```
### Parameters
The ID of the member invite.
The attributes to update in the member invite.
The email of the invited member.
The role that will be assigned to the member.
Whether the invitation has been accepted.
The JWT invitation token.
The date and time when the invitation expires.
A context used to share resources, such as transaction manager, between the application and the module.
### Returns
The updated member invite.
***
# deleteMemberInvites
This section provides a reference to the `deleteMemberInvites` method. This belongs to the Seller Module.
## deleteMemberInvites(ids, sharedContext?): Promise\
This method deletes member invites by their IDs.
### Example
```ts theme={null}
await sellerModuleService.deleteMemberInvites(["meminv_123", "meminv_321"])
```
### Parameters
The IDs of the member invites.
A context used to share resources, such as transaction manager, between the application and the module.
### Returns
Resolves when the member invites are deleted successfully.
## deleteMemberInvites(id, sharedContext?): Promise\
This method deletes a member invite by its ID.
### Example
```ts theme={null}
await sellerModuleService.deleteMemberInvites("meminv_123")
```
### Parameters
The ID of the member invite.
A context used to share resources, such as transaction manager, between the application and the module.
### Returns
Resolves when the member invite is deleted successfully.
***
# retrieveMemberInvite
This section provides a reference to the `retrieveMemberInvite` method. This belongs to the Seller Module.
This method retrieves a member invite by its ID.
## Example
```ts theme={null}
const invite = await sellerModuleService.retrieveMemberInvite("meminv_123")
```
To retrieve the seller relationship:
```ts theme={null}
const invite = await sellerModuleService.retrieveMemberInvite(
"meminv_123",
{
relations: ["seller"],
}
)
```
## Parameters
The ID of the member invite.
The configurations determining how the member invite is retrieved.
An array of strings, each being attribute names of the entity to retrieve in the result.
An array of strings, each being relation names of the entity to retrieve in the result. For example, `["seller"]`.
An object used to specify how to sort the returned records.
A boolean indicating whether deleted records should also be retrieved as part of the result.
A context used to share resources, such as transaction manager, between the application and the module.
## Returns
The retrieved member invite.
The ID of the member invite.
The email of the invited member.
The role that will be assigned to the member.
The JWT invitation token.
The date and time when the invitation expires.
Whether the invitation has been accepted.
The created date of the invite.
The updated date of the invite.
The associated seller (if included in relations).
***
# listMemberInvites
This section provides a reference to the `listMemberInvites` method. This belongs to the Seller Module.
This method retrieves a paginated list of member invites based on optional filters and configuration.
## Example
```ts theme={null}
const invites = await sellerModuleService.listMemberInvites({
seller_id: "sel_123",
accepted: false,
})
```
## Parameters
The filters to apply on the retrieved member invites.
The IDs to filter the member invites by.
Filter member invites by their seller IDs.
Filter member invites by their email addresses.
Filter member invites by whether they have been accepted.
The configurations determining how the member invite is retrieved.
An array of strings, each being attribute names of the entity to retrieve in the result.
A number indicating the number of records to skip before retrieving the results.
A number indicating the number of records to return in the result.
An array of strings, each being relation names of the entity to retrieve in the result.
An object used to specify how to sort the returned records.
A boolean indicating whether deleted records should also be retrieved as part of the result.
A context used to share resources, such as transaction manager, between the application and the module.
## Returns
The list of member invites.
***
# listAndCountMemberInvites
This section provides a reference to the `listAndCountMemberInvites` method. This belongs to the Seller Module.
This method retrieves a paginated list of member invites along with the total count of available member invites satisfying the provided filters.
## Example
```ts theme={null}
const [invites, count] = await sellerModuleService.listAndCountMemberInvites({
seller_id: "sel_123",
accepted: false,
})
```
## Parameters
The filters to apply on the retrieved member invites.
The IDs to filter the member invites by.
Filter member invites by their seller IDs.
Filter member invites by their email addresses.
Filter member invites by whether they have been accepted.
The configurations determining how the member invite is retrieved.
An array of strings, each being attribute names of the entity to retrieve in the result.
A number indicating the number of records to skip before retrieving the results.
A number indicating the number of records to return in the result.
An array of strings, each being relation names of the entity to retrieve in the result.
An object used to specify how to sort the returned records.
A boolean indicating whether deleted records should also be retrieved as part of the result.
A context used to share resources, such as transaction manager, between the application and the module.
## Returns
The list of member invites along with their total count.
***
# softDeleteMemberInvites
This section provides a reference to the `softDeleteMemberInvites` method. This belongs to the Seller Module.
This method soft deletes member invites by their IDs.
## Example
```ts theme={null}
await sellerModuleService.softDeleteMemberInvites([
"meminv_123",
"meminv_321",
])
```
## Parameters
The IDs of the member invites.
An object that is used to specify an entity's related entities that should be soft-deleted when the main entity is soft-deleted.
A context used to share resources, such as transaction manager, between the application and the module.
## Returns
An object that includes the IDs of related records that were also soft deleted. If there are no related records, the promise resolves to `void`.
***
# restoreMemberInvites
This section provides a reference to the `restoreMemberInvites` method. This belongs to the Seller Module.
This method restores soft deleted member invites by their IDs.
## Example
```ts theme={null}
await sellerModuleService.restoreMemberInvites(["meminv_123", "meminv_321"])
```
## Parameters
The IDs of the member invites.
Configurations determining which relations to restore along with each of the member invite.
A context used to share resources, such as transaction manager, between the application and the module.
## Returns
An object that includes the IDs of related records that were restored. If there are no related records restored, the promise resolves to `void`.
***
# createSellerOnboardings
This section provides a reference to the `createSellerOnboardings` method. This belongs to the Seller Module.
## createSellerOnboardings(data, sharedContext?): Promise\
This method creates seller onboarding records.
### Example
```ts theme={null}
const onboardings = await sellerModuleService.createSellerOnboardings([
{
seller_id: "sel_123",
store_information: true,
stripe_connection: false,
locations_shipping: false,
products: false,
},
])
```
### Parameters
The seller onboardings to be created.
The ID of the seller this onboarding belongs to.
Whether the store information step is completed.
Whether the Stripe connection step is completed.
Whether the locations and shipping setup step is completed.
Whether the products setup step is completed.
A context used to share resources, such as transaction manager, between the application and the module.
### Returns
The created seller onboardings.
***
# updateSellerOnboardings
This section provides a reference to the `updateSellerOnboardings` method. This belongs to the Seller Module.
## updateSellerOnboardings(id, data, sharedContext?): Promise\
This method updates an existing seller onboarding record.
### Example
```ts theme={null}
const onboarding = await sellerModuleService.updateSellerOnboardings("sel_onb_123", {
store_information: true,
stripe_connection: true,
})
```
### Parameters
The ID of the seller onboarding.
The attributes to update in the seller onboarding.
Whether the store information step is completed.
Whether the Stripe connection step is completed.
Whether the locations and shipping setup step is completed.
Whether the products setup step is completed.
A context used to share resources, such as transaction manager, between the application and the module.
### Returns
The updated seller onboarding.
The ID of the seller onboarding.
Whether the store information step is completed.
Whether the Stripe connection step is completed.
Whether the locations and shipping setup step is completed.
Whether the products setup step is completed.
The created date of the seller onboarding.
The updated date of the seller onboarding.
***
# isOnboardingCompleted
This section provides a reference to the `isOnboardingCompleted` method. This belongs to the Seller Module.
This method checks whether a seller has completed all onboarding steps.
## Example
```ts theme={null}
const isCompleted = await sellerModuleService.isOnboardingCompleted("sel_123")
```
## Parameters
The ID of the seller to check.
## Returns
A boolean indicating whether all onboarding steps are completed. Returns `true` if all four steps (`store_information`, `stripe_connection`, `locations_shipping`, `products`) are completed, otherwise `false`.
***
# deleteSellerOnboardings
This section provides a reference to the `deleteSellerOnboardings` method. This belongs to the Seller Module.
## deleteSellerOnboardings(ids, sharedContext?): Promise\
This method deletes seller onboardings by their IDs.
### Example
```ts theme={null}
await sellerModuleService.deleteSellerOnboardings(["sel_onb_123", "sel_onb_321"])
```
### Parameters
The IDs of the seller onboardings.
A context used to share resources, such as transaction manager, between the application and the module.
### Returns
Resolves when the seller onboardings are deleted successfully.
## deleteSellerOnboardings(id, sharedContext?): Promise\
This method deletes a seller onboarding by its ID.
### Example
```ts theme={null}
await sellerModuleService.deleteSellerOnboardings("sel_onb_123")
```
### Parameters
The ID of the seller onboarding.
A context used to share resources, such as transaction manager, between the application and the module.
### Returns
Resolves when the seller onboarding is deleted successfully.
***
# retrieveSellerOnboarding
This section provides a reference to the `retrieveSellerOnboarding` method. This belongs to the Seller Module.
This method retrieves a seller onboarding by its ID.
## Example
```ts theme={null}
const onboarding = await sellerModuleService.retrieveSellerOnboarding("sel_onb_123")
```
To retrieve the seller relationship:
```ts theme={null}
const onboarding = await sellerModuleService.retrieveSellerOnboarding(
"sel_onb_123",
{
relations: ["seller"],
}
)
```
## Parameters
The ID of the seller onboarding.
The configurations determining how the seller onboarding is retrieved.
An array of strings, each being attribute names of the entity to retrieve in the result.
An array of strings, each being relation names of the entity to retrieve in the result. For example, `["seller"]`.
An object used to specify how to sort the returned records.
A boolean indicating whether deleted records should also be retrieved as part of the result.
A context used to share resources, such as transaction manager, between the application and the module.
## Returns
The retrieved seller onboarding.
The ID of the seller onboarding.
Whether the store information step is completed.
Whether the Stripe connection step is completed.
Whether the locations and shipping setup step is completed.
Whether the products setup step is completed.
The created date of the seller onboarding.
The updated date of the seller onboarding.
The associated seller (if included in relations).
***
# listSellerOnboardings
This section provides a reference to the `listSellerOnboardings` method. This belongs to the Seller Module.
This method retrieves a paginated list of seller onboardings based on optional filters and configuration.
## Example
```ts theme={null}
const onboardings = await sellerModuleService.listSellerOnboardings({
seller_id: "sel_123",
})
```
## Parameters
The filters to apply on the retrieved seller onboardings.
The IDs to filter the seller onboardings by.
Filter seller onboardings by their seller IDs.
The configurations determining how the seller onboarding is retrieved.
An array of strings, each being attribute names of the entity to retrieve in the result.
A number indicating the number of records to skip before retrieving the results.
A number indicating the number of records to return in the result.
An array of strings, each being relation names of the entity to retrieve in the result.
An object used to specify how to sort the returned records.
A boolean indicating whether deleted records should also be retrieved as part of the result.
A context used to share resources, such as transaction manager, between the application and the module.
## Returns
The list of seller onboardings.
***
# listAndCountSellerOnboardings
This section provides a reference to the `listAndCountSellerOnboardings` method. This belongs to the Seller Module.
This method retrieves a paginated list of seller onboardings along with the total count of available seller onboardings satisfying the provided filters.
## Example
```ts theme={null}
const [onboardings, count] = await sellerModuleService.listAndCountSellerOnboardings({
seller_id: "sel_123",
})
```
## Parameters
The filters to apply on the retrieved seller onboardings.
The IDs to filter the seller onboardings by.
Filter seller onboardings by their seller IDs.
The configurations determining how the seller onboarding is retrieved.
An array of strings, each being attribute names of the entity to retrieve in the result.
A number indicating the number of records to skip before retrieving the results.
A number indicating the number of records to return in the result.
An array of strings, each being relation names of the entity to retrieve in the result.
An object used to specify how to sort the returned records.
A boolean indicating whether deleted records should also be retrieved as part of the result.
A context used to share resources, such as transaction manager, between the application and the module.
## Returns
The list of seller onboardings along with their total count.
***
# softDeleteSellerOnboardings
This section provides a reference to the `softDeleteSellerOnboardings` method. This belongs to the Seller Module.
This method soft deletes seller onboardings by their IDs.
## Example
```ts theme={null}
await sellerModuleService.softDeleteSellerOnboardings([
"sel_onb_123",
"sel_onb_321",
])
```
## Parameters
The IDs of the seller onboardings.
An object that is used to specify an entity's related entities that should be soft-deleted when the main entity is soft-deleted.
A context used to share resources, such as transaction manager, between the application and the module.
## Returns
An object that includes the IDs of related records that were also soft deleted. If there are no related records, the promise resolves to `void`.
***
# restoreSellerOnboardings
This section provides a reference to the `restoreSellerOnboardings` method. This belongs to the Seller Module.
This method restores soft deleted seller onboardings by their IDs.
## Example
```ts theme={null}
await sellerModuleService.restoreSellerOnboardings(["sel_onb_123", "sel_onb_321"])
```
## Parameters
The IDs of the seller onboardings.
Configurations determining which relations to restore along with each of the seller onboarding.
A context used to share resources, such as transaction manager, between the application and the module.
## Returns
An object that includes the IDs of related records that were restored. If there are no related records restored, the promise resolves to `void`.
# Split Order Payment Module Data Models
Source: https://docs.mercurjs.com/product/modules/b2c-core/split-order-payment/split-order-data-model-reference
Reference documentation for the Split Order Payment Module data models
## Relations Overview
| Relationship | Type | Description |
| ------------------------------------------------------ | ------------------- | ----------------------------------------------------- |
| SplitOrderPayment → PaymentCollection (Payment Module) | Read-only - has one | A split order payment references a payment collection |
## Data Models
* [SplitOrderPayment](#splitorderpayment)
## SplitOrderPayment
This documentation provides a reference to the SplitOrderPayment data model. It belongs to the Split Order Payment Module.
[View source code](https://github.com/mercurjs/mercur/blob/main/packages/modules/b2c-core/src/modules/split-order-payment/models/split-order-payment.ts)
| Field | Type | Description |
| ----------------------- | -------------------------------- | ---------------------------------------------------------------------------- |
| `id` | `PrimaryKeyModifier` | The ID of the split order payment. |
| `status` | `TextProperty` | The status of the split order payment. |
| `currency_code` | `TextProperty` | The ISO 3 currency code of the split order payment. For example, `usd`. |
| `authorized_amount` | `BigNumberProperty` | The authorized amount for this seller's portion of the order. |
| `captured_amount` | `BigNumberProperty` | The captured amount for this seller's portion of the order. Defaults to `0`. |
| `refunded_amount` | `BigNumberProperty` | The refunded amount for this seller's portion of the order. Defaults to `0`. |
| `payment_collection_id` | `TextProperty` | The ID of the payment collection that this split payment is part of. |
# Split Order Payment Module Links
Source: https://docs.mercurjs.com/product/modules/b2c-core/split-order-payment/split-order-links
Module links for the Split Order Payment Module
# Links between Split Order Payment Module and Other Modules
This document showcases the module links defined between the Split Order Payment Module and other Commerce Modules.
## Summary
The Split Order Payment Module has the following links to other modules:
| First Data Model | Second Data Model | Type | Description |
| ---------------- | ----------------- | ------------------- | --------------------------------------------------------------------------------------- |
| Order | SplitOrderPayment | Stored - one-to-one | Associates an order with its split payment record tracking the seller's payment portion |
***
## Order Module
Mercur defines a link between the Order Module's `Order` data model and the Split Order Payment Module's `SplitOrderPayment` data model. This allows tracking payment amounts (authorized, captured, refunded) specific to each seller's portion of an order in a multi-vendor marketplace.
### Retrieve with Query
To retrieve the split order payment of an order with Query, pass `split_order_payment.*` in `fields`:
```ts theme={null}
const { data: orders } = await query.graph({
entity: "order",
fields: [
"*",
"split_order_payment.*",
],
})
// orders[0].split_order_payment
```
```ts theme={null}
import { useQueryGraphStep } from "@medusajs/medusa/core-flows"
// ...
const { data: orders } = useQueryGraphStep({
entity: "order",
fields: [
"*",
"split_order_payment.*",
],
})
// orders[0].split_order_payment
```
### Manage with Link
To manage the split order payment of an order, use Link:
```ts theme={null}
import { Modules } from "@medusajs/framework/utils"
// ...
await link.create({
[Modules.ORDER]: {
order_id: "ord_123",
},
split_order_payment: {
split_order_payment_id: "sp_ord_pay_123",
},
})
```
```ts theme={null}
import { createRemoteLinkStep } from "@medusajs/medusa/core-flows"
// ...
createRemoteLinkStep({
[Modules.ORDER]: {
order_id: "ord_123",
},
split_order_payment: {
split_order_payment_id: "sp_ord_pay_123",
},
})
```
# Split Order Payment Module
Source: https://docs.mercurjs.com/product/modules/b2c-core/split-order-payment/split-order-payment-concept
Learn about the Split Order Payment Module and how to use it in your application
# Split Order Payment Module
In this section of the documentation, you will find resources to learn more about the Split Order Payment Module and how to use it in your application.
Mercur has payment splitting features available out-of-the-box through the Split Order Payment Module. A [module](https://docs.medusajs.com/learn/fundamentals/modules) is a standalone package that provides features for a single domain. Each of Mercur's marketplace features are placed in custom modules, such as this Split Order Payment Module.
Learn more about why modules are isolated in [this documentation](https://docs.medusajs.com/learn/fundamentals/modules/isolation).
## Split Order Payment Features
* **Payment Tracking per Seller**: Track payment amounts (authorized, captured, refunded) separately for each seller's portion of a multi-vendor order.
* **Payment Collection Association**: Link split payments to the main payment collection for the entire cart.
* **Automatic Status Updates**: Automatically update split payment status when the main payment is captured.
* **Refund Management**: Handle partial refunds specific to each seller's order.
* **Financial Reconciliation**: Maintain accurate payment records for commission calculation and payout processing.
***
## How to Use the Split Order Payment Module
In your Medusa application, you build flows around Commerce Modules. A flow is built as a [Workflow](https://docs.medusajs.com/learn/fundamentals/workflows), which is a special function composed of a series of steps that guarantees data consistency and reliable roll-back mechanism.
You can build custom workflows and steps. Mercur provides pre-built workflows for split payment operations in the `@mercurjs/b2c-core` package.
For example, the `markSplitOrderPaymentsAsCapturedWorkflow`:
```ts title="src/workflows/split-order-payment/mark-split-order-payments-as-captured.ts" theme={null}
import {
WorkflowResponse,
createWorkflow,
transform
} from '@medusajs/framework/workflows-sdk'
import { useQueryGraphStep } from '@medusajs/medusa/core-flows'
import { updateSplitOrderPaymentsStep } from '../steps'
export const markSplitOrderPaymentsAsCapturedWorkflow = createWorkflow(
{
name: 'mark-split-order-payments-as-captured'
},
function (payment_collection_id: string) {
// Query all split payments for this payment collection
const payments = useQueryGraphStep({
entity: 'split_order_payment',
fields: ['*'],
filters: {
payment_collection_id
}
})
// Transform to update payload
const updatePayload = transform(payments, (payments) => {
const entities = payments.data
return entities.map((p) => ({
id: p.id,
status: 'captured',
captured_amount: p.authorized_amount
}))
})
// Update all split payments to captured
const splitOrderPayments = updateSplitOrderPaymentsStep(updatePayload)
return new WorkflowResponse(splitOrderPayments)
}
)
```
You can then execute the workflow in your custom API routes, scheduled jobs, or subscribers:
### Subscriber
```ts title="src/subscribers/split-payment-payment-captured.ts" theme={null}
import { SubscriberArgs, SubscriberConfig } from '@medusajs/framework'
import { Modules, PaymentEvents } from '@medusajs/framework/utils'
import { markSplitOrderPaymentsAsCapturedWorkflow } from '../workflows/split-order-payment/workflows'
export default async function paymentCapturedHandler({
event,
container
}: SubscriberArgs<{ id: string }>) {
const payment_id = event.data.id
const paymentService = container.resolve(Modules.PAYMENT)
// Retrieve payment with its collection
const payment = await paymentService.retrievePayment(payment_id, {
relations: ['payment_collection']
})
// Mark all split payments as captured
await markSplitOrderPaymentsAsCapturedWorkflow.run({
container,
input: payment.payment_collection_id
})
}
export const config: SubscriberConfig = {
event: PaymentEvents.CAPTURED,
context: {
subscriberId: 'split-payment-payment-captured-handler'
}
}
```
Learn more about workflows in [this documentation](https://docs.medusajs.com/learn/fundamentals/workflows).
***
# Concepts
In this document, you'll learn about the main concepts related to split order payments in Mercur.
## Split Order Payment
A split order payment tracks the payment amounts specific to an individual seller's order within a multi-vendor purchase. It is represented by the [SplitOrderPayment data model](../data-model/split-order-payment-module-data-reference#splitorderpayment).
A split order payment holds information about:
* Payment status (authorized, captured, refunded)
* Authorized amount for this seller's portion
* Captured amount (funds actually received)
* Refunded amount (funds returned to customer)
* Currency code
* Associated payment collection ID
This allows the marketplace to track payment lifecycle events separately for each vendor involved in a multi-vendor order.
***
## Why Split Order Payments?
In a multi-vendor marketplace, when a customer checks out with products from multiple sellers:
**Payment Flow:**
1. Customer authorizes payment for the total cart amount (\$100)
2. Cart splits into 3 orders: Seller A ($40), Seller B ($35), Seller C (\$25)
3. Three `SplitOrderPayment` records are created, tracking each seller's portion
4. Payment is captured (\$100 total)
5. Each split payment updates to "captured" with their respective amounts
6. Commission is calculated per split payment
7. Payouts are processed to each seller (minus commission)
**Without Split Payments:**
* No way to track which seller's portion was captured/refunded
* Commission calculation would be difficult
* Payout processing would require complex lookups
* Refund handling would be ambiguous
**With Split Payments:**
* Clear payment tracking per seller
* Simple commission calculation
* Straightforward payout processing
* Accurate refund attribution
***
## Payment Lifecycle
### 1. Authorization
When a cart is completed:
* Main payment collection is created for the total amount
* Individual orders are created per seller
* `SplitOrderPayment` records are created with status `authorized`
* `authorized_amount` is set to each seller's order total
### 2. Capture
When payment is captured (either immediately or later):
* Main payment's `payment.captured` event is emitted
* Subscriber triggers `markSplitOrderPaymentsAsCapturedWorkflow`
* All split payments for the payment collection are updated:
* `status` → `captured`
* `captured_amount` → `authorized_amount`
### 3. Refund
When a refund is processed:
* Refund workflow identifies the specific seller's order
* `SplitOrderPayment` is updated:
* `refunded_amount` is incremented
* If fully refunded and `refunded_amount` equals `captured_amount`
This lifecycle tracking enables accurate financial reconciliation across the marketplace.
***
## Integration with Payment Module
Split order payments are tightly integrated with Medusa's Payment Module:
* **PaymentCollection**: The parent payment collection for the entire cart
* **Link**: One-to-one link between Order and SplitOrderPayment
* **Event-Driven**: Listens to `PaymentEvents.CAPTURED` to update split payment status
* **Automatic Sync**: Split payments stay synchronized with main payment lifecycle
This architecture separates concerns:
* **Payment Module**: Handles actual payment processing with providers
* **Split Order Payment Module**: Tracks seller-specific payment amounts
* **Payout Module**: Uses split payment data for seller payouts
***
## Status Values
Split order payments use string-based status tracking:
* **`authorized`**: Payment has been authorized but not yet captured
* **`captured`**: Payment has been captured and funds are secured
* **`refunded`**: Payment has been fully refunded to the customer
* **`partially_refunded`**: Some but not all funds have been refunded
The status field is flexible to accommodate provider-specific statuses or custom payment flows.
***
## Use Cases
**1. Multi-Vendor Checkout**
Customer purchases from 3 sellers; system creates 3 split payments tracking each seller's payment portion.
**2. Delayed Capture**
Marketplace authorizes payment on checkout but captures later (e.g., after shipping). Split payments track both authorization and capture timing.
**3. Partial Refunds**
Customer returns items from one seller; that seller's split payment tracks the refunded amount separately.
**4. Commission Calculation**
Commission module uses `captured_amount` from split payments to calculate marketplace fees per seller.
**5. Payout Processing**
Payout job queries orders with captured split payments to determine which sellers should receive funds.
**6. Financial Reporting**
Generate reports on authorized vs captured amounts per seller for cash flow analysis.
# Split Order Payment Module Service Reference
Source: https://docs.mercurjs.com/product/modules/b2c-core/split-order-payment/split-order-services
Reference documentation for the Split Order Payment Module service methods
# ISplitOrderPaymentModuleService Reference
This section of the documentation provides a reference to the `ISplitOrderPaymentModuleService` interface's methods. This is the interface developers use to use the functionalities provided by the Split Order Payment Module.
You should only use the methods in this reference when implementing complex customizations. For common cases, check out available workflows instead.
The main service interface for the Split Order Payment Module.
## Methods
* [createSplitOrderPayments](#createsplitorderpayments)
* [updateSplitOrderPayments](#updatesplitorderpayments)
* [deleteSplitOrderPayments](#deletesplitorderpayments)
* [retrieveSplitOrderPayment](#retrievesplitorderpayment)
* [listSplitOrderPayments](#listsplitorderpayments)
* [listAndCountSplitOrderPayments](#listandcountsplitorderpayments)
* [softDeleteSplitOrderPayments](#softdeletesplitorderpayments)
* [restoreSplitOrderPayments](#restoresplitorderpayments)
***
# createSplitOrderPayments
This section provides a reference to the `createSplitOrderPayments` method. This belongs to the Split Order Payment Module.
## createSplitOrderPayments(data, sharedContext?): Promise\
This method creates split order payments.
### Example
```ts theme={null}
const splitPayments = await splitOrderPaymentModuleService.createSplitOrderPayments([
{
order_id: "ord_123",
status: "authorized",
currency_code: "usd",
authorized_amount: 5000,
payment_collection_id: "paycol_123",
},
])
```
### Parameters
The split order payments to be created.
The ID of the order this split payment is associated with.
The status of the split order payment.
The ISO 3 currency code. For example, `usd`.
The authorized amount for this seller's portion of the order.
The ID of the payment collection that this split payment is part of.
A context used to share resources, such as transaction manager, between the application and the module.
### Returns
The created split order payments.
## createSplitOrderPayments(data, sharedContext?): Promise\
This method creates a split order payment.
### Example
```ts theme={null}
const splitPayment = await splitOrderPaymentModuleService.createSplitOrderPayments({
order_id: "ord_123",
status: "authorized",
currency_code: "usd",
authorized_amount: 5000,
payment_collection_id: "paycol_123",
})
```
### Parameters
The split order payment to be created.
The ID of the order this split payment is associated with.
The status of the split order payment.
The ISO 3 currency code. For example, `usd`.
The authorized amount for this seller's portion of the order.
The ID of the payment collection that this split payment is part of.
A context used to share resources, such as transaction manager, between the application and the module.
### Returns
The created split order payment.
***
# updateSplitOrderPayments
This section provides a reference to the `updateSplitOrderPayments` method. This belongs to the Split Order Payment Module.
## updateSplitOrderPayments(id, data, sharedContext?): Promise\
This method updates an existing split order payment.
### Example
```ts theme={null}
const splitPayment = await splitOrderPaymentModuleService.updateSplitOrderPayments("sp_ord_pay_123", {
status: "captured",
captured_amount: 5000,
})
```
### Parameters
The ID of the split order payment.
The attributes to update in the split order payment.
The status of the split order payment.
The authorized amount for this seller's portion of the order.
The captured amount for this seller's portion of the order.
The refunded amount for this seller's portion of the order.
A context used to share resources, such as transaction manager, between the application and the module.
### Returns
The updated split order payment.
The ID of the split order payment.
The status of the split order payment.
The ISO 3 currency code of the split order payment.
The authorized amount for this seller's portion of the order.
The captured amount for this seller's portion of the order.
The refunded amount for this seller's portion of the order.
The ID of the payment collection that this split payment is part of.
***
# deleteSplitOrderPayments
This section provides a reference to the `deleteSplitOrderPayments` method. This belongs to the Split Order Payment Module.
## deleteSplitOrderPayments(ids, sharedContext?): Promise\
This method deletes split order payments by their IDs.
### Example
```ts theme={null}
await splitOrderPaymentModuleService.deleteSplitOrderPayments(["sp_ord_pay_123", "sp_ord_pay_321"])
```
### Parameters
The IDs of the split order payments.
A context used to share resources, such as transaction manager, between the application and the module.
### Returns
Resolves when the split order payments are deleted successfully.
## deleteSplitOrderPayments(id, sharedContext?): Promise\
This method deletes a split order payment by its ID.
### Example
```ts theme={null}
await splitOrderPaymentModuleService.deleteSplitOrderPayments("sp_ord_pay_123")
```
### Parameters
The ID of the split order payment.
A context used to share resources, such as transaction manager, between the application and the module.
### Returns
Resolves when the split order payment is deleted successfully.
***
# retrieveSplitOrderPayment
This section provides a reference to the `retrieveSplitOrderPayment` method. This belongs to the Split Order Payment Module.
This method retrieves a split order payment by its ID.
## Example
```ts theme={null}
const splitPayment = await splitOrderPaymentModuleService.retrieveSplitOrderPayment("sp_ord_pay_123")
```
## Parameters
The ID of the split order payment.
The configurations determining how the split order payment is retrieved.
An array of strings, each being attribute names of the entity to retrieve in the result.
A number indicating the number of records to skip before retrieving the results.
A number indicating the number of records to return in the result.
An array of strings, each being relation names of the entity to retrieve in the result.
An object used to specify how to sort the returned records.
A boolean indicating whether deleted records should also be retrieved as part of the result.
A context used to share resources, such as transaction manager, between the application and the module.
## Returns
The retrieved split order payment.
The ID of the split order payment.
The status of the split order payment.
The ISO 3 currency code of the split order payment.
The authorized amount for this seller's portion of the order.
The captured amount for this seller's portion of the order.
The refunded amount for this seller's portion of the order.
The ID of the payment collection that this split payment is part of.
***
# listSplitOrderPayments
This section provides a reference to the `listSplitOrderPayments` method. This belongs to the Split Order Payment Module.
This method retrieves a paginated list of split order payments based on optional filters and configuration.
## Example
To retrieve split order payments for a specific payment collection:
```ts theme={null}
const splitPayments = await splitOrderPaymentModuleService.listSplitOrderPayments({
payment_collection_id: "paycol_123",
})
```
To filter by status:
```ts theme={null}
const splitPayments = await splitOrderPaymentModuleService.listSplitOrderPayments({
status: "captured",
})
```
By default, only the first `15` records are retrieved. You can control pagination:
```ts theme={null}
const splitPayments = await splitOrderPaymentModuleService.listSplitOrderPayments(
{
payment_collection_id: "paycol_123",
},
{
take: 20,
skip: 2,
}
)
```
## Parameters
The filters to apply on the retrieved split order payments.
The IDs to filter the split order payments by.
Filter split order payments by their payment collection IDs.
Filter split order payments by their status.
Filter split order payments by their currency codes.
The configurations determining how the split order payment is retrieved.
An array of strings, each being attribute names of the entity to retrieve in the result.
A number indicating the number of records to skip before retrieving the results.
A number indicating the number of records to return in the result.
An array of strings, each being relation names of the entity to retrieve in the result.
An object used to specify how to sort the returned records.
A boolean indicating whether deleted records should also be retrieved as part of the result.
A context used to share resources, such as transaction manager, between the application and the module.
## Returns
The list of split order payments.
***
# listAndCountSplitOrderPayments
This section provides a reference to the `listAndCountSplitOrderPayments` method. This belongs to the Split Order Payment Module.
This method retrieves a paginated list of split order payments along with the total count of available split order payments satisfying the provided filters.
## Example
To retrieve a list of split order payments with count:
```ts theme={null}
const [splitPayments, count] = await splitOrderPaymentModuleService.listAndCountSplitOrderPayments({
payment_collection_id: "paycol_123",
})
```
By default, only the first `15` records are retrieved. You can control pagination:
```ts theme={null}
const [splitPayments, count] = await splitOrderPaymentModuleService.listAndCountSplitOrderPayments(
{
status: "captured",
},
{
take: 20,
skip: 2,
}
)
```
## Parameters
The filters to apply on the retrieved split order payments.
The IDs to filter the split order payments by.
Filter split order payments by their payment collection IDs.
Filter split order payments by their status.
Filter split order payments by their currency codes.
The configurations determining how the split order payment is retrieved.
An array of strings, each being attribute names of the entity to retrieve in the result.
A number indicating the number of records to skip before retrieving the results.
A number indicating the number of records to return in the result.
An array of strings, each being relation names of the entity to retrieve in the result.
An object used to specify how to sort the returned records.
A boolean indicating whether deleted records should also be retrieved as part of the result.
A context used to share resources, such as transaction manager, between the application and the module.
## Returns
The list of split order payments along with their total count.
***
# softDeleteSplitOrderPayments
This section provides a reference to the `softDeleteSplitOrderPayments` method. This belongs to the Split Order Payment Module.
This method soft deletes split order payments by their IDs.
## Example
```ts theme={null}
await splitOrderPaymentModuleService.softDeleteSplitOrderPayments([
"sp_ord_pay_123",
"sp_ord_pay_321",
])
```
## Parameters
The IDs of the split order payments.
An object that is used to specify an entity's related entities that should be soft-deleted when the main entity is soft-deleted.
A context used to share resources, such as transaction manager, between the application and the module.
## Returns
An object that includes the IDs of related records that were also soft deleted. If there are no related records, the promise resolves to `void`.
***
# restoreSplitOrderPayments
This section provides a reference to the `restoreSplitOrderPayments` method. This belongs to the Split Order Payment Module.
This method restores soft deleted split order payments by their IDs.
## Example
```ts theme={null}
await splitOrderPaymentModuleService.restoreSplitOrderPayments(["sp_ord_pay_123", "sp_ord_pay_321"])
```
## Parameters
The IDs of the split order payments.
Configurations determining which relations to restore along with each of the split order payment.
A context used to share resources, such as transaction manager, between the application and the module.
## Returns
An object that includes the IDs of related records that were restored. If there are no related records restored, the promise resolves to `void`.
# Tax Code Module
Source: https://docs.mercurjs.com/product/modules/b2c-core/taxcode/taxcode-concept
Learn about the Tax Code Module and how to use it in your application
# Tax Code Module
In this section of the documentation, you will find resources to learn more about the Tax Code Module and how to use it in your application.
Mercur has tax code management features available out-of-the-box through the Tax Code Module. A [module](https://docs.medusajs.com/learn/fundamentals/modules) is a standalone package that provides features for a single domain. Each of Mercur's marketplace features are placed in custom modules, such as this Tax Code Module.
Learn more about why modules are isolated in [this documentation](https://docs.medusajs.com/learn/fundamentals/modules/isolation).
## Tax Code Features
* **Tax Code Storage**: Store standardized tax classification codes for products and categories.
* **Stripe Integration**: Fetch and sync tax codes from Stripe's Tax Code API.
* **Category Association**: Link tax codes to product categories for automatic tax classification.
* **Tax Compliance**: Enable proper tax calculation based on product type and jurisdiction.
***
## How to Use the Tax Code Module
The Tax Code Module provides a service method to sync tax codes from Stripe:
```ts theme={null}
import { TAXCODE_MODULE } from "./modules/taxcode"
// In a workflow or API route
const taxCodeService = container.resolve(TAXCODE_MODULE)
// Fetch all available tax codes from Stripe
const stripeTaxCodes = await taxCodeService.getTaxCodes()
// Create tax code records in the database
const taxCodes = await taxCodeService.createTaxCodes(
stripeTaxCodes.map(code => ({
code: code.id,
name: code.name,
description: code.description,
}))
)
```
Learn more about workflows in [this documentation](https://docs.medusajs.com/learn/fundamentals/workflows).
***
# Concepts
In this document, you'll learn about the main concepts related to tax codes in Mercur.
## Tax Code
A tax code is a standardized classification code used for tax calculation and compliance. It is represented by the [TaxCode data model](../data-model/taxcode-module-data-reference#taxcode).
A tax code holds information about:
* A unique code identifier (e.g., `txcd_00000000` for general goods)
* A human-readable name
* A description explaining what products fall under this code
* Created and updated timestamps
Tax codes follow standardized formats like:
* Stripe tax codes
* HS (Harmonized System) codes for customs
* Product tax categories for sales tax
***
## Stripe Tax Code Integration
The Tax Code Module includes integration with Stripe's tax code system through the `getTaxCodes()` method.
### How It Works
1. Module connects to Stripe API using configured API key
2. Fetches tax codes in batches of 100 (Stripe's limit)
3. Automatically paginates through all available tax codes
4. Returns complete array of Stripe tax code objects
```ts theme={null}
// Example Stripe tax codes:
// txcd_00000000 - General - Tangible Goods
// txcd_20010000 - Clothing
// txcd_10000000 - Books
// txcd_99999999 - Electronically supplied services
```
This allows marketplaces to maintain a synchronized catalog of valid tax codes without manual entry.
***
## Category-Level Tax Classification
Tax codes can be associated with product categories through module links:
**ProductCategory → TaxCode** (many-to-one)
This enables:
* Automatic tax classification for products in a category
* Consistent tax handling across similar products
* Simplified tax configuration (set once per category vs per product)
For example:
* "Electronics" category → `txcd_10200000` (Electronic equipment)
* "Clothing" category → `txcd_20010000` (Clothing)
* "Books" category → `txcd_10000000` (Books)
***
## Tax Code vs Tax Rate
It's important to distinguish between tax codes and tax rates:
**Tax Code** (This module):
* Classification code for product type
* Determines which tax rules apply
* Managed in Tax Code Module
* Example: "txcd\_20010000" (Clothing)
**Tax Rate** (Medusa Tax Module):
* Percentage amount to charge
* Varies by jurisdiction
* Managed in Tax Module
* Example: 8.5% sales tax for California
Tax codes help tax systems determine **which** rate to apply, while tax rates determine **how much** tax to charge.
***
## Use Cases
**1. Stripe Tax Integration**
Sync marketplace with Stripe's complete tax code catalog for accurate tax calculation with Stripe Tax.
**2. Product Tax Classification**
Assign appropriate tax codes to product categories, ensuring all products are classified correctly for tax purposes.
**3. International Commerce**
Use HS codes for customs declarations and international shipping requirements.
**4. Tax Compliance**
Maintain proper tax records for audit purposes by classifying all products with standardized codes.
**5. Multi-Jurisdiction Support**
Different jurisdictions may tax product categories differently (e.g., clothing is tax-exempt in some states); tax codes help systems apply the right rules.
# Tax Code Module Data Models
Source: https://docs.mercurjs.com/product/modules/b2c-core/taxcode/taxcode-data-model-reference
Reference documentation for the Tax Code Module data models
## Relations Overview
This module has no relations to other data models.
## Data Models
* [TaxCode](#taxcode)
## TaxCode
This documentation provides a reference to the TaxCode data model. It belongs to the Tax Code Module.
[View source code](https://github.com/mercurjs/mercur/blob/main/packages/modules/b2c-core/src/modules/taxcode/models/taxcode.ts)
| Field | Type | Description |
| ------------- | -------------------------------- | ---------------------------------------------------------- |
| `id` | `PrimaryKeyModifier` | The ID of the tax code. |
| `name` | `TextProperty` | The name of the tax code. Defaults to empty string. |
| `description` | `TextProperty` | The description of the tax code. Defaults to empty string. |
| `code` | `TextProperty` | The unique code of the tax code. |
# Tax Code Module Links
Source: https://docs.mercurjs.com/product/modules/b2c-core/taxcode/taxcode-links
Module links for the Tax Code Module
# Links between Tax Code Module and Other Modules
This document showcases the module links defined between the Tax Code Module and other Commerce Modules.
## Summary
The Tax Code Module has the following links to other modules:
| First Data Model | Second Data Model | Type | Description |
| ---------------- | ----------------- | -------------------- | ------------------------------------------------------------------- |
| ProductCategory | TaxCode | Stored - many-to-one | Associates product categories with tax codes for tax classification |
***
## Product Module
Mercur defines a link between the Product Module's `ProductCategory` data model and the Tax Code Module's `TaxCode` data model. This allows product categories to be associated with specific tax codes for proper tax calculation and compliance.
### Retrieve with Query
To retrieve the tax code of a product category with Query, pass `tax_code.*` in `fields`:
```ts theme={null}
const { data: categories } = await query.graph({
entity: "product_category",
fields: [
"*",
"tax_code.*",
],
})
// categories[0].tax_code
```
```ts theme={null}
import { useQueryGraphStep } from "@medusajs/medusa/core-flows"
// ...
const { data: categories } = useQueryGraphStep({
entity: "product_category",
fields: [
"*",
"tax_code.*",
],
})
// categories[0].tax_code
```
### Manage with Link
To manage the tax code of a product category, use Link:
```ts theme={null}
import { Modules } from "@medusajs/framework/utils"
// ...
await link.create({
[Modules.PRODUCT]: {
product_category_id: "pcat_123",
},
taxcode: {
tax_code_id: "taxc_123",
},
})
```
```ts theme={null}
import { createRemoteLinkStep } from "@medusajs/medusa/core-flows"
// ...
createRemoteLinkStep({
[Modules.PRODUCT]: {
product_category_id: "pcat_123",
},
taxcode: {
tax_code_id: "taxc_123",
},
})
```
# Tax Code Module Service Reference
Source: https://docs.mercurjs.com/product/modules/b2c-core/taxcode/taxcode-services
Reference documentation for the Tax Code Module service methods
# ITaxCodeModuleService Reference
This section of the documentation provides a reference to the `ITaxCodeModuleService` interface's methods. This is the interface developers use to use the functionalities provided by the Tax Code Module.
You should only use the methods in this reference when implementing complex customizations. For common cases, check out available workflows instead.
The main service interface for the Tax Code Module.
## Methods
* [createTaxCodes](#createtaxcodes)
* [updateTaxCodes](#updatetaxcodes)
* [deleteTaxCodes](#deletetaxcodes)
* [retrieveTaxCode](#retrievetaxcode)
* [listTaxCodes](#listtaxcodes)
* [listAndCountTaxCodes](#listandcounttaxcodes)
* [softDeleteTaxCodes](#softdeletetaxcodes)
* [restoreTaxCodes](#restoretaxcodes)
* [getTaxCodes](#gettaxcodes)
***
# createTaxCodes
This section provides a reference to the `createTaxCodes` method. This belongs to the Tax Code Module.
## createTaxCodes(data, sharedContext?): Promise\
This method creates tax codes.
### Example
```ts theme={null}
const taxCodes = await taxCodeModuleService.createTaxCodes([
{
name: "General",
code: "txcd_00000000",
description: "General - Tangible Goods",
},
{
name: "Clothing",
code: "txcd_20010000",
description: "Clothing",
},
])
```
### Parameters
The tax codes to be created.
The name of the tax code.
The unique code of the tax code.
The description of the tax code.
A context used to share resources, such as transaction manager, between the application and the module.
### Returns
The created tax codes.
## createTaxCodes(data, sharedContext?): Promise\
This method creates a tax code.
### Example
```ts theme={null}
const taxCode = await taxCodeModuleService.createTaxCodes({
name: "General",
code: "txcd_00000000",
description: "General - Tangible Goods",
})
```
### Parameters
The tax code to be created.
The name of the tax code.
The unique code of the tax code.
The description of the tax code.
A context used to share resources, such as transaction manager, between the application and the module.
### Returns
The created tax code.
***
# updateTaxCodes
This section provides a reference to the `updateTaxCodes` method. This belongs to the Tax Code Module.
## updateTaxCodes(id, data, sharedContext?): Promise\
This method updates an existing tax code.
### Example
```ts theme={null}
const taxCode = await taxCodeModuleService.updateTaxCodes("taxc_123", {
name: "Updated General",
description: "Updated description",
})
```
### Parameters
The ID of the tax code.
The attributes to update in the tax code.
The name of the tax code.
The unique code of the tax code.
The description of the tax code.
A context used to share resources, such as transaction manager, between the application and the module.
### Returns
The updated tax code.
The ID of the tax code.
The name of the tax code.
The unique code of the tax code.
The description of the tax code.
The created date of the tax code.
The updated date of the tax code.
***
# deleteTaxCodes
This section provides a reference to the `deleteTaxCodes` method. This belongs to the Tax Code Module.
## deleteTaxCodes(ids, sharedContext?): Promise\
This method deletes tax codes by their IDs.
### Example
```ts theme={null}
await taxCodeModuleService.deleteTaxCodes(["taxc_123", "taxc_321"])
```
### Parameters
The IDs of the tax codes.
A context used to share resources, such as transaction manager, between the application and the module.
### Returns
Resolves when the tax codes are deleted successfully.
## deleteTaxCodes(id, sharedContext?): Promise\
This method deletes a tax code by its ID.
### Example
```ts theme={null}
await taxCodeModuleService.deleteTaxCodes("taxc_123")
```
### Parameters
The ID of the tax code.
A context used to share resources, such as transaction manager, between the application and the module.
### Returns
Resolves when the tax code is deleted successfully.
***
# retrieveTaxCode
This section provides a reference to the `retrieveTaxCode` method. This belongs to the Tax Code Module.
This method retrieves a tax code by its ID.
## Example
```ts theme={null}
const taxCode = await taxCodeModuleService.retrieveTaxCode("taxc_123")
```
## Parameters
The ID of the tax code.
The configurations determining how the tax code is retrieved.
An array of strings, each being attribute names of the entity to retrieve in the result.
A number indicating the number of records to skip before retrieving the results.
A number indicating the number of records to return in the result.
An array of strings, each being relation names of the entity to retrieve in the result.
An object used to specify how to sort the returned records.
A boolean indicating whether deleted records should also be retrieved as part of the result.
A context used to share resources, such as transaction manager, between the application and the module.
## Returns
The retrieved tax code.
The ID of the tax code.
The name of the tax code.
The unique code of the tax code.
The description of the tax code.
The created date of the tax code.
The updated date of the tax code.
***
# listTaxCodes
This section provides a reference to the `listTaxCodes` method. This belongs to the Tax Code Module.
This method retrieves a paginated list of tax codes based on optional filters and configuration.
## Example
To retrieve a list of tax codes using their IDs:
```ts theme={null}
const taxCodes = await taxCodeModuleService.listTaxCodes({
id: ["taxc_123", "taxc_321"],
})
```
To retrieve tax codes by code:
```ts theme={null}
const taxCodes = await taxCodeModuleService.listTaxCodes({
code: "txcd_00000000",
})
```
By default, only the first `15` records are retrieved. You can control pagination by specifying the `skip` and `take` properties of the `config` parameter:
```ts theme={null}
const taxCodes = await taxCodeModuleService.listTaxCodes(
{},
{
take: 20,
skip: 2,
}
)
```
## Parameters
The filters to apply on the retrieved tax codes.
The IDs to filter the tax codes by.
Filter tax codes by their names.
Filter tax codes by their codes.
The configurations determining how the tax code is retrieved.
An array of strings, each being attribute names of the entity to retrieve in the result.
A number indicating the number of records to skip before retrieving the results.
A number indicating the number of records to return in the result.
An array of strings, each being relation names of the entity to retrieve in the result.
An object used to specify how to sort the returned records.
A boolean indicating whether deleted records should also be retrieved as part of the result.
A context used to share resources, such as transaction manager, between the application and the module.
## Returns
The list of tax codes.
***
# listAndCountTaxCodes
This section provides a reference to the `listAndCountTaxCodes` method. This belongs to the Tax Code Module.
This method retrieves a paginated list of tax codes along with the total count of available tax codes satisfying the provided filters.
## Example
To retrieve a list of tax codes with count:
```ts theme={null}
const [taxCodes, count] = await taxCodeModuleService.listAndCountTaxCodes({
id: ["taxc_123", "taxc_321"],
})
```
By default, only the first `15` records are retrieved. You can control pagination by specifying the `skip` and `take` properties of the `config` parameter:
```ts theme={null}
const [taxCodes, count] = await taxCodeModuleService.listAndCountTaxCodes(
{},
{
take: 20,
skip: 2,
}
)
```
## Parameters
The filters to apply on the retrieved tax codes.
The IDs to filter the tax codes by.
Filter tax codes by their names.
Filter tax codes by their codes.
The configurations determining how the tax code is retrieved.
An array of strings, each being attribute names of the entity to retrieve in the result.
A number indicating the number of records to skip before retrieving the results.
A number indicating the number of records to return in the result.
An array of strings, each being relation names of the entity to retrieve in the result.
An object used to specify how to sort the returned records.
A boolean indicating whether deleted records should also be retrieved as part of the result.
A context used to share resources, such as transaction manager, between the application and the module.
## Returns
The list of tax codes along with their total count.
***
# softDeleteTaxCodes
This section provides a reference to the `softDeleteTaxCodes` method. This belongs to the Tax Code Module.
This method soft deletes tax codes by their IDs.
## Example
```ts theme={null}
await taxCodeModuleService.softDeleteTaxCodes([
"taxc_123",
"taxc_321",
])
```
## Parameters
The IDs of the tax codes.
An object that is used to specify an entity's related entities that should be soft-deleted when the main entity is soft-deleted.
A context used to share resources, such as transaction manager, between the application and the module.
## Returns
An object that includes the IDs of related records that were also soft deleted. If there are no related records, the promise resolves to `void`.
***
# restoreTaxCodes
This section provides a reference to the `restoreTaxCodes` method. This belongs to the Tax Code Module.
This method restores soft deleted tax codes by their IDs.
## Example
```ts theme={null}
await taxCodeModuleService.restoreTaxCodes(["taxc_123", "taxc_321"])
```
## Parameters
The IDs of the tax codes.
Configurations determining which relations to restore along with each of the tax code.
A context used to share resources, such as transaction manager, between the application and the module.
## Returns
An object that includes the IDs of related records that were restored. If there are no related records restored, the promise resolves to `void`.
***
# getTaxCodes
This section provides a reference to the `getTaxCodes` method. This belongs to the Tax Code Module.
This method fetches all available tax codes from Stripe's Tax Code API. It automatically handles pagination to retrieve all tax codes across multiple API calls.
## Example
```ts theme={null}
const stripeTaxCodes = await taxCodeModuleService.getTaxCodes()
// Example response structure:
// [
// { id: "txcd_00000000", name: "General - Tangible Goods", description: "..." },
// { id: "txcd_20010000", name: "Clothing", description: "..." },
// ...
// ]
```
## Parameters
This method takes no parameters.
## Returns
An array of all available Stripe tax codes.
The Stripe tax code ID.
The name of the tax code.
The description of the tax code.
This method automatically handles Stripe API pagination, fetching up to 100 records per request and continuing until all tax codes are retrieved.
# Wishlist Module
Source: https://docs.mercurjs.com/product/modules/b2c-core/wishlist/wishlist-concept
Learn about the Wishlist Module and how to use it in your application
# Wishlist Module
In this section of the documentation, you will find resources to learn more about the Wishlist Module and how to use it in your application.
Mercur has wishlist features available out-of-the-box through the Wishlist Module. A [module](https://docs.medusajs.com/learn/fundamentals/modules) is a standalone package that provides features for a single domain. Each of Mercur's marketplace features are placed in custom modules, such as this Wishlist Module.
Learn more about why modules are isolated in [this documentation](https://docs.medusajs.com/learn/fundamentals/modules/isolation).
## Wishlist Features
* **Product Wishlists**: Allow customers to save products they're interested in for future purchase consideration.
* **Customer-Specific Wishlists**: Each customer has their own isolated wishlist with saved items.
* **Price Calculation**: Automatically calculate current prices for wishlist products including promotional pricing.
* **Product Availability**: Track product availability and variant information for wishlisted items.
* **Easy Management**: Add and remove products from wishlist with simple workflows.
***
## How to Use the Wishlist Module
In your Medusa application, you build flows around Commerce Modules. A flow is built as a [Workflow](https://docs.medusajs.com/learn/fundamentals/workflows), which is a special function composed of a series of steps that guarantees data consistency and reliable roll-back mechanism.
You can build custom workflows and steps. Mercur provides pre-built workflows for wishlist operations in the `@mercurjs/b2c-core` package.
For example, the `createWishlistEntryWorkflow`:
```ts title="src/workflows/wishlist/create-wishlist.ts" theme={null}
import {
WorkflowResponse,
createWorkflow
} from '@medusajs/framework/workflows-sdk'
import { CreateWishlistDTO } from '@mercurjs/framework'
import { createWishlistEntryStep } from '../steps'
export const createWishlistEntryWorkflow = createWorkflow(
{
name: 'create-wishlist'
},
function (input: CreateWishlistDTO) {
return new WorkflowResponse(createWishlistEntryStep(input))
}
)
```
You can then execute the workflow in your custom API routes:
### API Route
```ts title="src/api/store/wishlist/route.ts" theme={null}
import {
AuthenticatedMedusaRequest,
MedusaResponse,
} from "@medusajs/framework"
import { ContainerRegistrationKeys } from "@medusajs/framework/utils"
import customerWishlist from "../../../links/customer-wishlist"
import { createWishlistEntryWorkflow } from "../../../workflows/wishlist/workflows"
import { calculateWishlistProductsPrice } from "../../../modules/wishlist/utils"
// Create wishlist entry
export const POST = async (
req: AuthenticatedMedusaRequest,
res: MedusaResponse
) => {
const { result } = await createWishlistEntryWorkflow.run({
container: req.scope,
input: {
...req.validatedBody,
customer_id: req.auth_context.actor_id,
},
})
const query = req.scope.resolve(ContainerRegistrationKeys.QUERY)
const {
data: [wishlist],
} = await query.graph({
entity: "wishlist",
fields: req.queryConfig.fields,
filters: {
id: result.id,
},
})
res.status(201).json({ wishlist })
}
// Get customer's wishlist
export const GET = async (
req: AuthenticatedMedusaRequest,
res: MedusaResponse
) => {
const query = req.scope.resolve(ContainerRegistrationKeys.QUERY)
const { data: wishlists, metadata } = await query.graph({
entity: customerWishlist.entryPoint,
fields: [
...req.queryConfig.fields.map((field) => `wishlist.products.${field}`),
"wishlist.products.variants.prices.*",
],
filters: {
customer_id: req.auth_context.actor_id,
},
pagination: req.queryConfig.pagination,
})
// Calculate current prices for wishlist products
const formattedWithPrices = await calculateWishlistProductsPrice(
req.scope,
wishlists
)
res.json({
wishlists: formattedWithPrices,
count: metadata?.count,
offset: metadata?.skip,
limit: metadata?.take,
})
}
```
Learn more about workflows in [this documentation](https://docs.medusajs.com/learn/fundamentals/workflows).
***
# Concepts
In this document, you'll learn about the main concepts related to wishlists in Mercur.
## Wishlist
A wishlist is a collection of products that a customer has saved for future consideration. It is represented by the [Wishlist data model](../data-model/wishlist-module-data-reference#wishlist).
A wishlist entry holds information about:
* A unique ID
* The type of reference (currently only `product`)
* Created and updated timestamps
Each wishlist entry represents a single saved product for a customer.
***
## Customer-Product Relationship
Wishlists create a many-to-many relationship between customers and products:
* **Customer → Wishlist** (one-to-one): Each customer has one wishlist container
* **Wishlist → Product** (one-to-many): The wishlist can contain many saved products
This is implemented through module links that connect:
1. Customer to their Wishlist
2. Wishlist to multiple Products
The system automatically handles the relationship management when customers add or remove products.
***
## Reference Types
The `reference` field indicates what type of entity is being saved to the wishlist:
### product (Currently Supported)
Saves a product reference to the wishlist. This is the standard wishlist functionality for e-commerce.
### Future Extensibility
The reference system is designed to be extensible. Future implementations could add:
* `seller`: Save favorite sellers
* `collection`: Save favorite collections
* `search`: Save search queries
Currently, only `product` references are implemented.
***
## Price Calculation
When retrieving wishlist items, Mercur automatically calculates current prices through the `calculateWishlistProductsPrice` utility:
**What it does:**
* Fetches current prices for wishlist products
* Applies any active promotions or price lists
* Includes variant pricing information
* Respects customer group pricing if applicable
* Returns formatted product objects with calculated prices
This ensures customers always see up-to-date pricing when viewing their wishlist, even if prices have changed since they saved the products.
***
## Delete Cascade
Both wishlist module links have `deleteCascade` enabled:
* When a **customer is deleted**, their wishlist is automatically deleted
* When a **wishlist is deleted**, all wishlist entries are automatically removed
This ensures data consistency and prevents orphaned records when cleaning up customer data.
***
## Authentication Integration
Wishlists are customer-specific and require authentication:
* Routes use `authenticate("customer")` middleware
* Wishlist entries are filtered by `customer_id` from `req.auth_context.actor_id`
* Customers can only see and manage their own wishlist items
This security model ensures wishlist privacy and data isolation between customers.
***
## Use Cases
**1. Save for Later**
Customers browse the marketplace and save interesting products to revisit later without adding them to cart.
**2. Gift Lists**
Customers create wishlists of desired products that they can share for birthdays, holidays, or registries.
**3. Price Tracking**
Customers save expensive items and check back periodically to see if prices have dropped or promotions applied.
**4. Comparison Shopping**
Customers save multiple similar products to compare features, prices, and reviews before making a purchase decision.
**5. Stock Notifications**
(Future enhancement) Notify customers when wishlist items come back in stock or go on sale.
**6. Personalization**
Use wishlist data to personalize product recommendations and marketing communications.
# Wishlist Module Data Models
Source: https://docs.mercurjs.com/product/modules/b2c-core/wishlist/wishlist-data-model-reference
Reference documentation for the Wishlist Module data models
## Relations Overview
| Relationship | Type | Description |
| ----------------------------------- | ------------------- | ------------------------------------ |
| Wishlist → Product (Product Module) | Read-only - has one | A wishlist item references a product |
## Data Models
* [Wishlist](#wishlist)
## Wishlist
This documentation provides a reference to the Wishlist data model. It belongs to the Wishlist Module.
[View source code](https://github.com/mercurjs/mercur/blob/main/packages/modules/b2c-core/src/modules/wishlist/models/wishlist.ts)
| Field | Type | Description |
| ----------- | -------------------------------- | ---------------------------------------------------------------------- |
| `id` | `PrimaryKeyModifier` | The ID of the wishlist. |
| `reference` | `EnumProperty<["product"]>` | The type of the wishlist reference. Currently only supports `product`. |
# Wishlist Module Links
Source: https://docs.mercurjs.com/product/modules/b2c-core/wishlist/wishlist-links
Module links for the Wishlist Module
# Links between Wishlist Module and Other Modules
This document showcases the module links defined between the Wishlist Module and other Commerce Modules.
## Summary
The Wishlist Module has the following links to other modules:
| First Data Model | Second Data Model | Type | Description |
| ---------------- | ----------------- | -------------------- | ----------------------------------------- |
| Customer | Wishlist | Stored - one-to-one | Associates a customer with their wishlist |
| Wishlist | Product | Stored - one-to-many | Associates wishlist items with products |
***
## Customer Module
Mercur defines a link between the Customer Module's `Customer` data model and the Wishlist Module's `Wishlist` data model. This allows each customer to have a wishlist for saving products they're interested in.
### Retrieve with Query
To retrieve the wishlist of a customer with Query, pass `wishlist.*` in `fields`:
```ts theme={null}
const { data: customers } = await query.graph({
entity: "customer",
fields: [
"*",
"wishlist.*",
],
})
// customers[0].wishlist
```
```ts theme={null}
import { useQueryGraphStep } from "@medusajs/medusa/core-flows"
// ...
const { data: customers } = useQueryGraphStep({
entity: "customer",
fields: [
"*",
"wishlist.*",
],
})
// customers[0].wishlist
```
### Manage with Link
To manage the wishlist of a customer, use Link:
```ts theme={null}
import { Modules } from "@medusajs/framework/utils"
// ...
await link.create({
[Modules.CUSTOMER]: {
customer_id: "cus_123",
},
wishlist: {
wishlist_id: "wish_123",
},
})
```
```ts theme={null}
import { createRemoteLinkStep } from "@medusajs/medusa/core-flows"
// ...
createRemoteLinkStep({
[Modules.CUSTOMER]: {
customer_id: "cus_123",
},
wishlist: {
wishlist_id: "wish_123",
},
})
```
***
## Product Module
Mercur defines a link between the Wishlist Module's `Wishlist` data model and the Product Module's `Product` data model. This allows wishlist items to reference specific products that customers want to save for later.
### Retrieve with Query
To retrieve the products in a wishlist with Query, pass `product.*` in `fields`:
```ts theme={null}
const { data: wishlists } = await query.graph({
entity: "wishlist",
fields: [
"*",
"product.*",
],
})
// wishlists[0].product
```
```ts theme={null}
import { useQueryGraphStep } from "@medusajs/medusa/core-flows"
// ...
const { data: wishlists } = useQueryGraphStep({
entity: "wishlist",
fields: [
"*",
"product.*",
],
})
// wishlists[0].product
```
### Manage with Link
To manage the products in a wishlist, use Link:
```ts theme={null}
import { Modules } from "@medusajs/framework/utils"
// ...
await link.create({
wishlist: {
wishlist_id: "wish_123",
},
[Modules.PRODUCT]: {
product_id: "prod_123",
},
})
```
```ts theme={null}
import { createRemoteLinkStep } from "@medusajs/medusa/core-flows"
// ...
createRemoteLinkStep({
wishlist: {
wishlist_id: "wish_123",
},
[Modules.PRODUCT]: {
product_id: "prod_123",
},
})
```
Both links have `deleteCascade` enabled, meaning when a customer is deleted, their wishlist and all wishlist items are automatically deleted.
# Wishlist Module Service Reference
Source: https://docs.mercurjs.com/product/modules/b2c-core/wishlist/wishlist-services
Reference documentation for the Wishlist Module service methods
# IWishlistModuleService Reference
This section of the documentation provides a reference to the `IWishlistModuleService` interface's methods. This is the interface developers use to use the functionalities provided by the Wishlist Module.
You should only use the methods in this reference when implementing complex customizations. For common cases, check out available workflows instead.
The main service interface for the Wishlist Module.
## Methods
* [createWishlists](#createwishlists)
* [updateWishlists](#updatewishlists)
* [deleteWishlists](#deletewishlists)
* [retrieveWishlist](#retrievewishlist)
* [listWishlists](#listwishlists)
* [listAndCountWishlists](#listandcountwishlists)
* [softDeleteWishlists](#softdeletewishlists)
* [restoreWishlists](#restorewishlists)
***
# createWishlists
This section provides a reference to the `createWishlists` method. This belongs to the Wishlist Module.
## createWishlists(data, sharedContext?): Promise\
This method creates wishlist items.
### Example
```ts theme={null}
const wishlists = await wishlistModuleService.createWishlists([
{
reference: "product",
reference_id: "prod_123",
customer_id: "cus_123",
},
])
```
### Parameters
The wishlist items to be created.
The type of the wishlist reference. Currently only supports `product`.
The ID of the referenced entity (e.g., product ID).
The ID of the customer who owns this wishlist item.
A context used to share resources, such as transaction manager, between the application and the module.
### Returns
The created wishlist items.
## createWishlists(data, sharedContext?): Promise\
This method creates a wishlist item.
### Example
```ts theme={null}
const wishlist = await wishlistModuleService.createWishlists({
reference: "product",
reference_id: "prod_123",
customer_id: "cus_123",
})
```
### Parameters
The wishlist item to be created.
The type of the wishlist reference. Currently only supports `product`.
The ID of the referenced entity (e.g., product ID).
The ID of the customer who owns this wishlist item.
A context used to share resources, such as transaction manager, between the application and the module.
### Returns
The created wishlist item.
***
# updateWishlists
This section provides a reference to the `updateWishlists` method. This belongs to the Wishlist Module.
## updateWishlists(id, data, sharedContext?): Promise\
This method updates an existing wishlist item.
### Example
```ts theme={null}
const wishlist = await wishlistModuleService.updateWishlists("wish_123", {
reference_id: "prod_456",
})
```
### Parameters
The ID of the wishlist item.
The attributes to update in the wishlist item.
The type of the wishlist reference.
The ID of the referenced entity.
A context used to share resources, such as transaction manager, between the application and the module.
### Returns
The updated wishlist item.
The ID of the wishlist item.
The type of the wishlist reference.
The created date of the wishlist item.
The updated date of the wishlist item.
***
# deleteWishlists
This section provides a reference to the `deleteWishlists` method. This belongs to the Wishlist Module.
## deleteWishlists(ids, sharedContext?): Promise\
This method deletes wishlist items by their IDs.
### Example
```ts theme={null}
await wishlistModuleService.deleteWishlists(["wish_123", "wish_321"])
```
### Parameters
The IDs of the wishlist items.
A context used to share resources, such as transaction manager, between the application and the module.
### Returns
Resolves when the wishlist items are deleted successfully.
## deleteWishlists(id, sharedContext?): Promise\
This method deletes a wishlist item by its ID.
### Example
```ts theme={null}
await wishlistModuleService.deleteWishlists("wish_123")
```
### Parameters
The ID of the wishlist item.
A context used to share resources, such as transaction manager, between the application and the module.
### Returns
Resolves when the wishlist item is deleted successfully.
***
# retrieveWishlist
This section provides a reference to the `retrieveWishlist` method. This belongs to the Wishlist Module.
This method retrieves a wishlist item by its ID.
## Example
```ts theme={null}
const wishlist = await wishlistModuleService.retrieveWishlist("wish_123")
```
## Parameters
The ID of the wishlist item.
The configurations determining how the wishlist item is retrieved.
An array of strings, each being attribute names of the entity to retrieve in the result.
A number indicating the number of records to skip before retrieving the results.
A number indicating the number of records to return in the result.
An array of strings, each being relation names of the entity to retrieve in the result. Use Query to retrieve linked product data.
An object used to specify how to sort the returned records.
A boolean indicating whether deleted records should also be retrieved as part of the result.
A context used to share resources, such as transaction manager, between the application and the module.
## Returns
The retrieved wishlist item.
The ID of the wishlist item.
The type of the wishlist reference.
The created date of the wishlist item.
The updated date of the wishlist item.
***
# listWishlists
This section provides a reference to the `listWishlists` method. This belongs to the Wishlist Module.
This method retrieves a paginated list of wishlist items based on optional filters and configuration.
## Example
To retrieve a customer's wishlist:
```ts theme={null}
const wishlists = await wishlistModuleService.listWishlists({
customer_id: "cus_123",
})
```
To retrieve wishlist items for specific products:
```ts theme={null}
const wishlists = await wishlistModuleService.listWishlists({
reference_id: ["prod_123", "prod_456"],
})
```
By default, only the first `15` records are retrieved. You can control pagination by specifying the `skip` and `take` properties of the `config` parameter:
```ts theme={null}
const wishlists = await wishlistModuleService.listWishlists(
{
customer_id: "cus_123",
},
{
take: 20,
skip: 2,
}
)
```
## Parameters
The filters to apply on the retrieved wishlist items.
The IDs to filter the wishlist items by.
Filter wishlist items by their customer IDs.
Filter wishlist items by their reference type.
Filter wishlist items by their reference IDs (e.g., product IDs).
The configurations determining how the wishlist item is retrieved.
An array of strings, each being attribute names of the entity to retrieve in the result.
A number indicating the number of records to skip before retrieving the results.
A number indicating the number of records to return in the result.
An array of strings, each being relation names of the entity to retrieve in the result.
An object used to specify how to sort the returned records.
A boolean indicating whether deleted records should also be retrieved as part of the result.
A context used to share resources, such as transaction manager, between the application and the module.
## Returns
The list of wishlist items.
***
# listAndCountWishlists
This section provides a reference to the `listAndCountWishlists` method. This belongs to the Wishlist Module.
This method retrieves a paginated list of wishlist items along with the total count of available wishlist items satisfying the provided filters.
## Example
To retrieve a customer's wishlist with count:
```ts theme={null}
const [wishlists, count] = await wishlistModuleService.listAndCountWishlists({
customer_id: "cus_123",
})
```
By default, only the first `15` records are retrieved. You can control pagination by specifying the `skip` and `take` properties of the `config` parameter:
```ts theme={null}
const [wishlists, count] = await wishlistModuleService.listAndCountWishlists(
{
customer_id: "cus_123",
},
{
take: 20,
skip: 2,
}
)
```
## Parameters
The filters to apply on the retrieved wishlist items.
The IDs to filter the wishlist items by.
Filter wishlist items by their customer IDs.
Filter wishlist items by their reference type.
Filter wishlist items by their reference IDs (e.g., product IDs).
The configurations determining how the wishlist item is retrieved.
An array of strings, each being attribute names of the entity to retrieve in the result.
A number indicating the number of records to skip before retrieving the results.
A number indicating the number of records to return in the result.
An array of strings, each being relation names of the entity to retrieve in the result.
An object used to specify how to sort the returned records.
A boolean indicating whether deleted records should also be retrieved as part of the result.
A context used to share resources, such as transaction manager, between the application and the module.
## Returns
The list of wishlist items along with their total count.
***
# softDeleteWishlists
This section provides a reference to the `softDeleteWishlists` method. This belongs to the Wishlist Module.
This method soft deletes wishlist items by their IDs.
## Example
```ts theme={null}
await wishlistModuleService.softDeleteWishlists([
"wish_123",
"wish_321",
])
```
## Parameters
The IDs of the wishlist items.
An object that is used to specify an entity's related entities that should be soft-deleted when the main entity is soft-deleted.
A context used to share resources, such as transaction manager, between the application and the module.
## Returns
An object that includes the IDs of related records that were also soft deleted. If there are no related records, the promise resolves to `void`.
***
# restoreWishlists
This section provides a reference to the `restoreWishlists` method. This belongs to the Wishlist Module.
This method restores soft deleted wishlist items by their IDs.
## Example
```ts theme={null}
await wishlistModuleService.restoreWishlists(["wish_123", "wish_321"])
```
## Parameters
The IDs of the wishlist items.
Configurations determining which relations to restore along with each of the wishlist item.
A context used to share resources, such as transaction manager, between the application and the module.
## Returns
An object that includes the IDs of related records that were restored. If there are no related records restored, the promise resolves to `void`.
# Commission Module
Source: https://docs.mercurjs.com/product/modules/commission/commission/commission-concept
Learn about the Commission Module and how to use it in your application
# Commission Module
In this section of the documentation, you will find resources to learn more about the Commission Module and how to use it in your application.
Mercur has marketplace commission features available out-of-the-box through the Commission Module. A [module](https://docs.medusajs.com/learn/fundamentals/modules) is a standalone package that provides features for a single domain. Each of Mercur's marketplace features are placed in custom modules, such as this Commission Module.
Learn more about why modules are isolated in [this documentation](https://docs.medusajs.com/learn/fundamentals/modules/isolation).
## Commission Features
* **Flexible Commission Rules**: Create commission rules based on seller, product type, product category, or combinations thereof.
* **Priority-Based Rule Selection**: Automatically select the most specific applicable commission rule using a priority system.
* **Multiple Commission Types**: Support for both percentage-based and flat-rate commissions with min/max limits.
* **Tax-Inclusive Options**: Calculate commissions with or without tax included.
* **Automatic Calculation**: Calculate commission for all line items when orders are placed.
* **Line-Level Tracking**: Store commission amount for each individual line item in an order.
***
## How to Use the Commission Module
In your Medusa application, you build flows around Commerce Modules. A flow is built as a [Workflow](https://docs.medusajs.com/learn/fundamentals/workflows), which is a special function composed of a series of steps that guarantees data consistency and reliable roll-back mechanism.
You can build custom workflows and steps. Mercur provides pre-built workflows for commission operations in the `@mercurjs/commission` package.
For example, the `calculateCommissionWorkflow`:
```ts src/workflows/commission/calculate-commission.ts theme={null}
import { WorkflowResponse, createWorkflow } from '@medusajs/workflows-sdk'
import { calculateCommissionLinesStep } from '../steps/calculate-commission-lines'
import { createCommissionLinesStep } from '../steps/create-commission-lines'
type WorkflowInput = {
order_id: string
seller_id: string
}
export const calculateCommissionWorkflow = createWorkflow(
'calculate-commission-workflow',
function (input: WorkflowInput) {
// Calculate commission for all line items in the order
const lines = calculateCommissionLinesStep(input)
// Create commission line records
return new WorkflowResponse(createCommissionLinesStep(lines))
}
)
```
You can then execute the workflow e.g. in your custom subscribers:
### Subscriber
```ts src/subscribers/commission-order-set-placed.ts theme={null}
import { SubscriberArgs, SubscriberConfig } from "@medusajs/framework"
import { ContainerRegistrationKeys } from "@medusajs/framework/utils"
import { OrderSetWorkflowEvents, SELLER_ORDER_LINK } from "@mercurjs/framework"
import { calculateCommissionWorkflow } from "../workflows/commission/workflows"
export default async function commissionOrderSetPlacedHandler({
event,
container,
}: SubscriberArgs<{ id: string }>) {
const query = container.resolve(ContainerRegistrationKeys.QUERY)
// Get all orders from the order set
const {
data: [set],
} = await query.graph({
entity: "order_set",
fields: ["orders.id"],
filters: {
id: event.data.id,
},
})
const ordersCreated = set.orders.map((o) => o.id)
// Calculate commission for each order
for (const order_id of ordersCreated) {
const {
data: [seller],
} = await query.graph({
entity: SELLER_ORDER_LINK,
fields: ["seller_id"],
filters: {
order_id: order_id,
},
})
if (!seller) {
return
}
await calculateCommissionWorkflow.run({
input: {
order_id: order_id,
seller_id: seller.seller_id,
},
container,
})
}
}
export const config: SubscriberConfig = {
event: OrderSetWorkflowEvents.PLACED,
context: {
subscriberId: "commission-order-set-placed-handler",
},
}
```
Learn more about workflows in [this documentation](https://docs.medusajs.com/learn/fundamentals/workflows).
***
# Concepts
In this document, you'll learn about the main concepts related to commissions in Mercur.
## Commission Rule
A commission rule defines when and how marketplace commissions should be calculated. It is represented by the [CommissionRule data model](../data-model/commission-module-data-reference#commissionrule).
A commission rule holds information about:
* Rule name (for identification)
* Reference type (what the rule applies to)
* Reference ID (which specific entity)
* Active status (whether the rule is currently applied)
* Associated commission rate
Commission rules determine which fees apply to products based on seller, product type, or category.
***
## Rule Reference Types
Commission rules support six reference types with a priority system for selecting the applicable rule:
### Priority Order (Highest to Lowest)
1. **seller+product\_type**: Most specific - applies to products of a specific type sold by a specific seller
2. **seller+product\_category**: Applies to products in a specific category sold by a specific seller
3. **seller**: Applies to all products sold by a specific seller
4. **product\_type**: Applies to all products of a specific type regardless of seller
5. **product\_category**: Applies to all products in a specific category regardless of seller
6. **site**: Default commission applied to all products (lowest priority)
When calculating commission, the system searches from highest to lowest priority and uses the first matching active rule.
### Reference ID Format
* **site**: Empty string `""`
* **seller**: `"sel_123"`
* **product\_type**: `"ptyp_456"`
* **product\_category**: `"pcat_789"`
* **seller+product\_type**: `"sel_123+ptyp_456"`
* **seller+product\_category**: `"sel_123+pcat_789"`
***
## Commission Rate
A commission rate defines how the commission amount is calculated. It is represented by the [CommissionRate data model](../data-model/commission-module-data-reference#commissionrate).
### Commission Types
**Percentage-Based:**
```ts theme={null}
{
type: "percentage",
percentage_rate: 10, // 10% of item price
include_tax: false,
}
```
**Flat-Rate:**
```ts theme={null}
{
type: "flat",
price_set_id: "ps_123", // Fixed amount from price set
include_tax: false,
}
```
### Min/Max Limits
Commission rates can have minimum and maximum limits:
```ts theme={null}
{
type: "percentage",
percentage_rate: 10,
min_price_set_id: "ps_min", // Minimum $5 commission
max_price_set_id: "ps_max", // Maximum $100 commission
include_tax: false,
}
```
The calculated commission is clamped between these boundaries.
***
## Commission Line
A commission line represents the actual calculated commission for a specific order line item. It is represented by the [CommissionLine data model](../data-model/commission-module-data-reference#commissionline).
A commission line holds information about:
* The order line item ID it applies to
* The commission rule that was used
* Currency code
* Calculated commission value
Commission lines are created automatically when orders are placed and used for:
* Financial reporting
* Payout calculations (subtracting commission from seller payout)
* Analytics and insights
***
## Automatic Commission Calculation
When an order set is placed, commission is calculated automatically:
**Process:**
1. `OrderSetWorkflowEvents.PLACED` event is emitted
2. Subscriber retrieves all orders in the order set
3. For each order:
* Find the seller via `SELLER_ORDER_LINK`
* Execute `calculateCommissionWorkflow`
* Calculate commission for each line item
* Create commission line records
This ensures every order has accurate commission tracking for marketplace revenue.
***
## Commission Calculation Algorithm
For each line item in an order:
1. **Build Context**: Extract `seller_id`, `product_type_id`, `product_category_id`
2. **Select Rule**: Call `selectCommissionForProductLine` with context
3. **Apply Rule**: Use the selected rule's rate to calculate commission
4. **Apply Limits**: Clamp result between min/max if specified
5. **Store Line**: Create commission line record with calculated value
The `selectCommissionForProductLine` method queries rules in priority order and returns the first match.
***
## Tax Inclusivity
The `include_tax` property determines whether commission is calculated on the pre-tax or post-tax amount:
**Tax-Exclusive (include\_tax: false)**
```
Item price: $100
Tax (10%): $10
Total: $110
Commission (10%): $100 × 10% = $10
```
**Tax-Inclusive (include\_tax: true)**
```
Item price: $100
Tax (10%): $10
Total: $110
Commission (10%): $110 × 10% = $11
```
This allows marketplaces to choose whether they earn commission on the tax portion.
***
## Use Cases
**1. Seller-Specific Rates** Charge lower commission for premium sellers or those with high sales volume.
**2. Category-Based Pricing** Charge different commissions for different product categories (e.g., 10% for electronics, 15% for luxury goods).
**3. Seller + Category Combination** Create special commission rates for specific seller-category combinations (e.g., Seller A's electronics get 8% instead of the default 10%).
**4. Minimum Commission** Ensure the marketplace earns at least \$5 per sale using min\_price\_set\_id, even for low-value items.
**5. Maximum Commission** Cap commissions at \$100 for high-value items to remain competitive with other marketplaces.
**6. Default Site Commission** Set a baseline 12% commission for all products, then override with specific rules as needed.
# Commission Module Data Models
Source: https://docs.mercurjs.com/product/modules/commission/commission/commission-data-model-reference
Reference documentation for the Commission Module data models
## Relations Overview
| Relationship | Type | Description |
| ---------------------------------------- | ------------------- | ----------------------------------------------- |
| CommissionRule → CommissionRate | One-to-One | A commission rule has one commission rate |
| CommissionLine → CommissionRule | Read-only - has one | A commission line references a commission rule |
| CommissionLine → LineItem (Order Module) | Read-only - has one | A commission line references an order line item |
## Data Models
* [CommissionRule](#commissionrule)
* [CommissionRate](#commissionrate)
* [CommissionLine](#commissionline)
## CommissionRule
This documentation provides a reference to the CommissionRule data model. It belongs to the Commission Module.
[View source code](https://github.com/mercurjs/mercur/blob/main/packages/modules/commission/src/modules/commission/models/commission_rule.ts)
| Field | Type | Description |
| -------------- | -------------------------------- | -------------------------------------------------------------------------------------------------------------------------------------------------- |
| `id` | `PrimaryKeyModifier` | The ID of the commission rule. |
| `name` | `TextProperty` | The name of the commission rule |
| `reference` | `TextProperty` | The type of the commission rule. Can be `site`, `product_type`, `product_category`, `seller+product_category`, `seller+product_type`, or `seller`. |
| `reference_id` | `TextProperty` | The ID of the referenced entity (e.g., seller ID, product type ID). |
| `is_active` | `BooleanProperty` | Whether the commission rule is active. Defaults to `true`. |
| `rate` | `HasOne` | The associated [CommissionRate](#commissionrate). |
## CommissionRate
This documentation provides a reference to the CommissionRate data model. It belongs to the Commission Module.
[View source code](https://github.com/mercurjs/mercur/blob/main/packages/modules/commission/src/modules/commission/models/commission_rate.ts)
| Field | Type | Description |
| ------------------ | -------------------------------- | --------------------------------------------------------------- |
| `id` | `PrimaryKeyModifier` | The ID of the commission rate. |
| `type` | `TextProperty` | The type of the commission rate. Can be `flat` or `percentage`. |
| `percentage_rate` | `NumberProperty` | The percentage rate for percentage-based commissions. |
| `include_tax` | `BooleanProperty` | Whether the commission calculation includes tax. |
| `price_set_id` | `TextProperty` | The ID of the price set used for flat-rate commissions. |
| `max_price_set_id` | `TextProperty` | The ID of the price set defining the maximum commission amount. |
| `min_price_set_id` | `TextProperty` | The ID of the price set defining the minimum commission amount. |
| `rule` | `BelongsTo` | The associated [CommissionRule](#commissionrule). |
## CommissionLine
This documentation provides a reference to the CommissionLine data model. It belongs to the Commission Module.
[View source code](https://github.com/mercurjs/mercur/blob/main/packages/modules/commission/src/modules/commission/models/commission_line.ts)
| Field | Type | Description |
| --------------- | -------------------------------- | -------------------------------------------------------------- |
| `id` | `PrimaryKeyModifier` | The ID of the commission line. |
| `item_line_id` | `TextProperty` | The ID of the order line item that this commission applies to. |
| `rule_id` | `TextProperty` | The ID of the commission rule that was applied. |
| `currency_code` | `TextProperty` | The ISO 3 currency code of the commission. For example, `usd`. |
| `value` | `BigNumberProperty` | The calculated commission amount. |
# Commission Module Service Reference
Source: https://docs.mercurjs.com/product/modules/commission/commission/commission-services
Reference documentation for the Commission Module service methods
# ICommissionModuleService Reference
This section of the documentation provides a reference to the `ICommissionModuleService` interface's methods. This is the interface developers use to use the functionalities provided by the Commission Module.
You should only use the methods in this reference when implementing complex customizations. For common cases, check out available workflows instead.
The main service interface for the Commission Module.
## Methods
### Commission Rule Methods
* [createCommissionRules](#createcommissionrules)
* [updateCommissionRules](#updatecommissionrules)
* [deleteCommissionRules](#deletecommissionrules)
* [retrieveCommissionRule](#retrievecommissionrule)
* [listCommissionRules](#listcommissionrules)
* [listAndCountCommissionRules](#listandcountcommissionrules)
* [softDeleteCommissionRules](#softdeletecommissionrules)
* [restoreCommissionRules](#restorecommissionrules)
### Commission Rate Methods
* [createCommissionRates](#createcommissionrates)
* [updateCommissionRates](#updatecommissionrates)
* [deleteCommissionRates](#deletecommissionrates)
* [retrieveCommissionRate](#retrievecommissionrate)
* [listCommissionRates](#listcommissionrates)
* [listAndCountCommissionRates](#listandcountcommissionrates)
* [softDeleteCommissionRates](#softdeletecommissionrates)
* [restoreCommissionRates](#restorecommissionrates)
### Commission Line Methods
* [createCommissionLines](#createcommissionlines)
* [updateCommissionLines](#updatecommissionlines)
* [deleteCommissionLines](#deletecommissionlines)
* [retrieveCommissionLine](#retrievecommissionline)
* [listCommissionLines](#listcommissionlines)
* [listAndCountCommissionLines](#listandcountcommissionlines)
* [softDeleteCommissionLines](#softdeletecommissionlines)
* [restoreCommissionLines](#restorecommissionlines)
### Custom Methods
* [selectCommissionForProductLine](#selectcommissionforproductline)
***
# selectCommissionForProductLine
This section provides a reference to the `selectCommissionForProductLine` method. This belongs to the Commission Module.
This method selects the applicable commission rule for a given product line item based on the commission rule priority system. It searches through rules in priority order and returns the first matching active rule.
## Priority Order
1. `seller+product_type` (highest priority)
2. `seller+product_category`
3. `seller`
4. `product_type`
5. `product_category`
6. `site` (lowest priority/default)
## Example
```ts theme={null}
const rule = await commissionModuleService.selectCommissionForProductLine({
seller_id: "sel_123",
product_type_id: "ptyp_456",
product_category_id: "pcat_789",
})
```
## Parameters
The calculation context containing product and seller information.
The ID of the seller.
The ID of the product type.
The ID of the product category.
## Returns
The first applicable commission rule found, or `null` if no rule matches.
The ID of the commission rule.
The name of the commission rule.
The type of the commission rule reference.
The ID of the referenced entity.
The associated commission rate.
The ID of the commission rate.
The type of the commission rate.
The percentage rate for percentage-based commissions.
Whether the commission calculation includes tax.
The ID of the price set used for flat-rate commissions.
The ID of the price set defining the maximum commission amount.
The ID of the price set defining the minimum commission amount.
The created date of the commission rate.
The updated date of the commission rate.
The created date of the commission rule.
The updated date of the commission rule.
***
# createCommissionRules
This section provides a reference to the `createCommissionRules` method. This belongs to the Commission Module.
## createCommissionRules(data, sharedContext?): Promise\
This method creates commission rules.
### Example
```ts theme={null}
const rules = await commissionModuleService.createCommissionRules([
{
name: "Default Site Commission",
reference: "site",
reference_id: "",
is_active: true,
rate: {
type: "percentage",
percentage_rate: 10,
include_tax: false,
},
},
])
```
### Parameters
The commission rules to be created.
The name of the commission rule.
The type of the commission rule reference. Can be `site`, `product_type`, `product_category`, `seller+product_category`, `seller+product_type`, or `seller`.
The ID of the referenced entity. Empty string for `site` reference type.
Whether the commission rule is active.
The commission rate configuration.
The type of the commission rate.
The percentage rate for percentage-based commissions.
Whether the commission calculation includes tax.
The price set for flat-rate commissions.
The commission amount.
The ISO 3 currency code.
The minimum commission amount price set.
The maximum commission amount price set.
A context used to share resources, such as transaction manager, between the application and the module.
### Returns
The created commission rules.
## createCommissionRules(data, sharedContext?): Promise\
This method creates a commission rule.
### Example
```ts theme={null}
const rule = await commissionModuleService.createCommissionRules({
name: "Electronics Category Commission",
reference: "product_category",
reference_id: "pcat_electronics",
is_active: true,
rate: {
type: "percentage",
percentage_rate: 15,
include_tax: false,
},
})
```
### Parameters
The commission rule to be created.
The name of the commission rule.
The type of the commission rule reference. Can be `site`, `product_type`, `product_category`, `seller+product_category`, `seller+product_type`, or `seller`.
The ID of the referenced entity. Empty string for `site` reference type.
Whether the commission rule is active.
The commission rate configuration.
The type of the commission rate.
The percentage rate for percentage-based commissions.
Whether the commission calculation includes tax.
The price set for flat-rate commissions.
The commission amount.
The ISO 3 currency code.
The minimum commission amount price set.
The maximum commission amount price set.
A context used to share resources, such as transaction manager, between the application and the module.
### Returns
The created commission rule.
***
# updateCommissionRules
This section provides a reference to the `updateCommissionRules` method. This belongs to the Commission Module.
## updateCommissionRules(id, data, sharedContext?): Promise\
This method updates an existing commission rule.
### Example
```ts theme={null}
const rule = await commissionModuleService.updateCommissionRules("com_rule_123", {
name: "Updated Commission Rule",
is_active: false,
})
```
### Parameters
The ID of the commission rule.
The attributes to update in the commission rule.
The name of the commission rule.
The type of the commission rule reference.
The ID of the referenced entity.
Whether the commission rule is active.
The commission rate configuration to update.
The ID of the commission rate.
The type of the commission rate.
The percentage rate for percentage-based commissions.
Whether the commission calculation includes tax.
The price set for flat-rate commissions.
The minimum commission amount price set.
The maximum commission amount price set.
A context used to share resources, such as transaction manager, between the application and the module.
### Returns
The updated commission rule.
The ID of the commission rule.
The name of the commission rule.
The type of the commission rule reference.
The ID of the referenced entity.
The associated commission rate.
The created date of the commission rule.
The updated date of the commission rule.
***
# deleteCommissionRules
This section provides a reference to the `deleteCommissionRules` method. This belongs to the Commission Module.
## deleteCommissionRules(ids, sharedContext?): Promise\
This method deletes commission rules by their IDs.
### Example
```ts theme={null}
await commissionModuleService.deleteCommissionRules(["com_rule_123", "com_rule_321"])
```
### Parameters
The IDs of the commission rules.
A context used to share resources, such as transaction manager, between the application and the module.
### Returns
Resolves when the commission rules are deleted successfully.
## deleteCommissionRules(id, sharedContext?): Promise\
This method deletes a commission rule by its ID.
### Example
```ts theme={null}
await commissionModuleService.deleteCommissionRules("com_rule_123")
```
### Parameters
The ID of the commission rule.
A context used to share resources, such as transaction manager, between the application and the module.
### Returns
Resolves when the commission rule is deleted successfully.
***
# retrieveCommissionRule
This section provides a reference to the `retrieveCommissionRule` method. This belongs to the Commission Module.
This method retrieves a commission rule by its ID.
## Example
```ts theme={null}
const rule = await commissionModuleService.retrieveCommissionRule("com_rule_123")
```
To retrieve with the rate:
```ts theme={null}
const rule = await commissionModuleService.retrieveCommissionRule(
"com_rule_123",
{
relations: ["rate"],
}
)
```
## Parameters
The ID of the commission rule.
The configurations determining how the commission rule is retrieved.
An array of strings, each being attribute names of the entity to retrieve in the result.
A number indicating the number of records to skip before retrieving the results.
A number indicating the number of records to return in the result.
An array of strings, each being relation names of the entity to retrieve in the result. For example, `["rate"]`.
An object used to specify how to sort the returned records.
A boolean indicating whether deleted records should also be retrieved as part of the result.
A context used to share resources, such as transaction manager, between the application and the module.
## Returns
The retrieved commission rule.
The ID of the commission rule.
The name of the commission rule.
The type of the commission rule reference.
The ID of the referenced entity.
The associated commission rate (if included in relations).
The created date of the commission rule.
The updated date of the commission rule.
***
# listCommissionRules
This section provides a reference to the `listCommissionRules` method. This belongs to the Commission Module.
This method retrieves a paginated list of commission rules based on optional filters and configuration.
## Example
To retrieve active commission rules:
```ts theme={null}
const rules = await commissionModuleService.listCommissionRules({
is_active: true,
})
```
To retrieve rules for a specific seller:
```ts theme={null}
const rules = await commissionModuleService.listCommissionRules({
reference: "seller",
reference_id: "sel_123",
})
```
By default, only the first `15` records are retrieved. You can control pagination:
```ts theme={null}
const rules = await commissionModuleService.listCommissionRules(
{
is_active: true,
},
{
take: 20,
skip: 2,
relations: ["rate"],
}
)
```
## Parameters
The filters to apply on the retrieved commission rules.
The IDs to filter the commission rules by.
Filter commission rules by their names.
Filter commission rules by their reference types.
Filter commission rules by their reference IDs.
Filter by whether commission rules are active.
The configurations determining how the commission rule is retrieved.
An array of strings, each being attribute names of the entity to retrieve in the result.
A number indicating the number of records to skip before retrieving the results.
A number indicating the number of records to return in the result.
An array of strings, each being relation names of the entity to retrieve in the result. For example, `["rate"]`.
An object used to specify how to sort the returned records.
A boolean indicating whether deleted records should also be retrieved as part of the result.
A context used to share resources, such as transaction manager, between the application and the module.
## Returns
The list of commission rules.
***
# listAndCountCommissionRules
This section provides a reference to the `listAndCountCommissionRules` method. This belongs to the Commission Module.
This method retrieves a paginated list of commission rules along with the total count of available commission rules satisfying the provided filters.
## Example
```ts theme={null}
const [rules, count] = await commissionModuleService.listAndCountCommissionRules({
is_active: true,
})
```
## Parameters
The filters to apply on the retrieved commission rules.
The IDs to filter the commission rules by.
Filter commission rules by their names.
Filter commission rules by their reference types.
Filter commission rules by their reference IDs.
Filter by whether commission rules are active.
The configurations determining how the commission rule is retrieved.
An array of strings, each being attribute names of the entity to retrieve in the result.
A number indicating the number of records to skip before retrieving the results.
A number indicating the number of records to return in the result.
An array of strings, each being relation names of the entity to retrieve in the result.
An object used to specify how to sort the returned records.
A boolean indicating whether deleted records should also be retrieved as part of the result.
A context used to share resources, such as transaction manager, between the application and the module.
## Returns
The list of commission rules along with their total count.
***
# softDeleteCommissionRules
This section provides a reference to the `softDeleteCommissionRules` method. This belongs to the Commission Module.
This method soft deletes commission rules by their IDs.
## Example
```ts theme={null}
await commissionModuleService.softDeleteCommissionRules([
"com_rule_123",
"com_rule_321",
])
```
## Parameters
The IDs of the commission rules.
An object that is used to specify an entity's related entities that should be soft-deleted when the main entity is soft-deleted.
A context used to share resources, such as transaction manager, between the application and the module.
## Returns
An object that includes the IDs of related records that were also soft deleted. If there are no related records, the promise resolves to `void`.
***
# restoreCommissionRules
This section provides a reference to the `restoreCommissionRules` method. This belongs to the Commission Module.
This method restores soft deleted commission rules by their IDs.
## Example
```ts theme={null}
await commissionModuleService.restoreCommissionRules(["com_rule_123", "com_rule_321"])
```
## Parameters
The IDs of the commission rules.
Configurations determining which relations to restore along with each of the commission rule.
A context used to share resources, such as transaction manager, between the application and the module.
## Returns
An object that includes the IDs of related records that were restored. If there are no related records restored, the promise resolves to `void`.
***
# createCommissionRates
This section provides a reference to the `createCommissionRates` method. This belongs to the Commission Module.
## createCommissionRates(data, sharedContext?): Promise\
This method creates commission rates.
### Example
```ts theme={null}
const rates = await commissionModuleService.createCommissionRates([
{
type: "percentage",
percentage_rate: 10,
include_tax: false,
},
])
```
### Parameters
The commission rates to be created.
The type of the commission rate.
The percentage rate for percentage-based commissions.
Whether the commission calculation includes tax.
The price set for flat-rate commissions.
The commission amount.
The ISO 3 currency code.
The minimum commission amount price set.
The maximum commission amount price set.
A context used to share resources, such as transaction manager, between the application and the module.
### Returns
The created commission rates.
***
# updateCommissionRates
This section provides a reference to the `updateCommissionRates` method. This belongs to the Commission Module.
## updateCommissionRates(id, data, sharedContext?): Promise\
This method updates an existing commission rate.
### Example
```ts theme={null}
const rate = await commissionModuleService.updateCommissionRates("com_rate_123", {
percentage_rate: 15,
})
```
### Parameters
The ID of the commission rate.
The attributes to update in the commission rate.
The type of the commission rate.
The percentage rate for percentage-based commissions.
Whether the commission calculation includes tax.
The price set for flat-rate commissions.
The minimum commission amount price set.
The maximum commission amount price set.
A context used to share resources, such as transaction manager, between the application and the module.
### Returns
The updated commission rate.
The ID of the commission rate.
The type of the commission rate.
The percentage rate for percentage-based commissions.
Whether the commission calculation includes tax.
The ID of the price set used for flat-rate commissions.
The ID of the price set defining the maximum commission amount.
The ID of the price set defining the minimum commission amount.
The created date of the commission rate.
The updated date of the commission rate.
***
# deleteCommissionRates
This section provides a reference to the `deleteCommissionRates` method. This belongs to the Commission Module.
## deleteCommissionRates(ids, sharedContext?): Promise\
This method deletes commission rates by their IDs.
### Example
```ts theme={null}
await commissionModuleService.deleteCommissionRates(["com_rate_123", "com_rate_321"])
```
### Parameters
The IDs of the commission rates.
A context used to share resources, such as transaction manager, between the application and the module.
### Returns
Resolves when the commission rates are deleted successfully.
***
# retrieveCommissionRate
This section provides a reference to the `retrieveCommissionRate` method. This belongs to the Commission Module.
This method retrieves a commission rate by its ID.
## Example
```ts theme={null}
const rate = await commissionModuleService.retrieveCommissionRate("com_rate_123")
```
## Parameters
The ID of the commission rate.
The configurations determining how the commission rate is retrieved.
An array of strings, each being attribute names of the entity to retrieve in the result.
An array of strings, each being relation names of the entity to retrieve in the result.
An object used to specify how to sort the returned records.
A boolean indicating whether deleted records should also be retrieved as part of the result.
A context used to share resources, such as transaction manager, between the application and the module.
## Returns
The retrieved commission rate.
The ID of the commission rate.
The type of the commission rate.
The percentage rate for percentage-based commissions.
Whether the commission calculation includes tax.
The ID of the price set used for flat-rate commissions.
The ID of the price set defining the maximum commission amount.
The ID of the price set defining the minimum commission amount.
The created date of the commission rate.
The updated date of the commission rate.
***
# listCommissionRates
This section provides a reference to the `listCommissionRates` method. This belongs to the Commission Module.
This method retrieves a paginated list of commission rates based on optional filters and configuration.
## Example
```ts theme={null}
const rates = await commissionModuleService.listCommissionRates({
type: "percentage",
})
```
## Parameters
The filters to apply on the retrieved commission rates.
The IDs to filter the commission rates by.
Filter commission rates by their types.
Filter by whether commission rates include tax in calculation.
The configurations determining how the commission rate is retrieved.
An array of strings, each being attribute names of the entity to retrieve in the result.
A number indicating the number of records to skip before retrieving the results.
A number indicating the number of records to return in the result.
An array of strings, each being relation names of the entity to retrieve in the result.
An object used to specify how to sort the returned records.
A boolean indicating whether deleted records should also be retrieved as part of the result.
A context used to share resources, such as transaction manager, between the application and the module.
## Returns
The list of commission rates.
***
# listAndCountCommissionRates
This section provides a reference to the `listAndCountCommissionRates` method. This belongs to the Commission Module.
This method retrieves a paginated list of commission rates along with the total count of available commission rates satisfying the provided filters.
## Example
```ts theme={null}
const [rates, count] = await commissionModuleService.listAndCountCommissionRates({
type: "percentage",
})
```
## Parameters
The filters to apply on the retrieved commission rates.
The IDs to filter the commission rates by.
Filter commission rates by their types.
Filter by whether commission rates include tax in calculation.
The configurations determining how the commission rate is retrieved.
An array of strings, each being attribute names of the entity to retrieve in the result.
A number indicating the number of records to skip before retrieving the results.
A number indicating the number of records to return in the result.
An array of strings, each being relation names of the entity to retrieve in the result.
An object used to specify how to sort the returned records.
A boolean indicating whether deleted records should also be retrieved as part of the result.
A context used to share resources, such as transaction manager, between the application and the module.
## Returns
The list of commission rates along with their total count.
***
# softDeleteCommissionRates
This section provides a reference to the `softDeleteCommissionRates` method. This belongs to the Commission Module.
This method soft deletes commission rates by their IDs.
## Example
```ts theme={null}
await commissionModuleService.softDeleteCommissionRates([
"com_rate_123",
"com_rate_321",
])
```
## Parameters
The IDs of the commission rates.
An object that is used to specify an entity's related entities that should be soft-deleted when the main entity is soft-deleted.
A context used to share resources, such as transaction manager, between the application and the module.
## Returns
An object that includes the IDs of related records that were also soft deleted. If there are no related records, the promise resolves to `void`.
***
# restoreCommissionRates
This section provides a reference to the `restoreCommissionRates` method. This belongs to the Commission Module.
This method restores soft deleted commission rates by their IDs.
## Example
```ts theme={null}
await commissionModuleService.restoreCommissionRates(["com_rate_123", "com_rate_321"])
```
## Parameters
The IDs of the commission rates.
Configurations determining which relations to restore along with each of the commission rate.
A context used to share resources, such as transaction manager, between the application and the module.
## Returns
An object that includes the IDs of related records that were restored. If there are no related records restored, the promise resolves to `void`.
***
# createCommissionLines
This section provides a reference to the `createCommissionLines` method. This belongs to the Commission Module.
## createCommissionLines(data, sharedContext?): Promise\
This method creates commission lines.
### Example
```ts theme={null}
const lines = await commissionModuleService.createCommissionLines([
{
item_line_id: "ordli_123",
rule_id: "com_rule_123",
currency_code: "usd",
value: 500,
},
])
```
### Parameters
The commission lines to be created.
The ID of the order line item that this commission applies to.
The ID of the commission rule that was applied.
The ISO 3 currency code of the commission.
The calculated commission amount.
A context used to share resources, such as transaction manager, between the application and the module.
### Returns
The created commission lines.
***
# updateCommissionLines
This section provides a reference to the `updateCommissionLines` method. This belongs to the Commission Module.
## updateCommissionLines(id, data, sharedContext?): Promise\
This method updates an existing commission line.
### Example
```ts theme={null}
const line = await commissionModuleService.updateCommissionLines("com_line_123", {
value: 600,
})
```
### Parameters
The ID of the commission line.
The attributes to update in the commission line.
The ID of the order line item that this commission applies to.
The ID of the commission rule that was applied.
The ISO 3 currency code of the commission.
The calculated commission amount.
A context used to share resources, such as transaction manager, between the application and the module.
### Returns
The updated commission line.
The ID of the commission line.
The ID of the order line item that this commission applies to.
The ID of the commission rule that was applied.
The ISO 3 currency code of the commission.
The calculated commission amount.
The created date of the commission line.
The updated date of the commission line.
***
# deleteCommissionLines
This section provides a reference to the `deleteCommissionLines` method. This belongs to the Commission Module.
## deleteCommissionLines(ids, sharedContext?): Promise\
This method deletes commission lines by their IDs.
### Example
```ts theme={null}
await commissionModuleService.deleteCommissionLines(["com_line_123", "com_line_321"])
```
### Parameters
The IDs of the commission lines.
A context used to share resources, such as transaction manager, between the application and the module.
### Returns
Resolves when the commission lines are deleted successfully.
***
# retrieveCommissionLine
This section provides a reference to the `retrieveCommissionLine` method. This belongs to the Commission Module.
This method retrieves a commission line by its ID.
## Example
```ts theme={null}
const line = await commissionModuleService.retrieveCommissionLine("com_line_123")
```
## Parameters
The ID of the commission line.
The configurations determining how the commission line is retrieved.
An array of strings, each being attribute names of the entity to retrieve in the result.
An array of strings, each being relation names of the entity to retrieve in the result.
An object used to specify how to sort the returned records.
A boolean indicating whether deleted records should also be retrieved as part of the result.
A context used to share resources, such as transaction manager, between the application and the module.
## Returns
The retrieved commission line.
The ID of the commission line.
The ID of the order line item that this commission applies to.
The ID of the commission rule that was applied.
The ISO 3 currency code of the commission.
The calculated commission amount.
The created date of the commission line.
The updated date of the commission line.
***
# listCommissionLines
This section provides a reference to the `listCommissionLines` method. This belongs to the Commission Module.
This method retrieves a paginated list of commission lines based on optional filters and configuration.
## Example
To retrieve commission lines for a specific order line item:
```ts theme={null}
const lines = await commissionModuleService.listCommissionLines({
item_line_id: "ordli_123",
})
```
To retrieve commission lines by rule:
```ts theme={null}
const lines = await commissionModuleService.listCommissionLines({
rule_id: "com_rule_123",
})
```
## Parameters
The filters to apply on the retrieved commission lines.
The IDs to filter the commission lines by.
Filter commission lines by their order line item IDs.
Filter commission lines by their commission rule IDs.
Filter commission lines by their currency codes.
The configurations determining how the commission line is retrieved.
An array of strings, each being attribute names of the entity to retrieve in the result.
A number indicating the number of records to skip before retrieving the results.
A number indicating the number of records to return in the result.
An array of strings, each being relation names of the entity to retrieve in the result.
An object used to specify how to sort the returned records.
A boolean indicating whether deleted records should also be retrieved as part of the result.
A context used to share resources, such as transaction manager, between the application and the module.
## Returns
The list of commission lines.
***
# listAndCountCommissionLines
This section provides a reference to the `listAndCountCommissionLines` method. This belongs to the Commission Module.
This method retrieves a paginated list of commission lines along with the total count of available commission lines satisfying the provided filters.
## Example
```ts theme={null}
const [lines, count] = await commissionModuleService.listAndCountCommissionLines({
item_line_id: "ordli_123",
})
```
## Parameters
The filters to apply on the retrieved commission lines.
The IDs to filter the commission lines by.
Filter commission lines by their order line item IDs.
Filter commission lines by their commission rule IDs.
Filter commission lines by their currency codes.
The configurations determining how the commission line is retrieved.
An array of strings, each being attribute names of the entity to retrieve in the result.
A number indicating the number of records to skip before retrieving the results.
A number indicating the number of records to return in the result.
An array of strings, each being relation names of the entity to retrieve in the result.
An object used to specify how to sort the returned records.
A boolean indicating whether deleted records should also be retrieved as part of the result.
A context used to share resources, such as transaction manager, between the application and the module.
## Returns
The list of commission lines along with their total count.
***
# softDeleteCommissionLines
This section provides a reference to the `softDeleteCommissionLines` method. This belongs to the Commission Module.
This method soft deletes commission lines by their IDs.
## Example
```ts theme={null}
await commissionModuleService.softDeleteCommissionLines([
"com_line_123",
"com_line_321",
])
```
## Parameters
The IDs of the commission lines.
An object that is used to specify an entity's related entities that should be soft-deleted when the main entity is soft-deleted.
A context used to share resources, such as transaction manager, between the application and the module.
## Returns
An object that includes the IDs of related records that were also soft deleted. If there are no related records, the promise resolves to `void`.
***
# restoreCommissionLines
This section provides a reference to the `restoreCommissionLines` method. This belongs to the Commission Module.
This method restores soft deleted commission lines by their IDs.
## Example
```ts theme={null}
await commissionModuleService.restoreCommissionLines(["com_line_123", "com_line_321"])
```
## Parameters
The IDs of the commission lines.
Configurations determining which relations to restore along with each of the commission line.
A context used to share resources, such as transaction manager, between the application and the module.
## Returns
An object that includes the IDs of related records that were restored. If there are no related records restored, the promise resolves to `void`.
# Order Return Request Module
Source: https://docs.mercurjs.com/product/modules/requests/order-return-request/order-return-request
Learn about the Order Return Request Module and how to use it in your application
# Order Return Request Module
In this section of the documentation, you will find resources to learn more about the Order Return Request Module and how to use it in your application.
Mercur has order return management features available out-of-the-box through the Order Return Request Module. A [module](https://docs.medusajs.com/learn/fundamentals/modules) is a standalone package that provides features for a single domain. Each of Mercur's marketplace features are placed in custom modules, such as this Order Return Request Module.
Learn more about why modules are isolated in [this documentation](https://docs.medusajs.com/learn/fundamentals/modules/isolation).
## Order Return Request Features
* **Customer Return Requests**: Allow customers to request returns for purchased items with reasons and notes.
* **Multi-Tier Review System**: Support both vendor review and admin escalation for dispute resolution.
* **Line Item Tracking**: Track which specific items and quantities are being returned.
* **Status Workflow**: Manage return requests through multiple statuses (pending, refunded, withdrawn, escalated, canceled).
* **Reviewer Notes**: Store notes from both vendors and admins explaining their decisions.
* **Shipping Integration**: Associate return requests with shipping options for return logistics.
***
## How to Use the Order Return Request Module
In your Medusa application, you build flows around Commerce Modules. A flow is built as a [Workflow](https://docs.medusajs.com/learn/fundamentals/workflows), which is a special function composed of a series of steps that guarantees data consistency and reliable roll-back mechanism.
You can build custom workflows and steps. Mercur provides pre-built workflows for return request operations in the `@mercurjs/requests` package.
For example, the `createOrderReturnRequestWorkflow`:
```ts title="src/workflows/order-return-request/create-return-request.ts" theme={null}
import { Modules } from "@medusajs/framework/utils"
import {
WorkflowResponse,
createHook,
createWorkflow,
transform,
} from "@medusajs/framework/workflows-sdk"
import { createRemoteLinkStep } from "@medusajs/medusa/core-flows"
import { CreateOrderReturnRequestDTO } from "@mercurjs/framework"
import { ORDER_RETURN_MODULE } from "../../../modules/order-return-request"
import { SELLER_MODULE } from "@mercurjs/framework"
import {
createOrderReturnRequestStep,
validateOrderReturnRequestStep,
} from "../steps"
export const createOrderReturnRequestWorkflow = createWorkflow(
"create-order-return-request",
function (input: { data: CreateOrderReturnRequestDTO; seller_id: string }) {
// Validate the return request data
validateOrderReturnRequestStep(input.data)
// Create the return request
const request = createOrderReturnRequestStep(input.data)
const requestId = transform({ request }, ({ request }) => request.id)
// Create module links
createRemoteLinkStep([
{
[SELLER_MODULE]: {
seller_id: input.seller_id,
},
[ORDER_RETURN_MODULE]: {
order_return_request_id: requestId,
},
},
{
[ORDER_RETURN_MODULE]: {
order_return_request_id: requestId,
},
[Modules.ORDER]: {
order_id: input.data.order_id,
},
},
])
// Emit workflow hook
const orderReturnRequestCreatedHook = createHook(
"orderReturnRequestCreated",
{
requestId: request.id,
}
)
return new WorkflowResponse(request, {
hooks: [orderReturnRequestCreatedHook],
})
}
)
```
You can then execute the workflow in your custom API routes:
### API Route
```ts title="src/api/store/return-request/route.ts" theme={null}
import { AuthenticatedMedusaRequest, MedusaResponse } from '@medusajs/framework'
import { ContainerRegistrationKeys } from '@medusajs/framework/utils'
import { createOrderReturnRequestWorkflow } from "../../../workflows/order-return-request/workflows"
import sellerOrder from '../../../links/seller-order'
export const POST = async (
req: AuthenticatedMedusaRequest,
res: MedusaResponse
) => {
const query = req.scope.resolve(ContainerRegistrationKeys.QUERY)
// Get seller_id from the order
const {
data: [resource],
} = await query.graph({
entity: sellerOrder.entryPoint,
fields: ["seller_id"],
filters: {
order_id: req.validatedBody.order_id,
},
})
// Execute the createOrderReturnRequestWorkflow
const { result: order_return_request } =
await createOrderReturnRequestWorkflow.run({
container: req.scope,
input: {
data: { ...req.validatedBody, customer_id: req.auth_context.actor_id },
seller_id: resource.seller_id,
},
})
res.json({ order_return_request })
}
```
Learn more about workflows in [this documentation](https://docs.medusajs.com/learn/fundamentals/workflows).
***
# Concepts
In this document, you'll learn about the main concepts related to order return requests in Mercur.
## Order Return Request
An order return request represents a customer's request to return items from an order. It is represented by the [OrderReturnRequest data model](../data-model/order-return-request-module-data-reference#orderreturnrequest).
An order return request holds information about:
* The customer who submitted the request
* Customer's note explaining the return reason
* Shipping option for return logistics
* Vendor reviewer information (ID, note, review date)
* Admin reviewer information (ID, note, review date)
* Current status in the review workflow
* Associated line items being returned
This enables a structured return process with accountability and tracking at each stage.
***
## Return Request Status Workflow
Return requests follow a multi-tier approval workflow with five possible statuses:
### pending
**Initial state** when customer creates the return request.
* Awaiting vendor review
* Customer has submitted their reason
* No action taken yet
### refunded
**Approved by vendor** - the return is accepted.
* Vendor agrees with the return reason
* Return and refund process proceeds
* Customer receives refund
* Items are returned to seller
### withdrawn
**Rejected by vendor** - the return is denied.
* Vendor determines return doesn't meet criteria
* Vendor provides explanation in `vendor_reviewer_note`
* No refund issued
* Customer keeps the items
### escalated
**Disputed by vendor** - vendor disagrees with return reason.
* Vendor believes return is unfair or against policy
* Request is escalated to marketplace admin for final decision
* Admin reviews both customer and vendor perspectives
* Admin makes final decision (refunded or canceled)
### canceled
**Rejected by admin** - admin sides with vendor on escalated request.
* Admin reviewed escalated request
* Admin determined vendor was correct to deny
* Admin provides explanation in `admin_reviewer_note`
* No refund issued
***
## Return Request Line Item
A return request line item specifies which products and quantities are being returned. It is represented by the [OrderReturnRequestLineItem data model](../data-model/order-return-request-module-data-reference#orderreturnrequestlineitem).
Each line item includes:
* Original order line item ID
* Quantity to be returned (can be partial)
* Return reason ID (optional)
This granular tracking allows customers to return specific items or quantities from an order, not just the entire order.
***
## Multi-Tier Review System
The return request system implements a two-tier review process:
### Tier 1: Vendor Review
**Reviewer**: Seller member\
**Actions**: Refunded, Withdrawn, Escalated\
**Fields**: `vendor_reviewer_id`, `vendor_reviewer_note`, `vendor_review_date`
Vendors handle the first level of review, deciding whether to:
* Accept the return (refunded)
* Deny the return (withdrawn)
* Dispute the return (escalated)
### Tier 2: Admin Review (Escalations Only)
**Reviewer**: Marketplace admin\
**Actions**: Refunded, Canceled\
**Fields**: `admin_reviewer_id`, `admin_reviewer_note`, `admin_review_date`
Admins only review escalated requests, providing final arbitration when vendors and customers disagree.
This system balances seller autonomy with marketplace oversight.
***
## Return Request Validation
The `validateOrderReturnRequestStep` ensures return requests meet requirements:
* Order exists and belongs to the customer
* Line items exist in the order
* Quantities don't exceed ordered amounts
* Order is in a returnable state
* Return window hasn't expired (if configured)
This prevents fraudulent or invalid return requests.
***
## Workflow Integration
Return requests integrate with other marketplace workflows:
**On Creation:**
* Links created to Seller and Order
* Workflow hook emitted for extensibility
* Notifications can be triggered
**On Status Change:**
* Return and refund workflows triggered (if refunded)
* Inventory updated (if items returned to stock)
* Payout adjustments made (if already paid out)
***
## Use Cases
**1. Standard Return**
Customer receives damaged item, creates return request, vendor approves, refund processed.
**2. Vendor Denial**
Customer requests return after 30-day window, vendor denies with explanation, customer keeps item.
**3. Escalation to Admin**
Customer claims item is counterfeit, vendor disputes, admin reviews and makes final decision.
**4. Partial Return**
Customer orders 3 items but only wants to return 1; line item tracking handles partial returns.
**5. Return Reason Tracking**
Marketplace tracks return reasons (damaged, wrong item, not as described) for quality insights.
**6. Multi-Vendor Returns**
Customer bought from 3 sellers, creates separate return requests for each seller's items.
# Order Return Request Module Data Models
Source: https://docs.mercurjs.com/product/modules/requests/order-return-request/order-return-request-data-model-reference
Reference documentation for the Order Return Request Module data models
## Relations Overview
| Relationship | Type | Description |
| -------------------------------------------------------- | ------------------- | -------------------------------------------------------- |
| OrderReturnRequest → OrderReturnRequestLineItem | One-to-Many | A return request has many line items |
| OrderReturnRequest → Customer (Customer Module) | Read-only - has one | A return request belongs to a customer |
| OrderReturnRequest → ShippingOption (Fulfillment Module) | Read-only - has one | A return request references a shipping option |
| OrderReturnRequestLineItem → LineItem (Order Module) | Read-only - has one | A return request line item references an order line item |
## Data Models
* [OrderReturnRequest](#orderreturnrequest)
* [OrderReturnRequestLineItem](#orderreturnrequestlineitem)
## OrderReturnRequest
This documentation provides a reference to the OrderReturnRequest data model. It belongs to the Order Return Request Module.
[View source code](https://github.com/mercurjs/mercur/blob/main/packages/modules/requests/src/modules/order-return-request/models/return-request.ts)
| Field | Type | Description |
| ---------------------- | ----------------------------------------------------------------------------- | --------------------------------------------------------------------------------- |
| `id` | `PrimaryKeyModifier` | The ID of the order return request. |
| `customer_id` | `TextProperty` | The ID of the customer who created the return request. |
| `customer_note` | `TextProperty` | The customer's note explaining the reason for the return. |
| `shipping_option_id` | `TextProperty` | The ID of the shipping option for returning the items. |
| `vendor_reviewer_id` | `TextProperty` | The ID of the vendor member who reviewed the request. |
| `vendor_reviewer_note` | `TextProperty` | The vendor's note regarding the return request. |
| `vendor_review_date` | `DateTimeProperty` | The date when the vendor reviewed the request. |
| `admin_reviewer_id` | `TextProperty` | The ID of the admin user who reviewed the escalated request. |
| `admin_reviewer_note` | `TextProperty` | The admin's note regarding the return request. |
| `admin_review_date` | `DateTimeProperty` | The date when the admin reviewed the request. |
| `status` | `EnumProperty<["pending", "refunded", "withdrawn", "escalated", "canceled"]>` | The status of the return request. Defaults to `pending`. |
| `line_items` | `HasMany` | The associated [OrderReturnRequestLineItem](#orderreturnrequestlineitem) records. |
## OrderReturnRequestLineItem
This documentation provides a reference to the OrderReturnRequestLineItem data model. It belongs to the Order Return Request Module.
[View source code](https://github.com/mercurjs/mercur/blob/main/packages/modules/requests/src/modules/order-return-request/models/return-request-line-item.ts)
| Field | Type | Description |
| ---------------- | -------------------------------- | --------------------------------------------------------- |
| `id` | `PrimaryKeyModifier` | The ID of the order return request line item. |
| `line_item_id` | `TextProperty` | The ID of the original order line item being returned. |
| `quantity` | `NumberProperty` | The quantity of the item to be returned. |
| `reason_id` | `TextProperty` | The ID of the return reason. |
| `return_request` | `BelongsTo` | The associated [OrderReturnRequest](#orderreturnrequest). |
# Order Return Request Module Links
Source: https://docs.mercurjs.com/product/modules/requests/order-return-request/order-return-request-links
Module links for the Order Return Request Module
# Links between Order Return Request Module and Other Modules
This document showcases the module links defined between the Order Return Request Module and other Commerce Modules.
## Summary
The Order Return Request Module has the following links to other modules:
| First Data Model | Second Data Model | Type | Description |
| ------------------ | ------------------ | -------------------- | -------------------------------------------------- |
| OrderReturnRequest | Order | Stored - many-to-one | Associates return requests with the original order |
| Seller | OrderReturnRequest | Stored - one-to-many | Associates a seller with their return requests |
***
## Order Module
Mercur defines a link between the Order Return Request Module's `OrderReturnRequest` data model and the Order Module's `Order` data model. This allows return requests to be associated with the original order being returned.
### Retrieve with Query
To retrieve the order of a return request with Query, pass `order.*` in `fields`:
```ts theme={null}
const { data: returnRequests } = await query.graph({
entity: "order_return_request",
fields: [
"*",
"order.*",
],
})
// returnRequests[0].order
```
```ts theme={null}
import { useQueryGraphStep } from "@medusajs/medusa/core-flows"
// ...
const { data: returnRequests } = useQueryGraphStep({
entity: "order_return_request",
fields: [
"*",
"order.*",
],
})
// returnRequests[0].order
```
### Manage with Link
To manage the order association of a return request, use Link:
```ts theme={null}
import { Modules } from "@medusajs/framework/utils"
// ...
await link.create({
order_return_request: {
order_return_request_id: "oretreq_123",
},
[Modules.ORDER]: {
order_id: "ord_123",
},
})
```
```ts theme={null}
import { createRemoteLinkStep } from "@medusajs/medusa/core-flows"
// ...
createRemoteLinkStep({
order_return_request: {
order_return_request_id: "oretreq_123",
},
[Modules.ORDER]: {
order_id: "ord_123",
},
})
```
***
## Seller Module
Mercur defines a link between the Seller Module's `Seller` data model and the Order Return Request Module's `OrderReturnRequest` data model. This allows tracking which return requests belong to each seller for vendor review and processing.
### Retrieve with Query
To retrieve the return requests of a seller with Query, pass `order_return_request.*` in `fields`:
```ts theme={null}
const { data: sellers } = await query.graph({
entity: "seller",
fields: [
"*",
"order_return_request.*",
],
})
// sellers[0].order_return_request
```
```ts theme={null}
import { useQueryGraphStep } from "@medusajs/medusa/core-flows"
// ...
const { data: sellers } = useQueryGraphStep({
entity: "seller",
fields: [
"*",
"order_return_request.*",
],
})
// sellers[0].order_return_request
```
### Manage with Link
To manage the return requests of a seller, use Link:
```ts theme={null}
// ...
await link.create({
seller: {
seller_id: "sel_123",
},
order_return_request: {
order_return_request_id: "oretreq_123",
},
})
```
```ts theme={null}
import { createRemoteLinkStep } from "@medusajs/medusa/core-flows"
// ...
createRemoteLinkStep({
seller: {
seller_id: "sel_123",
},
order_return_request: {
order_return_request_id: "oretreq_123",
},
})
```
# Order Return Request Module Service Reference
Source: https://docs.mercurjs.com/product/modules/requests/order-return-request/order-return-request-services
Reference documentation for the Order Return Request Module service methods
# IOrderReturnRequestModuleService Reference
This section of the documentation provides a reference to the `IOrderReturnRequestModuleService` interface's methods. This is the interface developers use to use the functionalities provided by the Order Return Request Module.
You should only use the methods in this reference when implementing complex customizations. For common cases, check out available workflows instead.
The main service interface for the Order Return Request Module.
## Methods
### Order Return Request Methods
* [createOrderReturnRequests](#createorderreturnrequests)
* [updateOrderReturnRequests](#updateorderreturnrequests)
* [deleteOrderReturnRequests](#deleteorderreturnrequests)
* [retrieveOrderReturnRequest](#retrieveorderreturnrequest)
* [listOrderReturnRequests](#listorderreturnrequests)
* [listAndCountOrderReturnRequests](#listandcountorderreturnrequests)
* [softDeleteOrderReturnRequests](#softdeleteorderreturnrequests)
* [restoreOrderReturnRequests](#restoreorderreturnrequests)
### Order Return Request Line Item Methods
* [createOrderReturnRequestLineItems](#createorderreturnrequestlineitems)
* [updateOrderReturnRequestLineItems](#updateorderreturnrequestlineitems)
* [deleteOrderReturnRequestLineItems](#deleteorderreturnrequestlineitems)
* [retrieveOrderReturnRequestLineItem](#retrieveorderreturnrequestlineitem)
* [listOrderReturnRequestLineItems](#listorderreturnrequestlineitems)
* [listAndCountOrderReturnRequestLineItems](#listandcountorderreturnrequestlineitems)
* [softDeleteOrderReturnRequestLineItems](#softdeleteorderreturnrequestlineitems)
* [restoreOrderReturnRequestLineItems](#restoreorderreturnrequestlineitems)
***
# createOrderReturnRequests
This section provides a reference to the `createOrderReturnRequests` method. This belongs to the Order Return Request Module.
## createOrderReturnRequests(data, sharedContext?): Promise\
This method creates order return requests.
### Example
```ts theme={null}
const returnRequests = await orderReturnRequestModuleService.createOrderReturnRequests([
{
order_id: "ord_123",
customer_id: "cus_123",
customer_note: "Product arrived damaged",
shipping_option_id: "so_123",
line_items: [
{ line_item_id: "ordli_123", quantity: 1, reason_id: "reason_123" },
],
},
])
```
### Parameters
The order return requests to be created.
The ID of the order this return request is for.
The ID of the customer who created the return request.
The customer's note explaining the reason for the return.
The ID of the shipping option for returning the items.
The line items to be returned.
The ID of the original order line item being returned.
The quantity of the item to be returned.
The ID of the return reason.
A context used to share resources, such as transaction manager, between the application and the module.
### Returns
The created order return requests.
## createOrderReturnRequests(data, sharedContext?): Promise\
This method creates an order return request.
### Example
```ts theme={null}
const returnRequest = await orderReturnRequestModuleService.createOrderReturnRequests({
order_id: "ord_123",
customer_id: "cus_123",
customer_note: "Product arrived damaged",
shipping_option_id: "so_123",
line_items: [
{ line_item_id: "ordli_123", quantity: 1, reason_id: "reason_123" },
],
})
```
### Parameters
The order return request to be created.
The ID of the order this return request is for.
The ID of the customer who created the return request.
The customer's note explaining the reason for the return.
The ID of the shipping option for returning the items.
The line items to be returned.
The ID of the original order line item being returned.
The quantity of the item to be returned.
The ID of the return reason.
A context used to share resources, such as transaction manager, between the application and the module.
### Returns
The created order return request.
***
# updateOrderReturnRequests
This section provides a reference to the `updateOrderReturnRequests` method. This belongs to the Order Return Request Module.
## updateOrderReturnRequests(id, data, sharedContext?): Promise\
This method updates an existing order return request.
### Example
Vendor reviewing a return request:
```ts theme={null}
const returnRequest = await orderReturnRequestModuleService.updateOrderReturnRequests("oretreq_123", {
vendor_reviewer_id: "mem_123",
vendor_reviewer_note: "Approved for return",
vendor_review_date: new Date(),
status: "refunded",
})
```
Admin reviewing an escalated return request:
```ts theme={null}
const returnRequest = await orderReturnRequestModuleService.updateOrderReturnRequests("oretreq_123", {
admin_reviewer_id: "user_123",
admin_reviewer_note: "Customer is right, approve the return",
admin_review_date: new Date(),
status: "refunded",
})
```
### Parameters
The ID of the order return request.
The attributes to update in the order return request.
The customer's note explaining the reason for the return.
The ID of the shipping option for returning the items.
The ID of the vendor member who reviewed the request.
The vendor's note regarding the return request.
The date when the vendor reviewed the request.
The ID of the admin user who reviewed the escalated request.
The admin's note regarding the return request.
The date when the admin reviewed the request.
The status of the return request.
A context used to share resources, such as transaction manager, between the application and the module.
### Returns
The updated order return request.
The ID of the order return request.
The ID of the customer who created the return request.
The customer's note explaining the reason for the return.
The ID of the shipping option for returning the items.
The ID of the vendor member who reviewed the request.
The vendor's note regarding the return request.
The date when the vendor reviewed the request.
The ID of the admin user who reviewed the escalated request.
The admin's note regarding the return request.
The date when the admin reviewed the request.
The status of the return request.
The associated line items (if included in relations).
The created date of the order return request.
The updated date of the order return request.
***
# deleteOrderReturnRequests
This section provides a reference to the `deleteOrderReturnRequests` method. This belongs to the Order Return Request Module.
## deleteOrderReturnRequests(ids, sharedContext?): Promise\
This method deletes order return requests by their IDs.
### Example
```ts theme={null}
await orderReturnRequestModuleService.deleteOrderReturnRequests(["oretreq_123", "oretreq_321"])
```
### Parameters
The IDs of the order return requests.
A context used to share resources, such as transaction manager, between the application and the module.
### Returns
Resolves when the order return requests are deleted successfully.
## deleteOrderReturnRequests(id, sharedContext?): Promise\
This method deletes an order return request by its ID.
### Example
```ts theme={null}
await orderReturnRequestModuleService.deleteOrderReturnRequests("oretreq_123")
```
### Parameters
The ID of the order return request.
A context used to share resources, such as transaction manager, between the application and the module.
### Returns
Resolves when the order return request is deleted successfully.
***
# retrieveOrderReturnRequest
This section provides a reference to the `retrieveOrderReturnRequest` method. This belongs to the Order Return Request Module.
This method retrieves an order return request by its ID.
## Example
```ts theme={null}
const returnRequest = await orderReturnRequestModuleService.retrieveOrderReturnRequest("oretreq_123")
```
To retrieve with line items:
```ts theme={null}
const returnRequest = await orderReturnRequestModuleService.retrieveOrderReturnRequest(
"oretreq_123",
{
relations: ["line_items"],
}
)
```
## Parameters
The ID of the order return request.
The configurations determining how the order return request is retrieved.
An array of strings, each being attribute names of the entity to retrieve in the result.
A number indicating the number of records to skip before retrieving the results.
A number indicating the number of records to return in the result.
An array of strings, each being relation names of the entity to retrieve in the result. For example, `["line_items"]`.
An object used to specify how to sort the returned records.
A boolean indicating whether deleted records should also be retrieved as part of the result.
A context used to share resources, such as transaction manager, between the application and the module.
## Returns
The retrieved order return request.
The ID of the order return request.
The ID of the customer who created the return request.
The customer's note explaining the reason for the return.
The ID of the shipping option for returning the items.
The ID of the vendor member who reviewed the request.
The vendor's note regarding the return request.
The date when the vendor reviewed the request.
The ID of the admin user who reviewed the escalated request.
The admin's note regarding the return request.
The date when the admin reviewed the request.
The status of the return request.
The associated line items (if included in relations).
The created date of the order return request.
The updated date of the order return request.
***
# listOrderReturnRequests
This section provides a reference to the `listOrderReturnRequests` method. This belongs to the Order Return Request Module.
This method retrieves a paginated list of order return requests based on optional filters and configuration.
## Example
To retrieve pending return requests:
```ts theme={null}
const returnRequests = await orderReturnRequestModuleService.listOrderReturnRequests({
status: "pending",
})
```
To retrieve return requests for a specific customer:
```ts theme={null}
const returnRequests = await orderReturnRequestModuleService.listOrderReturnRequests({
customer_id: "cus_123",
})
```
By default, only the first `15` records are retrieved. You can control pagination:
```ts theme={null}
const returnRequests = await orderReturnRequestModuleService.listOrderReturnRequests(
{
status: "pending",
},
{
take: 20,
skip: 2,
relations: ["line_items"],
}
)
```
## Parameters
The filters to apply on the retrieved order return requests.
The IDs to filter the order return requests by.
Filter order return requests by their customer IDs.
Filter order return requests by their status.
Filter order return requests by their vendor reviewer IDs.
Filter order return requests by their admin reviewer IDs.
The configurations determining how the order return request is retrieved.
An array of strings, each being attribute names of the entity to retrieve in the result.
A number indicating the number of records to skip before retrieving the results.
A number indicating the number of records to return in the result.
An array of strings, each being relation names of the entity to retrieve in the result. For example, `["line_items"]`.
An object used to specify how to sort the returned records.
A boolean indicating whether deleted records should also be retrieved as part of the result.
A context used to share resources, such as transaction manager, between the application and the module.
## Returns
The list of order return requests.
***
# listAndCountOrderReturnRequests
This section provides a reference to the `listAndCountOrderReturnRequests` method. This belongs to the Order Return Request Module.
This method retrieves a paginated list of order return requests along with the total count of available order return requests satisfying the provided filters.
## Example
```ts theme={null}
const [returnRequests, count] = await orderReturnRequestModuleService.listAndCountOrderReturnRequests({
status: "pending",
})
```
## Parameters
The filters to apply on the retrieved order return requests.
The IDs to filter the order return requests by.
Filter order return requests by their customer IDs.
Filter order return requests by their status.
Filter order return requests by their vendor reviewer IDs.
Filter order return requests by their admin reviewer IDs.
The configurations determining how the order return request is retrieved.
An array of strings, each being attribute names of the entity to retrieve in the result.
A number indicating the number of records to skip before retrieving the results.
A number indicating the number of records to return in the result.
An array of strings, each being relation names of the entity to retrieve in the result.
An object used to specify how to sort the returned records.
A boolean indicating whether deleted records should also be retrieved as part of the result.
A context used to share resources, such as transaction manager, between the application and the module.
## Returns
The list of order return requests along with their total count.
***
# softDeleteOrderReturnRequests
This section provides a reference to the `softDeleteOrderReturnRequests` method. This belongs to the Order Return Request Module.
This method soft deletes order return requests by their IDs.
## Example
```ts theme={null}
await orderReturnRequestModuleService.softDeleteOrderReturnRequests([
"oretreq_123",
"oretreq_321",
])
```
## Parameters
The IDs of the order return requests.
An object that is used to specify an entity's related entities that should be soft-deleted when the main entity is soft-deleted.
A context used to share resources, such as transaction manager, between the application and the module.
## Returns
An object that includes the IDs of related records that were also soft deleted. If there are no related records, the promise resolves to `void`.
***
# restoreOrderReturnRequests
This section provides a reference to the `restoreOrderReturnRequests` method. This belongs to the Order Return Request Module.
This method restores soft deleted order return requests by their IDs.
## Example
```ts theme={null}
await orderReturnRequestModuleService.restoreOrderReturnRequests(["oretreq_123", "oretreq_321"])
```
## Parameters
The IDs of the order return requests.
Configurations determining which relations to restore along with each of the order return request.
A context used to share resources, such as transaction manager, between the application and the module.
## Returns
An object that includes the IDs of related records that were restored. If there are no related records restored, the promise resolves to `void`.
***
# createOrderReturnRequestLineItems
This section provides a reference to the `createOrderReturnRequestLineItems` method. This belongs to the Order Return Request Module.
## createOrderReturnRequestLineItems(data, sharedContext?): Promise\
This method creates order return request line items.
### Example
```ts theme={null}
const lineItems = await orderReturnRequestModuleService.createOrderReturnRequestLineItems([
{
return_request_id: "oretreq_123",
line_item_id: "ordli_123",
quantity: 2,
reason_id: "reason_123",
},
])
```
### Parameters
The order return request line items to be created.
The ID of the return request this line item belongs to.
The ID of the original order line item being returned.
The quantity of the item to be returned.
The ID of the return reason.
A context used to share resources, such as transaction manager, between the application and the module.
### Returns
The created order return request line items.
***
# updateOrderReturnRequestLineItems
This section provides a reference to the `updateOrderReturnRequestLineItems` method. This belongs to the Order Return Request Module.
## updateOrderReturnRequestLineItems(id, data, sharedContext?): Promise\
This method updates an existing order return request line item.
### Example
```ts theme={null}
const lineItem = await orderReturnRequestModuleService.updateOrderReturnRequestLineItems("oretreqli_123", {
quantity: 1,
})
```
### Parameters
The ID of the order return request line item.
The attributes to update in the order return request line item.
The ID of the original order line item being returned.
The quantity of the item to be returned.
The ID of the return reason.
A context used to share resources, such as transaction manager, between the application and the module.
### Returns
The updated order return request line item.
The ID of the order return request line item.
The ID of the original order line item being returned.
The quantity of the item to be returned.
The ID of the return reason.
The created date of the line item.
The updated date of the line item.
***
# deleteOrderReturnRequestLineItems
This section provides a reference to the `deleteOrderReturnRequestLineItems` method. This belongs to the Order Return Request Module.
## deleteOrderReturnRequestLineItems(ids, sharedContext?): Promise\
This method deletes order return request line items by their IDs.
### Example
```ts theme={null}
await orderReturnRequestModuleService.deleteOrderReturnRequestLineItems(["oretreqli_123", "oretreqli_321"])
```
### Parameters
The IDs of the order return request line items.
A context used to share resources, such as transaction manager, between the application and the module.
### Returns
Resolves when the order return request line items are deleted successfully.
***
# retrieveOrderReturnRequestLineItem
This section provides a reference to the `retrieveOrderReturnRequestLineItem` method. This belongs to the Order Return Request Module.
This method retrieves an order return request line item by its ID.
## Example
```ts theme={null}
const lineItem = await orderReturnRequestModuleService.retrieveOrderReturnRequestLineItem("oretreqli_123")
```
To retrieve with the return request:
```ts theme={null}
const lineItem = await orderReturnRequestModuleService.retrieveOrderReturnRequestLineItem(
"oretreqli_123",
{
relations: ["return_request"],
}
)
```
## Parameters
The ID of the order return request line item.
The configurations determining how the order return request line item is retrieved.
An array of strings, each being attribute names of the entity to retrieve in the result.
An array of strings, each being relation names of the entity to retrieve in the result. For example, `["return_request"]`.
An object used to specify how to sort the returned records.
A boolean indicating whether deleted records should also be retrieved as part of the result.
A context used to share resources, such as transaction manager, between the application and the module.
## Returns
The retrieved order return request line item.
The ID of the order return request line item.
The ID of the original order line item being returned.
The quantity of the item to be returned.
The ID of the return reason.
The created date of the line item.
The updated date of the line item.
The associated return request (if included in relations).
***
# listOrderReturnRequestLineItems
This section provides a reference to the `listOrderReturnRequestLineItems` method. This belongs to the Order Return Request Module.
This method retrieves a paginated list of order return request line items based on optional filters and configuration.
## Example
To retrieve line items for a specific return request:
```ts theme={null}
const lineItems = await orderReturnRequestModuleService.listOrderReturnRequestLineItems({
return_request_id: "oretreq_123",
})
```
To retrieve line items for specific order line items:
```ts theme={null}
const lineItems = await orderReturnRequestModuleService.listOrderReturnRequestLineItems({
line_item_id: ["ordli_123", "ordli_456"],
})
```
## Parameters
The filters to apply on the retrieved order return request line items.
The IDs to filter the order return request line items by.
Filter line items by their return request IDs.
Filter line items by their order line item IDs.
Filter line items by their return reason IDs.
The configurations determining how the order return request line item is retrieved.
An array of strings, each being attribute names of the entity to retrieve in the result.
A number indicating the number of records to skip before retrieving the results.
A number indicating the number of records to return in the result.
An array of strings, each being relation names of the entity to retrieve in the result.
An object used to specify how to sort the returned records.
A boolean indicating whether deleted records should also be retrieved as part of the result.
A context used to share resources, such as transaction manager, between the application and the module.
## Returns
The list of order return request line items.
***
# listAndCountOrderReturnRequestLineItems
This section provides a reference to the `listAndCountOrderReturnRequestLineItems` method. This belongs to the Order Return Request Module.
This method retrieves a paginated list of order return request line items along with the total count of available order return request line items satisfying the provided filters.
## Example
```ts theme={null}
const [lineItems, count] = await orderReturnRequestModuleService.listAndCountOrderReturnRequestLineItems({
return_request_id: "oretreq_123",
})
```
## Parameters
The filters to apply on the retrieved order return request line items.
The IDs to filter the order return request line items by.
Filter line items by their return request IDs.
Filter line items by their order line item IDs.
Filter line items by their return reason IDs.
The configurations determining how the order return request line item is retrieved.
An array of strings, each being attribute names of the entity to retrieve in the result.
A number indicating the number of records to skip before retrieving the results.
A number indicating the number of records to return in the result.
An array of strings, each being relation names of the entity to retrieve in the result.
An object used to specify how to sort the returned records.
A boolean indicating whether deleted records should also be retrieved as part of the result.
A context used to share resources, such as transaction manager, between the application and the module.
## Returns
The list of order return request line items along with their total count.
***
# softDeleteOrderReturnRequestLineItems
This section provides a reference to the `softDeleteOrderReturnRequestLineItems` method. This belongs to the Order Return Request Module.
This method soft deletes order return request line items by their IDs.
## Example
```ts theme={null}
await orderReturnRequestModuleService.softDeleteOrderReturnRequestLineItems([
"oretreqli_123",
"oretreqli_321",
])
```
## Parameters
The IDs of the order return request line items.
An object that is used to specify an entity's related entities that should be soft-deleted when the main entity is soft-deleted.
A context used to share resources, such as transaction manager, between the application and the module.
## Returns
An object that includes the IDs of related records that were also soft deleted. If there are no related records, the promise resolves to `void`.
***
# restoreOrderReturnRequestLineItems
This section provides a reference to the `restoreOrderReturnRequestLineItems` method. This belongs to the Order Return Request Module.
This method restores soft deleted order return request line items by their IDs.
## Example
```ts theme={null}
await orderReturnRequestModuleService.restoreOrderReturnRequestLineItems(["oretreqli_123", "oretreqli_321"])
```
## Parameters
The IDs of the order return request line items.
Configurations determining which relations to restore along with each of the order return request line item.
A context used to share resources, such as transaction manager, between the application and the module.
## Returns
An object that includes the IDs of related records that were restored. If there are no related records restored, the promise resolves to `void`.
# Request Module Data Models
Source: https://docs.mercurjs.com/product/modules/requests/requests/request-data-model-reference
Reference documentation for the Request Module data models
## Relations Overview
| Relationship | Type | Description |
| -------------------------------- | ------------------- | ----------------------------------------- |
| Request → Member (Seller Module) | Read-only - has one | A request is submitted by a seller member |
| Request → User (User Module) | Read-only - has one | A request is reviewed by an admin user |
## Data Models
* [Request](#request)
## Request
This documentation provides a reference to the Request data model. It belongs to the Request Module.
[View source code](https://github.com/mercurjs/mercur/blob/main/packages/modules/requests/src/modules/requests/models/request.ts)
| Field | Type | Description |
| --------------- | ------------------------------------------------------------ | --------------------------------------------------------------------------------------------------------------------------------------- |
| `id` | `PrimaryKeyModifier` | The ID of the request. |
| `type` | `TextProperty` | The type of the request. Can be `product`, `product_collection`, `product_type`, `product_category`, `product_tag`, or `review_remove`. |
| `data` | `JSONProperty` | The request payload containing the proposed entity data. |
| `submitter_id` | `TextProperty` | The ID of the seller member who submitted the request. |
| `reviewer_id` | `TextProperty` | The ID of the admin user who reviewed the request. |
| `reviewer_note` | `TextProperty` | The admin's note explaining their decision. |
| `status` | `EnumProperty<["draft", "pending", "accepted", "rejected"]>` | The status of the request. Defaults to `pending`. |
# Request Module
Source: https://docs.mercurjs.com/product/modules/requests/requests/requests-concept
Learn about the Request Module and how to use it in your application
# Request Module
In this section of the documentation, you will find resources to learn more about the Request Module and how to use it in your application.
Mercur has seller request and approval features available out-of-the-box through the Request Module. A [module](https://docs.medusajs.com/learn/fundamentals/modules) is a standalone package that provides features for a single domain. Each of Mercur's marketplace features are placed in custom modules, such as this Request Module.
Learn more about why modules are isolated in [this documentation](https://docs.medusajs.com/learn/fundamentals/modules/isolation).
## Request Features
* **Seller Proposals**: Allow sellers to propose new marketplace resources (products, categories, collections, types, tags).
* **Admin Approval Workflow**: Require admin review and approval before seller-proposed resources go live.
* **Request Types**: Support multiple request types for different marketplace entities.
* **Review Notes**: Store admin explanations for approval or rejection decisions.
* **Status Tracking**: Track requests through draft, pending, accepted, and rejected statuses.
* **Automatic Resource Creation**: Automatically create the proposed resource when a request is accepted.
***
## How to Use the Request Module
In your Medusa application, you build flows around Commerce Modules. A flow is built as a [Workflow](https://docs.medusajs.com/learn/fundamentals/workflows), which is a special function composed of a series of steps that guarantees data consistency and reliable roll-back mechanism.
You can build custom workflows and steps. Mercur provides pre-built workflows for request operations in the `@mercurjs/requests` package.
For example, the `acceptProductRequestWorkflow`:
```ts title="src/workflows/requests/accept-product-request.ts" theme={null}
import { WorkflowResponse, createWorkflow } from "@medusajs/workflows-sdk"
import { AcceptRequestDTO, updateProductStatusStep } from "@mercurjs/framework"
import { updateRequestWorkflow } from "./update-request"
import { ProductStatus } from "@medusajs/framework/utils"
export const acceptProductRequestWorkflow = createWorkflow(
"accept-product-request",
function (input: AcceptRequestDTO) {
// Update the product status to published
const product = updateProductStatusStep({
id: input.data.product_id,
status: ProductStatus.PUBLISHED,
})
// Update the request status to accepted
updateRequestWorkflow.runAsStep({ input })
return new WorkflowResponse(product)
}
)
```
You can then execute the workflow in your custom API routes, scheduled jobs, or subscribers:
### API Route
```ts title="src/api/admin/requests/route.ts" theme={null}
import { MedusaRequest, MedusaResponse } from '@medusajs/framework'
import { ContainerRegistrationKeys } from '@medusajs/framework/utils'
export async function GET(
req: MedusaRequest,
res: MedusaResponse
): Promise {
const query = req.scope.resolve(ContainerRegistrationKeys.QUERY)
const { data: requests, metadata } = await query.graph({
entity: 'request',
fields: req.queryConfig.fields,
filters: {
...req.filterableFields,
status: req.filterableFields.status || { $ne: 'draft' }
},
pagination: req.queryConfig.pagination
})
res.json({
requests,
count: metadata?.count,
offset: metadata?.skip,
limit: metadata?.take
})
}
```
### Subscriber
```ts title="src/subscribers/product-request-to-create.ts" theme={null}
import { SubscriberArgs, SubscriberConfig } from "@medusajs/framework"
import {
CreateRequestDTO,
ProductRequestUpdatedEvent,
} from "@mercurjs/framework"
import { createProductRequestWorkflow } from "../workflows"
export default async function productRequestToCreateHandler({
event,
container,
}: SubscriberArgs<{
data: CreateRequestDTO
seller_id: string
}>) {
const input = event.data
await createProductRequestWorkflow.run({
container,
input,
})
}
export const config: SubscriberConfig = {
event: ProductRequestUpdatedEvent.TO_CREATE,
context: {
subscriberId: "product-request-to-create",
},
}
```
Learn more about workflows in [this documentation](https://docs.medusajs.com/learn/fundamentals/workflows).
***
# Concepts
In this document, you'll learn about the main concepts related to requests in Mercur.
## Request
A request represents a seller's proposal to create a new marketplace resource that requires admin approval. It is represented by the [Request data model](../data-model/request-module-data-reference#request).
A request holds information about:
* Request type (what kind of resource is being proposed)
* Request data (the payload containing the proposed resource details)
* Submitter ID (the seller member who created the request)
* Reviewer ID (the admin who reviewed the request)
* Reviewer note (admin's explanation of their decision)
* Status (current state in the approval workflow)
This enables controlled marketplace growth where admins can review and approve seller contributions.
***
## Request Types
The Request Module supports multiple request types for different marketplace entities:
### product
Seller proposes a new product to be added to the marketplace catalog.
**Data payload includes:**
* Product title, description, handle
* Product type, collection, category
* Variants, options, pricing
* Images and metadata
### product\_category
Seller proposes a new product category.
**Data payload includes:**
* Category name, description
* Parent category ID (for hierarchy)
* Handle for URL
### product\_collection
Seller proposes a new product collection.
**Data payload includes:**
* Collection title, handle
* Description and metadata
### product\_type
Seller proposes a new product type classification.
**Data payload includes:**
* Type value (e.g., "Electronics", "Apparel")
### product\_tag
Seller proposes a new product tag.
**Data payload includes:**
* Tag value (e.g., "Eco-Friendly", "Sale")
### review\_remove
Seller requests removal of an unfair or policy-violating review.
**Data payload includes:**
* Review ID to be removed
* Reason for removal request
### product\_update
Seller proposes updates to an existing product that requires approval.
**Data payload includes:**
* Product ID
* Fields to be updated
* New values
***
## Request Status Workflow
Requests follow a four-state workflow:
### draft
**Initial state** for requests being prepared.
* Not yet submitted for review
* Can be edited or deleted
* Not visible to admins
### pending
**Submitted for review**.
* Awaiting admin decision
* Visible in admin request queue
* Cannot be edited by seller
### accepted
**Approved by admin**.
* Resource is automatically created from request data
* Request marked as accepted
* Seller notified of approval
* Resource goes live in marketplace
### rejected
**Denied by admin**.
* Resource is not created
* Admin provides explanation in `reviewer_note`
* Seller notified of rejection
* Request archived
***
## Automatic Resource Creation
When a request is accepted, the appropriate workflow automatically creates the resource:
**Product Request → Product**
```ts theme={null}
acceptProductRequestWorkflow
→ updateProductStatusStep (set to PUBLISHED)
→ updateRequestWorkflow (mark as accepted)
```
**Category Request → ProductCategory**
```ts theme={null}
acceptProductCategoryRequestWorkflow
→ createProductCategoriesStep
→ updateRequestWorkflow
```
**Collection Request → ProductCollection**
```ts theme={null}
acceptProductCollectionRequestWorkflow
→ createCollectionsStep
→ updateRequestWorkflow
```
This ensures consistency between the request approval and resource creation.
***
## Event-Driven Architecture
The Request Module uses an event-driven pattern for resource creation:
1. **Request Created**: Seller creates request with status "pending"
2. **Admin Reviews**: Admin accepts the request
3. **Event Emitted**: `ProductRequestUpdatedEvent.TO_CREATE` emitted
4. **Subscriber Triggered**: `product-request-to-create` subscriber executes
5. **Workflow Runs**: `createProductRequestWorkflow` creates the resource
6. **Request Updated**: Request status updated to "accepted"
This decouples request approval from resource creation, allowing for flexible workflows and error handling.
***
## Configuration Integration
The Request Module integrates with the Configuration Module to control availability:
```ts theme={null}
const isEnabled = await checkConfigurationRule(
req.scope,
"product_request_enabled"
)
if (!isEnabled) {
return res.status(403).json({
message: "Product request functionality is disabled"
})
}
```
Marketplace admins can enable or disable the request system globally through configuration rules.
***
## Notification Integration
The Request Module triggers notifications for key events:
**For Admins:**
* New request created → Admin notification in feed
**For Sellers:**
* Request accepted → Success notification with resource details
* Request rejected → Rejection notification with admin's reason
This keeps both parties informed throughout the approval process.
***
## Use Cases
**1. Curated Marketplace**
Sellers propose new products; admins review for quality, accuracy, and policy compliance before approval.
**2. Category Expansion**
Sellers request new product categories when existing ones don't fit their products; admins approve to grow the catalog.
**3. Tag Management**
Sellers propose new tags for better product organization; admins approve to maintain tag consistency.
**4. Review Moderation**
Sellers request removal of unfair reviews; admins review both sides and make final decision.
**5. Product Updates**
In strict marketplaces, even product edits require approval to maintain quality standards.
**6. Seller Onboarding**
New seller registration goes through request approval before account activation.
# Request Module Links
Source: https://docs.mercurjs.com/product/modules/requests/requests/requests-links
Module links for the Request Module
# Links between Request Module and Other Modules
This document showcases the module links defined between the Request Module and other Commerce Modules.
## Summary
The Request Module has the following links to other modules:
| First Data Model | Second Data Model | Type | Description |
| ---------------- | ----------------- | -------------------- | --------------------------------------------------------------------------- |
| Seller | Request | Stored - one-to-many | Associates a seller with their submitted requests for marketplace resources |
***
## Seller Module
Mercur defines a link between the Seller Module's `Seller` data model and the Request Module's `Request` data model. This allows sellers to submit requests for creating new marketplace resources (products, categories, collections, etc.) that require admin approval.
### Retrieve with Query
To retrieve the requests of a seller with Query, pass `request.*` in `fields`:
```ts theme={null}
const { data: sellers } = await query.graph({
entity: "seller",
fields: [
"*",
"request.*",
],
})
// sellers[0].request
```
```ts theme={null}
import { useQueryGraphStep } from "@medusajs/medusa/core-flows"
// ...
const { data: sellers } = useQueryGraphStep({
entity: "seller",
fields: [
"*",
"request.*",
],
})
// sellers[0].request
```
### Manage with Link
To manage the requests of a seller, use Link:
```ts theme={null}
// ...
await link.create({
seller: {
seller_id: "sel_123",
},
request: {
request_id: "req_123",
},
})
```
```ts theme={null}
import { createRemoteLinkStep } from "@medusajs/medusa/core-flows"
// ...
createRemoteLinkStep({
seller: {
seller_id: "sel_123",
},
request: {
request_id: "req_123",
},
})
```
# Request Module Service Reference
Source: https://docs.mercurjs.com/product/modules/requests/requests/requests-services
Reference documentation for the Request Module service methods
# IRequestModuleService Reference
This section of the documentation provides a reference to the `IRequestModuleService` interface's methods. This is the interface developers use to use the functionalities provided by the Request Module.
You should only use the methods in this reference when implementing complex customizations. For common cases, check out available workflows instead.
The main service interface for the Request Module.
## Methods
* [createRequests](#createrequests)
* [updateRequests](#updaterequests)
* [deleteRequests](#deleterequests)
* [retrieveRequest](#retrieverequest)
* [listRequests](#listrequests)
* [listAndCountRequests](#listandcountrequests)
* [softDeleteRequests](#softdeleterequests)
* [restoreRequests](#restorerequests)
***
# createRequests
This section provides a reference to the `createRequests` method. This belongs to the Request Module.
## createRequests(data, sharedContext?): Promise\
This method creates requests.
### Example
```ts theme={null}
const requests = await requestModuleService.createRequests([
{
type: "product",
submitter_id: "mem_123",
data: {
title: "New Product",
description: "Product description",
},
status: "pending",
},
{
type: "product_category",
submitter_id: "mem_123",
data: {
name: "Electronics",
parent_category_id: null,
},
},
])
```
### Parameters
The requests to be created.
The type of the request. Can be `product`, `product_collection`, `product_type`, `product_category`, `product_tag`, or `review_remove`.
The ID of the seller member who submitted the request.
The request payload containing the proposed entity data.
The status of the request.
The ID of the admin user who reviewed the request.
The admin's note explaining their decision.
A context used to share resources, such as transaction manager, between the application and the module.
### Returns
The created requests.
## createRequests(data, sharedContext?): Promise\
This method creates a request.
### Example
```ts theme={null}
const request = await requestModuleService.createRequests({
type: "product",
submitter_id: "mem_123",
data: {
title: "New Product",
description: "Product description",
},
status: "pending",
})
```
### Parameters
The request to be created.
The type of the request. Can be `product`, `product_collection`, `product_type`, `product_category`, `product_tag`, or `review_remove`.
The ID of the seller member who submitted the request.
The request payload containing the proposed entity data.
The status of the request.
The ID of the admin user who reviewed the request.
The admin's note explaining their decision.
A context used to share resources, such as transaction manager, between the application and the module.
### Returns
The created request.
***
# updateRequests
This section provides a reference to the `updateRequests` method. This belongs to the Request Module.
## updateRequests(id, data, sharedContext?): Promise\
This method updates an existing request.
### Example
Accepting a request:
```ts theme={null}
const request = await requestModuleService.updateRequests("req_123", {
reviewer_id: "user_123",
reviewer_note: "Looks good, approved",
status: "accepted",
})
```
Rejecting a request:
```ts theme={null}
const request = await requestModuleService.updateRequests("req_123", {
reviewer_id: "user_123",
reviewer_note: "Duplicate product",
status: "rejected",
})
```
### Parameters
The ID of the request.
The attributes to update in the request.
The ID of the admin user who reviewed the request.
The admin's note explaining their decision.
The status of the request.
A context used to share resources, such as transaction manager, between the application and the module.
### Returns
The updated request.
The ID of the request.
The type of the request.
The request payload containing the proposed entity data.
The ID of the seller member who submitted the request.
The ID of the admin user who reviewed the request.
The admin's note explaining their decision.
The status of the request.
The created date of the request.
The updated date of the request.
***
# deleteRequests
This section provides a reference to the `deleteRequests` method. This belongs to the Request Module.
## deleteRequests(ids, sharedContext?): Promise\
This method deletes requests by their IDs.
### Example
```ts theme={null}
await requestModuleService.deleteRequests(["req_123", "req_321"])
```
### Parameters
The IDs of the requests.
A context used to share resources, such as transaction manager, between the application and the module.
### Returns
Resolves when the requests are deleted successfully.
## deleteRequests(id, sharedContext?): Promise\
This method deletes a request by its ID.
### Example
```ts theme={null}
await requestModuleService.deleteRequests("req_123")
```
### Parameters
The ID of the request.
A context used to share resources, such as transaction manager, between the application and the module.
### Returns
Resolves when the request is deleted successfully.
***
# retrieveRequest
This section provides a reference to the `retrieveRequest` method. This belongs to the Request Module.
This method retrieves a request by its ID.
## Example
```ts theme={null}
const request = await requestModuleService.retrieveRequest("req_123")
```
## Parameters
The ID of the request.
The configurations determining how the request is retrieved.
An array of strings, each being attribute names of the entity to retrieve in the result.
A number indicating the number of records to skip before retrieving the results.
A number indicating the number of records to return in the result.
An array of strings, each being relation names of the entity to retrieve in the result. Use Query to retrieve linked submitter or reviewer data.
An object used to specify how to sort the returned records.
A boolean indicating whether deleted records should also be retrieved as part of the result.
A context used to share resources, such as transaction manager, between the application and the module.
## Returns
The retrieved request.
The ID of the request.
The type of the request.
The request payload containing the proposed entity data.
The ID of the seller member who submitted the request.
The ID of the admin user who reviewed the request.
The admin's note explaining their decision.
The status of the request.
The created date of the request.
The updated date of the request.
***
# listRequests
This section provides a reference to the `listRequests` method. This belongs to the Request Module.
This method retrieves a paginated list of requests based on optional filters and configuration.
## Example
To retrieve pending requests:
```ts theme={null}
const requests = await requestModuleService.listRequests({
status: "pending",
})
```
To retrieve requests by type:
```ts theme={null}
const requests = await requestModuleService.listRequests({
type: "product",
})
```
To retrieve requests from a specific seller:
```ts theme={null}
const requests = await requestModuleService.listRequests({
submitter_id: "mem_123",
})
```
By default, only the first `15` records are retrieved. You can control pagination:
```ts theme={null}
const requests = await requestModuleService.listRequests(
{
status: "pending",
},
{
take: 20,
skip: 2,
}
)
```
## Parameters
The filters to apply on the retrieved requests.
The IDs to filter the requests by.
Filter requests by their types.
Filter requests by their submitter IDs.
Filter requests by their reviewer IDs.
Filter requests by their status.
The configurations determining how the request is retrieved.
An array of strings, each being attribute names of the entity to retrieve in the result.
A number indicating the number of records to skip before retrieving the results.
A number indicating the number of records to return in the result.
An array of strings, each being relation names of the entity to retrieve in the result.
An object used to specify how to sort the returned records.
A boolean indicating whether deleted records should also be retrieved as part of the result.
A context used to share resources, such as transaction manager, between the application and the module.
## Returns
The list of requests.
***
# listAndCountRequests
This section provides a reference to the `listAndCountRequests` method. This belongs to the Request Module.
This method retrieves a paginated list of requests along with the total count of available requests satisfying the provided filters.
## Example
To retrieve pending requests with count:
```ts theme={null}
const [requests, count] = await requestModuleService.listAndCountRequests({
status: "pending",
})
```
By default, only the first `15` records are retrieved. You can control pagination:
```ts theme={null}
const [requests, count] = await requestModuleService.listAndCountRequests(
{
type: "product",
status: "pending",
},
{
take: 20,
skip: 2,
}
)
```
## Parameters
The filters to apply on the retrieved requests.
The IDs to filter the requests by.
Filter requests by their types.
Filter requests by their submitter IDs.
Filter requests by their reviewer IDs.
Filter requests by their status.
The configurations determining how the request is retrieved.
An array of strings, each being attribute names of the entity to retrieve in the result.
A number indicating the number of records to skip before retrieving the results.
A number indicating the number of records to return in the result.
An array of strings, each being relation names of the entity to retrieve in the result.
An object used to specify how to sort the returned records.
A boolean indicating whether deleted records should also be retrieved as part of the result.
A context used to share resources, such as transaction manager, between the application and the module.
## Returns
The list of requests along with their total count.
***
# softDeleteRequests
This section provides a reference to the `softDeleteRequests` method. This belongs to the Request Module.
This method soft deletes requests by their IDs.
## Example
```ts theme={null}
await requestModuleService.softDeleteRequests([
"req_123",
"req_321",
])
```
## Parameters
The IDs of the requests.
An object that is used to specify an entity's related entities that should be soft-deleted when the main entity is soft-deleted.
A context used to share resources, such as transaction manager, between the application and the module.
## Returns
An object that includes the IDs of related records that were also soft deleted. If there are no related records, the promise resolves to `void`.
***
# restoreRequests
This section provides a reference to the `restoreRequests` method. This belongs to the Request Module.
This method restores soft deleted requests by their IDs.
## Example
```ts theme={null}
await requestModuleService.restoreRequests(["req_123", "req_321"])
```
## Parameters
The IDs of the requests.
Configurations determining which relations to restore along with each of the request.
A context used to share resources, such as transaction manager, between the application and the module.
## Returns
An object that includes the IDs of related records that were restored. If there are no related records restored, the promise resolves to `void`.
# Review Module Data Models
Source: https://docs.mercurjs.com/product/modules/reviews/reviews/review-data-model-reference
Reference documentation for the Review Module data models
## Relations Overview
| Relationship | Type | Description |
| ----------------------------------- | ------------------- | --------------------------------- |
| Review → Product (Product Module) | Read-only - has one | A review can reference a product |
| Review → Seller (Seller Module) | Read-only - has one | A review can reference a seller |
| Review → Customer (Customer Module) | Read-only - has one | A review is created by a customer |
## Data Models
* [Review](#review)
## Review
This documentation provides a reference to the Review data model. It belongs to the Review Module.
[View source code](https://github.com/mercurjs/mercur/blob/main/packages/modules/reviews/src/modules/reviews/models/review.ts)
| Field | Type | Description |
| --------------- | ------------------------------------- | ---------------------------------------------------------------- |
| `id` | `PrimaryKeyModifier` | The ID of the review. |
| `reference` | `EnumProperty<["product", "seller"]>` | The type of entity being reviewed. Can be `product` or `seller`. |
| `rating` | `NumberProperty` | The rating value of the review (1-5). |
| `customer_note` | `TextProperty` | The customer's written review comment. |
| `seller_note` | `TextProperty` | The seller's response to the review. |
# Review Module Links
Source: https://docs.mercurjs.com/product/modules/reviews/reviews/review-links
Module links for the Review Module
# Links between Review Module and Other Modules
This document showcases the module links defined between the Review Module and other Commerce Modules.
## Summary
The Review Module has the following links to other modules:
| First Data Model | Second Data Model | Type | Description |
| ---------------- | ----------------- | -------------------- | -------------------------------------------------- |
| Customer | Review | Stored - one-to-many | Associates a customer with their submitted reviews |
| Order | Review | Stored - one-to-many | Associates an order with its reviews |
| Product | Review | Stored - one-to-many | Associates a product with its reviews |
| Seller | Review | Stored - one-to-many | Associates a seller with reviews about them |
***
## Customer Module
Mercur defines a link between the Customer Module's `Customer` data model and the Review Module's `Review` data model. This allows tracking all reviews submitted by a specific customer.
### Retrieve with Query
To retrieve the reviews of a customer with Query, pass `review.*` in `fields`:
```ts theme={null}
const { data: customers } = await query.graph({
entity: "customer",
fields: [
"*",
"review.*",
],
})
// customers[0].review
```
```ts theme={null}
import { useQueryGraphStep } from "@medusajs/medusa/core-flows"
// ...
const { data: customers } = useQueryGraphStep({
entity: "customer",
fields: [
"*",
"review.*",
],
})
// customers[0].review
```
### Manage with Link
To manage the reviews of a customer, use Link:
```ts theme={null}
import { Modules } from "@medusajs/framework/utils"
// ...
await link.create({
[Modules.CUSTOMER]: {
customer_id: "cus_123",
},
review: {
review_id: "rev_123",
},
})
```
```ts theme={null}
import { createRemoteLinkStep } from "@medusajs/medusa/core-flows"
// ...
createRemoteLinkStep({
[Modules.CUSTOMER]: {
customer_id: "cus_123",
},
review: {
review_id: "rev_123",
},
})
```
***
## Order Module
Mercur defines a link between the Order Module's `Order` data model and the Review Module's `Review` data model. This ensures customers can only review products or sellers from orders they've actually purchased.
### Retrieve with Query
To retrieve the reviews of an order with Query, pass `review.*` in `fields`:
```ts theme={null}
const { data: orders } = await query.graph({
entity: "order",
fields: [
"*",
"review.*",
],
})
// orders[0].review
```
```ts theme={null}
import { useQueryGraphStep } from "@medusajs/medusa/core-flows"
// ...
const { data: orders } = useQueryGraphStep({
entity: "order",
fields: [
"*",
"review.*",
],
})
// orders[0].review
```
### Manage with Link
To manage the reviews of an order, use Link:
```ts theme={null}
import { Modules } from "@medusajs/framework/utils"
// ...
await link.create({
[Modules.ORDER]: {
order_id: "ord_123",
},
review: {
review_id: "rev_123",
},
})
```
```ts theme={null}
import { createRemoteLinkStep } from "@medusajs/medusa/core-flows"
// ...
createRemoteLinkStep({
[Modules.ORDER]: {
order_id: "ord_123",
},
review: {
review_id: "rev_123",
},
})
```
***
## Product Module
Mercur defines a link between the Product Module's `Product` data model and the Review Module's `Review` data model. This allows products to have multiple customer reviews for ratings and feedback.
### Retrieve with Query
To retrieve the reviews of a product with Query, pass `review.*` in `fields`:
```ts theme={null}
const { data: products } = await query.graph({
entity: "product",
fields: [
"*",
"review.*",
],
})
// products[0].review
```
```ts theme={null}
import { useQueryGraphStep } from "@medusajs/medusa/core-flows"
// ...
const { data: products } = useQueryGraphStep({
entity: "product",
fields: [
"*",
"review.*",
],
})
// products[0].review
```
### Manage with Link
To manage the reviews of a product, use Link:
```ts theme={null}
import { Modules } from "@medusajs/framework/utils"
// ...
await link.create({
[Modules.PRODUCT]: {
product_id: "prod_123",
},
review: {
review_id: "rev_123",
},
})
```
```ts theme={null}
import { createRemoteLinkStep } from "@medusajs/medusa/core-flows"
// ...
createRemoteLinkStep({
[Modules.PRODUCT]: {
product_id: "prod_123",
},
review: {
review_id: "rev_123",
},
})
```
***
## Seller Module
Mercur defines a link between the Seller Module's `Seller` data model and the Review Module's `Review` data model. This allows sellers to receive customer reviews about their service and performance.
### Retrieve with Query
To retrieve the reviews of a seller with Query, pass `review.*` in `fields`:
```ts theme={null}
const { data: sellers } = await query.graph({
entity: "seller",
fields: [
"*",
"review.*",
],
})
// sellers[0].review
```
```ts theme={null}
import { useQueryGraphStep } from "@medusajs/medusa/core-flows"
// ...
const { data: sellers } = useQueryGraphStep({
entity: "seller",
fields: [
"*",
"review.*",
],
})
// sellers[0].review
```
### Manage with Link
To manage the reviews of a seller, use Link:
```ts theme={null}
// ...
await link.create({
seller: {
seller_id: "sel_123",
},
review: {
review_id: "rev_123",
},
})
```
```ts theme={null}
import { createRemoteLinkStep } from "@medusajs/medusa/core-flows"
// ...
createRemoteLinkStep({
seller: {
seller_id: "sel_123",
},
review: {
review_id: "rev_123",
},
})
```
# Review Module Service Reference
Source: https://docs.mercurjs.com/product/modules/reviews/reviews/review-service
Reference documentation for the Review Module service methods
# IReviewModuleService Reference
This section of the documentation provides a reference to the `IReviewModuleService` interface's methods. This is the interface developers use to use the functionalities provided by the Review Module.
You should only use the methods in this reference when implementing complex customizations. For common cases, check out available workflows instead.
The main service interface for the Review Module.
## Methods
* [createReviews](#createreviews)
* [updateReviews](#updatereviews)
* [deleteReviews](#deletereviews)
* [retrieveReview](#retrievereview)
* [listReviews](#listreviews)
* [listAndCountReviews](#listandcountreviews)
* [softDeleteReviews](#softdeletereviews)
* [restoreReviews](#restorereviews)
***
# createReviews
This section provides a reference to the `createReviews` method. This belongs to the Review Module.
## createReviews(data, sharedContext?): Promise\
This method creates reviews.
### Example
Creating product reviews:
```ts theme={null}
const reviews = await reviewModuleService.createReviews([
{
order_id: "ord_123",
reference: "product",
reference_id: "prod_123",
rating: 5,
customer_note: "Excellent product!",
customer_id: "cus_123",
},
])
```
Creating seller reviews:
```ts theme={null}
const reviews = await reviewModuleService.createReviews([
{
order_id: "ord_123",
reference: "seller",
reference_id: "sel_123",
rating: 4,
customer_note: "Good service",
customer_id: "cus_123",
},
])
```
### Parameters
The reviews to be created.
The ID of the order this review is associated with.
The type of entity being reviewed.
The ID of the entity being reviewed (product ID or seller ID).
The rating value (1-5).
The customer's written review comment.
The ID of the customer who created the review.
A context used to share resources, such as transaction manager, between the application and the module.
### Returns
The created reviews.
## createReviews(data, sharedContext?): Promise\
This method creates a review.
### Example
```ts theme={null}
const review = await reviewModuleService.createReviews({
order_id: "ord_123",
reference: "product",
reference_id: "prod_123",
rating: 5,
customer_note: "Excellent product!",
customer_id: "cus_123",
})
```
### Parameters
The review to be created.
The ID of the order this review is associated with.
The type of entity being reviewed.
The ID of the entity being reviewed (product ID or seller ID).
The rating value (1-5).
The customer's written review comment.
The ID of the customer who created the review.
A context used to share resources, such as transaction manager, between the application and the module.
### Returns
The created review.
***
# updateReviews
This section provides a reference to the `updateReviews` method. This belongs to the Review Module.
## updateReviews(id, data, sharedContext?): Promise\
This method updates an existing review.
### Example
Customer updating their review:
```ts theme={null}
const review = await reviewModuleService.updateReviews("rev_123", {
rating: 4,
customer_note: "Updated my review",
})
```
Seller responding to a review:
```ts theme={null}
const review = await reviewModuleService.updateReviews("rev_123", {
seller_note: "Thank you for your feedback!",
})
```
### Parameters
The ID of the review.
The attributes to update in the review.
The rating value (1-5).
The customer's written review comment.
The seller's response to the review.
A context used to share resources, such as transaction manager, between the application and the module.
### Returns
The updated review.
The ID of the review.
The type of entity being reviewed.
The rating value (1-5).
The customer's written review comment.
The ID of the customer who created the review.
The seller's response to the review.
The created date of the review.
The updated date of the review.
***
# deleteReviews
This section provides a reference to the `deleteReviews` method. This belongs to the Review Module.
## deleteReviews(ids, sharedContext?): Promise\
This method deletes reviews by their IDs.
### Example
```ts theme={null}
await reviewModuleService.deleteReviews(["rev_123", "rev_321"])
```
### Parameters
The IDs of the reviews.
A context used to share resources, such as transaction manager, between the application and the module.
### Returns
Resolves when the reviews are deleted successfully.
## deleteReviews(id, sharedContext?): Promise\
This method deletes a review by its ID.
### Example
```ts theme={null}
await reviewModuleService.deleteReviews("rev_123")
```
### Parameters
The ID of the review.
A context used to share resources, such as transaction manager, between the application and the module.
### Returns
Resolves when the review is deleted successfully.
***
# retrieveReview
This section provides a reference to the `retrieveReview` method. This belongs to the Review Module.
This method retrieves a review by its ID.
## Example
```ts theme={null}
const review = await reviewModuleService.retrieveReview("rev_123")
```
## Parameters
The ID of the review.
The configurations determining how the review is retrieved.
An array of strings, each being attribute names of the entity to retrieve in the result.
A number indicating the number of records to skip before retrieving the results.
A number indicating the number of records to return in the result.
An array of strings, each being relation names of the entity to retrieve in the result. Use Query to retrieve linked customer, product, or seller data.
An object used to specify how to sort the returned records.
A boolean indicating whether deleted records should also be retrieved as part of the result.
A context used to share resources, such as transaction manager, between the application and the module.
## Returns
The retrieved review.
The ID of the review.
The type of entity being reviewed.
The rating value (1-5).
The customer's written review comment.
The ID of the customer who created the review.
The seller's response to the review.
The created date of the review.
The updated date of the review.
***
# listReviews
This section provides a reference to the `listReviews` method. This belongs to the Review Module.
This method retrieves a paginated list of reviews based on optional filters and configuration.
## Example
To retrieve product reviews:
```ts theme={null}
const reviews = await reviewModuleService.listReviews({
reference: "product",
reference_id: "prod_123",
})
```
To retrieve seller reviews:
```ts theme={null}
const reviews = await reviewModuleService.listReviews({
reference: "seller",
reference_id: "sel_123",
})
```
To retrieve a customer's reviews:
```ts theme={null}
const reviews = await reviewModuleService.listReviews({
customer_id: "cus_123",
})
```
By default, only the first `15` records are retrieved. You can control pagination:
```ts theme={null}
const reviews = await reviewModuleService.listReviews(
{
reference: "product",
reference_id: "prod_123",
},
{
take: 20,
skip: 2,
}
)
```
## Parameters
The filters to apply on the retrieved reviews.
The IDs to filter the reviews by.
Filter reviews by their reference type (`product` or `seller`).
Filter reviews by the ID of the entity being reviewed.
Filter reviews by their customer IDs.
Filter reviews by their rating values.
The configurations determining how the review is retrieved.
An array of strings, each being attribute names of the entity to retrieve in the result.
A number indicating the number of records to skip before retrieving the results.
A number indicating the number of records to return in the result.
An array of strings, each being relation names of the entity to retrieve in the result.
An object used to specify how to sort the returned records.
A boolean indicating whether deleted records should also be retrieved as part of the result.
A context used to share resources, such as transaction manager, between the application and the module.
## Returns
The list of reviews.
***
# listAndCountReviews
This section provides a reference to the `listAndCountReviews` method. This belongs to the Review Module.
This method retrieves a paginated list of reviews along with the total count of available reviews satisfying the provided filters.
## Example
To retrieve product reviews with count:
```ts theme={null}
const [reviews, count] = await reviewModuleService.listAndCountReviews({
reference: "product",
reference_id: "prod_123",
})
```
To retrieve 5-star reviews:
```ts theme={null}
const [reviews, count] = await reviewModuleService.listAndCountReviews({
rating: 5,
})
```
By default, only the first `15` records are retrieved. You can control pagination:
```ts theme={null}
const [reviews, count] = await reviewModuleService.listAndCountReviews(
{
customer_id: "cus_123",
},
{
take: 20,
skip: 2,
}
)
```
## Parameters
The filters to apply on the retrieved reviews.
The IDs to filter the reviews by.
Filter reviews by their reference type (`product` or `seller`).
Filter reviews by the ID of the entity being reviewed.
Filter reviews by their customer IDs.
Filter reviews by their rating values.
The configurations determining how the review is retrieved.
An array of strings, each being attribute names of the entity to retrieve in the result.
A number indicating the number of records to skip before retrieving the results.
A number indicating the number of records to return in the result.
An array of strings, each being relation names of the entity to retrieve in the result.
An object used to specify how to sort the returned records.
A boolean indicating whether deleted records should also be retrieved as part of the result.
A context used to share resources, such as transaction manager, between the application and the module.
## Returns
The list of reviews along with their total count.
***
# softDeleteReviews
This section provides a reference to the `softDeleteReviews` method. This belongs to the Review Module.
This method soft deletes reviews by their IDs.
## Example
```ts theme={null}
await reviewModuleService.softDeleteReviews([
"rev_123",
"rev_321",
])
```
## Parameters
The IDs of the reviews.
An object that is used to specify an entity's related entities that should be soft-deleted when the main entity is soft-deleted.
A context used to share resources, such as transaction manager, between the application and the module.
## Returns
An object that includes the IDs of related records that were also soft deleted. If there are no related records, the promise resolves to `void`.
***
# restoreReviews
This section provides a reference to the `restoreReviews` method. This belongs to the Review Module.
This method restores soft deleted reviews by their IDs.
## Example
```ts theme={null}
await reviewModuleService.restoreReviews(["rev_123", "rev_321"])
```
## Parameters
The IDs of the reviews.
Configurations determining which relations to restore along with each of the review.
A context used to share resources, such as transaction manager, between the application and the module.
## Returns
An object that includes the IDs of related records that were restored. If there are no related records restored, the promise resolves to `void`.
# Review Module
Source: https://docs.mercurjs.com/product/modules/reviews/reviews/reviews-concept
Learn about the Review Module and how to use it in your application
# Review Module
In this section of the documentation, you will find resources to learn more about the Review Module and how to use it in your application.
Mercur has product and seller review features available out-of-the-box through the Review Module. A [module](https://docs.medusajs.com/learn/fundamentals/modules) is a standalone package that provides features for a single domain. Each of Mercur's marketplace features are placed in custom modules, such as this Review Module.
Learn more about why modules are isolated in [this documentation](https://docs.medusajs.com/learn/fundamentals/modules/isolation).
## Review Features
* **Dual Review Types**: Support reviews for both products and sellers using a single unified system.
* **Rating System**: 1-5 star rating system for quantitative feedback.
* **Customer Notes**: Allow customers to write detailed review comments.
* **Seller Responses**: Enable sellers to respond to reviews about their products or service.
* **Order Verification**: Link reviews to orders to ensure only verified purchasers can review.
* **Review Removal Requests**: Allow sellers to request removal of unfair reviews through the request system.
***
## How to Use the Review Module
In your Medusa application, you build flows around Commerce Modules. A flow is built as a [Workflow](https://docs.medusajs.com/learn/fundamentals/workflows), which is a special function composed of a series of steps that guarantees data consistency and reliable roll-back mechanism.
You can build custom workflows and steps. Mercur provides pre-built workflows for review operations in the `@mercurjs/reviews` package.
For example, the `createReviewWorkflow`:
```ts title="src/workflows/review/create-review.ts" theme={null}
import { Modules } from "@medusajs/framework/utils"
import {
WorkflowResponse,
createHook,
createWorkflow,
transform,
} from "@medusajs/framework/workflows-sdk"
import {
createRemoteLinkStep,
emitEventStep,
} from "@medusajs/medusa/core-flows"
import { AlgoliaEvents, CreateReviewDTO } from "@mercurjs/framework"
import { REVIEW_MODULE } from "../../../modules/reviews"
import { createReviewStep, validateReviewStep } from "../steps"
const SELLER_MODULE = "seller"
export const createReviewWorkflow = createWorkflow(
{
name: "create-review",
},
function (input: CreateReviewDTO) {
// Validate review data
validateReviewStep(input)
// Create the review
const review = createReviewStep(input)
// Create appropriate module link based on reference type
const link = transform({ input, review }, ({ input, review }) => {
return input.reference === "product"
? [
{
[Modules.PRODUCT]: {
product_id: input.reference_id,
},
[REVIEW_MODULE]: {
review_id: review.id,
},
},
]
: [
{
[SELLER_MODULE]: {
seller_id: input.reference_id,
},
[REVIEW_MODULE]: {
review_id: review.id,
},
},
]
})
createRemoteLinkStep(link)
// Emit event for search engine reindexing
emitEventStep({
eventName: AlgoliaEvents.REVIEW_CHANGED,
data: { review },
})
// Emit workflow hook
const reviewCreatedHook = createHook("reviewCreated", {
review_id: review.id,
})
return new WorkflowResponse(review, {
hooks: [reviewCreatedHook],
})
}
)
```
You can then execute the workflow in your custom API routes:
### API Route
```ts title="src/api/store/reviews/route.ts" theme={null}
import {
AuthenticatedMedusaRequest,
MedusaResponse,
} from "@medusajs/framework"
import { ContainerRegistrationKeys } from "@medusajs/framework/utils"
import { createReviewWorkflow } from "../../../workflows/review/workflows"
export const POST = async (
req: AuthenticatedMedusaRequest,
res: MedusaResponse
) => {
// Execute the createReviewWorkflow
const { result } = await createReviewWorkflow.run({
container: req.scope,
input: {
...req.validatedBody,
customer_id: req.auth_context.actor_id,
},
})
const query = req.scope.resolve(ContainerRegistrationKeys.QUERY)
const {
data: [review],
} = await query.graph({
entity: "review",
fields: req.queryConfig.fields,
filters: {
id: result.id,
},
})
res.status(201).json({ review })
}
```
Learn more about workflows in [this documentation](https://docs.medusajs.com/learn/fundamentals/workflows).
***
# Concepts
In this document, you'll learn about the main concepts related to reviews in Mercur.
## Review
A review represents customer feedback about a product or seller. It is represented by the [Review data model](../data-model/review-module-data-reference#review).
A review holds information about:
* Reference type (product or seller)
* Rating value (1-5)
* Customer note (written review comment)
* Customer ID (who wrote the review)
* Seller note (seller's response to the review)
* Created and updated timestamps
This enables a two-way feedback system where customers can share experiences and sellers can engage with feedback.
***
## Dual Reference System
The Review Module uses a single data model to handle two types of reviews:
### Product Reviews
**Reference**: `product`\
**Reference ID**: Product ID\
**Purpose**: Rate and review specific products
Customers can review:
* Product quality
* Accuracy of description
* Value for money
* Overall satisfaction
Product reviews help other customers make informed purchase decisions and provide sellers with product feedback.
### Seller Reviews
**Reference**: `seller`\
**Reference ID**: Seller ID\
**Purpose**: Rate and review seller service
Customers can review:
* Shipping speed
* Communication quality
* Packaging quality
* Overall seller experience
Seller reviews build marketplace trust and help customers choose reliable vendors.
***
## Rating System
Reviews use a 1-5 star rating system:
* **5 stars**: Excellent
* **4 stars**: Good
* **3 stars**: Average
* **2 stars**: Below Average
* **1 star**: Poor
The `rating` field stores the numeric value (1-5). Marketplaces can calculate:
* Average ratings per product/seller
* Rating distributions (e.g., "80% 5-star reviews")
* Trending ratings over time
***
## Customer Notes
The `customer_note` field allows customers to write detailed review comments (up to 300 characters in typical implementations).
This provides qualitative feedback beyond the numeric rating:
* Specific product details
* Use case descriptions
* Pros and cons
* Recommendations
Customer notes are displayed publicly to help other shoppers.
***
## Seller Responses
The `seller_note` field allows sellers to respond to reviews:
**Use Cases:**
* Thank customers for positive reviews
* Address concerns in negative reviews
* Provide additional product information
* Offer solutions to problems
Seller responses demonstrate:
* Customer service quality
* Responsiveness
* Professionalism
* Commitment to customer satisfaction
This two-way communication builds trust and shows sellers actively engage with feedback.
***
## Order Verification
Reviews are linked to orders through module links, ensuring:
* Only verified purchasers can review
* Customers can only review products/sellers they've bought from
* One review per customer per product/seller per order
* Review authenticity is guaranteed
This prevents fake reviews and maintains marketplace integrity.
***
## Review Removal System
Sellers can request review removal through the Request Module when they believe a review:
* Violates marketplace policies
* Contains inappropriate content
* Is fraudulent or fake
* Is unfair or inaccurate
**Process:**
1. Seller creates `review_remove` request with review ID and reason
2. Admin reviews the request and both the original review
3. If approved: `RemoveReviewRequestUpdatedEvent.REMOVED` is emitted
4. Subscriber triggers `deleteReviewWorkflow`
5. Review is deleted from the system
This provides a dispute resolution mechanism while maintaining review integrity.
***
## Search Engine Integration
When reviews are created or updated, the workflow emits `AlgoliaEvents.REVIEW_CHANGED`:
```ts theme={null}
emitEventStep({
eventName: AlgoliaEvents.REVIEW_CHANGED,
data: { review },
})
```
This triggers:
* Product reindexing with updated average rating
* Seller profile reindexing with updated rating
* Search results updated with current ratings
Keeping search indexes synchronized ensures customers always see accurate ratings.
***
## Use Cases
**1. Product Feedback**
Customer purchases a product, receives it, and leaves a 5-star review praising quality.
**2. Seller Service Review**
Customer reviews seller's fast shipping and excellent communication with 4 stars.
**3. Seller Response**
Seller receives 3-star review, responds professionally addressing the customer's concern and offering a solution.
**4. Review Removal**
Seller receives unfair 1-star review from competitor, requests removal, admin investigates and approves removal.
**5. Average Rating Display**
Marketplace calculates and displays average rating (4.7/5 from 234 reviews) on product pages.
**6. Verified Purchase Badge**
Reviews linked to orders display "Verified Purchase" badge, increasing trust.