View Stores
To view all stores, select “Stores” in the sidebar menu in your panel. The table shows store details like name, email, status, date and and whether the admin featured the store. Use search, filter, and sort to find a specific store. One vendor can have multiple stores, each displayed separately in the list.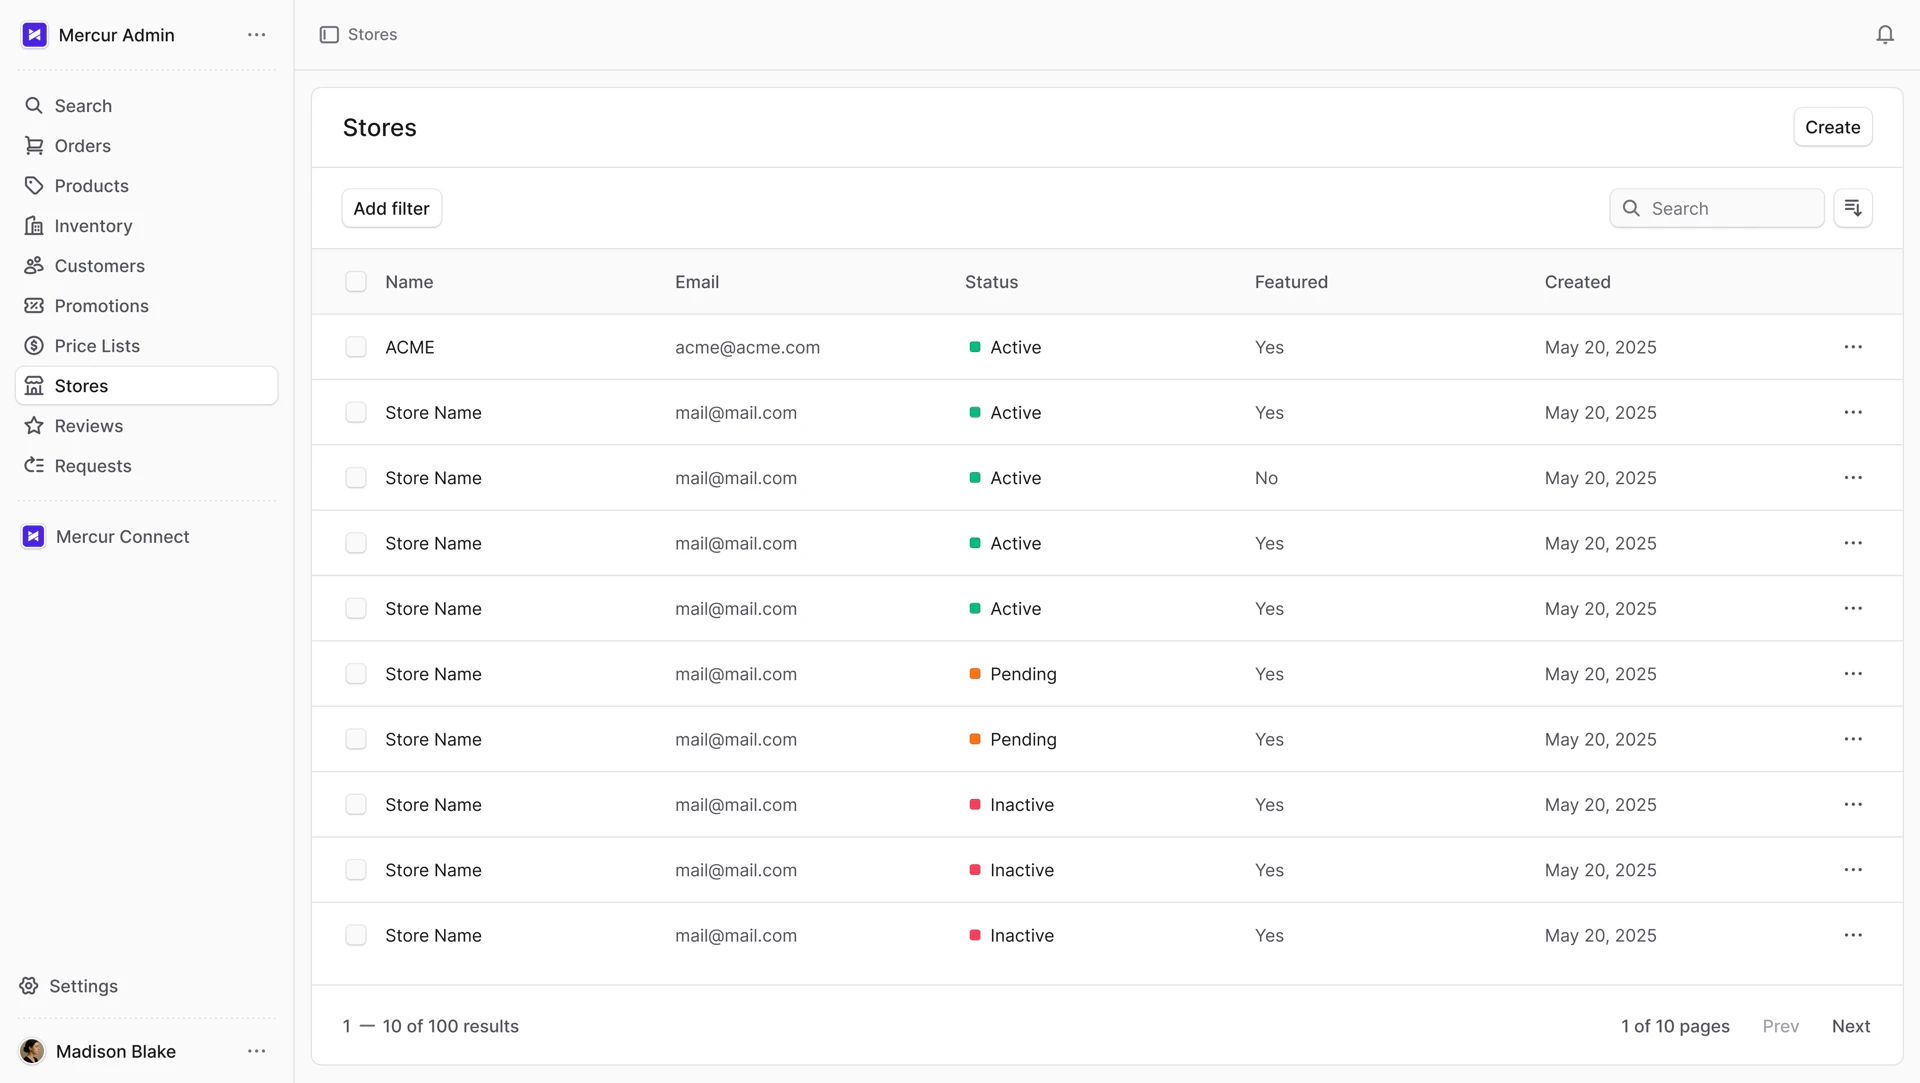
Create Store
To create a store:- Go to “Stores” in the sidebar.
- Click on the “Create” button.
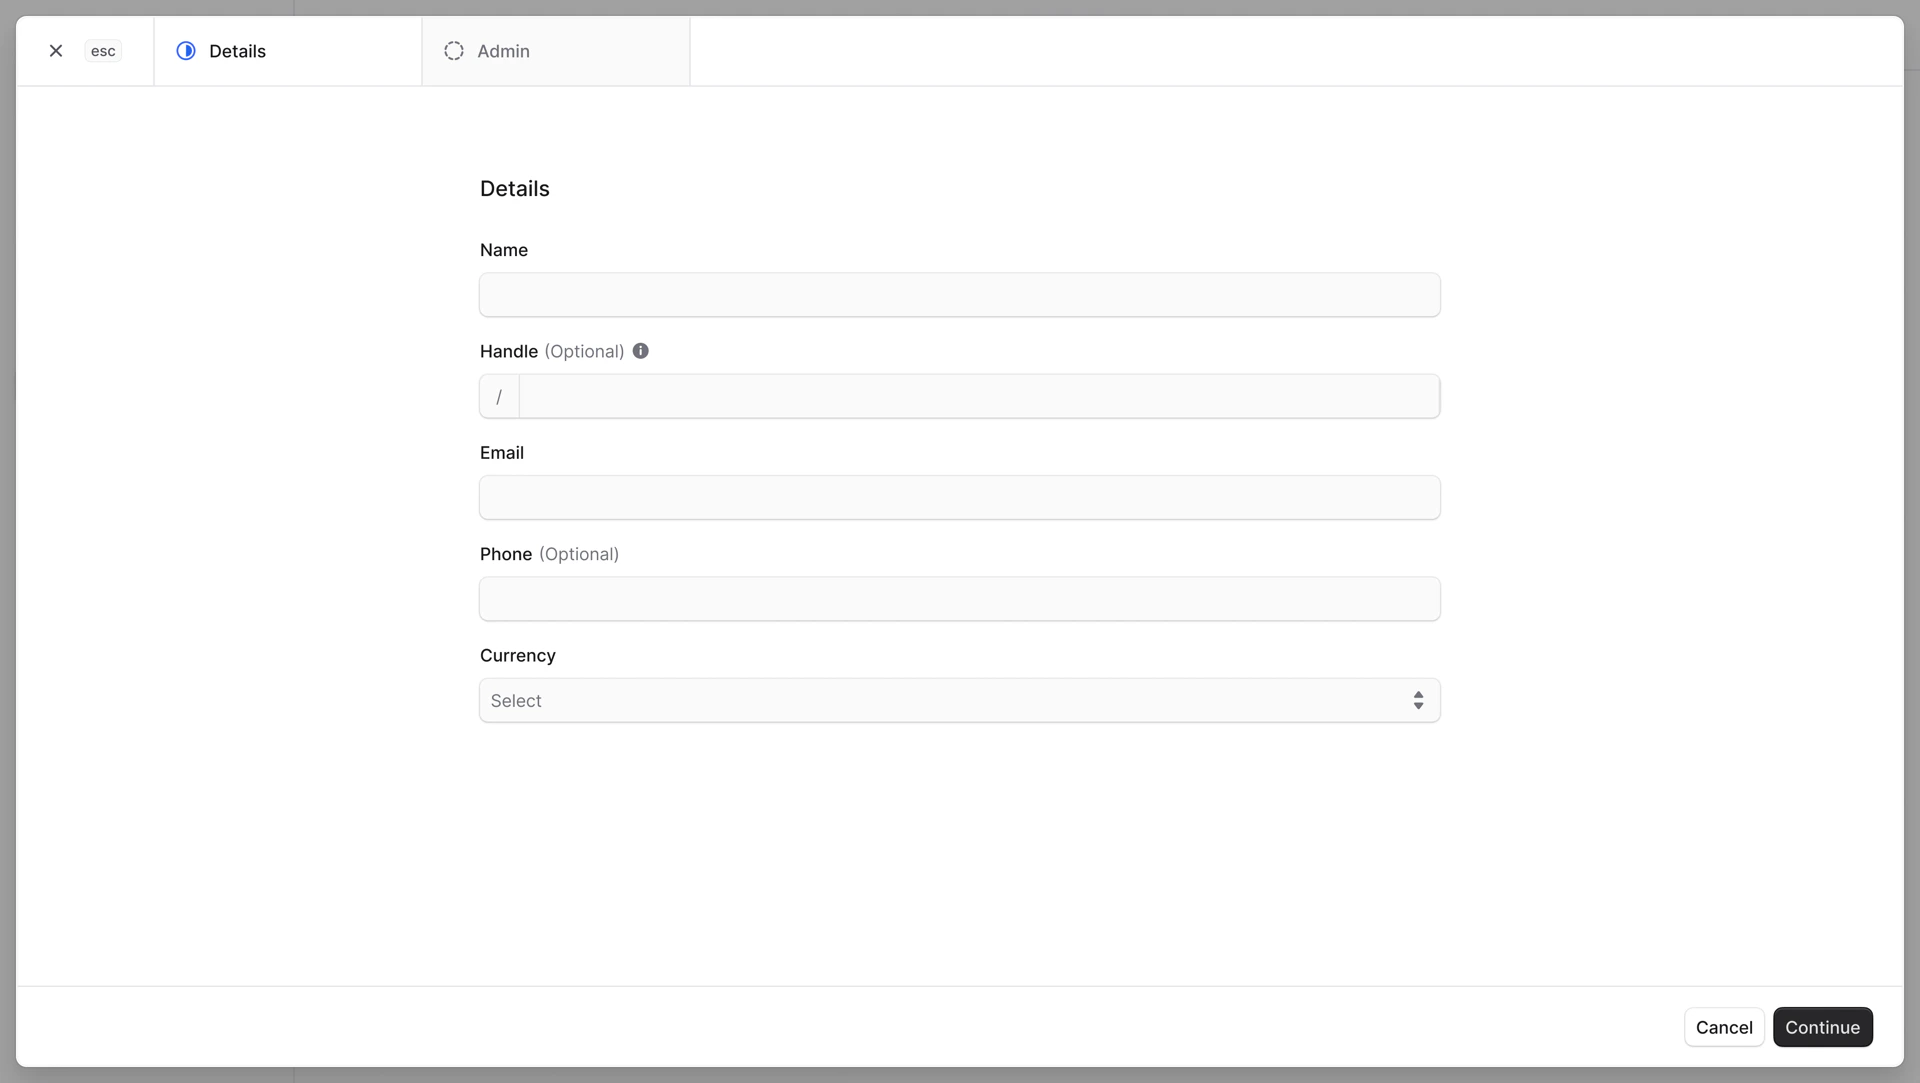
1. Details Step
In the first “Details” step, you can enter the store general information:- Enter “Name” and “Email”
- Optionally enter “Handle” and “Phone”. The “Handle” field value appears in the store storefront URL. It creates a human-readable URL and must be unique across all stores, containing only lowercase letters, numbers, and hyphens. If left blank, Mercur generates a handle from the name.
- Select “Currency.” Each store can have only one currency.
- Once you’re done, click the “Continue” button.
2. Admin Step
In the second “Admin” step, you assign an admin vendor to manage this store. You can select an existing user or invite a new one. As you type, suggestions will appear: select one or add a new email. Once the store is created, the selected user will receive an email invitation to join.
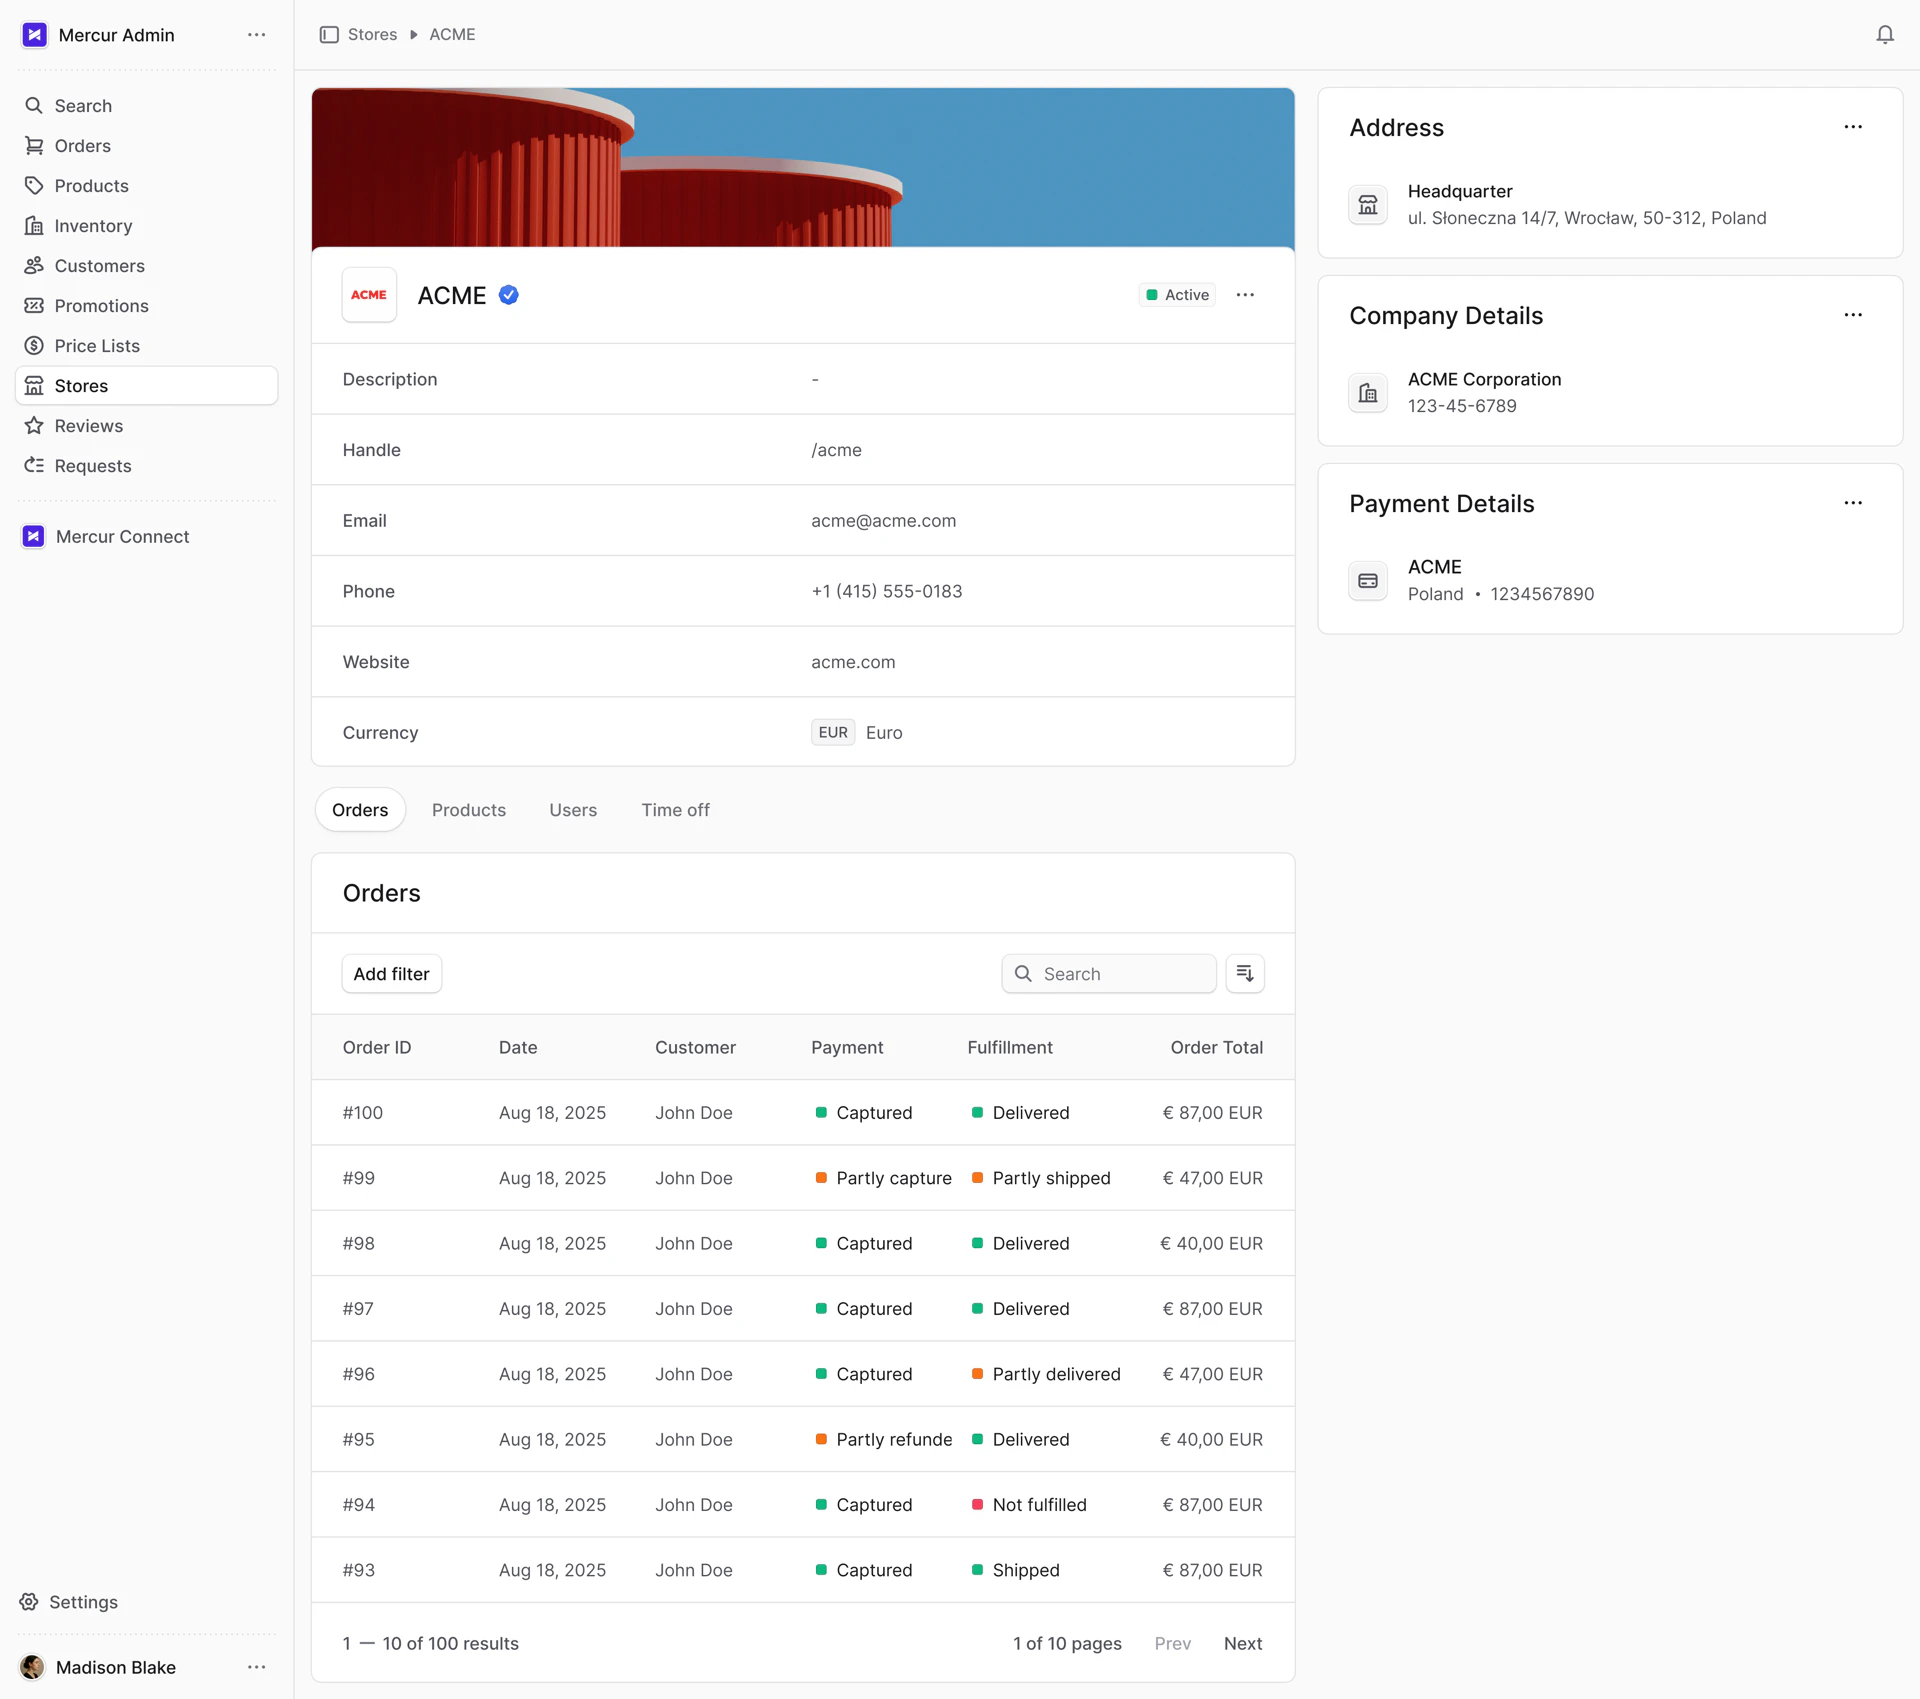
Store Details
To view store details:- Go to “Stores” in the sidebar.
- Choose the store from the list.
Edit Store Details
To edit store details:- Go to “Stores” in the sidebar.
- Choose the store from the list.
- Click the icon in the section’s header.
- Choose “Edit” from the dropdown.
- In the side window that opens, you can edit the store:
- Status. There are three statuses: Active, Pending, Inactive. When a store is “Inactive” or “Pending”, their products won’t be visible on the storefront.
- Name
- Description
- Handle
- Phone
- Website
- Featured Store Settings. If checked, the store will be highlighted with a special badge for internal use or promotional purposes.
- Media. You can add logo and banner. This media will be visible on the storefront.
- Once you’re done, click the “Save” button.
Once the admin edits store details, the vendor is notified in their panel.

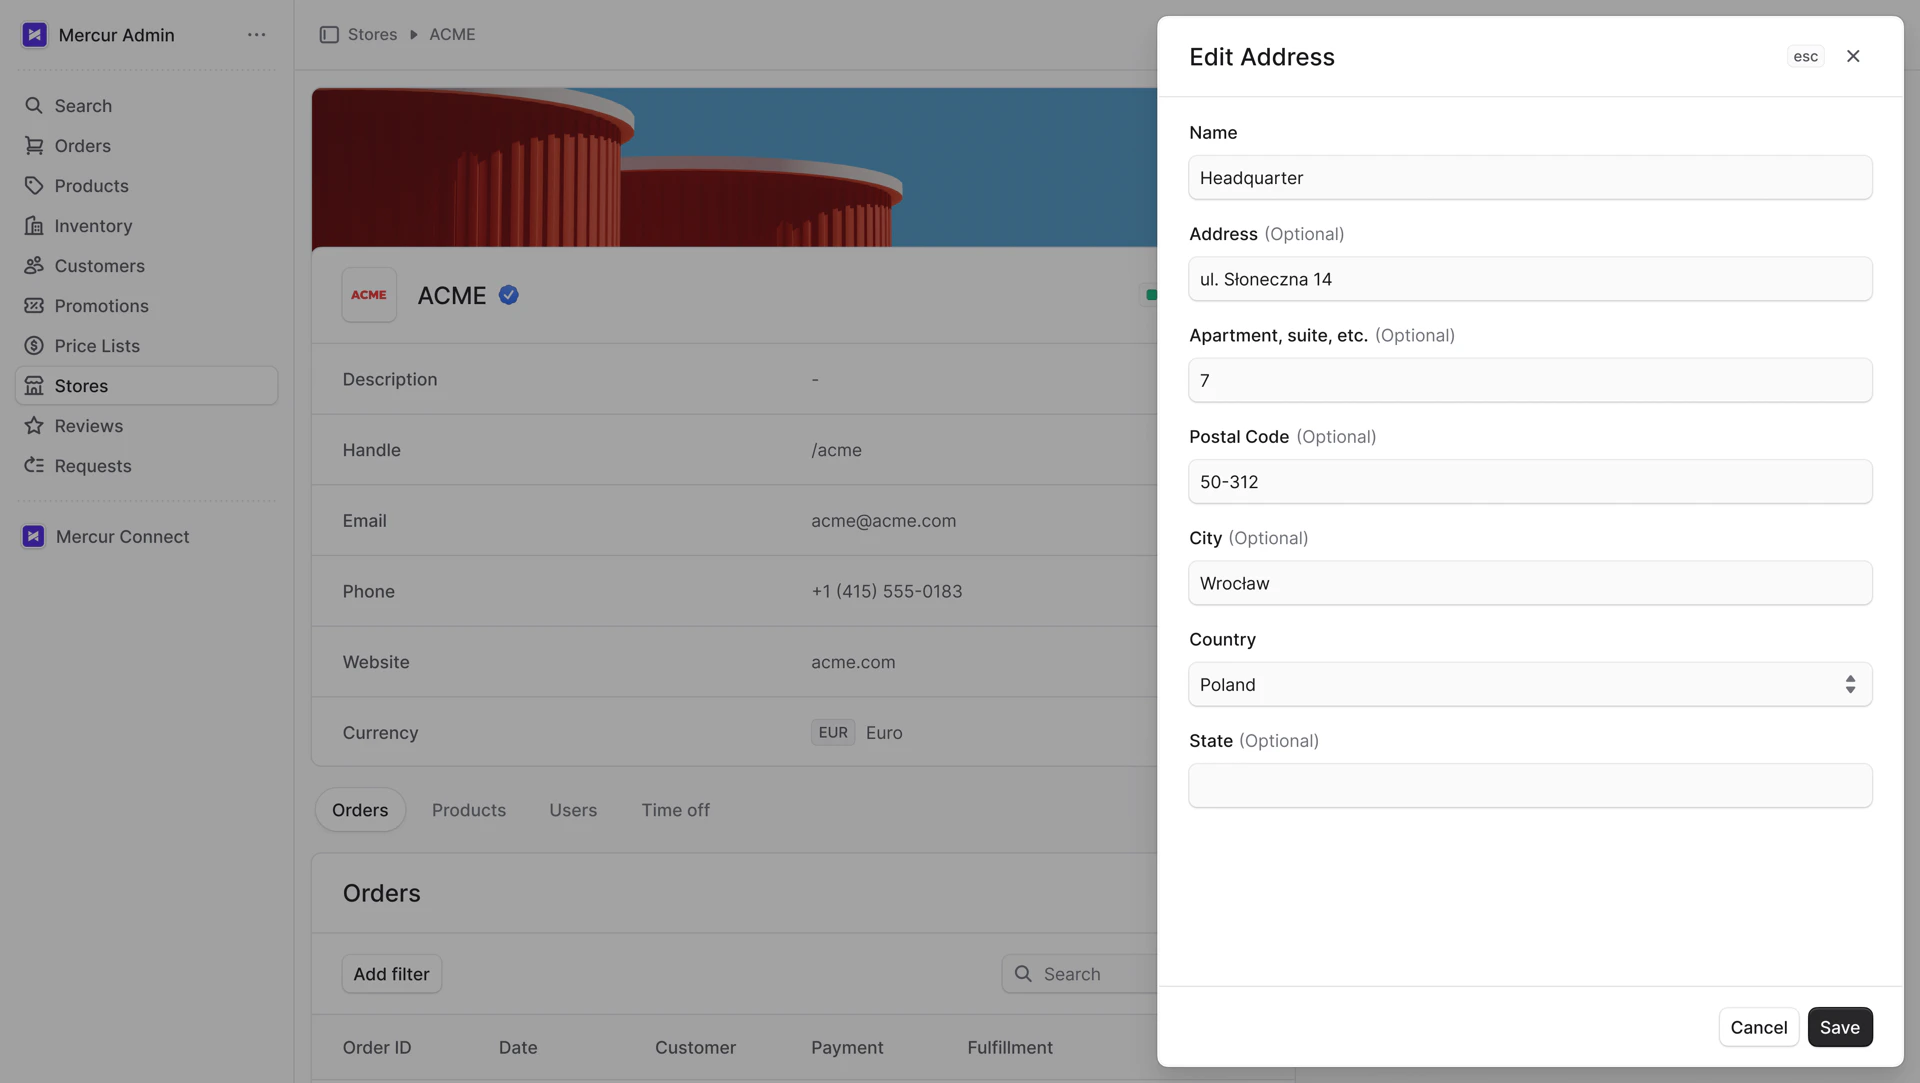
Edit Store Address
To edit store address:- Go to “Stores” in the sidebar.
- Choose the store from the list.
- Click the icon in the “Address” header.
- Choose “Edit” from the dropdown.
- In the side window that opens, you can edit:
- Name
- Address
- Apartment, suite, etc.
- Postal Code
- City
- Country
- State
- Once you’re done, click the “Save” button.
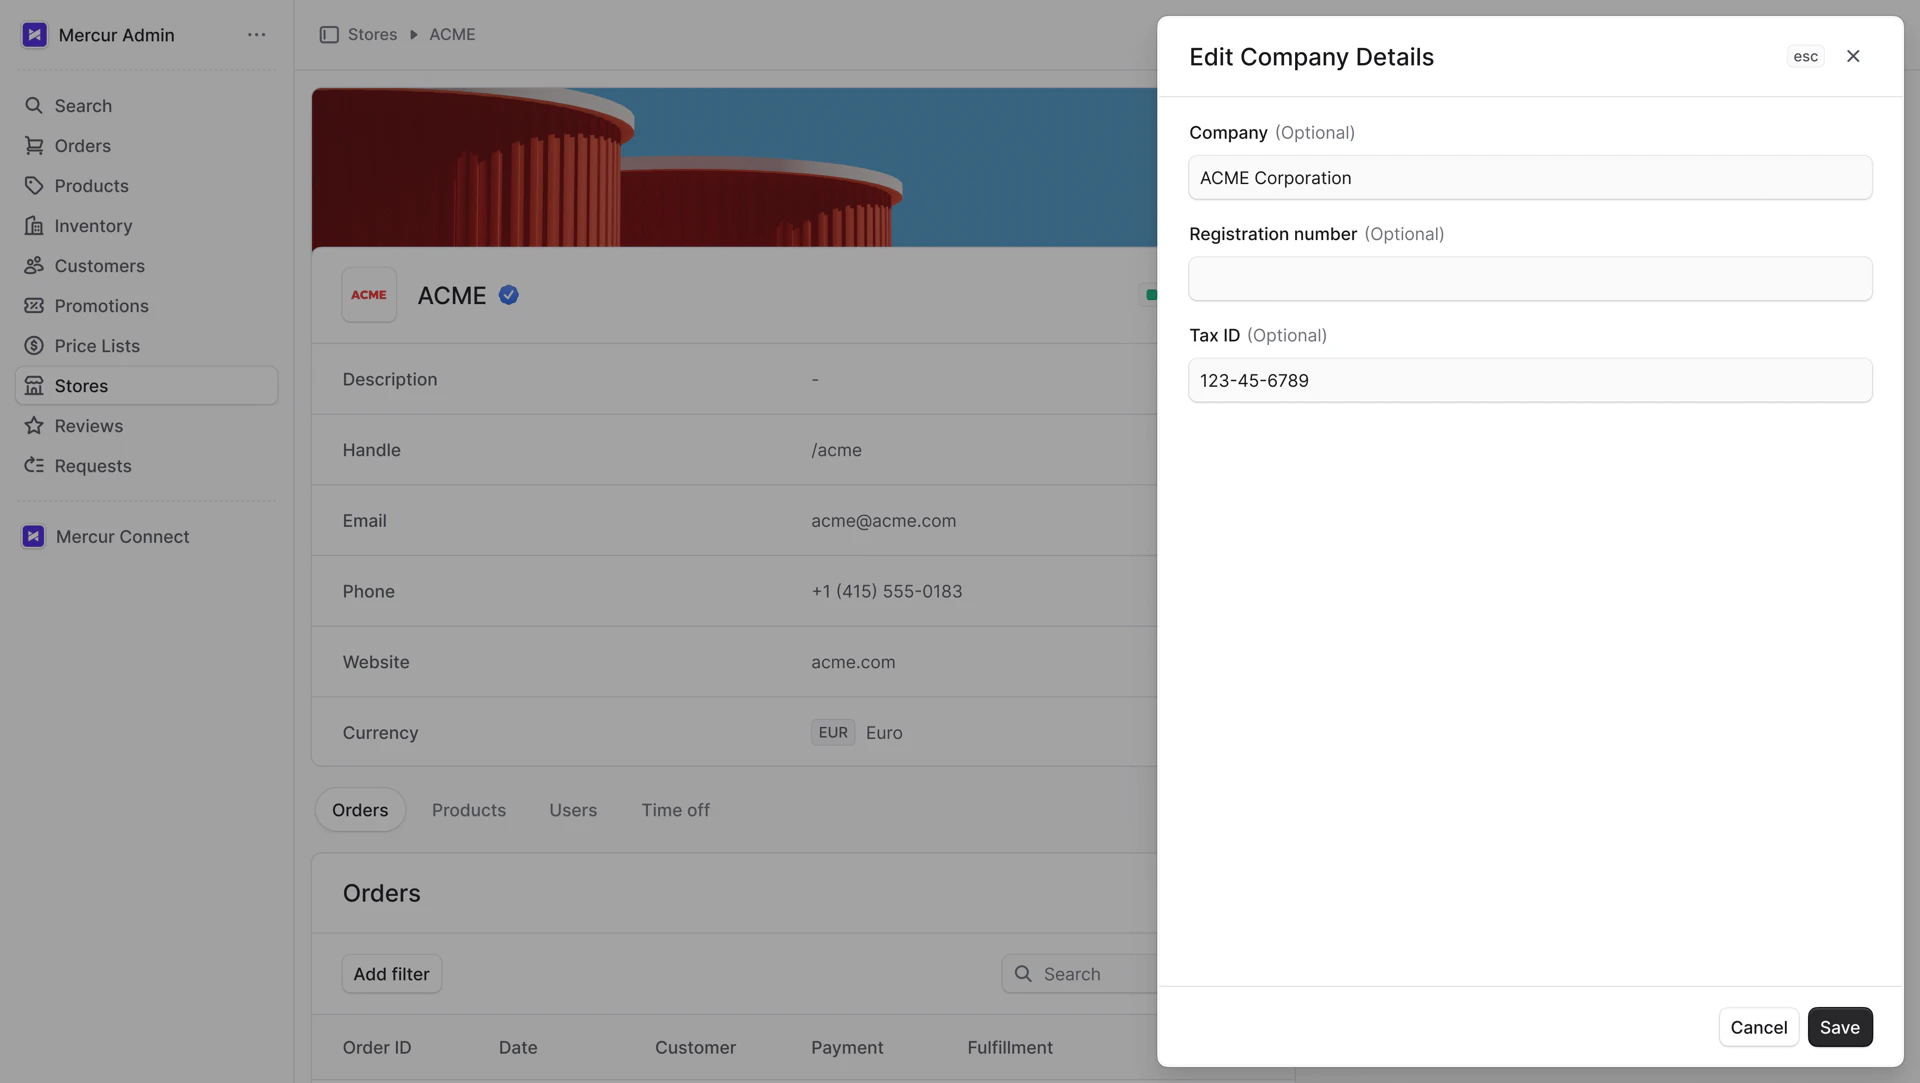
Edit Store Company Details
To edit company details:- Go to “Stores” in the sidebar.
- Choose the store from the list.
- Click the icon in the “Company Details” header.
- Choose “Edit” from the dropdown.
- In the side window that opens, you can edit:
- Company
- Registration number
- Tax ID
- Once you’re done, click the “Save” button.
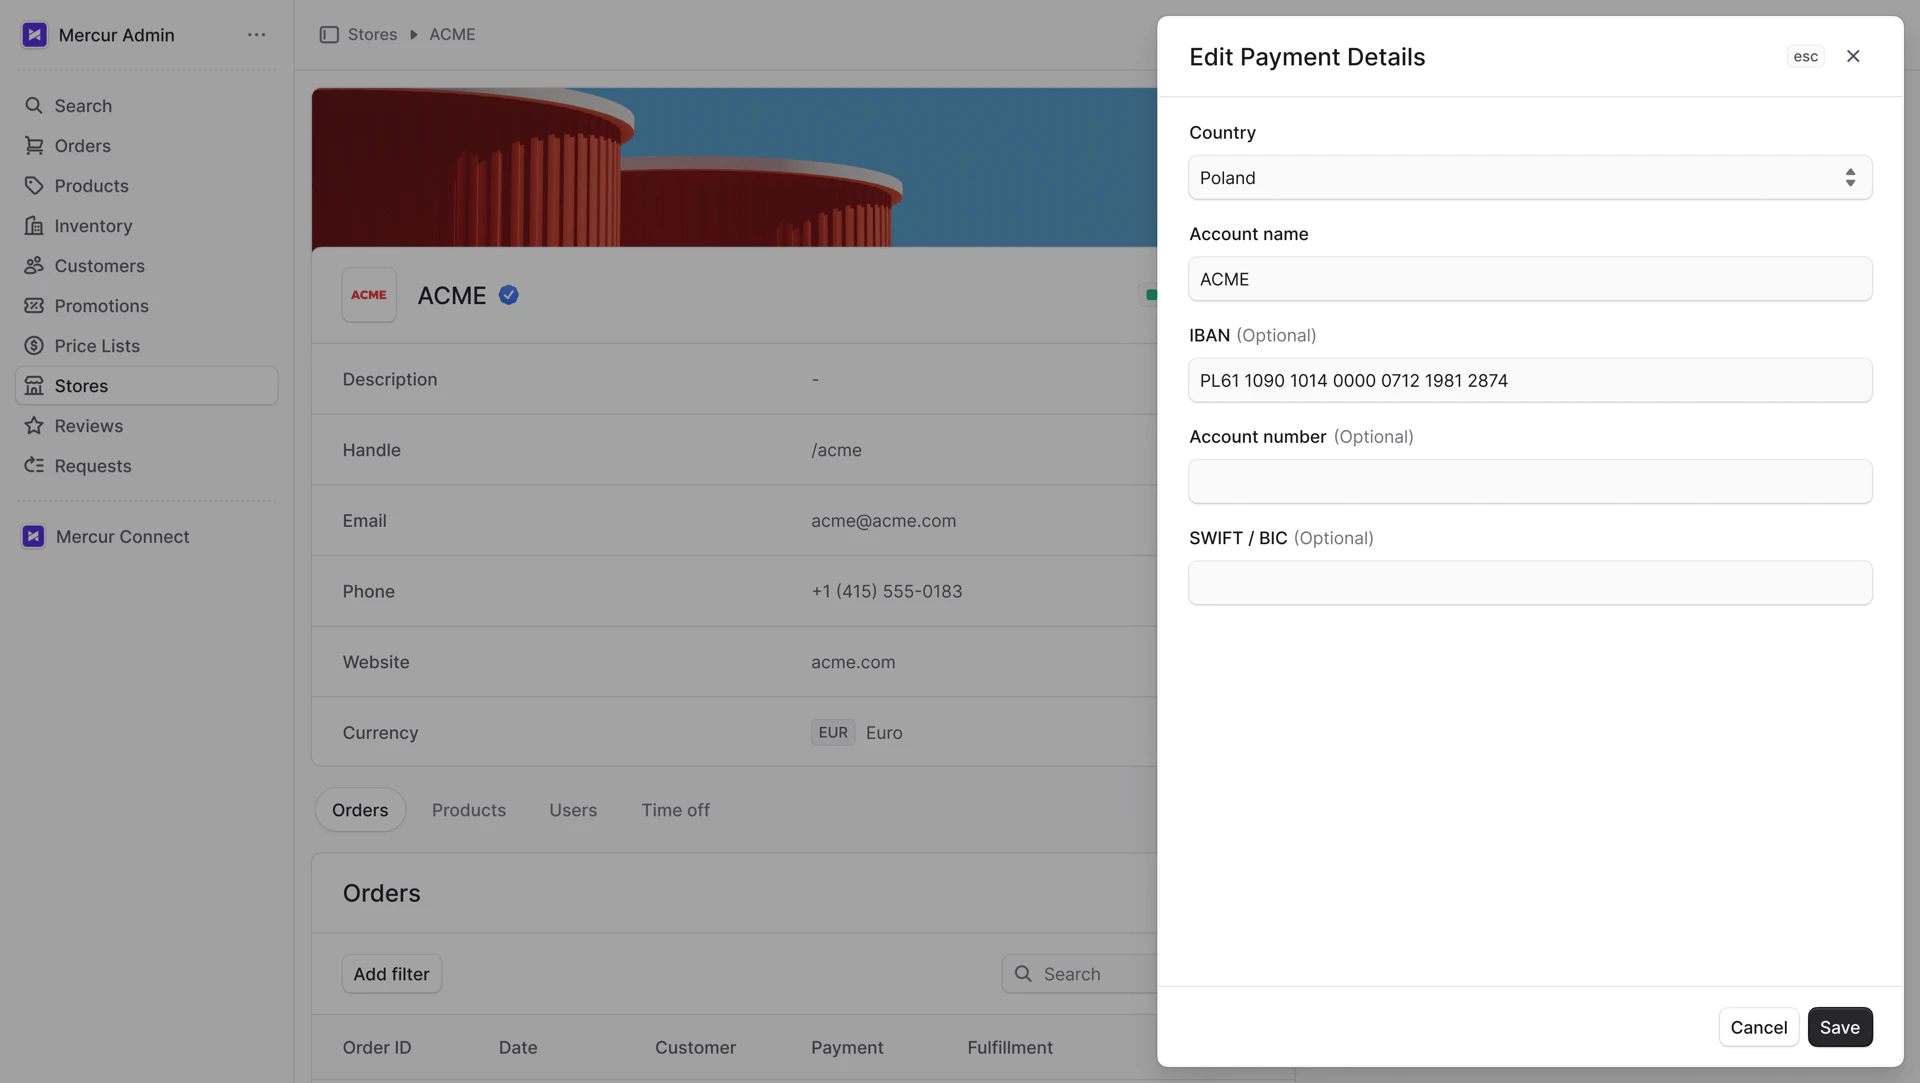
Edit Store Payment Details
To edit payment details:- Go to “Stores” in the sidebar.
- Choose the store from the list.
- Click the icon in the “Payment Details” header.
- Choose “Edit” from the dropdown.
- In the side window, you can edit payment details:
- For all countries except the United States, provide the following details based on your needs:
- Account name
- IBAN
- Account number
- SWIFT/BIC
- For United States:
- Account name
- Account number
- ACH routing number
- For all countries except the United States, provide the following details based on your needs:
- Once you’re done, click the “Save” button.
Users
In the “Users” tab, view all store team members who manage the store. You can add new users by selecting existing ones from your base or inviting new members. You can also remove users from the store. The user added during store creation is the main admin and cannot be removed. This user is marked with an “Admin” badge.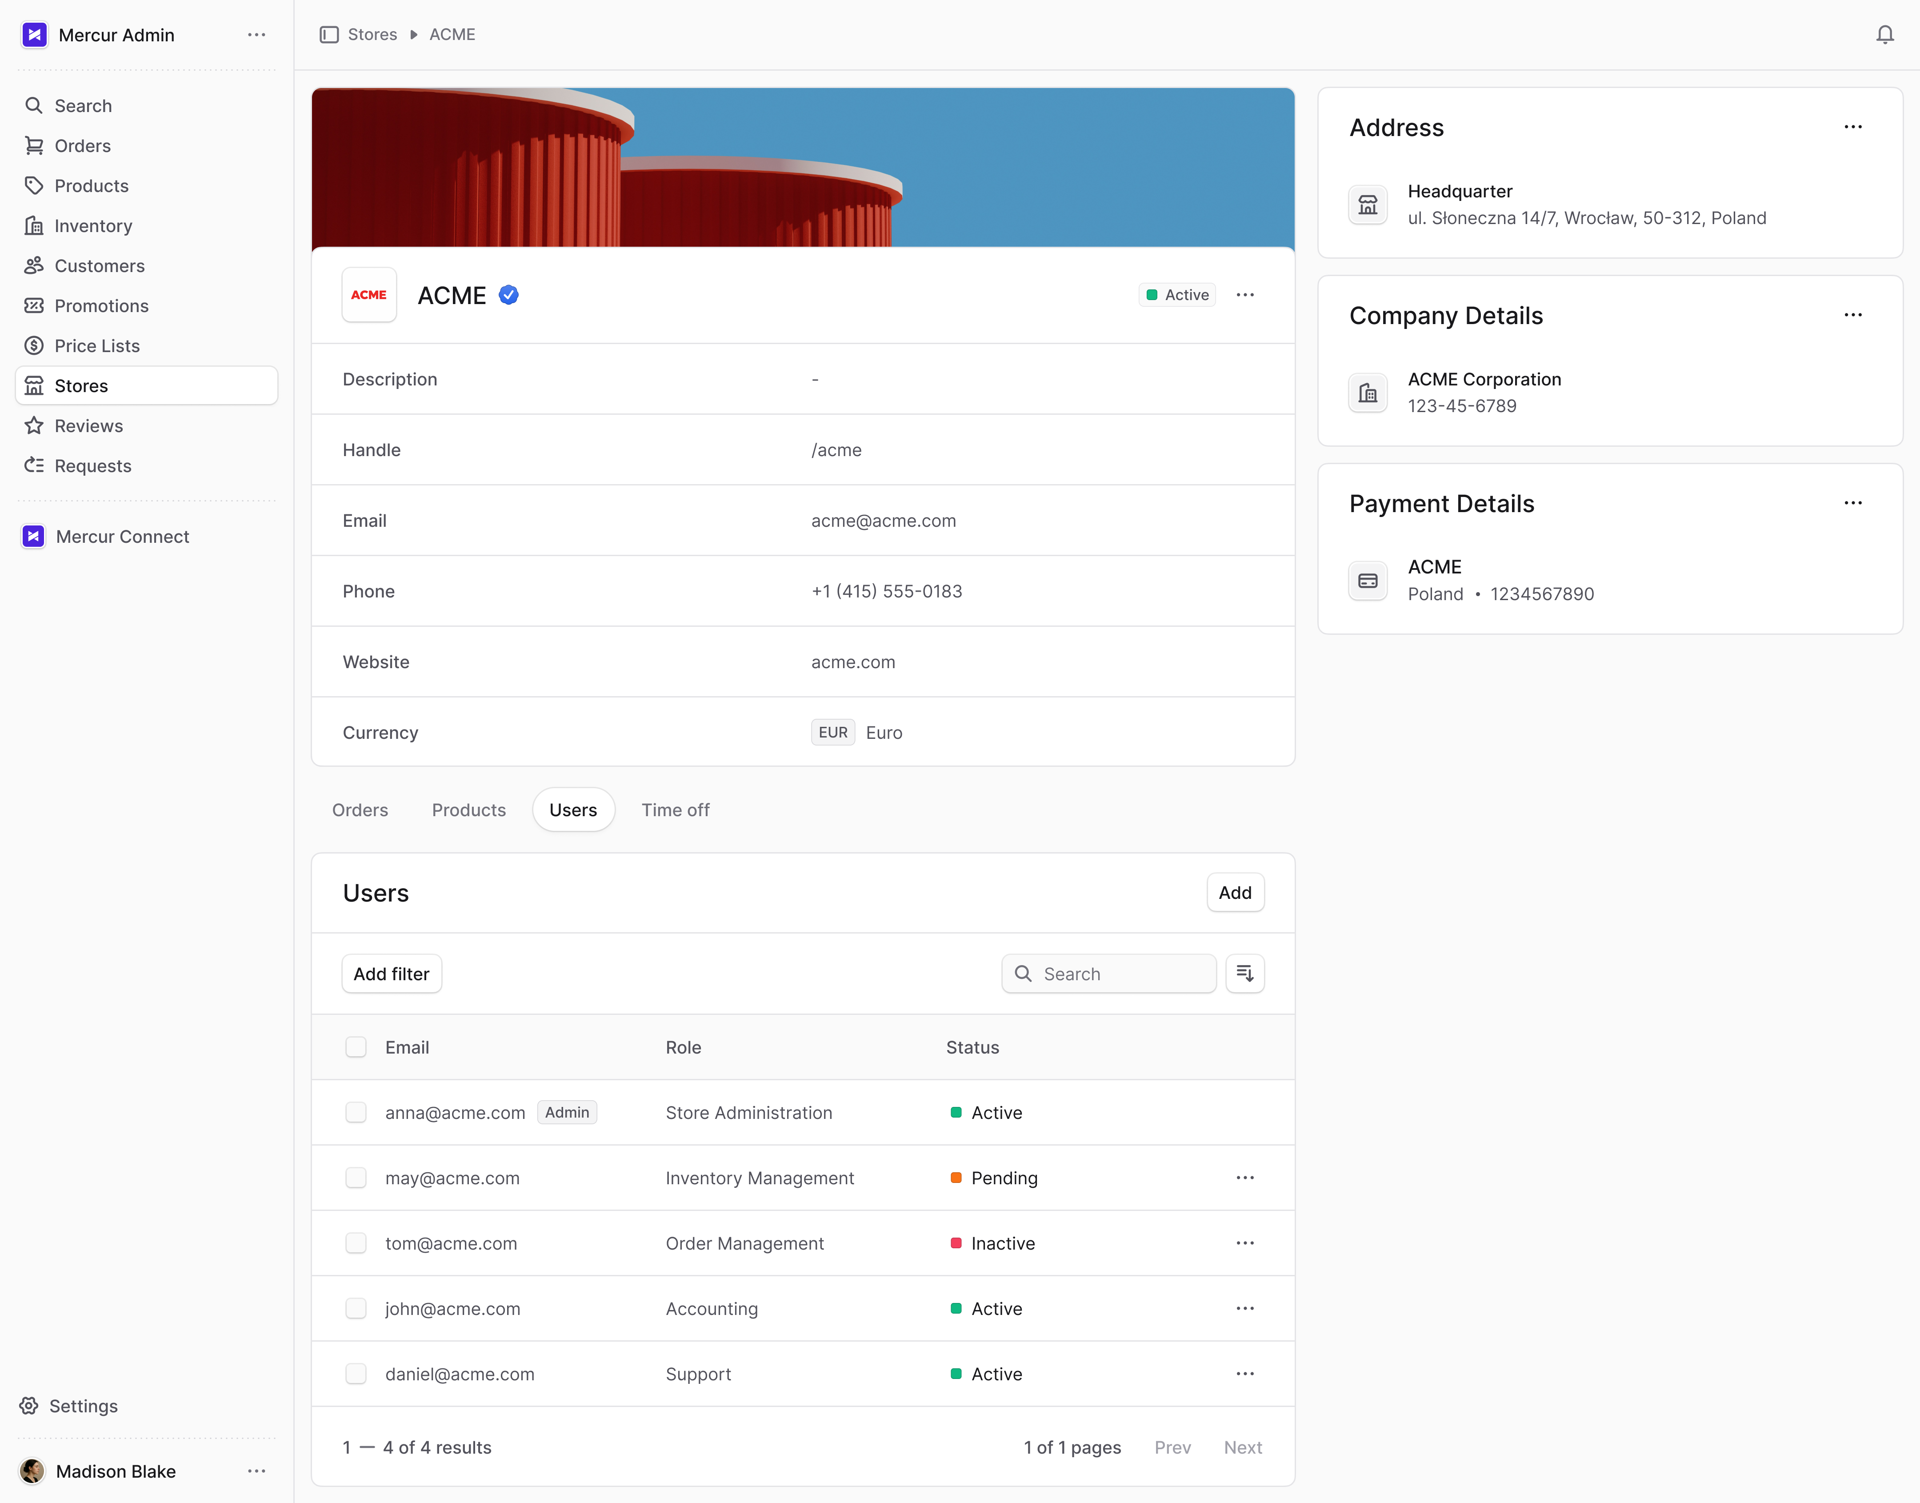
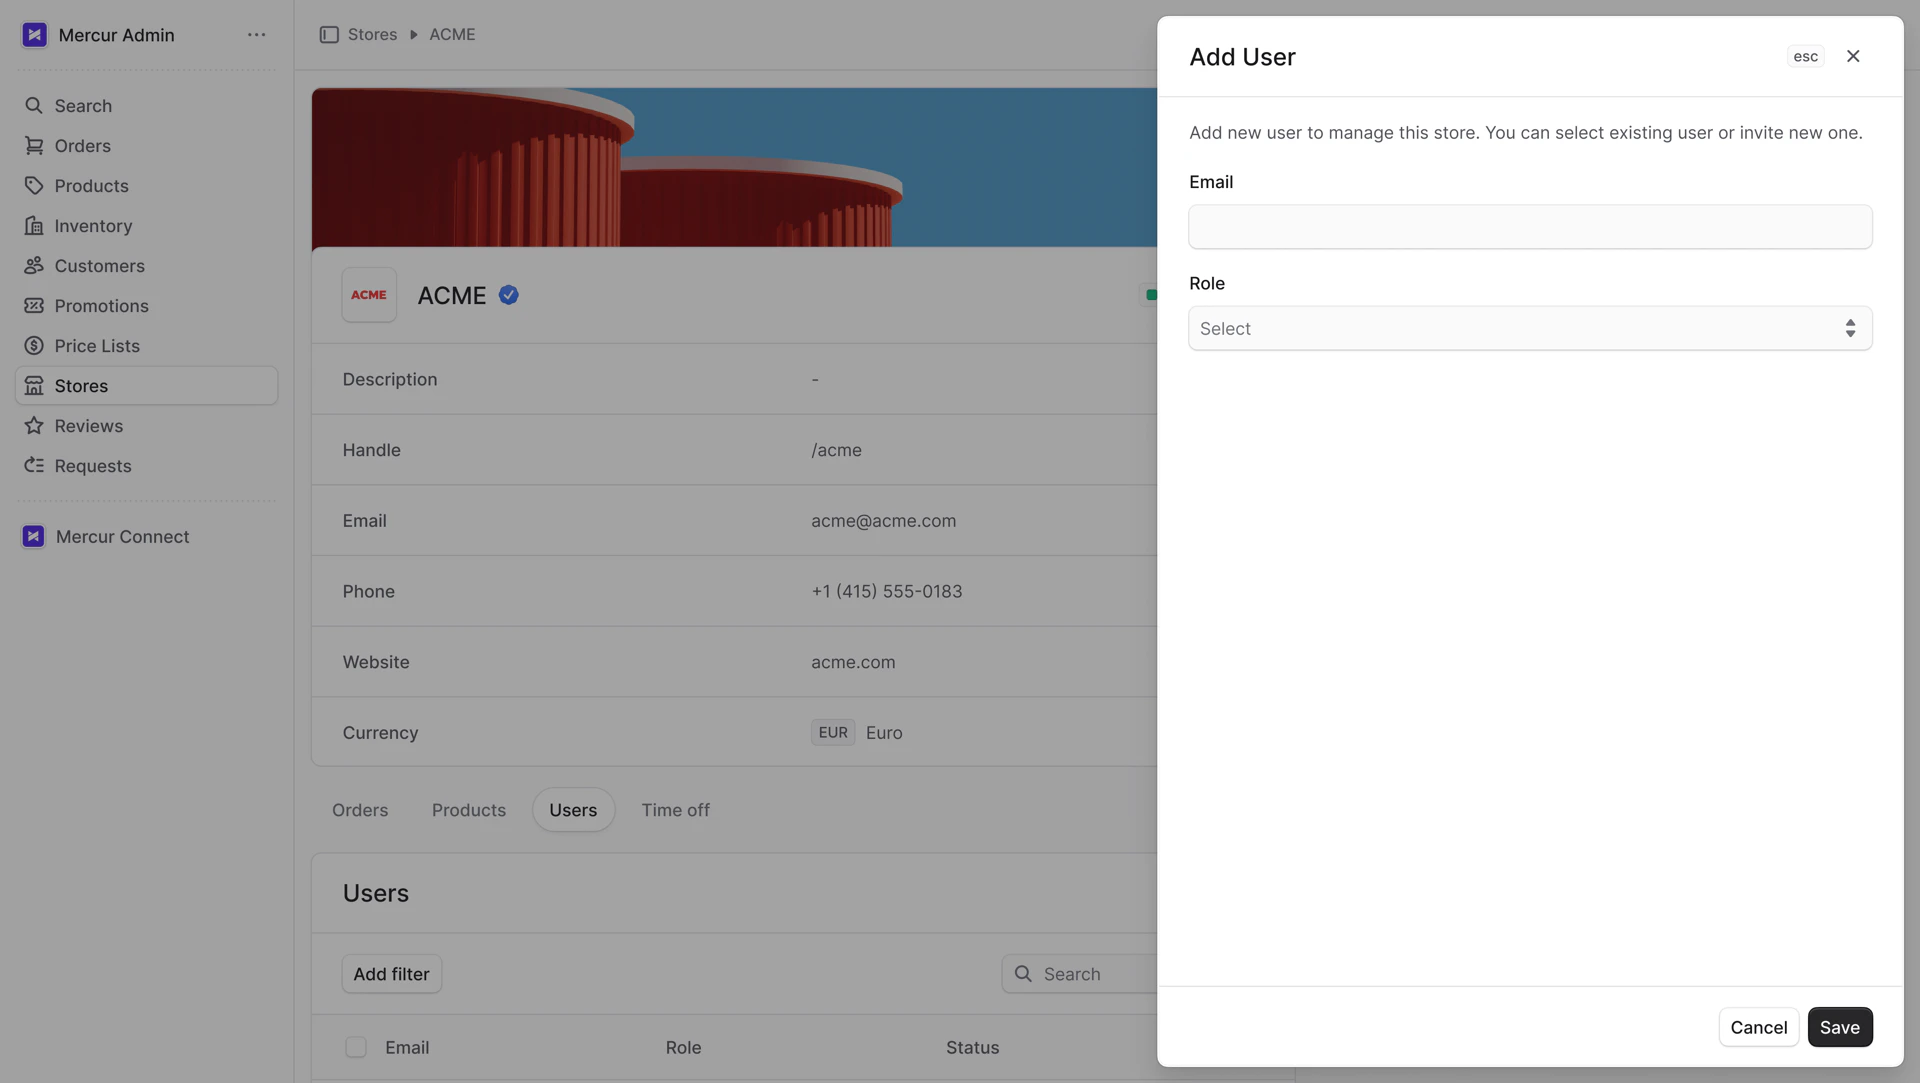
Add New User
To add a new user:- Go to “Stores” in the sidebar.
- Choose the store from the list.
- Select the “Users” tab
- Click the “Add” button in the section’s header.
- In the form that opens add:
- Email. As you type, suggestions will appear; select one or add a new email.
- Role. There are five roles:
- Store Administration
- Inventory Management
- Order Management
- Accounting
- Support
- Once you’re done, click the “Save” button.
Time Off
In the “Time off” tab, view the store’s time off. It specifies the period when the store will be unavailable to receive orders. The vendor can specify one time off period and add a note. During this period, the store’s products will not be visible on the storefront.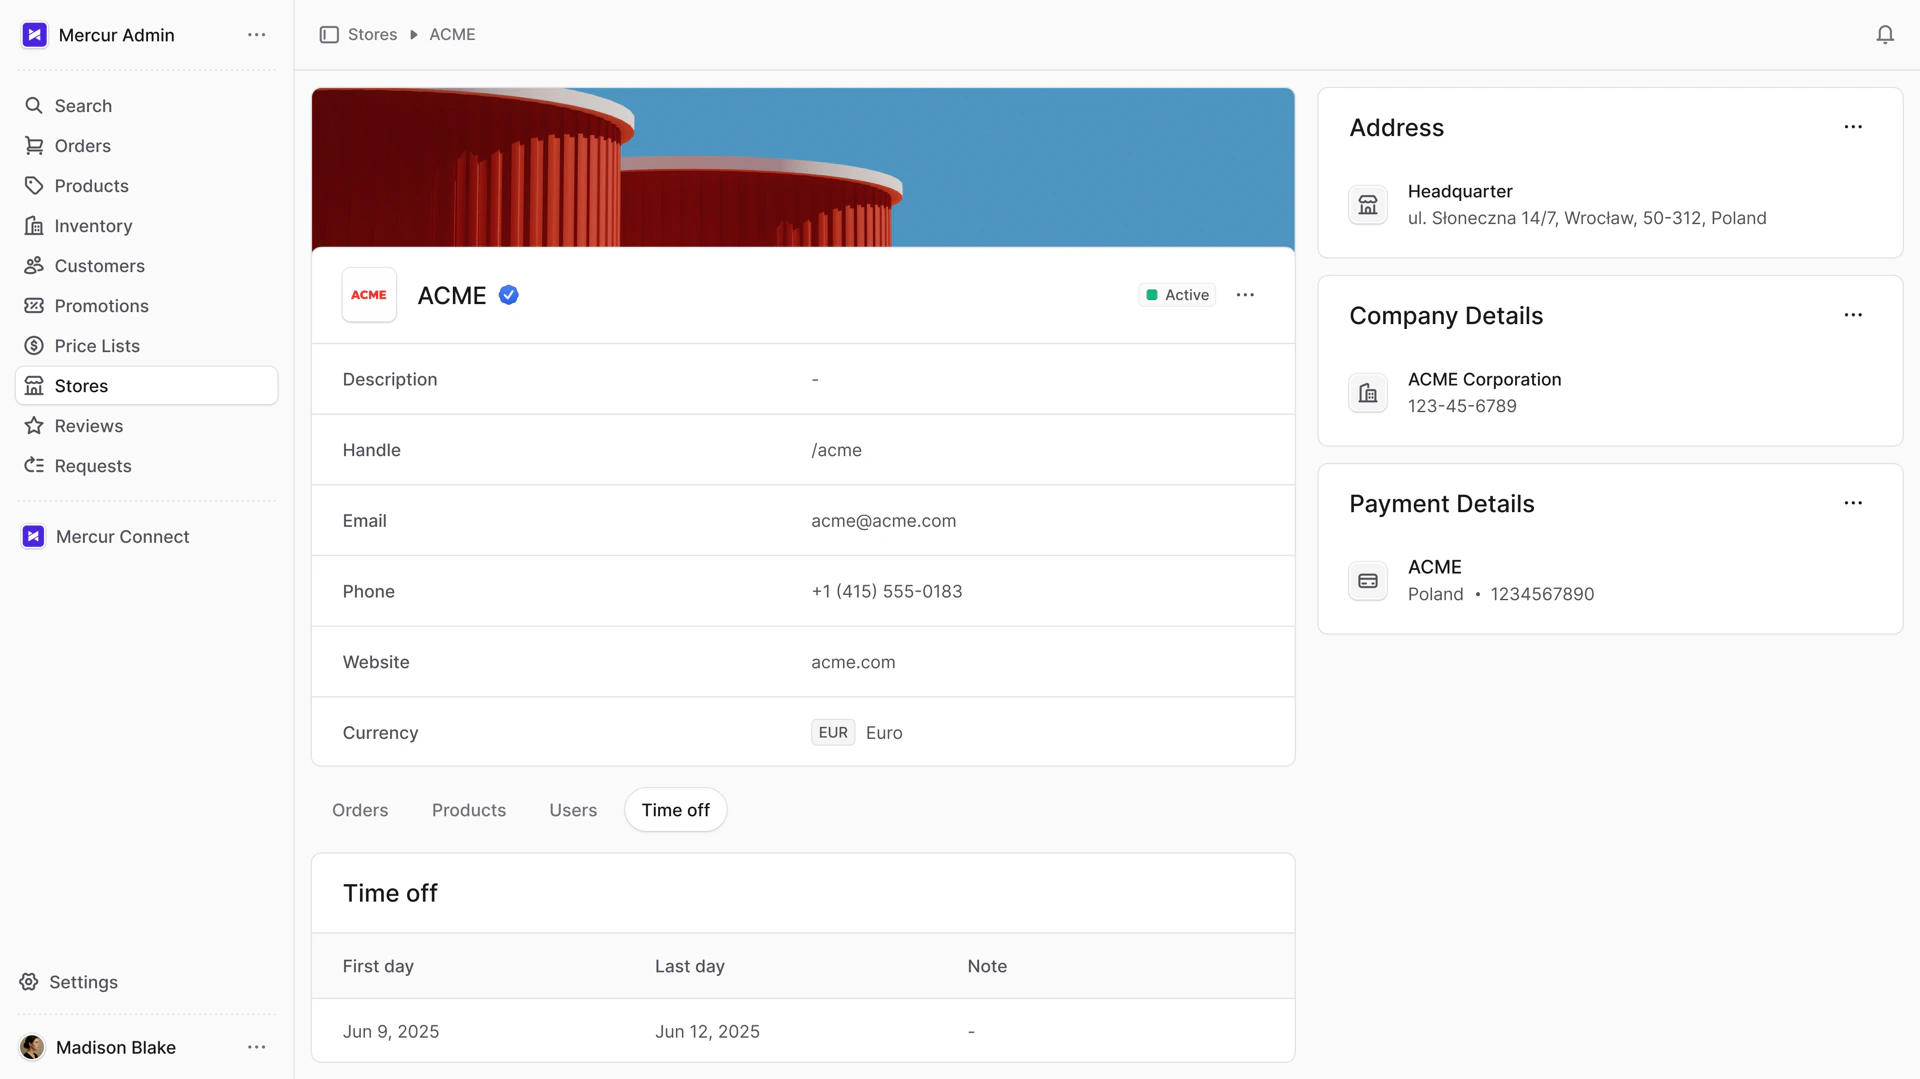
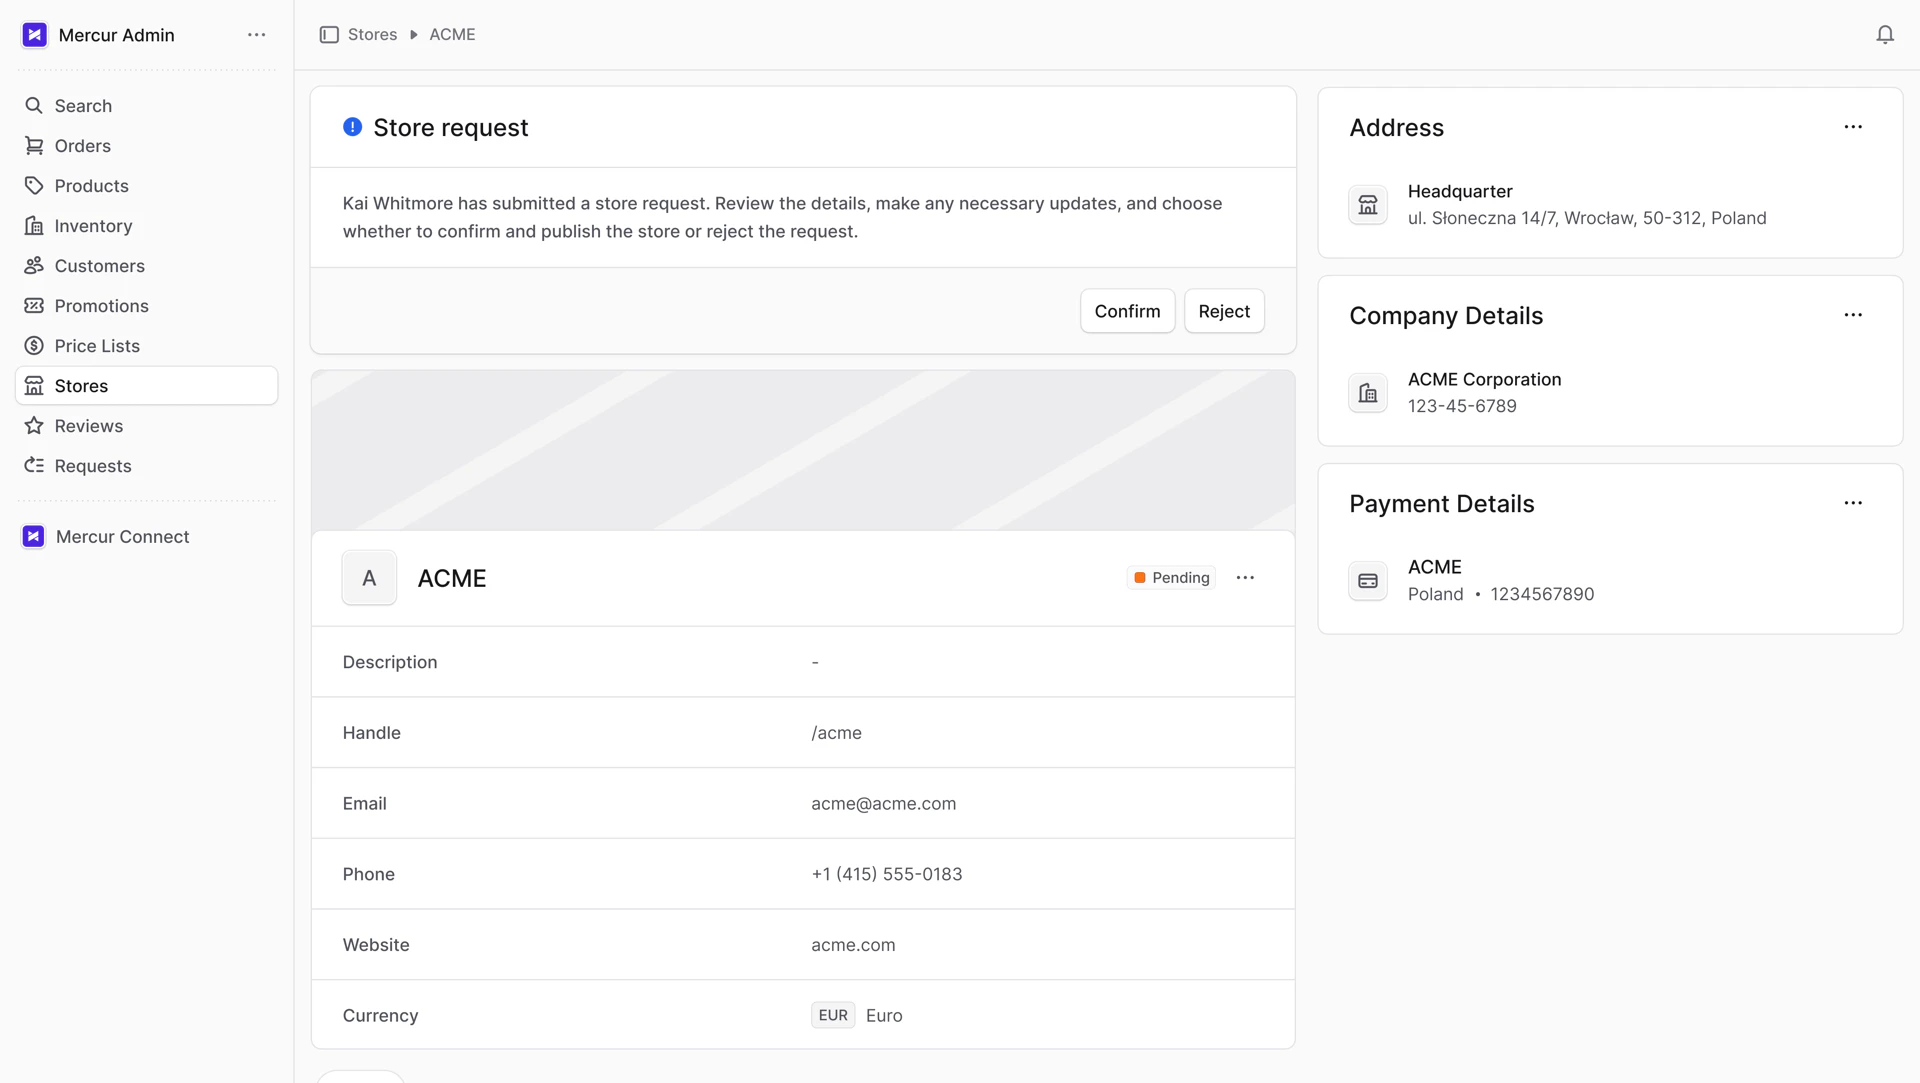
Store Request
The vendor can submit a request to create a new store. Once submitted, the store appears on the list with “Pending” status. On the store details page, a block appears at the top with two actions:- Confirm
- Reject
Once the admin confirms or rejects the store creation request, the vendor receives an email.